
1. Introduction
The MAONO MaonoCaster AME2C Pro is a comprehensive podcast equipment bundle designed for high-quality audio recording and streaming. This manual provides detailed instructions for setting up, operating, and maintaining your equipment to ensure optimal performance across various platforms including PC, smartphones, and tablets.

Figure 1: MAONO MaonoCaster AME2C Pro Podcast Equipment Bundle Overview
2. Package Contents
Please verify that all items listed below are included in your package:
- 1x Audio Interface (MaonoCaster AME2C Pro)
- 1x XLR Dynamic Microphone
- 1x Boom Arm
- 1x Table Clamp
- 1x XLR Microphone Cable
- 1x USB A-C Charging Cable
- 2x 3.5mm TRRS Audio Cables
- 1x User Manual
3. Setup Guide
Follow these steps to set up your MAONO MaonoCaster AME2C Pro for optimal performance.
3.1 Connecting the Microphone and Boom Arm
- Attach the table clamp to your desk or desired surface.
- Insert the boom arm into the table clamp and secure it.
- Mount the XLR dynamic microphone onto the boom arm.
- Connect the XLR microphone cable from the microphone to the MIC1 or MIC2 input on the audio interface.

Figure 2: Connecting the XLR Dynamic Microphone
3.2 Powering On and Connecting to Devices
- Connect the USB A-C charging cable from the audio interface's USB-C port to your computer or a power adapter.
- Press the ON/OFF button on the audio interface to power it on.
- For computer/tablet connection: Use the USB-C cable to connect the audio interface to your computer or tablet.
- For smartphone connection (for recording/streaming): Use the two 3.5mm TRRS audio cables to connect your smartphone to the LIVE-OUTPUT1/2 jacks on the audio interface.
- For studio monitor connection: Connect your studio monitor to the MONITOR SPK output.
- For external audio input: Use the AUX-IN jack to connect a smartphone or other devices for background music or accompaniment.
- For instruments: Connect your guitar, bass, or other instruments to the INST input.

Figure 3: Rear Panel Connections
3.3 Initial Configuration
Ensure your operating system (Windows, macOS, Android/iOS) recognizes the audio interface as an input/output device. Adjust system audio settings as needed.
Video 1: MAONOCASTER E2 Pro Usage Guide - This video provides a comprehensive guide on how to set up and use the MaonoCaster E2 Pro, including various connections and initial configurations.
4. Operating Instructions
The MaonoCaster AME2C Pro offers a wide range of controls for fine-tuning your audio.
4.1 Microphone and Instrument Controls
- Mic Gain Adjustment: The AME2C Pro features 3-level mic gain adjustment, supporting ultra-low noise gain up to 60dB for high-end dynamic microphones.
- 48V Phantom Power: Activate 48V phantom power for condenser microphones.
- Instrument Input: Adjust gain and volume for connected guitars, basses, or other instruments.
- Tone Adjustment: Utilize the Low, Mid, and High knobs to modify the tonal characteristics of your audio.
- Pitch Changer: Use the Pitch knob to alter the pitch of your voice.
- Auto-Tune: Engage the 12-step auto-tune feature for vocal correction.

Figure 4: Fine-tuning Audio Controls (Low, Mid, High, Pitch, Auto-Tune)
4.2 Sound Pads and Effects
- Customized Sound Pads: The mixer allows for 11 customizable sound pads. 3 pads support up to 60s of audio with one-key looping, and 8 pads support 20s of audio. Adjust the volume of each pad independently.
- Uploading Audio: Upload your favorite audio clips to the sound pads via smartphone, PC, microphone, or Bluetooth.
- Reverb Modes: Choose from six adjustable reverb modes.
- DENOISE Function: Activate the DENOISE function to reduce background noise for clearer sound.
- Pro Features: Utilize sidechain, music-only, and loopback switches for advanced audio control.

Figure 5: Sound Pad Interface and Reverb Controls
Video 2: How to upload Customized sound pads? - This video demonstrates the process of uploading custom audio to the sound pads on your MaonoCaster AME2C Pro.
4.3 Bluetooth Connectivity
The audio interface supports Bluetooth for responsive, low-latency wireless audio input from compatible devices.
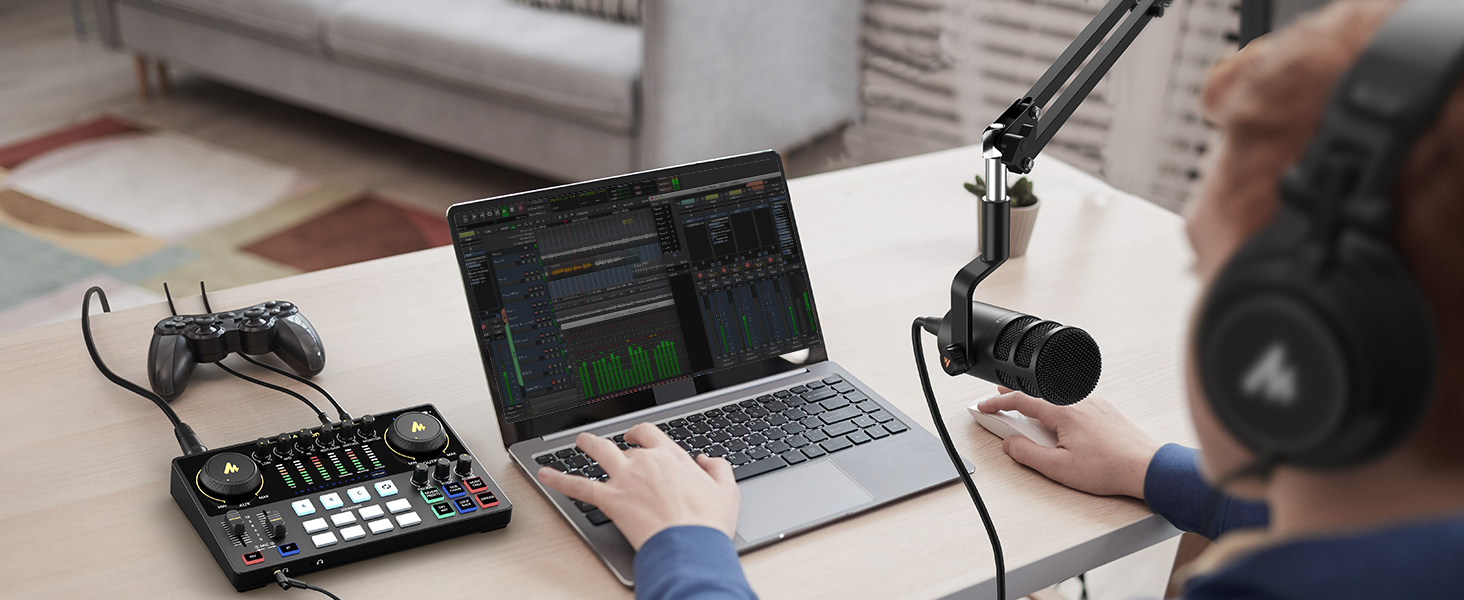
Figure 6: Bluetooth Connectivity for Wireless Audio
5. Microphone Details
The included XLR dynamic microphone is designed for clear sound recording.
- Design: Features a built-in dynamic core and inner double-layer pop filter.
- Noise Isolation: Advanced noise isolation technology provides better attenuation of plosives.
- Frequency Response: Delivers well-balanced reproduction across a wide frequency response range of 60-14kHz.

Figure 7: MAONO XLR Dynamic Microphone
6. Connectivity and Compatibility
The MaonoCaster AME2C Pro is designed for versatile connectivity and broad compatibility.
- Input/Output Ports: USB-C, LIVE-OUTPUT1/2, MONITOR SPK, AUX-IN, MIC1/2 (XLR), INST (6.35mm).
- Compatible Devices: PC, smartphones, tablets, cameras, guitar, XLR condenser microphone, dynamic microphone, headphones.
- Operating Systems: Windows, macOS, Android/iOS.
- Supported Software: OBS, DISCORD, ZOOM, AUDACITY, AU, YouTube, TikTok, Facebook.

Figure 8: Live Streaming Setup Example
7. Specifications
| Feature | Specification |
|---|---|
| Item Weight | 2.07 Kilograms (4.55 pounds) |
| Product Dimensions | 9.64"D x 6.18"W x 2.16"H |
| Number of Channels | 10 |
| Power Source | Corded Electric |
| Voltage | 5 Volts |
| Wattage | 20 Microwatts |
| Battery Type | 1 Lithium Polymer batteries required (included) |
| Hardware Platform | Android/iOS |
| Operating System | Windows, macOS |
| Connectivity Technology | USB, Bluetooth |
| Connector Type | 1/4-Inch Straight, XLR to XLR |
| Compatible Devices | Computer, Smartphone, Tablet, Camera, Guitar, XLR condenser microphone, Dynamic microphone, Headphone |
| Supported Software | OBS, DISCORD, ZOOM, AUDACITY, AU, YouTube, TikTok, Facebook |
8. Troubleshooting
If you encounter issues with your MaonoCaster AME2C Pro, please refer to the following common solutions:
- Microphone Not Detected (Windows 11): Ensure the microphone is correctly identified in your sound settings. Sometimes, it may be mislabeled (e.g., as headphones). Access Advanced Sound Settings to enable and select the microphone as the input device.
- No Sound Output: Check all cable connections (microphone, headphones, speakers, device outputs). Verify volume levels on the audio interface and your connected device.
- Phantom Power: If using a condenser microphone, ensure 48V phantom power is activated on the audio interface.
- Background Noise: Activate the DENOISE function on the audio interface. Ensure all cables are securely connected and not damaged.
- Sound Pad Issues: If sound pads are not recording or playing correctly, ensure sufficient recording time is available for the pad type (60s for 3 pads, 20s for 8 pads). Check volume levels for individual sound pads.
9. Warranty and Support
MAONO is committed to providing excellent customer service and product support.
- 365 Days Replacement: Enjoy a 365-day replacement policy for eligible products.
- Lifetime Tech Support: Benefit from lifetime technical support for your product.
- 7/24H Customer Support: Access customer support services 24 hours a day, 7 days a week.


