
1. Introduction
This instruction manual provides detailed guidance for the safe and proper installation, operation, and maintenance of your FORGING MOUNT Corner TV Wall Mount, Model HY9441. This full-motion TV mount is designed to fit TVs and monitors ranging from 13 to 43 inches, supporting a maximum weight of 77 lbs (35 kg) and VESA patterns up to 200x200mm. Its long 25.6-inch extension arm allows for versatile viewing angles, including corner installations.

Figure 1: FORGING MOUNT Corner TV Wall Mount (Model HY9441)
2. Safety Information
Please read and understand all instructions before installation and use. If you have any questions, contact customer service. Improper installation or use may result in property damage, serious injury, or death.
- Weight Capacity: Do not exceed the maximum weight capacity of 77 lbs (35 kg). This mount is intended for use only with the maximum weights indicated. Use with products heavier than the maximum weights indicated may result in instability causing possible injury.
- Wall Type: This mount is designed for installation on solid concrete walls, brick walls, and solid wood stud walls (12"/16" wood studs). DO NOT mount the product on plaster walls, cavity walls, drywall, or soft walls alone. Always ensure the mounting surface can safely support the combined weight of the equipment and all attached hardware.
- VESA Compatibility: Ensure your TV's VESA mounting pattern (the distance between the four mounting holes on the back of the TV) is compatible with the mount (75x75mm, 100x100mm, 100x200mm, 200x100mm, 200x200mm).
- Professional Assistance: If you are unsure about the installation process or the suitability of your wall, consult a qualified professional.
- Children: Keep children away from the installation area during setup.
- Tools: Use appropriate tools and follow all safety precautions for tool usage.

Figure 2: Compatible Wall Types for Installation
3. Package Contents
Verify that all components are present and undamaged before beginning installation. If any parts are missing or damaged, do not attempt to install. Contact customer service for assistance.
- Wall Plate Assembly with Articulating Arms
- TV Plate (VESA compatible)
- Mounting Hardware Kit (various screws, washers, spacers for TV and wall)
- Concrete Anchors (if applicable)
- Level Gauge
- Cable Ties
- Instruction Manual
4. Product Features
- Long Extension Arm: Equipped with a 25.6-inch long extension arm, allowing the TV to be pulled out from the wall for versatile viewing angles, including corner installations.
- Full Motion Capability: Offers swivel of ±90°, tilt of +5° to -10°, and level adjustment of ±3° for optimal viewing comfort.
- Heavy Duty Construction: Made with high-quality thickened alloy steel for stability and durability, supporting TVs up to 77 lbs.
- VESA Compatibility: Supports VESA patterns 75x75mm, 100x100mm, 100x200mm, 200x100mm, and 200x200mm.
- Space Saving Design: Can be retracted to a minimum distance of 2.48 inches from the wall, allowing the TV to sit close to the wall when not extended.

Figure 3: Robust Construction of the Mount

Figure 4: Versatile Application in Different Environments
5. Setup (Installation Guide)
5.1 Pre-Installation Checklist
- Ensure you have all necessary tools: drill, stud finder (for wood studs), level, tape measure, pencil, screwdriver, socket wrench.
- Confirm your TV's weight and VESA pattern are within the mount's specifications.
- Identify the type of wall you are mounting to (wood stud, concrete, or brick).
- Locate the center of your desired mounting position and mark it.
5.2 Installation Steps
- Attach TV Brackets to TV: Carefully place your TV face down on a soft, clean surface. Attach the two vertical TV brackets to the back of your TV using the appropriate screws, washers, and spacers from the hardware kit. Ensure the brackets are centered and securely fastened to the TV's VESA holes.
- Mount Wall Plate: Position the wall plate assembly on the wall at your desired height. Use a level to ensure it is perfectly horizontal. Mark the drilling locations through the holes on the wall plate. For wood studs, drill pilot holes into the center of the studs. For concrete/brick walls, drill holes and insert concrete anchors. Secure the wall plate to the wall using the provided lag bolts.
- Adjust Level (if needed): Before hanging the TV, ensure the wall plate is level. If minor adjustments are needed, some mounts allow for slight leveling adjustments on the wall plate itself.
- Hang TV on Wall Plate: With assistance, carefully lift the TV with the attached brackets and hook them onto the arms of the wall plate assembly. Ensure the TV is securely seated.
- Secure TV to Mount: Tighten the security screws on the TV brackets to lock the TV onto the mount, preventing accidental dislodgement.

Figure 5: Overview of 4 Installation Steps
6. Operating (Adjustments)
Your FORGING MOUNT TV wall mount offers full motion capabilities for optimal viewing. Adjustments should be made carefully to avoid damage to the TV or mount.
- Swivel: The mount allows for ±90° swivel. Gently push or pull the TV to the desired left or right angle. This is particularly useful for corner installations or viewing from different areas of a room.
- Tilt: Adjust the vertical tilt from +5° (upward) to -10° (downward) to reduce glare or achieve a better viewing angle. Loosen the tilt adjustment screws on the TV plate, adjust the angle, and then re-tighten the screws securely.
- Level: If your TV appears slightly unlevel after installation, you can adjust the level by ±3°. Loosen the leveling screws, rotate the TV slightly, and then re-tighten.
- Extension/Retraction: The articulating arms allow the TV to extend up to 25.6 inches from the wall and retract to a minimum of 2.48 inches. Gently pull or push the TV to extend or retract the arms.
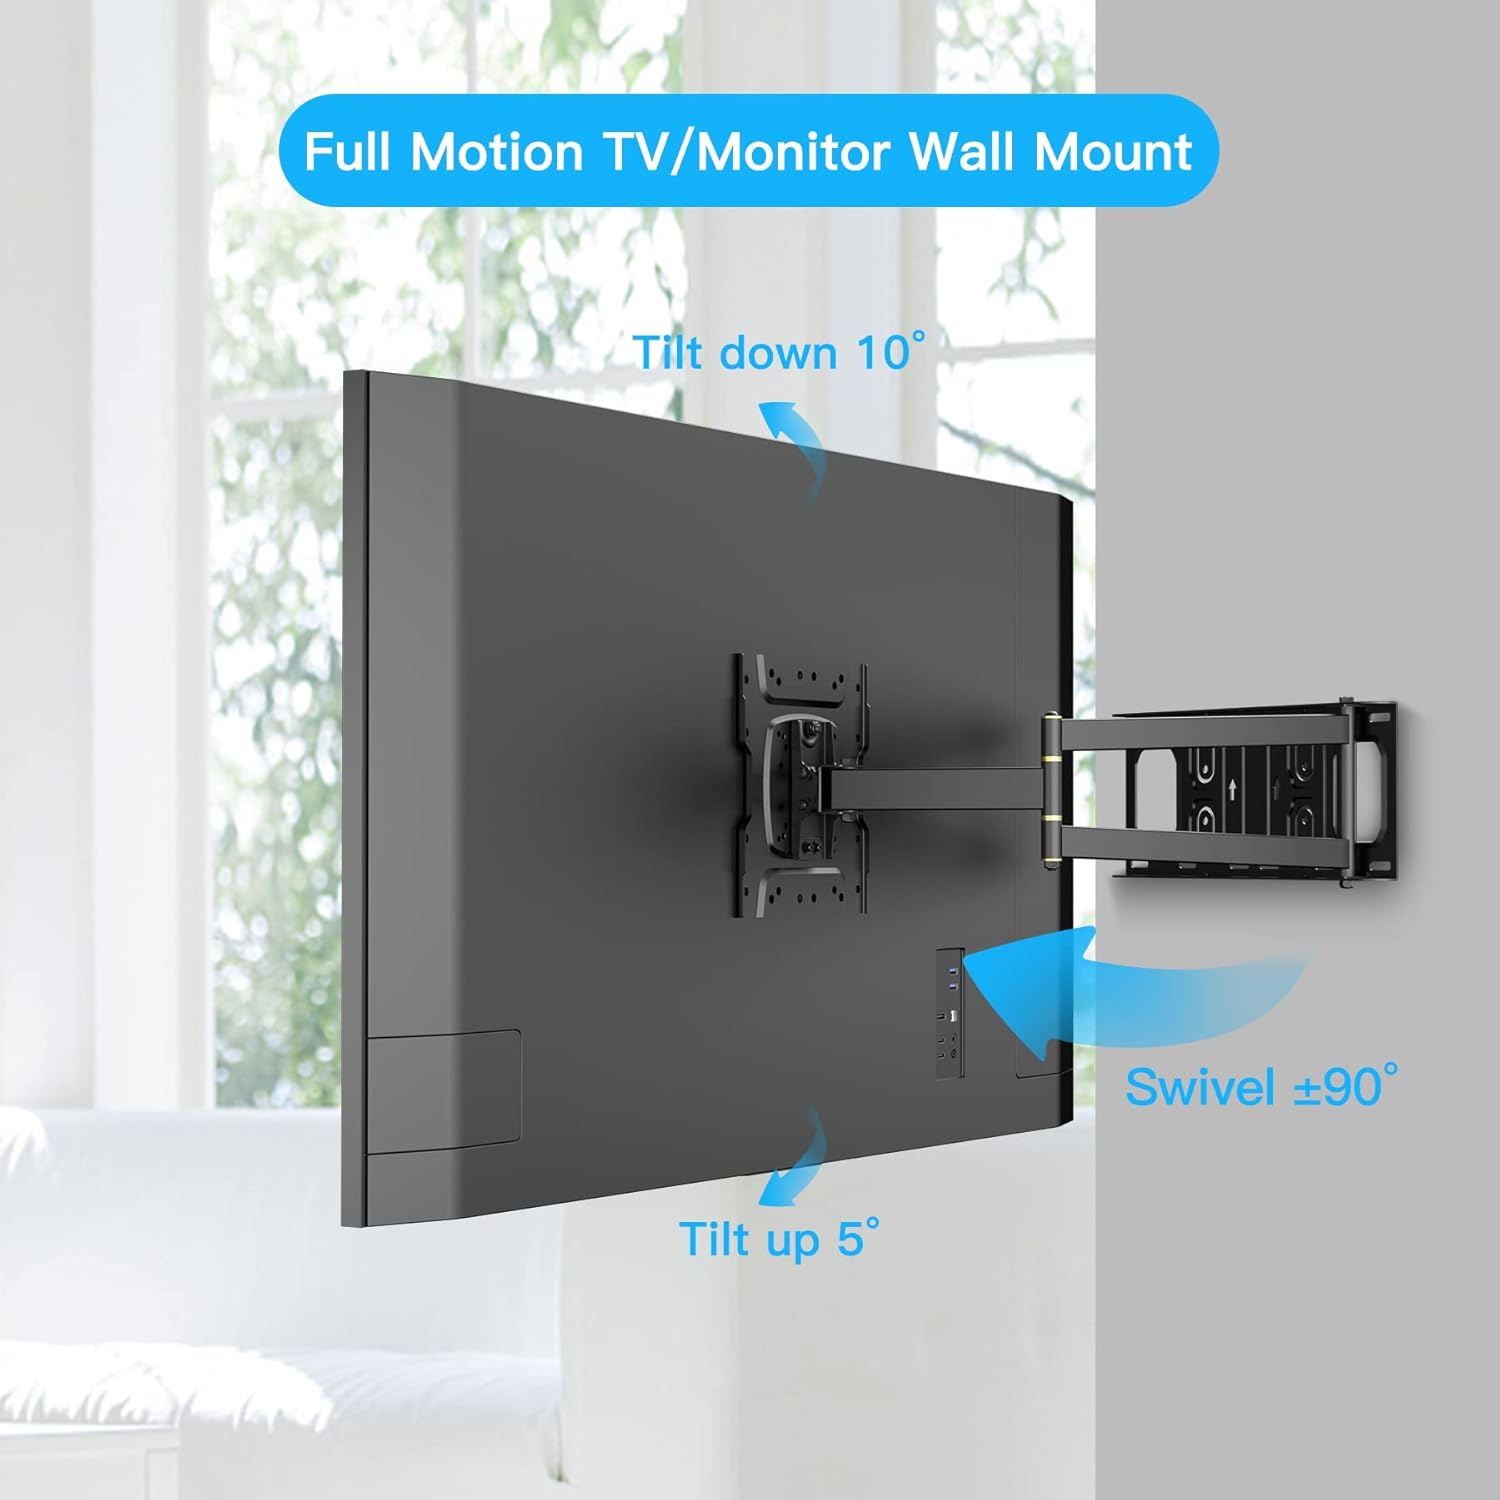
Figure 6: Swivel and Tilt Capabilities
Video 1: Demonstration of Corner TV Wall Mount Movement (Swivel, Tilt, Extension, Leveling)
7. Maintenance
Regular maintenance ensures the longevity and safe operation of your TV mount.
- Cleaning: Dust the mount regularly with a soft, dry cloth. For stubborn dirt, use a slightly damp cloth and mild detergent, then wipe dry. Avoid abrasive cleaners or solvents.
- Check Connections: Periodically check all screws and bolts to ensure they remain tight and secure. Re-tighten if necessary.
- Inspect for Damage: Inspect the mount for any signs of wear, corrosion, or damage. If any damage is observed, discontinue use and contact customer service.
8. Troubleshooting
Refer to the table below for common issues and their solutions.
| Problem | Possible Cause | Solution |
|---|---|---|
| TV is not level. | Wall plate not perfectly level during installation, or leveling screws need adjustment. | Loosen the leveling screws on the TV plate, adjust the TV to be level using a spirit level, then re-tighten the screws. |
| Mount feels unstable. | Mounting bolts not fully tightened, incorrect wall anchors used, or wall type is unsuitable. | Ensure all wall bolts are securely tightened. Verify that the correct anchors were used for your wall type. If unsure, consult a professional. Do not use if unstable. |
| Difficulty adjusting tilt/swivel. | Adjustment screws are too tight, or joints need lubrication. | For tilt, loosen the tilt adjustment screws slightly, adjust, then re-tighten. For swivel, ensure no cables are snagged. Joints are pre-lubricated; if stiffness persists, contact support. |
| TV is too heavy for the mount. | TV weight exceeds the mount's maximum capacity. | Immediately remove the TV from the mount. This mount supports up to 77 lbs (35 kg). Do not use if your TV is heavier. |
9. Specifications
| Model Number: | HY9441 |
| Compatible TV Sizes: | 13 - 43 inches |
| Maximum Load Capacity: | 77 lbs (35 kg) |
| VESA Compatibility: | 75x75mm, 100x100mm, 100x200mm, 200x100mm, 200x200mm |
| Tilt Angle: | +5° to -10° |
| Swivel Angle: | ±90° |
| Level Adjustment: | ±3° |
| Wall Distance (Retracted): | 2.48 inches (63mm) |
| Wall Distance (Extended): | 25.6 inches (650mm) |
| Material: | Alloy Steel |
| Product Dimensions: | 16 x 2.75 x 25.6 inches |
| Item Weight: | 5 pounds |

Figure 7: TV Compatibility and Load Capacity

Figure 8: Mount Dimensions
10. Warranty and Support
FORGING MOUNT is committed to providing high-quality products and excellent customer service. For any questions, concerns, or assistance with your product, please contact our customer support team.
- Customer Service: Refer to the contact information provided with your product packaging or visit the official FORGING MOUNT website for support.
- Warranty: Information regarding product warranty can be found on the FORGING MOUNT website or by contacting customer service directly. Please retain your proof of purchase for warranty claims.
