
1. Introduction
Thank you for choosing the VGR V-979 Professional Digital Rechargeable Shaver. This device is designed for precise and smooth hair trimming, offering convenience and efficiency. Please read this manual carefully before using the shaver to ensure safe and optimal performance. Keep this manual for future reference.
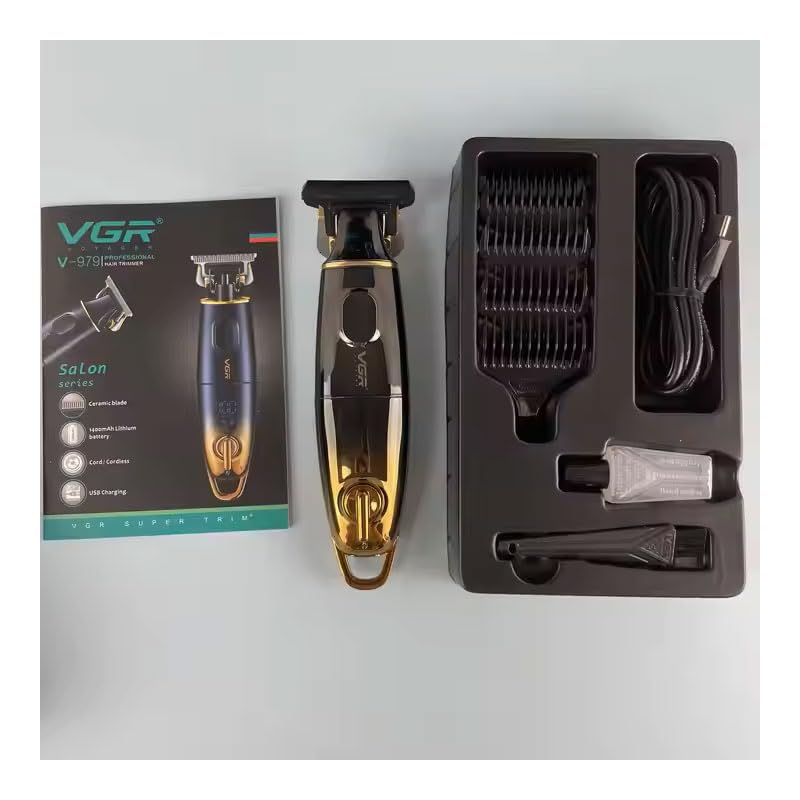
Image: The VGR V-979 Professional Digital Rechargeable Shaver, showcasing its sleek design and digital display.
2. Safety Instructions
To reduce the risk of electric shock, injury, or fire, always follow these basic safety precautions:
- Do not immerse the shaver in water or use it near water (e.g., bathtub, shower).
- Keep the appliance away from heated surfaces.
- Do not use the shaver if it is damaged, especially the cord or plug.
- This appliance is not intended for use by persons (including children) with reduced physical, sensory, or mental capabilities, or lack of experience and knowledge, unless they have been given supervision or instruction concerning use of the appliance by a person responsible for their safety.
- Children should be supervised to ensure that they do not play with the appliance.
- Only use attachments supplied by the manufacturer.
- Unplug the shaver before cleaning or when not in use for extended periods.
- Do not attempt to repair the appliance yourself. Contact qualified service personnel for repairs.
3. Package Contents
Carefully unpack your VGR V-979 shaver and check for the following items:
- VGR V-979 Professional Digital Rechargeable Shaver
- 5 Guide Combs (1mm, 2mm, 3mm, 4mm, 5mm)
- Protection Cap
- Cleaning Brush
- Lubricating Oil
- USB Type-C Charging Cable

Image: The VGR V-979 product box, illustrating the shaver and its included accessories such as guide combs, cleaning brush, oil, and charging cable.
4. Product Overview
Familiarize yourself with the main components of your VGR V-979 shaver:
- Ceramic Blades: Advanced ceramic blades for precise and smooth cutting.
- Power Button: Used to turn the shaver ON/OFF.
- LED Display: Shows battery level and charging status.
- USB Type-C Charging Port: For convenient charging.
- Guide Comb Attachment Points: For securing the various guide combs.
5. Setup
5.1 Initial Charging
Before first use, fully charge the shaver. Connect the USB Type-C charging cable to the shaver's charging port and plug the other end into a compatible USB power adapter (not included) or a USB port. The LED display will indicate the charging progress. A full charge takes approximately 2.5 hours.
5.2 Attaching Guide Combs
To attach a guide comb, align the comb with the shaver head and push it firmly until it clicks into place. To remove, gently pull the comb away from the shaver head. Select the desired comb (1mm, 2mm, 3mm, 4mm, or 5mm) based on your preferred hair length.
6. Operating Instructions
6.1 Turning On/Off
Press the Power Button once to turn the shaver ON. The LED display will illuminate, showing the current battery level. Press the Power Button again to turn the shaver OFF.
6.2 Trimming Hair
- Ensure your hair is clean and dry for best results.
- Attach the desired guide comb. For a closer trim, use without a guide comb.
- Hold the shaver with the blades facing the area you wish to trim.
- Move the shaver against the direction of hair growth, using slow, even strokes.
- Regularly check the trimmed area and adjust your technique as needed.
- The shaver provides up to 180 minutes of operating time on a full charge. Monitor the LED display for battery status.
7. Maintenance and Cleaning
Proper maintenance ensures the longevity and performance of your shaver.
7.1 Cleaning the Blades
- Turn off the shaver and disconnect it from the power source.
- Remove any attached guide comb.
- Use the provided cleaning brush to remove loose hairs from the blades and the shaver head.
- For a more thorough cleaning, the blade head can be rinsed under running water. Ensure the shaver body does not get wet. Dry thoroughly before reattaching.
7.2 Oiling the Blades
After every few uses, or if the shaver's performance decreases, apply a small drop of the provided lubricating oil to the blades. Turn the shaver on for a few seconds to distribute the oil evenly. This helps maintain blade sharpness and smooth operation.
7.3 Storage
Store the shaver in a cool, dry place, away from direct sunlight and moisture. Use the protection cap to cover the blades when not in use to prevent damage.
8. Troubleshooting
| Problem | Possible Cause | Solution |
|---|---|---|
| Shaver does not turn on. | Battery is depleted. | Charge the shaver fully. |
| Poor trimming performance. | Blades are clogged with hair or not oiled. | Clean the blades thoroughly and apply lubricating oil. |
| Shaver makes unusual noise. | Blades may be misaligned or require oiling. | Check blade alignment and apply lubricating oil. If problem persists, contact support. |
| Charging indicator not working. | Faulty charging cable or power adapter. | Try a different USB Type-C cable or power adapter. |
9. Specifications
- Model: V-979
- Brand: VGR
- Blade Material: Advanced Ceramic
- Guide Combs: 1mm, 2mm, 3mm, 4mm, 5mm
- Charging Type: USB Type-C
- Charging Time: Approximately 2.5 hours
- Operating Time: Up to 180 minutes
- Display: LED Battery Level Indicator
10. Warranty and Support
This product is covered by a manufacturer's warranty against defects in materials and workmanship. For specific warranty terms and conditions, please refer to the warranty card included with your purchase or contact the retailer. For technical support or service inquiries, please contact VGR customer service through their official website or the contact information provided with your product packaging.
Please retain your proof of purchase for warranty claims.


