
1. Product Overview
This Prichor Universal Ceiling Fan Remote Control Kit (Model RC-05+5R) is designed to provide convenient and flexible control over your ceiling fan and its integrated lighting. It features multi-speed fan control and light dimming capabilities, making it a versatile solution for enhancing comfort in your home. This kit is compatible with a wide range of ceiling fan brands, including Hunter, Harbor Breeze, and Hampton Bay, and is specifically designed to work with Hunter models 99122, 99123, and 99600.
The kit includes a handheld remote control and a receiver unit, both manufactured to meet high standards and approved by the FCC for reliable performance. The powerful receiver is rated at 240W, ensuring compatibility with multiple light bulbs and extending the overall lifespan of the unit.

Figure 1.1: The Prichor RC-05+5R remote control and its corresponding receiver unit. The remote features clearly labeled buttons for fan speed and light control, while the receiver is a compact unit designed for installation within the fan canopy.
2. Setup & Installation
Proper installation is crucial for the safe and effective operation of your ceiling fan remote control kit. Please follow these instructions carefully. If you are unsure about any step, consult a qualified electrician.
2.1 Safety Precautions
- WARNING: HIGH VOLTAGE! Always disconnect power by removing the fuse or switching off the circuit breaker before beginning installation.
- Do not use this kit with solid-state fans.
- All electrical wiring must meet local and national electrical code requirements.
- The power supply for the fan must be 110/120 volt, 60Hz.
- Maximum fan motor amps: 1.0A.
- Maximum light watts: 300W for dimmable LED or incandescent bulbs only. Exceeding this wattage can cause serious injury or death.
2.2 Pre-Installation Check
Before installation, verify the dimensions of the receiver unit to ensure there is sufficient space within your ceiling fan's canopy. The receiver measures approximately 4.09 inches (length) x 1.97 inches (width) x 0.98 inches (thickness).

Figure 2.1: Dimensions of the remote control and receiver unit, along with the wall holder. Ensure adequate space in the fan canopy for the receiver.
2.3 Installation Steps
- Disconnect Power: Ensure power to the ceiling fan is completely disconnected at the circuit breaker before proceeding.
- Disconnect Existing Fan Wiring: Carefully disconnect the existing wiring from your ceiling fan.
- Install the Controller: Connect the wires from the receiver unit to your ceiling fan and household wiring according to the provided wiring diagram. The wires are clearly labeled for ease of installation. Use the included connectors to secure all connections.
- Secure Receiver: Carefully tuck the receiver unit into the fan canopy, ensuring no wires are pinched.
- Restore Power: Once all connections are secure and the receiver is properly placed, restore power at the circuit breaker.

Figure 2.2: Visual guide for installation, showing disconnection of fan wiring and connection of the receiver. A detailed wiring diagram illustrates the connections: Red to AC 110-120V, White to AC 110-120V, Blue to Light, Black to Motor, White to Motor.
2.4 Remote Control Pairing (Learn Key)
The remote control and receiver need to be paired to communicate. This kit features a "LEARN" key for easy matching.
- Insert Battery: Open the battery compartment on the remote control and insert one CR2032 battery (not included). Ensure correct polarity.
- Initiate Learning: Within 30 seconds of restoring power to the fan, press and hold the "LEARN" key located inside the remote's battery compartment for approximately 3 seconds. The fan light should blink, indicating successful pairing.
- Test Functionality: Test all remote functions (fan speeds, light on/off/dimming) to ensure proper operation.
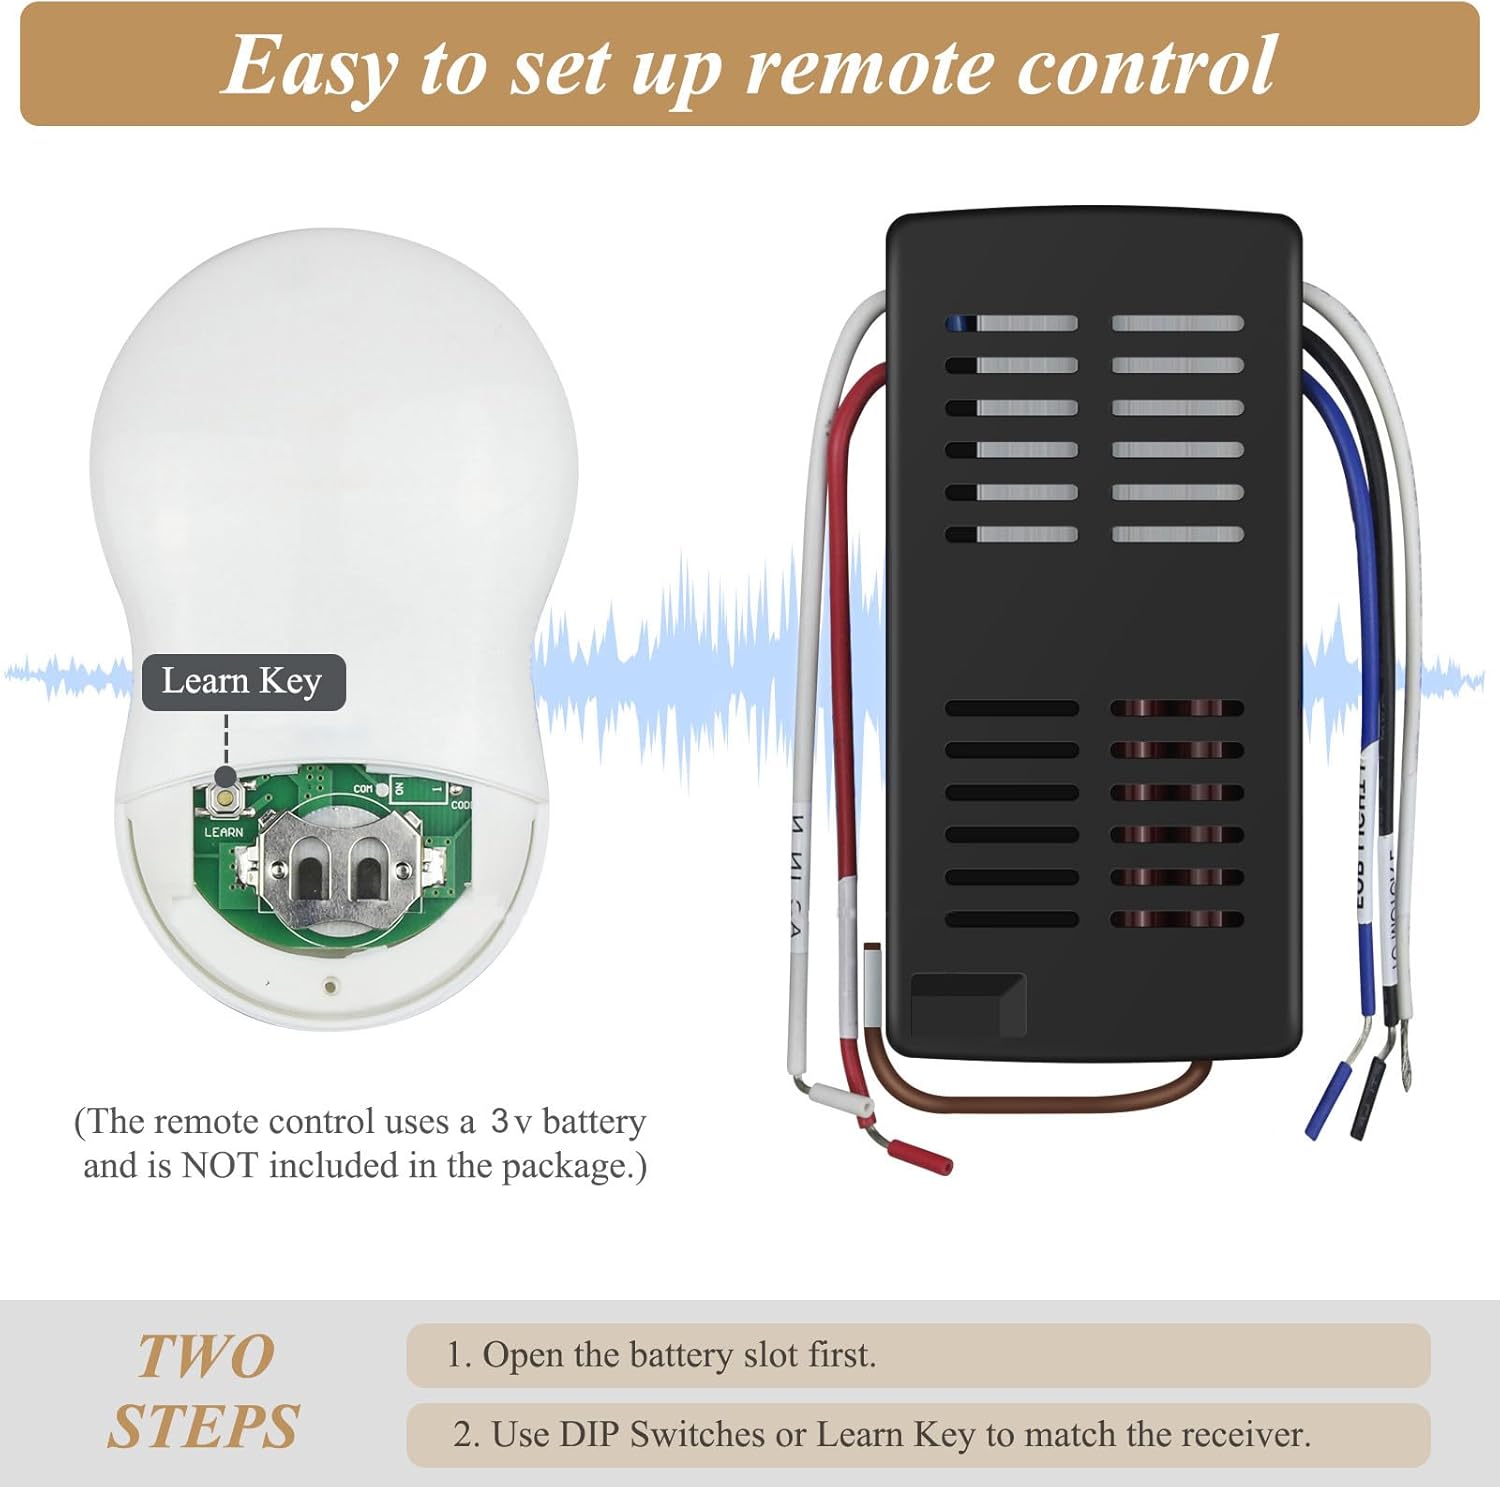
Figure 2.3: Location of the "LEARN" key and battery slot within the remote control. The remote requires a 3V CR2032 battery, which is not supplied with the kit.
3. Operation
The remote control provides intuitive access to your ceiling fan's functions.
3.1 Remote Control Functions
- Fan Speed Buttons (1, 2, 3): Press these buttons to cycle through the three available fan speeds:
- 1: Low Speed
- 2: Medium Speed
- 3: High Speed
- Fan ON/OFF Button (0): Press this button to turn the fan motor ON or OFF.
- Light Button (Light Bulb Icon): This button controls the fan's light:
- Press once to turn the light ON or OFF.
- Press and hold to dim or brighten the light. Release when the desired brightness is achieved.
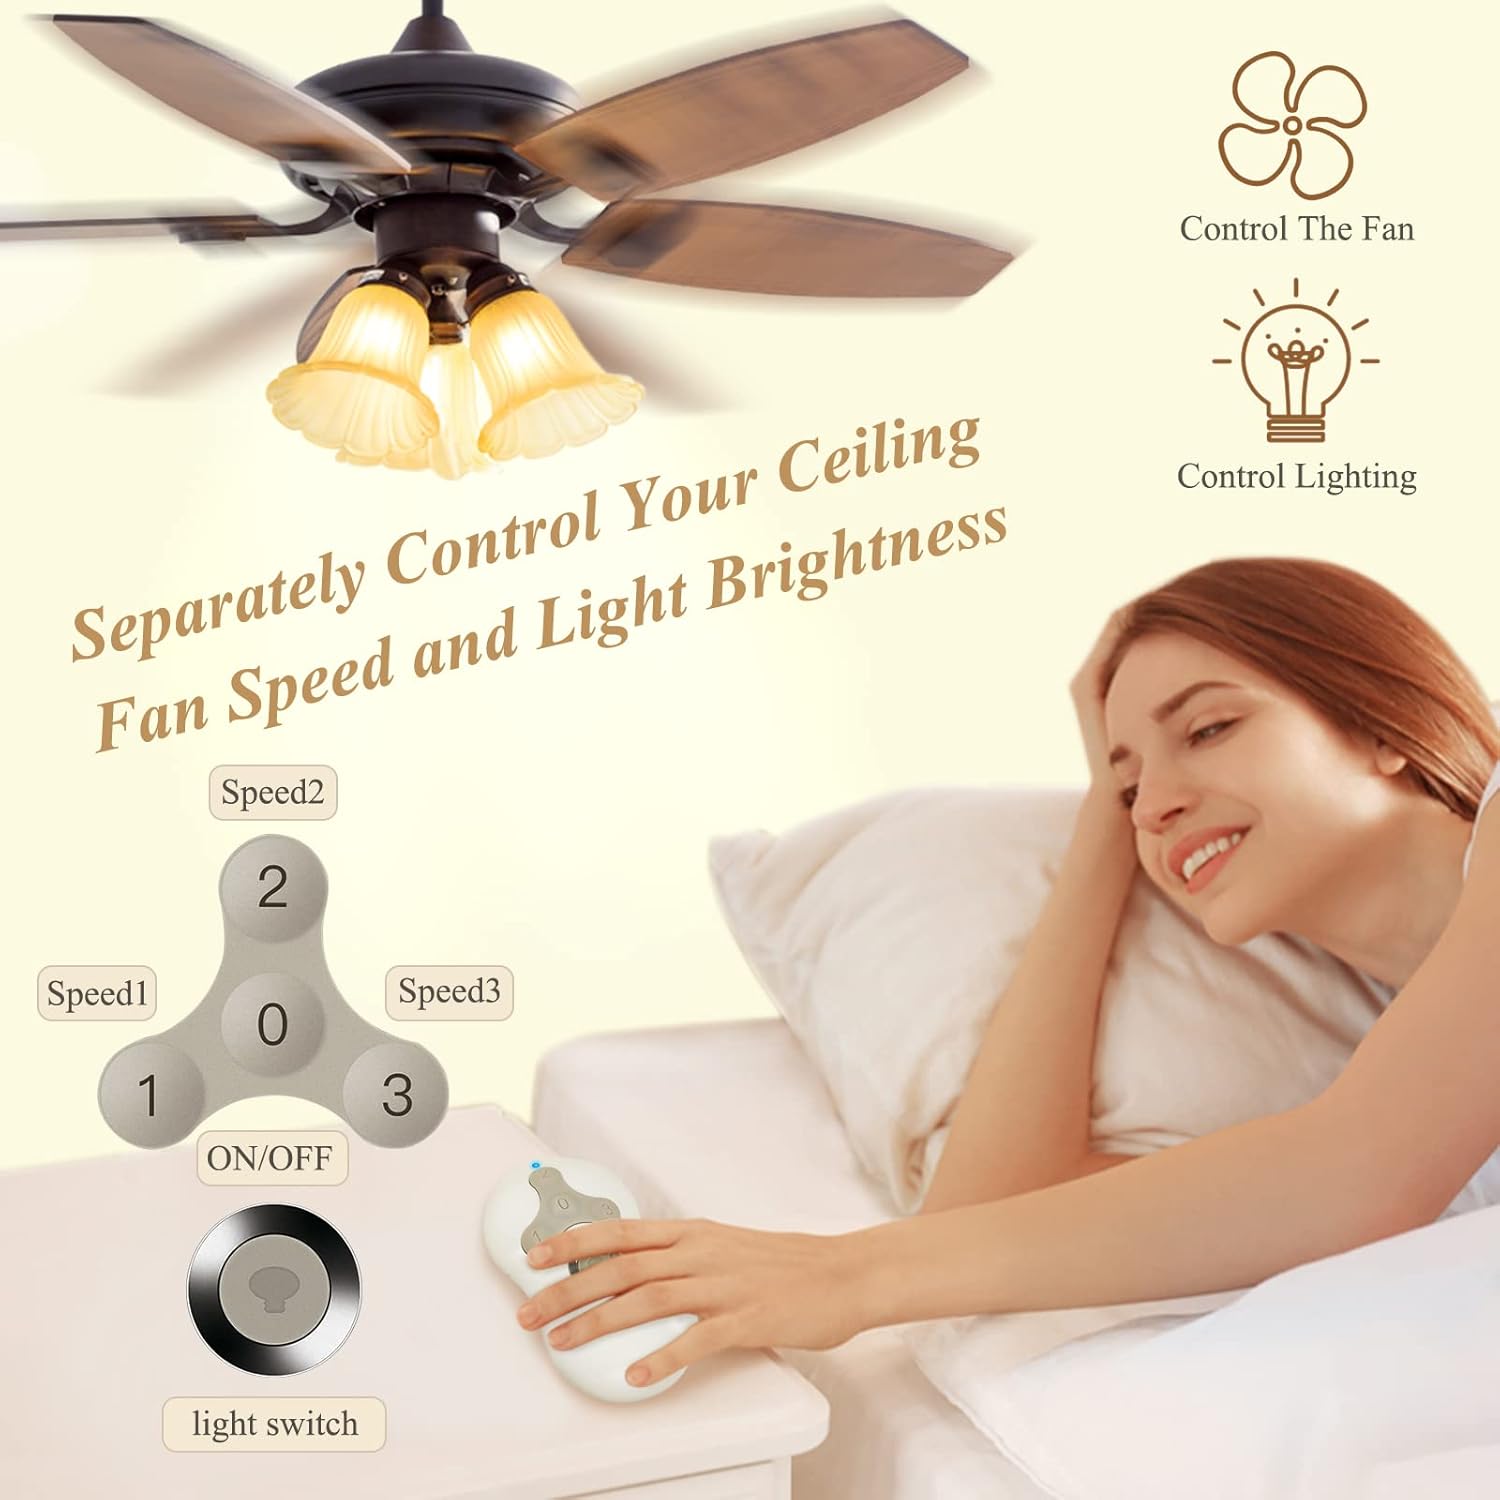
Figure 3.1: The remote control layout, highlighting the fan speed buttons (1, 2, 3, 0/OFF) and the light control button. This remote allows for separate control of fan speed and light brightness.
4. Maintenance
To ensure the longevity and optimal performance of your Prichor Ceiling Fan Remote Control Kit, follow these simple maintenance guidelines:
- Cleaning: Wipe the remote control and receiver with a soft, dry cloth. Do not use abrasive cleaners, solvents, or harsh chemicals, as these can damage the surfaces or internal components.
- Battery Replacement: When the remote control's range decreases or it becomes unresponsive, it's time to replace the CR2032 battery. Refer to Section 2.4 for instructions on accessing the battery compartment. Dispose of old batteries responsibly.
- Environmental Conditions: Avoid exposing the remote control or receiver to excessive moisture, extreme temperatures, or direct sunlight.
5. Troubleshooting
If you experience issues with your ceiling fan remote control kit, refer to the following common problems and solutions:
| Problem | Possible Cause | Solution |
|---|---|---|
| Fan or Light does not respond to remote. |
|
|
| Fan operates at wrong speed or inconsistently. |
|
|
| Light does not dim or flickers. |
|
|
6. Specifications
| Feature | Detail |
|---|---|
| Model Number | RC-05+5R |
| Product Dimensions | 4.1 x 2.6 x 0.5 inches (Remote) |
| Receiver Dimensions | Approx. 4.09 x 1.97 x 0.98 inches |
| Item Weight | 7 ounces |
| Batteries Required | 1 x CR2032 (for remote control, not included) |
| Compatible Devices | Ceiling Fans (AC motor only) |
| Max Number of Supported Devices | 1 (per kit) |
| Special Features | 3-speed control, Universal compatibility, Light dimmer |
| Color | White |
| Manufacturer | Prichor |
| First Available Date | August 29, 2022 |
6.1 Compatibility
This remote control kit is compatible with all kinds of AC motor ceiling fans. It is not designed to work with DC motor ceiling fans.
For lighting, the dimmer function supports Tungsten bulbs (up to 4.2A/500W Max), CFL bulbs (up to 1.5A/150W Max), and LED bulbs (up to 1.5A/150W Max). Ensure bulbs are dimmable for proper dimming functionality.
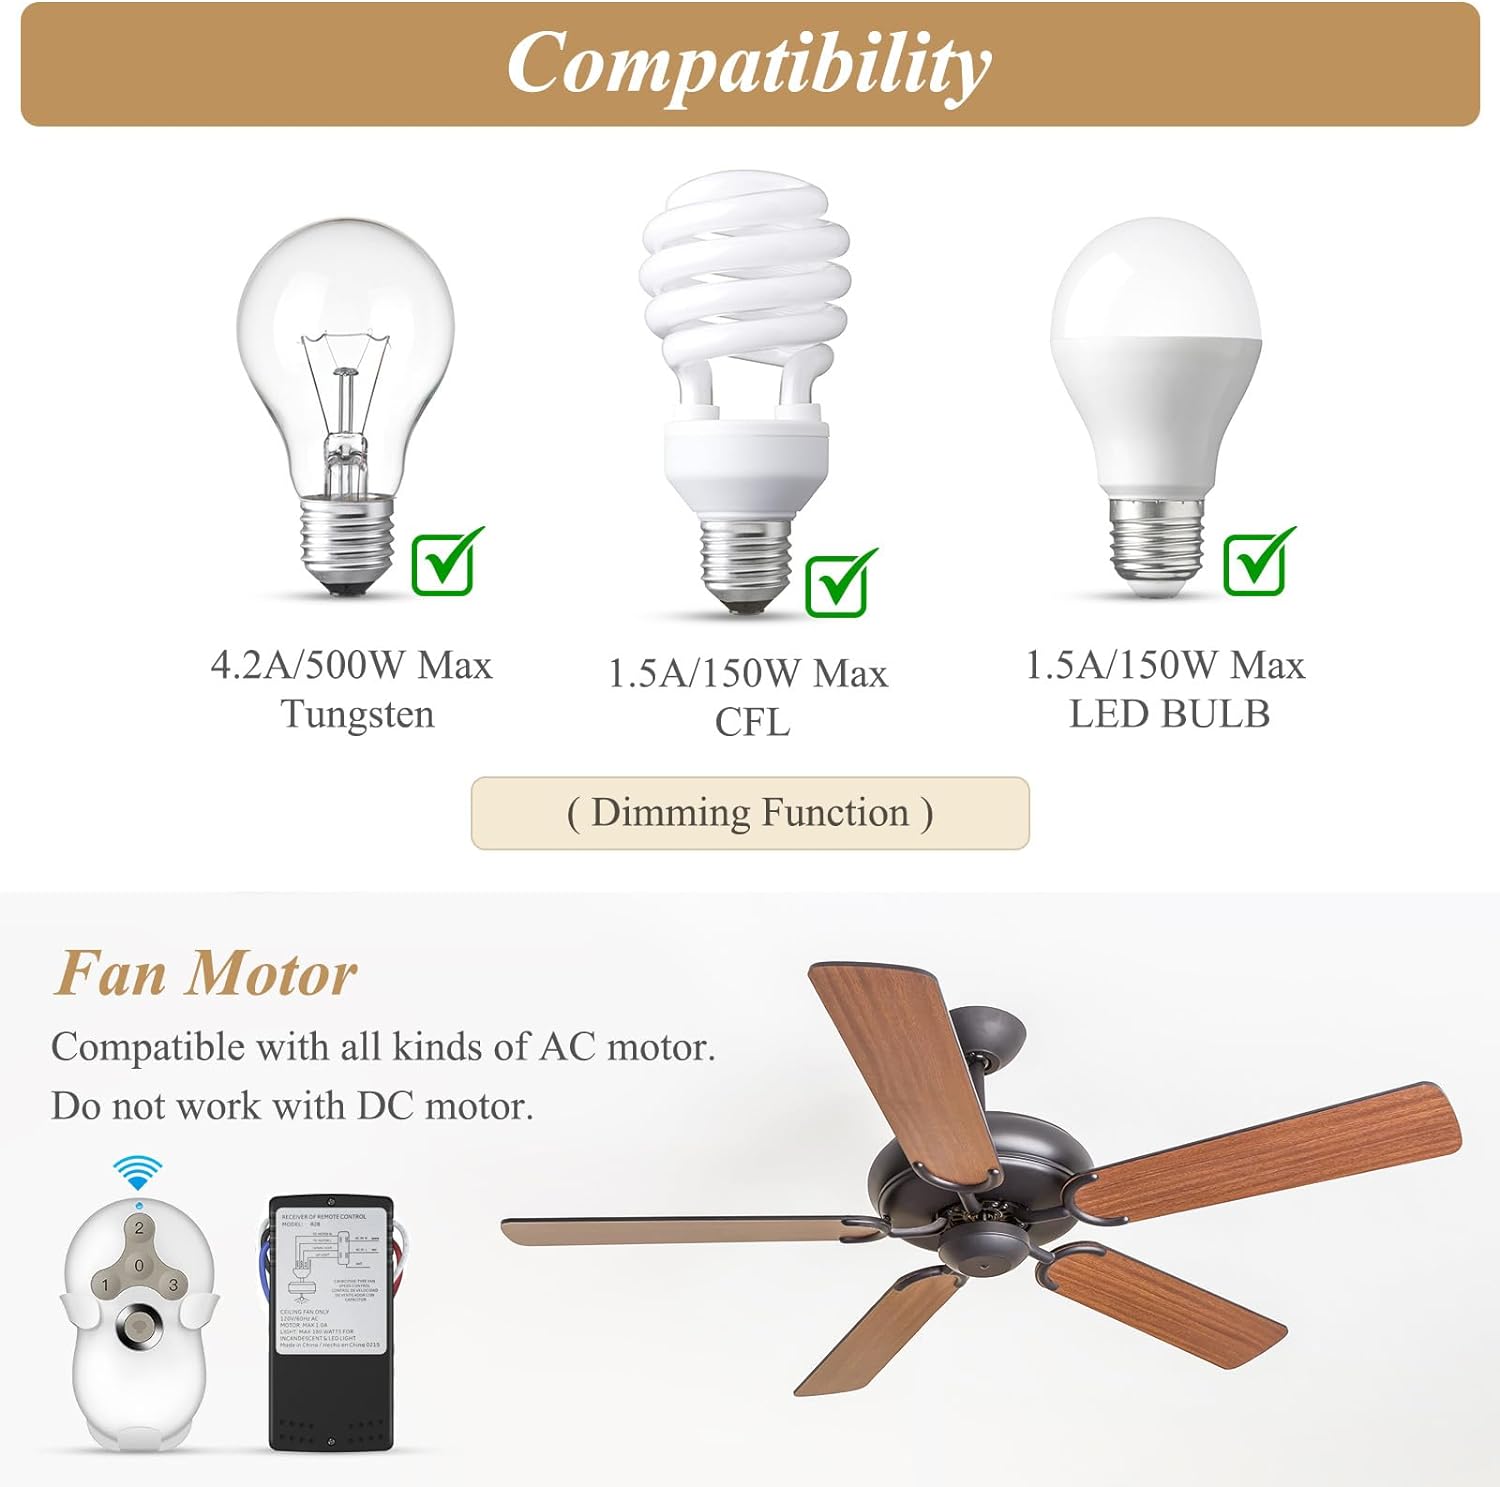
Figure 6.1: Visual representation of bulb compatibility (Tungsten, CFL, LED) and confirmation of AC motor fan compatibility. DC motor fans are not supported.
7. Warranty & Support
7.1 Warranty Information
Specific warranty details for the Prichor Universal Ceiling Fan Remote Control Kit are typically provided by the manufacturer at the time of purchase or within the product packaging. Please refer to any documentation included with your product for precise warranty terms and conditions. For additional protection, extended protection plans may be available through your retailer.
7.2 Customer Support
For technical assistance, troubleshooting beyond this manual, or inquiries regarding your product, please contact Prichor customer support. You can typically find contact information on the manufacturer's official website or through the retailer where you purchased the product. When contacting support, please have your product model number (RC-05+5R) and purchase details ready.
You can also visit the official Prichor store on Amazon for more information and product updates: Prichor Amazon Store.