1. Introduction
Thank you for choosing the WORKPRO 3.6V Electric 2-in-1 Staple Gun and Brad Nailer. This tool is designed for various fastening tasks, including upholstery, material repair, woodworking, decoration, furniture, and DIY projects. It is compatible with JT21 staples and BN18 brad nails. Please read this manual thoroughly before operation to ensure safe and efficient use.

Image 1.1: WORKPRO Electric Staple Gun and Brad Nailer with included fasteners and USB cable.
2. Safety Instructions
Always follow basic safety precautions to reduce the risk of personal injury or damage to the tool.
- Read All Instructions: Familiarize yourself with the tool's operation and safety features before use.
- Eye Protection: Always wear appropriate eye protection (safety glasses) when operating the tool.
- Hand Protection: Wear gloves to protect hands from potential hazards.
- Work Area: Keep the work area clean, well-lit, and free from obstructions.
- Secure Workpiece: Ensure the material being worked on is stable and secured.
- Triple Safety Mechanism: The tool features three safety switches. It will only fire when the ON button is activated, the trigger is pressed, and the contact safety device is fully depressed against the workpiece.
- Power Off When Not in Use: Always turn off the power switch (position "O") when the tool is not in use, during loading/unloading, or during maintenance.
- Avoid Overheating: To prevent damage, do not exceed 30 shots per minute. Allow a 1-minute break for every 100 nails fired.
- Correct Fasteners: Only use 1/4"-9/16" JT21 staples and 5/8" 18GA BN18 nails. Using incorrect fasteners (e.g., T50 staples) can damage the tool.
- Not for Hardwoods: This tool is not suitable for professional carpentry or nailing hardwoods.
3. Package Contents
Verify that all items are present in the package:
- 1 x WORKPRO 3.6V Electric 2-in-1 Staple Gun and Brad Nailer
- 1000 x JT21 Staples (1/4"-9/16")
- 1000 x BN18 Brad Nails (5/8" 18GA)
- 1 x USB Charger Cable
4. Product Features and Components
Familiarize yourself with the different parts of your electric staple gun/nailer.

Image 4.1: Labeled components of the WORKPRO Electric Staple Gun, including LED indicator, charge port, ON/OFF switch, trigger, contact safety, nail viewer window, and quick release magazine.
- ON/OFF Switch: Controls the power to the tool.
- LED Indicator: Displays charging status (Red for low power/charging, Green for full charge/shooting).
- Charge Port: For connecting the USB charging cable.
- Trigger: Activates the firing mechanism when safety conditions are met.
- Contact Safety Device: Must be pressed against the workpiece for the tool to fire.
- Nail Viewer Window: Allows checking the remaining fastener level.
- Quick Release Magazine: For loading staples and nails.
5. Setup
5.1 Charging the Battery
The electric staple gun is powered by a 3.6V Lithium-Ion battery. Ensure the tool is fully charged before first use.
- Connect the provided USB charging cable to the charge port on the tool.
- Connect the other end of the USB cable to a 5V DC power source (e.g., mobile phone charger, computer USB port, power bank).
- The LED indicator will show Red during charging.
- Charging typically takes 1-2 hours. The LED indicator will turn Green when fully charged.
- A full charge can fire up to 1000 nails/staples.

Image 5.1: Illustration of fast charging capability (1-2 hours) using a 5V DC power source.
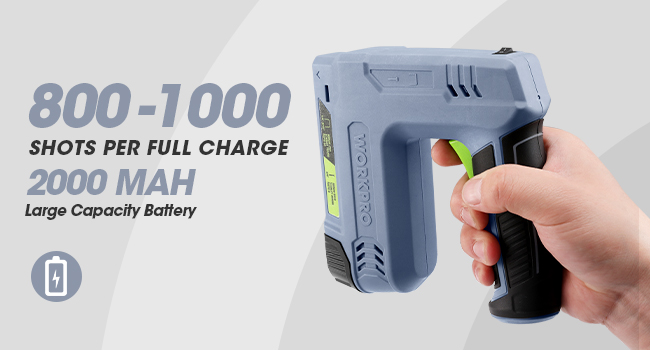
Image 5.2: Information on battery capacity (2000mAh 3.6V) and shots per full charge (800-1000).
5.2 Loading Staples and Nails
Ensure the power switch is in the "O" (OFF) position before loading fasteners.

Image 5.3: Overview of compatible fasteners: JT21 Staples (1/4"-9/16") and 18GA Brad Nails (5/8").
- Pull out the magazine cover: Locate the quick release magazine at the bottom of the tool and pull out its cover.
- Load Staples: Place JT21 staples into the magazine with their points facing upwards.
- Load Nails: Place BN18 nails into the loading side of the magazine with their points facing upwards.
- Close the magazine cover: Push the magazine cover back until it locks securely into place.

Image 5.4: Visual guide for loading fasteners: pulling out the magazine, placing staples with points up, placing nails with points up, and closing the magazine.

Image 5.5: Emphasizes placing staples with points upwards.
6. Operating the Tool
Follow these steps to operate your WORKPRO Electric Staple Gun/Brad Nailer safely and effectively.
- Turn On Power: Slide the ON/OFF switch to the "I" (ON) position. The LED indicator will turn green if the battery has sufficient charge.
- Position the Tool: Place the contact safety device firmly against the surface of the object where you intend to fasten.
- Squeeze the Trigger: While maintaining firm contact with the workpiece, squeeze the trigger to fire a staple or nail.
- Monitor Fastener Level: Use the nail viewer window to check the remaining fasteners and reload as needed.
- After Use: Always slide the ON/OFF switch to the "O" (OFF) position when you have finished using the tool or before performing any adjustments or maintenance.

Image 6.1: Illustrates the three steps for safe operation: Power Switch On, Press Contact Safety Device Down Completely, and Squeeze the Trigger to Shoot.
6.1 Recommended Applications
This tool is suitable for various light to medium-duty fastening tasks:
- Upholstery projects
- Material repair (e.g., fabric, paper, leather)
- Woodworking with softwood products
- Decorative tasks
- Furniture assembly and repair
- General DIY projects

Image 6.2: Examples of proper use, including pet house construction, DIY wood products, photo frame assembly, and upholstery.
7. Maintenance
Regular maintenance ensures the longevity and optimal performance of your tool.
- Cleaning: Keep the tool clean and free from dust and debris. Use a dry cloth to wipe down the exterior.
- Storage: Store the tool in a dry, cool place, away from direct sunlight and moisture. Ensure the power switch is OFF.
- Battery Care: Do not store the tool with a completely discharged battery for extended periods. Charge it periodically if not in use.
- Fastener Magazine: Periodically check the magazine for any obstructions or bent fasteners that could cause jamming.
- Avoid Overuse: Adhere to the recommended firing rate (no more than 30 shots per minute, with a 1-minute break every 100 shots) to prevent motor overheating and potential damage.
8. Troubleshooting
If you encounter issues, refer to the following common problems and solutions:
| Problem | Possible Cause | Solution |
|---|---|---|
| Tool does not fire | Power switch is OFF Battery is discharged Contact safety not fully depressed Magazine is empty Fastener jam | Turn power switch ON Charge the battery Press tool firmly against workpiece Reload fasteners Clear any jammed fasteners (ensure power is OFF) |
| Fasteners do not fully penetrate | Incorrect fastener type Working on hardwood Low battery charge | Ensure correct JT21 staples or BN18 nails are used This tool is not for hardwoods; use on softwoods Charge the battery fully |
| Tool jams frequently | Incorrect fastener type Bent or damaged fasteners Magazine not properly closed Firing too rapidly | Use only specified fasteners Inspect fasteners before loading Ensure magazine is securely locked Adhere to recommended firing rate (max 30 shots/min) |
| Battery not charging | USB cable or charger faulty Charge port obstructed | Try a different USB cable or 5V DC charger Check charge port for debris |
9. Specifications
Technical details for the WORKPRO Electric Staple Gun and Brad Nailer.

Image 9.1: Visual representation of the tool's dimensions and key specifications.
- Model: W125177AE
- Power Source: 3.6V Lithium-Ion Battery (2000mAh)
- Charging Voltage: 5V DC
- Charging Time: 1-2 hours
- Max Shots per Charge: 800-1000
- Max Shot Rate: 30 shots/minute (with 1-minute break every 100 shots)
- Compatible Staples: JT21 (1/4"-9/16" / 6-14mm)
- Compatible Nails: BN18 (5/8" 18GA / 15mm)
- Item Weight: 1.76 lbs (0.8 kg)
- Product Dimensions: 5.71"L x 5.67"W x 0.1"H (approximately 14.5cm x 14.4cm)
- Material: Acrylonitrile Butadiene Styrene
- Color: Gray
10. Warranty and Support
For warranty information or technical support, please refer to the documentation included with your purchase or contact WORKPRO customer service. Keep your purchase receipt as proof of purchase.


