
Thamtu G2
Thamtu G2 Robot Vacuum and Mop Combo User Manual
Model: G2
1. Introduction
Thank you for choosing the Thamtu G2 Robot Vacuum and Mop Combo. This intelligent cleaning device is designed to simplify your home cleaning routine by offering both vacuuming and mopping functionalities. Please read this manual thoroughly before using the product to ensure proper operation, maintenance, and safety.

Figure 1: Thamtu G2 Robot Vacuum and Mop Combo
2. Important Safety Instructions
To reduce the risk of injury or damage, read these safety instructions carefully and keep them for future reference.
- The appliance is for indoor use only. Do not use it outdoors or on commercial surfaces.
- Do not allow children to play with the appliance. Supervise children and pets when the appliance is operating.
- Do not handle the appliance with wet hands.
- Do not use the appliance to pick up large debris, broken glass, or anything that is burning or smoking.
- Keep hair, loose clothing, fingers, and all parts of the body away from openings and moving parts.
- Ensure the charging base is placed against a wall on a level surface and that there are no obstacles within 1 meter (3 feet) in front and 0.5 meters (1.5 feet) on either side.
- Only use the original power adapter and charging base provided by the manufacturer.
- Remove any loose cables, small objects, or fragile items from the cleaning path before operation.
3. Package Contents
Verify that all components are included in your package:
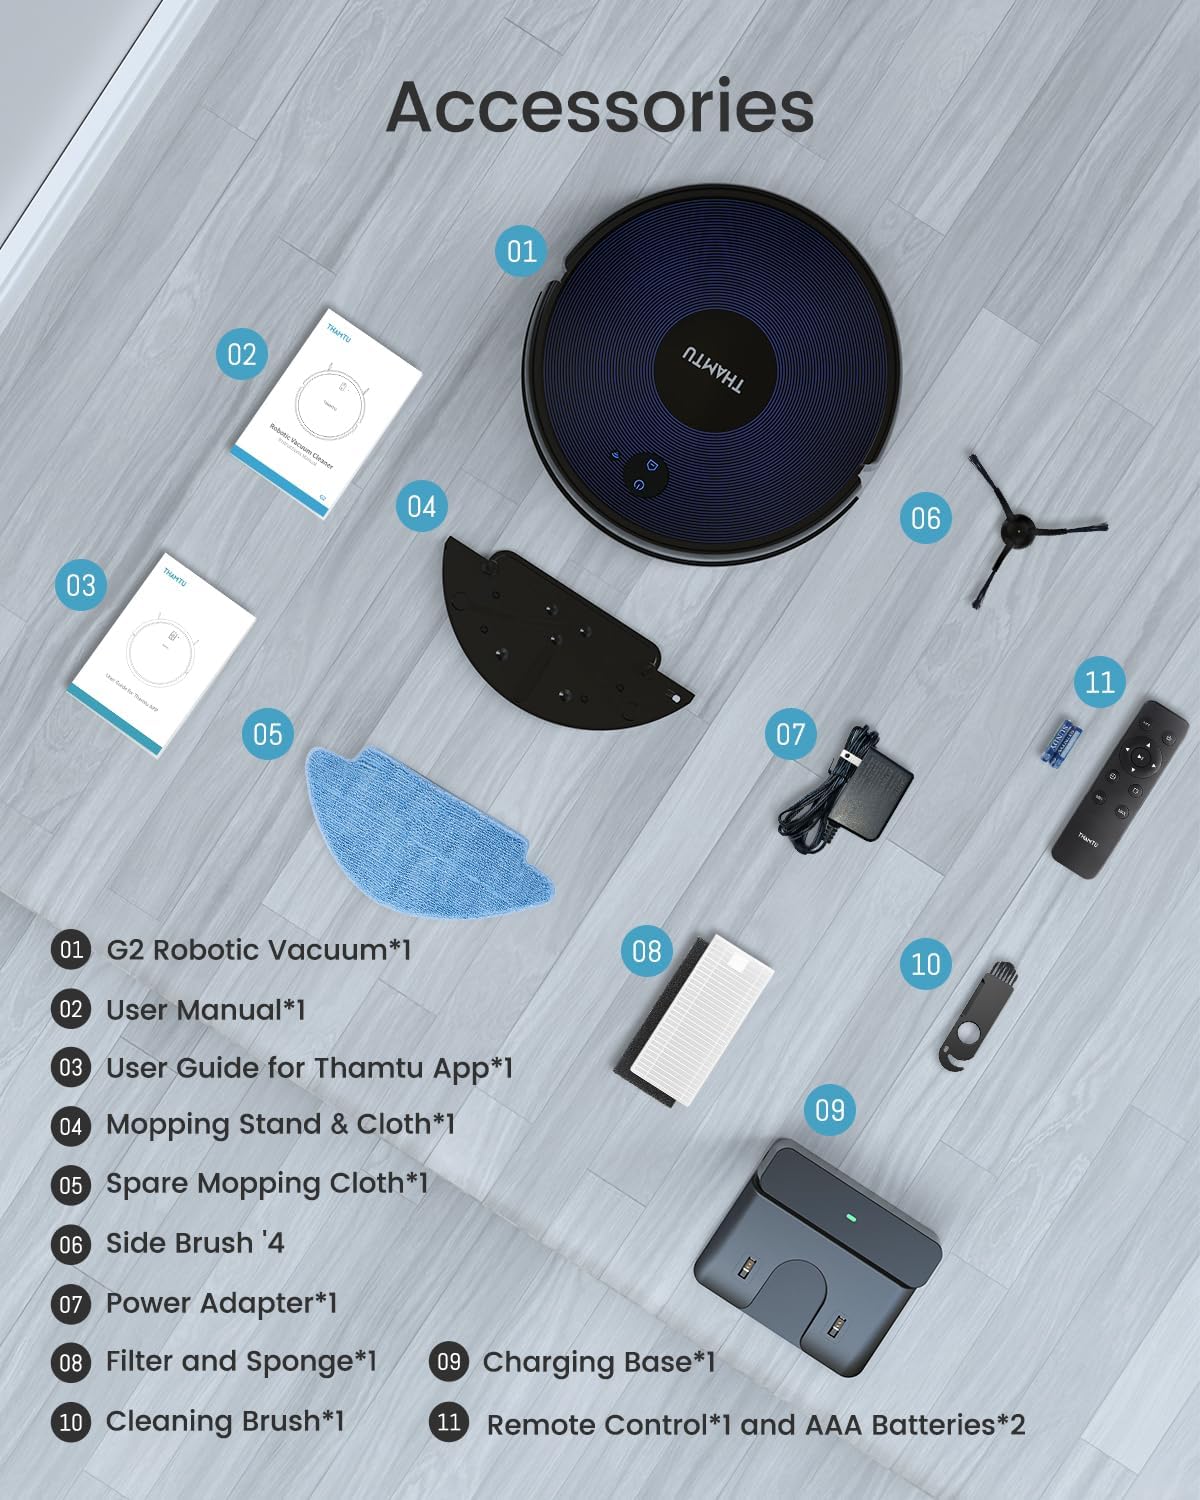
Figure 2: Included Accessories
- G2 Robotic Vacuum (1)
- Charging Base (1)
- Power Adapter (1)
- User Manual (1)
- User Guide for Thamtu App (1)
- Side Brush (4)
- Spare Mopping Cloth (1)
- Mopping Stand & Cloth (1)
- Filter and Sponge (1)
- Cleaning Brush (1)
- Remote Control (1)
- AAA Batteries (2)
4. Product Overview
Top View
Figure 3: Top View of G2
Bottom View

Figure 4: Bottom View of G2 with Dual Side Brushes
The G2 features dual side brushes for efficient dust gathering and a brushless suction port to prevent hair tangles, making it ideal for pet owners.

Figure 5: Brushless Suction Port for Tangle-Free Cleaning
Water Tank and Filtration System

Figure 6: Electrically Controlled Water Tank for Adjustable Water Output

Figure 7: Three-Layer Filtration System for Improved Air Quality
5. Setup
5.1 Charging the Robot
Before first use, fully charge the robot. Place the charging base on a hard, level surface against a wall. Ensure there are no obstacles within 1 meter (3 feet) in front and 0.5 meters (1.5 feet) on either side of the charging base. Connect the power adapter to the charging base and plug it into a wall outlet. Place the robot on the charging base, ensuring the charging contacts align. The indicator lights on the robot will show charging status.
5.2 App Connection
The Thamtu G2 can be controlled via the Thamtu APP. Follow these steps to connect your robot:
- Download the Thamtu APP from the App Store (iOS) or Google Play Store (Android).
- Register a new account or log in if you already have one.
- Ensure your phone's Bluetooth is enabled.
- Power on the robot by pressing the side power button.
- Open the Thamtu APP and select 'Add Device'. The app should automatically detect the G2.
- Follow the on-screen prompts to connect the robot to your 2.4GHz Wi-Fi network. (Note: Only 2.4GHz Wi-Fi networks are supported for stable connection).
Video 1: How to connect your Thamtu G2 to the APP. This video demonstrates the step-by-step process of connecting your G2 robot vacuum to the Thamtu mobile application, including downloading the app, registration, and device pairing.
Once connected, you can control the robot, schedule cleanings, and view cleaning history through the app.

Figure 8: Smart Recharge and Cleaning Area Display on App

Figure 9: Smart Home Life - App Control Features
6. Operating the Thamtu G2
6.1 Starting a Cleaning Cycle
Press the power button on the robot or the 'Start' button in the Thamtu APP to begin a cleaning cycle. The robot will automatically select the optimal cleaning path.
Video 2: Robot Vacuum in operation. This video shows the Thamtu G2 robot vacuum cleaning a hard floor surface, demonstrating its movement and side brush functionality.
6.2 Cleaning Modes
The G2 offers multiple cleaning modes:
- Auto Cleaning: The robot automatically cleans the entire floor area.
- Spot Cleaning: Focuses on a specific dirty area, cleaning in a spiral pattern.
- Edge Cleaning: Cleans along walls and furniture edges.
6.3 Mopping Function
Attach the mopping stand with a wet mopping cloth to the bottom of the robot. Fill the water tank with clean water. The electrically controlled water tank allows for adjustable water output.
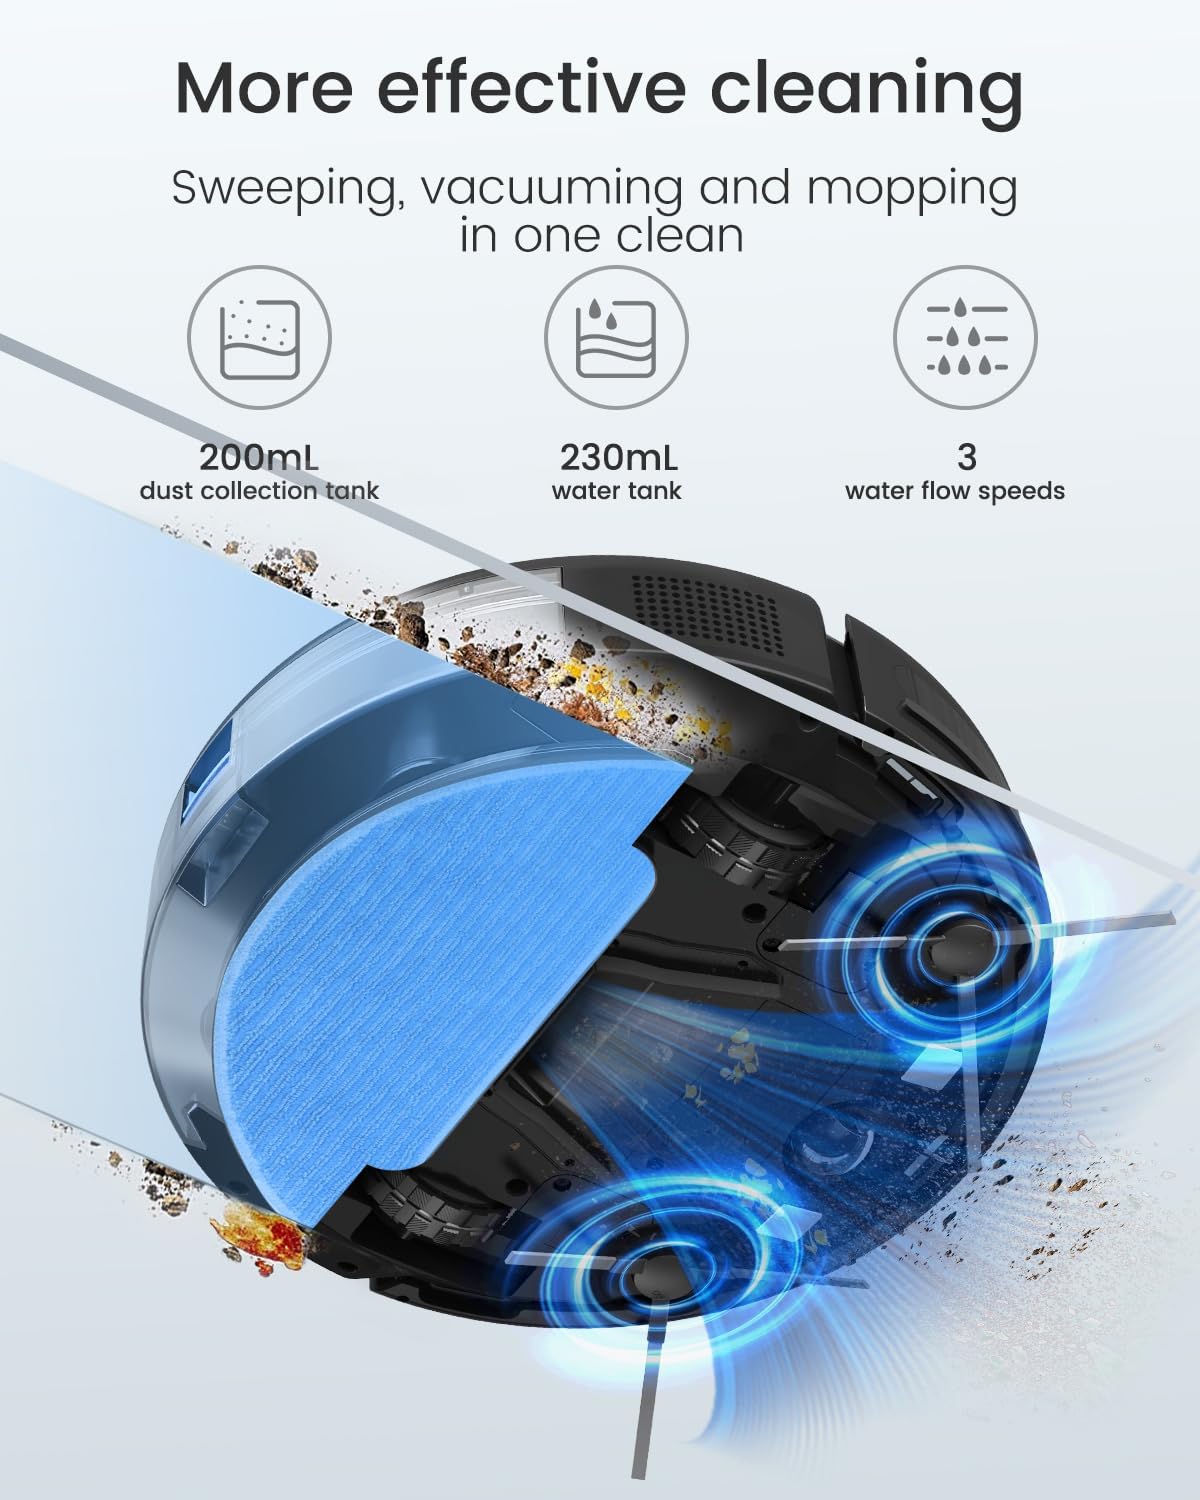
Figure 10: More Effective Cleaning with Vacuuming and Mopping
6.4 Voice Control
The G2 is compatible with Amazon Alexa and Google Assistant. Once connected through the Thamtu APP, you can use voice commands to start or stop cleaning.

Figure 11: Control Options including Voice Control
7. Maintenance
Regular maintenance ensures optimal performance of your Thamtu G2.
7.1 Emptying the Dustbin
Open the top cover of the robot and remove the dustbin. Open the dustbin cover and empty its contents into a trash bin. It is recommended to empty the dustbin after each cleaning cycle.
7.2 Cleaning the Filter and Sponge
Remove the filter and sponge from the dustbin. Tap them gently to remove dust. For thorough cleaning, rinse them under running water. Ensure they are completely dry before reinserting them into the dustbin.
7.3 Cleaning Side Brushes
Periodically check the side brushes for tangled hair or debris. Use the provided cleaning brush or scissors to remove any obstructions. If brushes are worn, replace them with new ones.
7.4 Cleaning the Mopping Cloth
Remove the mopping cloth from the mopping stand. Rinse it thoroughly with water after each use. It can be hand-washed or machine-washed. Allow it to air dry completely before reattaching.
8. Troubleshooting
If you encounter issues with your Thamtu G2, refer to the following common problems and solutions:
| Problem | Possible Cause | Solution |
|---|---|---|
| Robot does not turn on | Low battery; Power switch off | Charge the robot; Turn on the main power switch on the side. |
| Robot gets stuck frequently | Obstacles (cables, rugs); Uneven surfaces | Clear the cleaning area; Ensure the robot is on a suitable surface. |
| Poor cleaning performance | Full dustbin; Clogged filter; Worn brushes | Empty dustbin; Clean/replace filter; Clean/replace side brushes. |
| Cannot connect to APP | Incorrect Wi-Fi (not 2.4GHz); Incorrect password; Bluetooth off | Ensure 2.4GHz Wi-Fi; Re-enter password; Enable Bluetooth. |
| Robot does not return to charging base | Charging base obstructed; Robot too far from base | Clear area around base; Manually place robot closer to base. |
If the problem persists, please contact Thamtu customer support.
9. Specifications
| Feature | Detail |
|---|---|
| Brand | Thamtu |
| Model Name | G2 |
| Special Features | Anti-Collision, Robot Vacuum and Mop Combo, Anti-Fall, Pet Hair Pick Up, Auto-Docking |
| Color | Black |
| Product Dimensions | 16.93"L x 13.58"W x 4.45"H |
| Filter Type | Hepa |
| Battery Life | 100 minutes |
| Voltage | 14.4 Volts |
| Power Source | Battery Powered |
| Control Method | App, Remote, Touch, Voice |
| Compatible Devices | Smartphones, Amazon Echo |
| Form Factor | Robotic |
| UPC | 741527980412 |
| Item Weight | 5.3 pounds |
| Manufacturer | Thamtu |
| Batteries Included | Yes (2 AAA batteries for remote) |
10. Warranty and Support
Thamtu products come with a standard warranty. For detailed warranty information, please refer to the warranty card included in your package or visit the official Thamtu website. If you require technical support, troubleshooting assistance, or have any questions regarding your G2 Robot Vacuum, please contact Thamtu customer service through the contact information provided on the product packaging or their official website.
Note: As per customer reviews, some plastic parts may degrade over time. Please contact customer service for parts replacement under warranty if applicable.
Related documentsG2

Ask a question about this manual
Ask about setup, troubleshooting, compatibility, parts, safety, or missing instructions. Manuals+ will review the question and use this page’s manual context to help answer it.