
Introduction
This manual provides detailed instructions for the installation, operation, and maintenance of your Casta Diva CD-Y060 Smart Toilet. Please read this manual thoroughly before installation and use to ensure proper function and safety. The CD-Y060 Smart Toilet features a built-in tank with pump-assist flushing, an automatic open/close lid, a heated seat, warm water bidet functions, a warm air dryer, blackout flush capability, and an integrated night light for enhanced comfort and hygiene.
Safety Information
- Ensure all electrical connections are performed by a qualified electrician and comply with local codes.
- Do not immerse the product in water or spray water directly onto electrical components.
- Always disconnect power before performing any maintenance or cleaning.
- Keep children and pets away from the toilet during operation, especially when the lid is opening/closing or bidet functions are active.
- Do not use abrasive cleaners or harsh chemicals on any part of the toilet, as this may damage surfaces or internal components.
- Verify water pressure is within the recommended range for optimal performance.
Package Contents
Before beginning installation, ensure all components are present:
- Casta Diva CD-Y060 Smart Toilet Unit
- Remote Control
- T-valve
- Flange Plate
- Mounting Blocks
- Screws and Spacers
- Expansion Tubes
- Sludge/Wax Ring
- Toilet Holders
- Water Supply Hoses
Setup and Installation
Follow these steps for proper installation of your smart toilet. For a visual guide, please refer to the installation video below.
Video: Smart Toilet Installation Method
- Prepare Sewage Pipes: Cut off any excess sewage pipes to ensure a flush surface for installation. Grind the edges of the sewage outlet for a smooth finish.

Image: Cutting and grinding the sewage pipe for a level base.
- Clean the Ground: Thoroughly clean the area around the sewage outlet to remove any debris or dust.

Image: Cleaning the floor surface before flange plate installation.
- Check Water and Power Supply: Verify the positions of the water supply valve and power outlet are accessible and correctly located for the toilet unit.

Image: Confirming the placement of water and electrical connections.
- Mark Flange Plate Position: Place the flange plate over the sewage outlet and mark the screw positions. Drill holes at the marked points.

Image: Marking the screw points for the flange plate on the floor.
- Assemble and Secure Flange Plate: Assemble the mounting blocks with the flange plate. Insert the flange plate into the sewage outlet and tighten the four screws to secure it to the floor.

Image: The flange plate with mounting blocks secured to the sewage outlet.
- Apply Wax Ring: Stick the provided sludge (wax ring) onto the sewage outlet at the ceramic bottom of the toilet unit.

Image: Attaching the wax ring to the toilet's ceramic base for a watertight seal.
- Install Toilet Unit: Carefully place the toilet unit onto the flange plate, ensuring it aligns correctly with the sewage outlet. Secure the toilet to the floor using the provided screws and decorative hats.

Image: Inserting the decorative screws to firmly attach the toilet to the floor.
- Connect Water Supply: Connect the T-valve to the angle valve of your water supply. Then, connect the water supply hoses from the T-valve to the toilet unit. Ensure all connections are tight to prevent leaks.

Image: Tightening the water supply connections to the T-valve and toilet.
- Connect Power Supply: Plug the toilet's power cord into a grounded electrical outlet.

Image: Plugging the smart toilet into the electrical outlet.
Operating Instructions
Your Casta Diva CD-Y060 Smart Toilet offers a range of automated and customizable features for a comfortable and hygienic experience.
Automatic Lid Operation
The toilet lid automatically opens when you approach and closes when you leave, providing hands-free operation. The seat can also be flipped up using a foot kick button located at the base of the toilet.
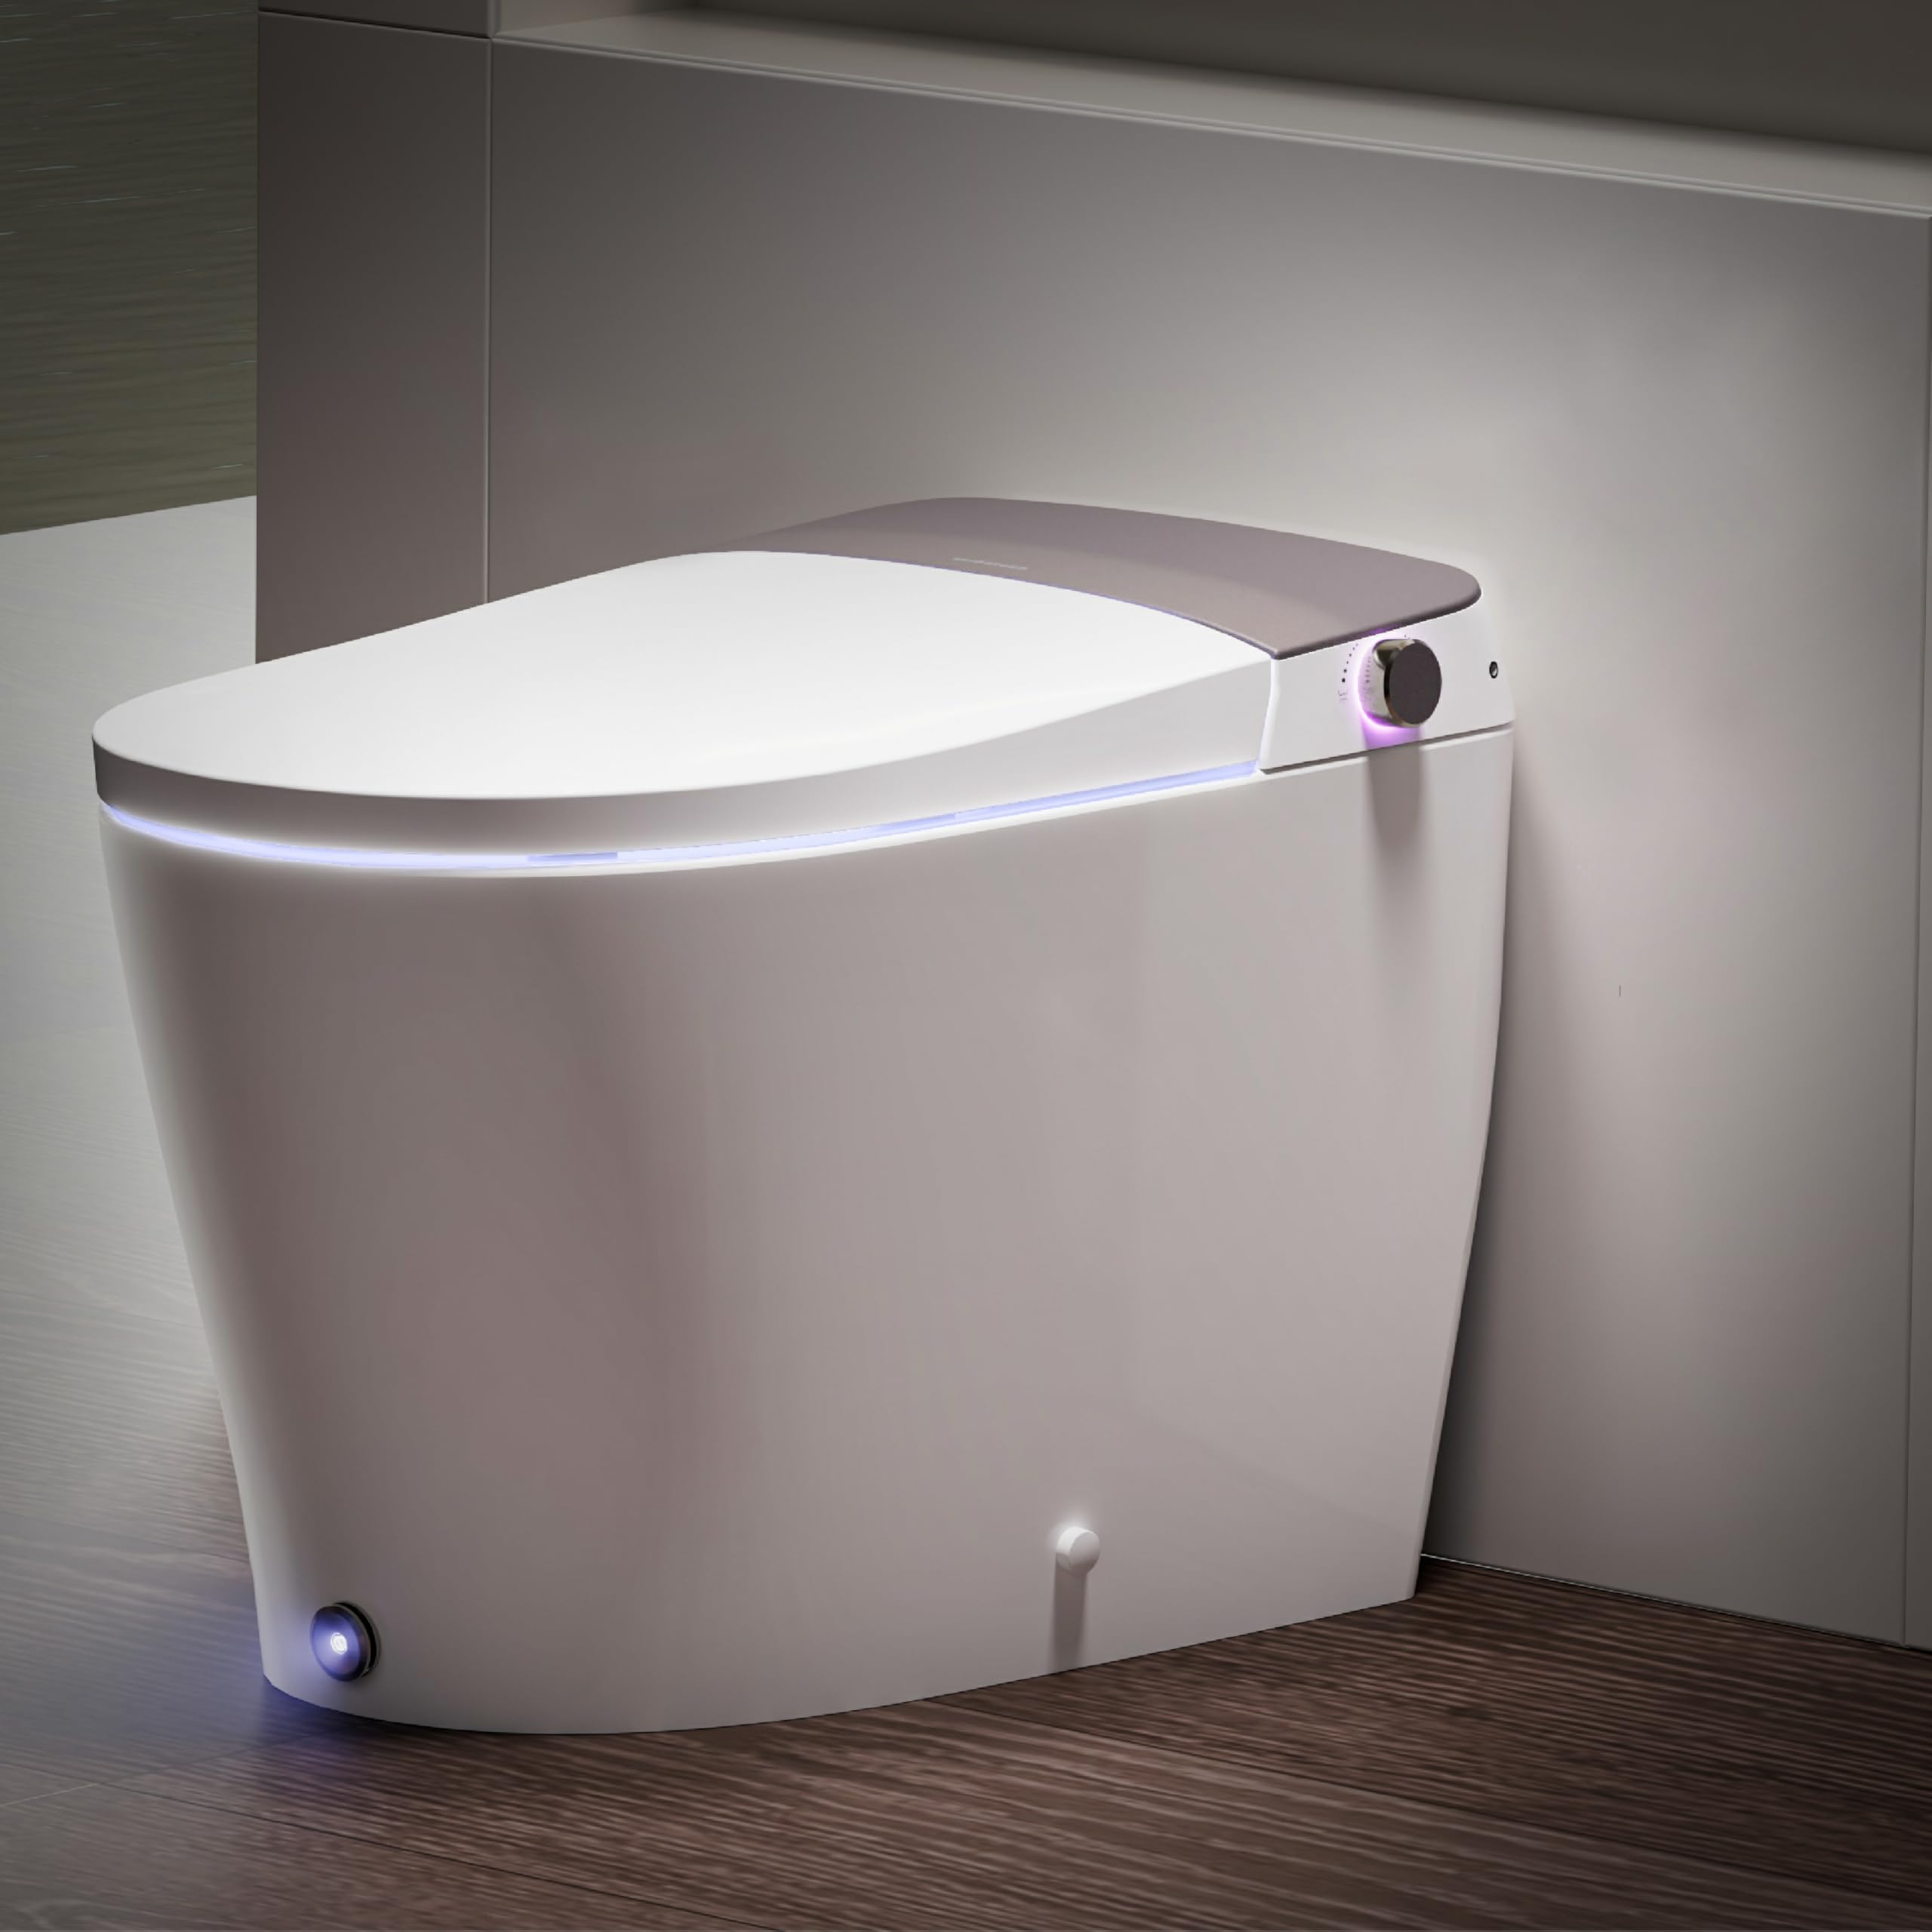
Image: The automatic lid opening and closing mechanism.
Flushing Options
The CD-Y060 provides multiple flushing methods:
- Pump-assisted Flushing: The built-in tank and pump ensure a powerful and efficient flush, suitable even for homes with low water pressure.
- Remote Flush: Use the remote control to activate a flush.
- Side Knob Flush: A manual knob on the side of the toilet allows for flushing.
- Kick Flush: A foot-activated button at the base provides a convenient flush option.
- Blackout Flush: In case of a power outage, the toilet's backup battery system ensures that flushing functions remain operational via the kick foot button or side button.
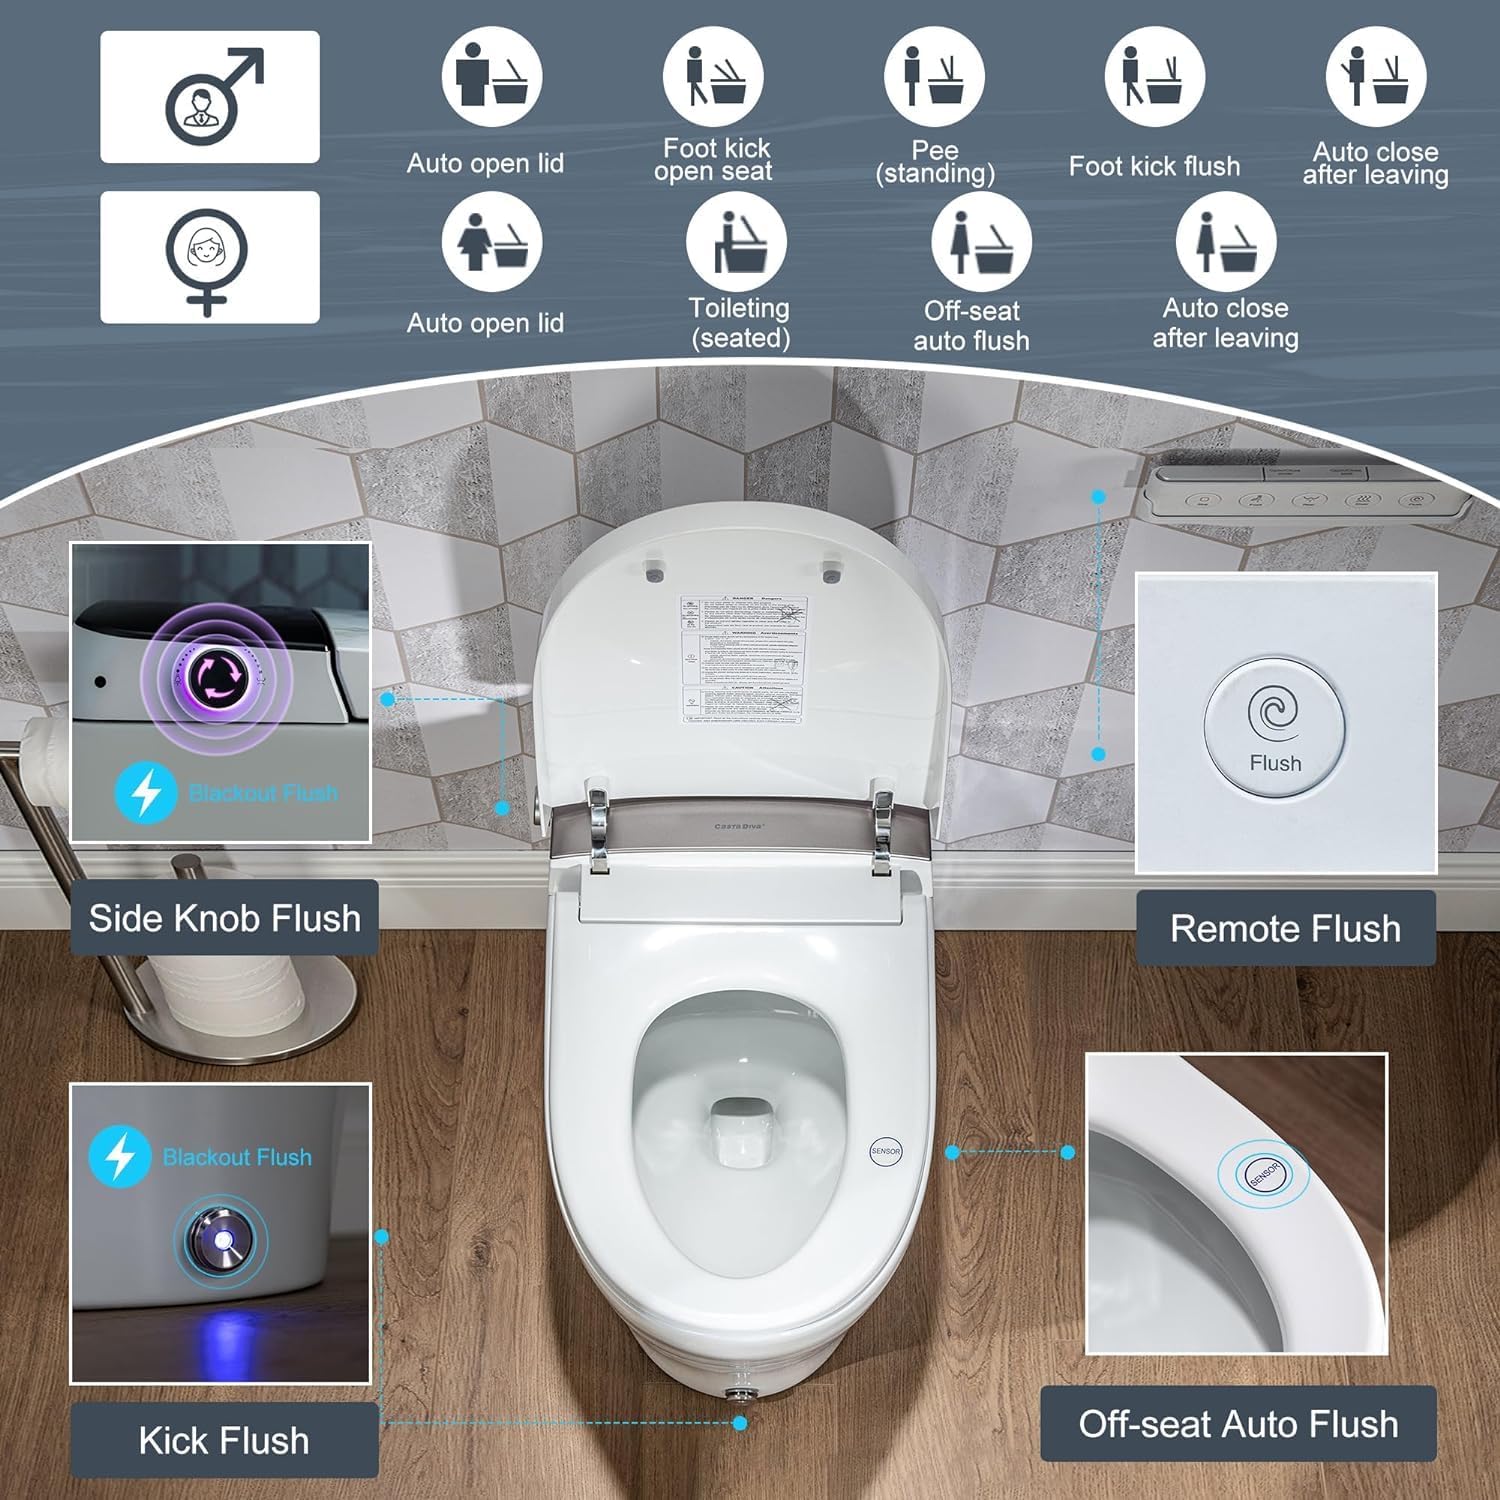
Image: Overview of the various flushing methods available on the smart toilet.

Image: Internal diagram illustrating the pump-assisted flushing mechanism.
Bidet Functions
The integrated bidet offers a personalized cleansing experience:
Video: Bidet Functions Overview
- Feminine Wash: Gentle wash for feminine hygiene.
- Rear Wash: Standard posterior cleansing.
- Oscillating Wash: The nozzle moves back and forth for a wider cleaning area.
- Adjustable Nozzle Position and Water Pressure: Customize the nozzle's position and water pressure using the remote control for optimal comfort.
- Heated Seat: Enjoy a warm seat, adjustable to your preference.
- Warm Air Dryer: After cleansing, a warm air dryer provides a touch-free drying experience.
- Auto Deodorization: An integrated system helps neutralize odors.
- Instant Warm Water: Provides continuous warm water for bidet functions without a tank.

Image: Visual representation of the heated seat, warm water, warm air dryer, and auto deodorization features.
Remote Control
The remote control allows you to manage all functions of the smart toilet. It features buttons for various wash modes, temperature adjustments, and other settings. Refer to the diagram below for button functions and indicators.

Image: Detailed view of the remote control with button descriptions and temperature indicators.
Night Light
The integrated night light provides soft illumination for easy navigation in the dark.
Video: CD-Y060 Features Overview
Maintenance
Regular maintenance ensures the longevity and hygienic operation of your smart toilet.
- Nozzle Cleaning: The bidet nozzle features a self-cleaning function. Additionally, the nozzle is removable for manual cleaning if needed.
- Exterior Cleaning: Wipe the exterior surfaces with a soft, damp cloth and mild, non-abrasive cleaner. Avoid harsh chemicals.
- Filter Maintenance: Check and clean the water inlet filter periodically to prevent blockages and maintain water flow.
- Power Disconnection: For extended periods of non-use or before deep cleaning, disconnect the power supply.
Troubleshooting
If you encounter issues with your Casta Diva CD-Y060 Smart Toilet, refer to the following common problems and solutions:
| Problem | Possible Cause | Solution |
|---|---|---|
| No power/Unit unresponsive | Power cord unplugged, circuit breaker tripped, remote batteries dead. | Check power connection, reset breaker, replace remote batteries. |
| No flush | Water supply valve closed, power outage (if not using blackout flush), sensor obstruction. | Open water valve, use blackout flush, clear sensor area. |
| Bidet not working | Water supply off, nozzle blocked, seat sensor not activated. | Check water supply, clean nozzle, ensure proper seating. |
| Water leakage | Loose connections, damaged seals. | Tighten all water connections, inspect seals for damage. If leakage persists, contact support. |
For issues not listed here or if troubleshooting steps do not resolve the problem, please contact customer support.
Specifications
- Model: CD-Y060
- Color: White
- Product Dimensions: 26.92"D x 15.66"W x 17.1"H
- Material: Ceramic, Plastic
- Installation Type: Floor Mounted
- Item Weight: 114.9 pounds
- Power: 120V (Rated Voltage)
- Power Cord Length: 4.92 FT (1.5M)
- Flush Volume: 1.06 GPF (Gallons Per Flush)
- Remote Batteries: 2 AAA batteries (not included)

Image: Diagram showing the dimensions of the Casta Diva CD-Y060 Smart Toilet.
Warranty and Support
The Casta Diva CD-Y060 Smart Toilet comes with a manufacturer's warranty. Please refer to the warranty card included with your product for specific terms and conditions. For technical support, replacement parts, or any inquiries, please contact Casta Diva customer service through the retailer where the product was purchased or visit the official Casta Diva website.


