1. Introduction
This manual provides detailed instructions for the installation, operation, and maintenance of your SilverStone FARA R1 V2 Mid-Tower ATX Case. The FARA R1 V2 is designed for high compatibility and efficient thermal performance, featuring a tempered glass side panel and a perforated mesh front panel for optimal airflow. Please read this manual thoroughly before beginning assembly to ensure proper setup and functionality.

Figure 1: SilverStone FARA R1 V2 Mid-Tower ATX Case (SST-FAR1B-G-V2)
2. Package Contents
Verify that all components are present in the package:
- SilverStone FARA R1 V2 Mid-Tower ATX Case
- Accessory box (screws, standoffs, cable ties)
- User Manual (this document)
- Pre-installed 120mm rear fan (quantity may vary by model)
3. Specifications
| Model Name | FARA R1 V2 |
| Model Number | SST-FAR1B-G-V2 |
| Case Type | Mid Tower |
| Motherboard Compatibility | ATX, Micro-ATX, Mini-ITX |
| Material | Steel, Tempered Glass, Plastic |
| Dimensions (LxWxH) | 15.35 x 8.15 x 17.56 inches (390 x 207 x 446 mm) |
| Weight | 15.92 pounds (7.22 kg) |
| Expansion Slots | 7 |
| Front I/O Ports | 2x USB 3.0, 1x USB 2.0, 1x Audio Jack (combined) |
| Cooling Method | Air |
| Power Supply Mounting | Bottom Mount |
| Max GPU Length | 340mm (with front fan), 365mm (without front fan) |
| Max CPU Cooler Height | 161mm |

Figure 2: Component Compatibility Overview
4. Setup and Installation
4.1 Preparing the Case
- Remove Side Panels: Unscrew the thumbscrews on the rear of the case to remove the tempered glass side panel and the solid steel side panel.
- Accessory Box: Locate the accessory box inside the case, which contains all necessary screws, standoffs, and cable ties for installation.

Figure 3: Interior View of the Case
4.2 Motherboard Installation
- Install Standoffs: Align the motherboard with the pre-drilled holes in the motherboard tray. Install additional standoffs as required for your specific motherboard form factor (ATX, Micro-ATX, Mini-ITX).
- Secure Motherboard: Place the motherboard onto the standoffs and secure it with the provided screws.
4.3 Power Supply Installation
- Mount PSU: Slide the power supply unit (PSU) into the dedicated compartment at the bottom rear of the case.
- Secure PSU: Secure the PSU to the case with screws from the rear.

Figure 4: Rear Panel and PSU Mounting Area
4.4 Storage Drive Installation
- 2.5" SSDs: Two 2.5" drive mounts are located behind the motherboard tray. Secure SSDs using the provided screws.
- 3.5" HDDs: The drive cage at the bottom of the case supports two 3.5" HDDs. Slide drives into the trays and secure them.

Figure 5: 2.5" SSD Mounting Locations

Figure 6: 3.5" HDD Drive Cage
4.5 Graphics Card and Expansion Card Installation
- Remove PCI-E Slot Covers: Remove the necessary PCI-E slot covers from the rear of the case. Note that some covers are punch-out type and cannot be reinstalled.
- Install Card: Insert your graphics card or other expansion cards into the motherboard's PCI-E slots and secure them with screws.
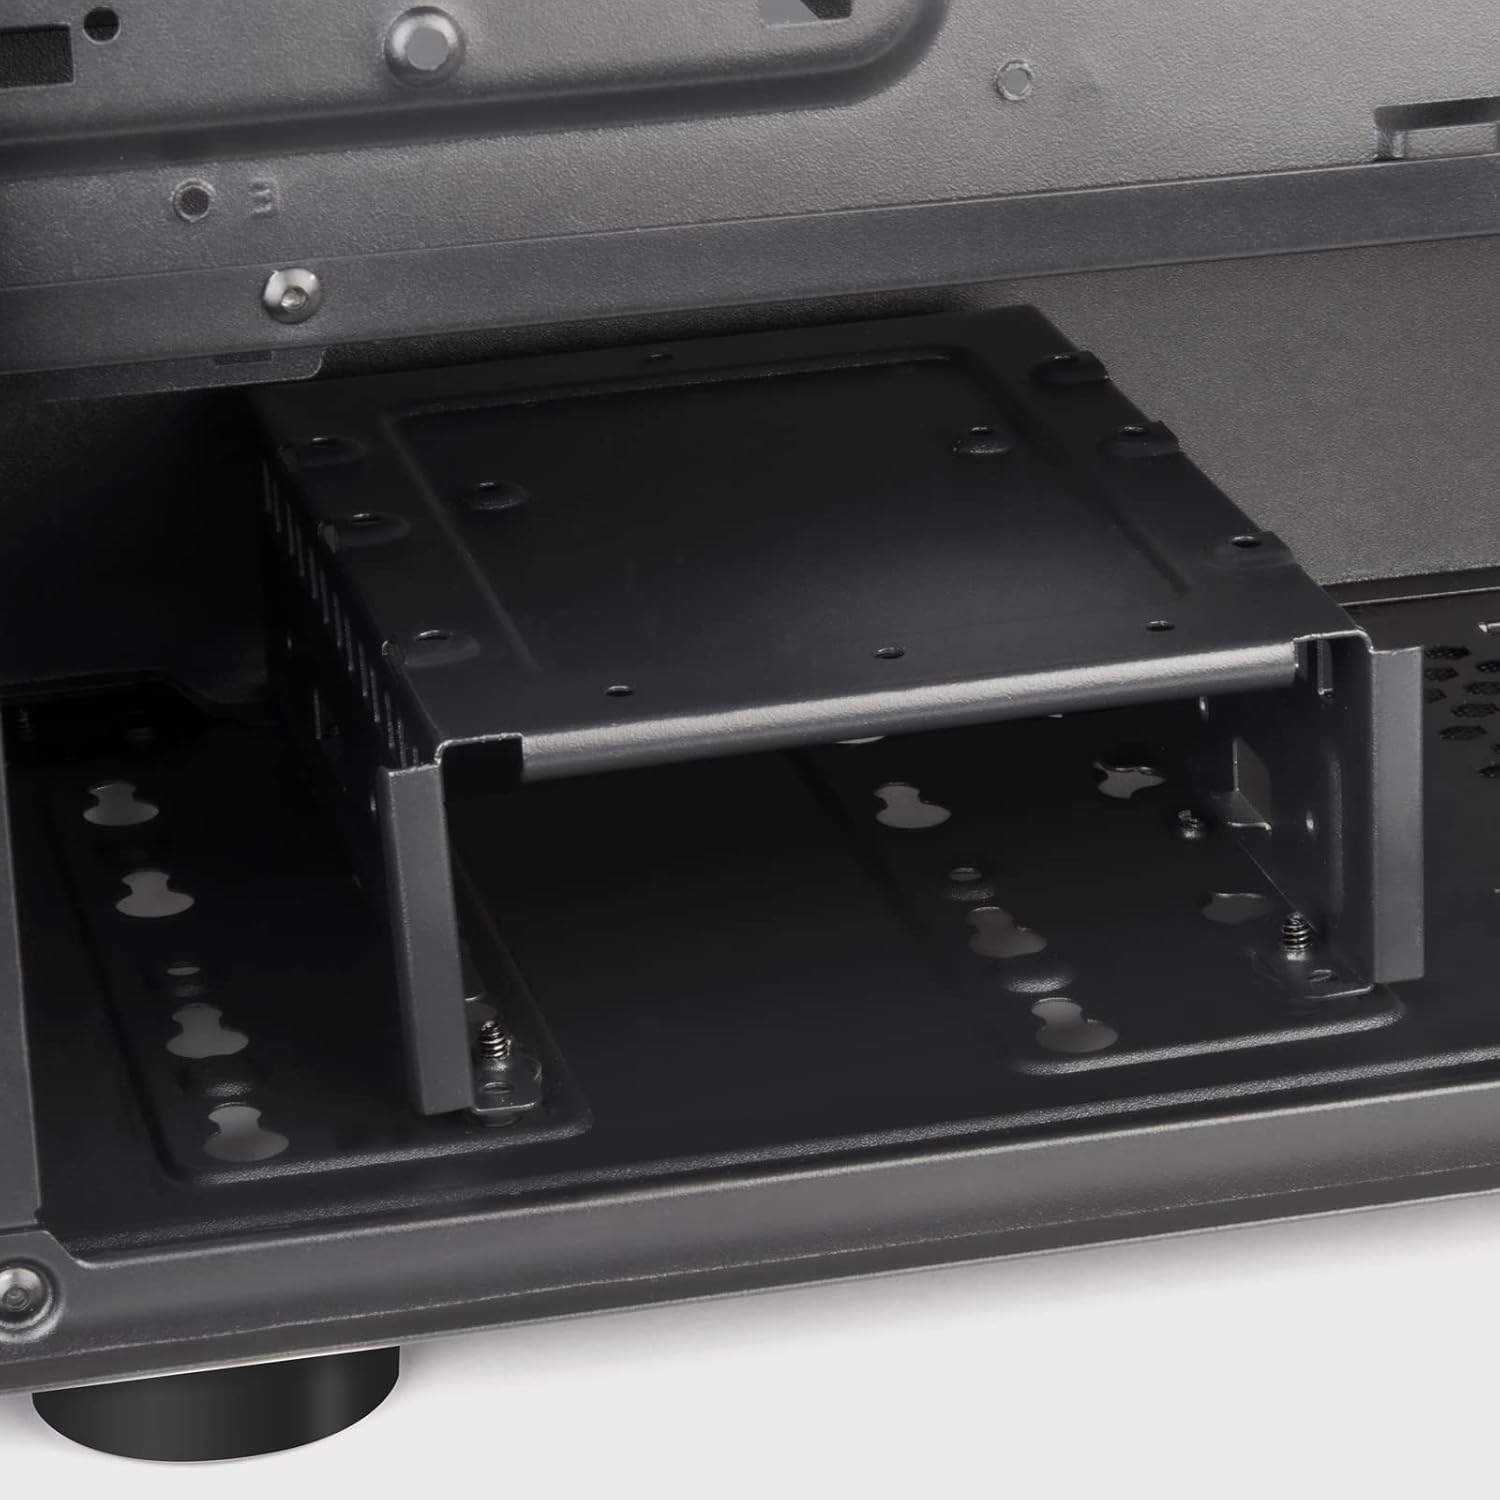
Figure 7: Expansion Slots
4.6 Fan and Radiator Installation
The FARA R1 V2 supports various fan and radiator configurations for optimal cooling.
- Front: 3 x 120mm or 2 x 140mm fans / 240mm, 280mm, 360mm radiators
- Top: 2 x 120mm or 2 x 140mm fans / 240mm, 280mm radiators
- Rear: 1 x 120mm fan (pre-installed)

Figure 8: Fan and Radiator Support

Figure 9: Internal Fan Mount
4.7 Cable Management
Utilize the cable routing cutouts and tie-down points behind the motherboard tray to organize cables. This improves airflow and aesthetics.
5. Operating the Case
Once all components are installed and secured, and the side panels are reattached, your system is ready for operation.
5.1 Front I/O Panel
The front I/O panel provides convenient access to essential ports:
- Power Button: Located at the top right of the front panel.
- Reset Button: Small button below the power button.
- USB 3.0 Ports (x2): For high-speed data transfer.
- USB 2.0 Port (x1): For standard USB devices.
- Audio Jack (x1): Combined headphone/microphone port.

Figure 10: Front I/O Panel
5.2 Airflow Optimization
The FARA R1 V2 features a fully meshed front panel to maximize air intake. Ensure proper fan configuration (intake at front, exhaust at rear/top) for optimal cooling performance.
6. Maintenance
Regular maintenance helps ensure the longevity and performance of your PC case.
- Dust Filters: The case includes removable dust filters on the top and bottom (for the PSU intake). Regularly remove and clean these filters with water and mild soap, or by vacuuming, to prevent dust buildup and maintain airflow.
- Exterior Cleaning: Wipe the exterior surfaces with a soft, damp cloth. Avoid abrasive cleaners.
- Interior Cleaning: Periodically, with the system powered off and unplugged, use compressed air to remove dust from internal components and fan blades.
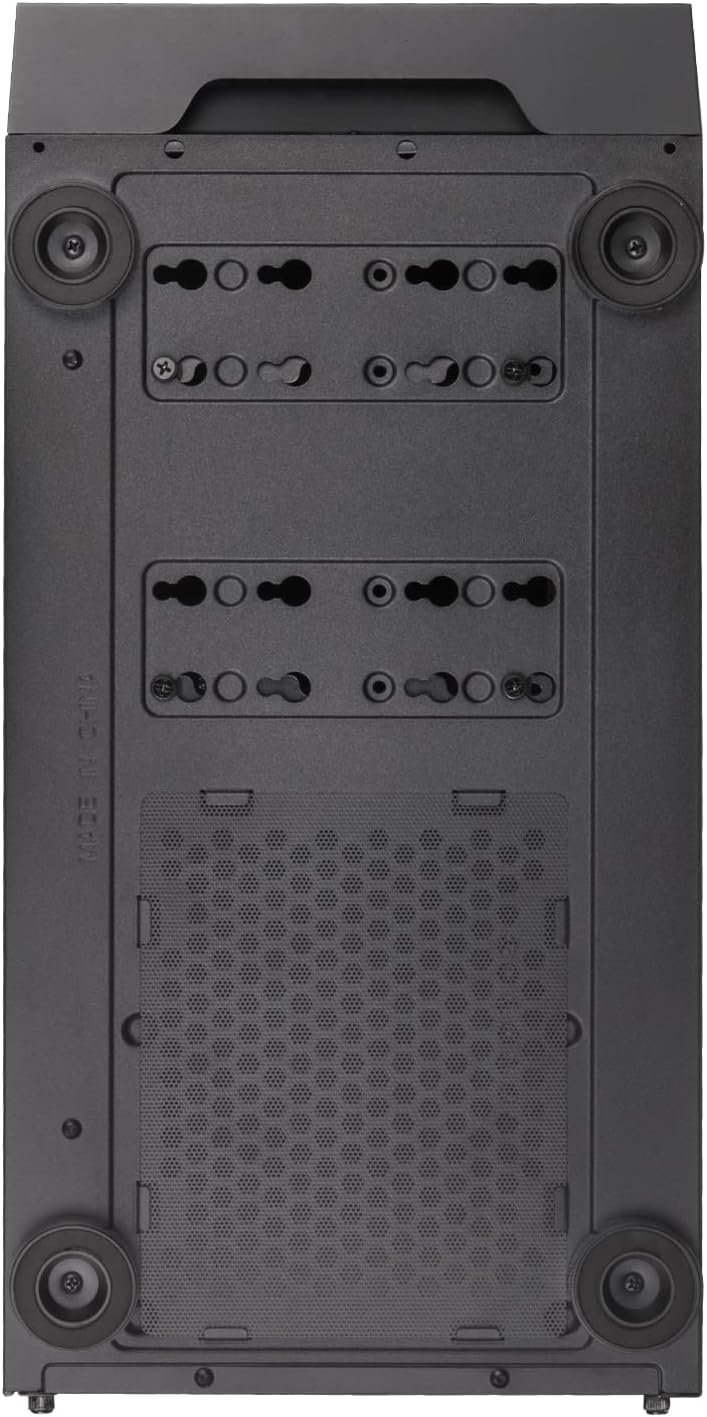
Figure 11: Bottom Dust Filter
7. Troubleshooting
This section addresses common issues you might encounter.
- System Not Powering On:
- Ensure all power cables (24-pin ATX, 8-pin CPU, GPU power) are securely connected.
- Verify the PSU switch is in the "ON" position.
- Check that the front panel power button cable is correctly connected to the motherboard's F_PANEL header.
- Poor Airflow/Overheating:
- Clean all dust filters and internal components.
- Ensure fans are installed in the correct orientation (intake/exhaust).
- Verify fan cables are properly connected to the motherboard or fan controller.
- Front USB/Audio Ports Not Working:
- Check that the USB 3.0, USB 2.0, and HD Audio cables from the front panel are correctly connected to the corresponding headers on the motherboard.
- Tempered Glass Panel Issues:
- Handle the tempered glass panel with care to prevent damage.
- Ensure thumbscrews are tightened sufficiently but not overtightened.
8. Warranty and Support
SilverStone Technology provides a limited warranty for its products. For detailed warranty information, technical support, or to inquire about replacement parts, please visit the official SilverStone website or contact their customer service department.
Official Website: www.silverstonetek.com
Please retain your proof of purchase for warranty claims.


