
Introduction
The NZXT F120 RGB 120mm PC Fan Triple Pack provides efficient and quiet cooling for your computer system, featuring customizable RGB lighting. This manual guides you through the installation, operation, and maintenance of your new fans, ensuring optimal performance and aesthetic integration.
What's in the Box
Verify that all components are present before beginning installation.
- 3 x NZXT F120 RGB 120mm PWM PC Fans
- 1 x RGB & Fan Controller
- Mounting Screws
Setup
1. Physical Installation
Identify suitable mounting locations within your PC case. Fans can be installed as intake (drawing air in) or exhaust (pushing air out). The side with the fan blades visible is typically the intake side, while the side with the motor support structure is the exhaust side.

Image: Front view of the NZXT F120 RGB fan, showcasing its white blades and the vibrant RGB lighting ring. This view typically represents the intake side of the fan.
Secure each fan to the desired location using the provided mounting screws. Ensure the screws are tightened firmly but do not overtighten to avoid damaging the fan frame.

Image: An angled perspective of the NZXT F120 RGB fan, illustrating its compact design and the continuous RGB light strip along its perimeter.
2. Wiring Connections
- Connect Fans to Controller: Each F120 RGB fan has two cables: a 4-pin PWM cable for fan speed control and a proprietary RGB cable for lighting. Connect the RGB cable from each fan to an available RGB port on the included NZXT RGB & Fan Controller.
- Connect Controller to Power: Connect the SATA power connector from your PC's power supply unit (PSU) to the NZXT RGB & Fan Controller.
- Connect Controller to Motherboard: Connect the USB 2.0 header cable from the NZXT RGB & Fan Controller to an available USB 2.0 header on your motherboard. This enables software control via NZXT CAM.
- Connect Fan PWM Cables: Connect the 4-pin PWM cables from the fans to the fan ports on the NZXT RGB & Fan Controller. Alternatively, if you prefer direct motherboard control for fan speed, connect them to available 4-pin fan headers on your motherboard.
3. Software Installation
Download and install the latest version of the NZXT CAM software from the official NZXT website (nzxt.com/cam). CAM software is required to customize RGB lighting effects and monitor/control fan speeds.
Operating
Fan Control
Once NZXT CAM is installed and your controller is connected, launch the software. Navigate to the 'Cooling' section to monitor fan speeds and temperatures. You can create custom fan curves based on CPU or GPU temperatures, or select from predefined modes (e.g., Silent, Performance, Fixed RPM).
RGB Lighting Control
In the NZXT CAM software, go to the 'Lighting' section. Here, you can customize the 18 individually addressable RGB LEDs on each F120 RGB fan. Choose from a variety of preset lighting effects, adjust colors, brightness, and speed, or create your own custom lighting profiles. Ensure your fans are detected by the software for full customization.
Video: An official product video demonstrating the features and customizable RGB lighting effects of the NZXT F120 RGB fans.
Maintenance
Regular maintenance helps ensure the longevity and optimal performance of your fans.
- Cleaning: Periodically clean the fan blades and frame to remove dust buildup. Use compressed air or a soft brush. Ensure the PC is powered off and unplugged before cleaning.
- Check Connections: Occasionally verify that all cables (PWM, RGB, SATA power, USB 2.0) are securely connected to the fans, controller, and motherboard.
Troubleshooting
If you encounter issues, refer to the following common solutions:
| Problem | Possible Solution |
|---|---|
| Fans not spinning |
|
| RGB lighting not working |
|
| NZXT CAM not detecting controller/fans |
|
Specifications
Detailed technical specifications for the NZXT F120 RGB 120mm PC Fans:
- Model Number: RF-R12TF-W1
- Product Dimensions: 9.13"L x 5"W x 3.23"H
- Power Connector Type: 4-Pin PWM
- Voltage: 12 Volts
- Wattage: 2.16 watts
- Cooling Method: Fan
- Compatible Devices: Desktop PCs
- Noise Level: 27.5 Decibels (Max)
- Material: Plastic, rubber, PCB
- Maximum Rotational Speed: 1800 RPM
- Air Flow Capacity: 50.18 Cubic Feet Per Minute (CFM)
- Item Weight: 1.61 pounds (for the pack)
- LEDs per Fan: 18 individually addressable RGB LEDs
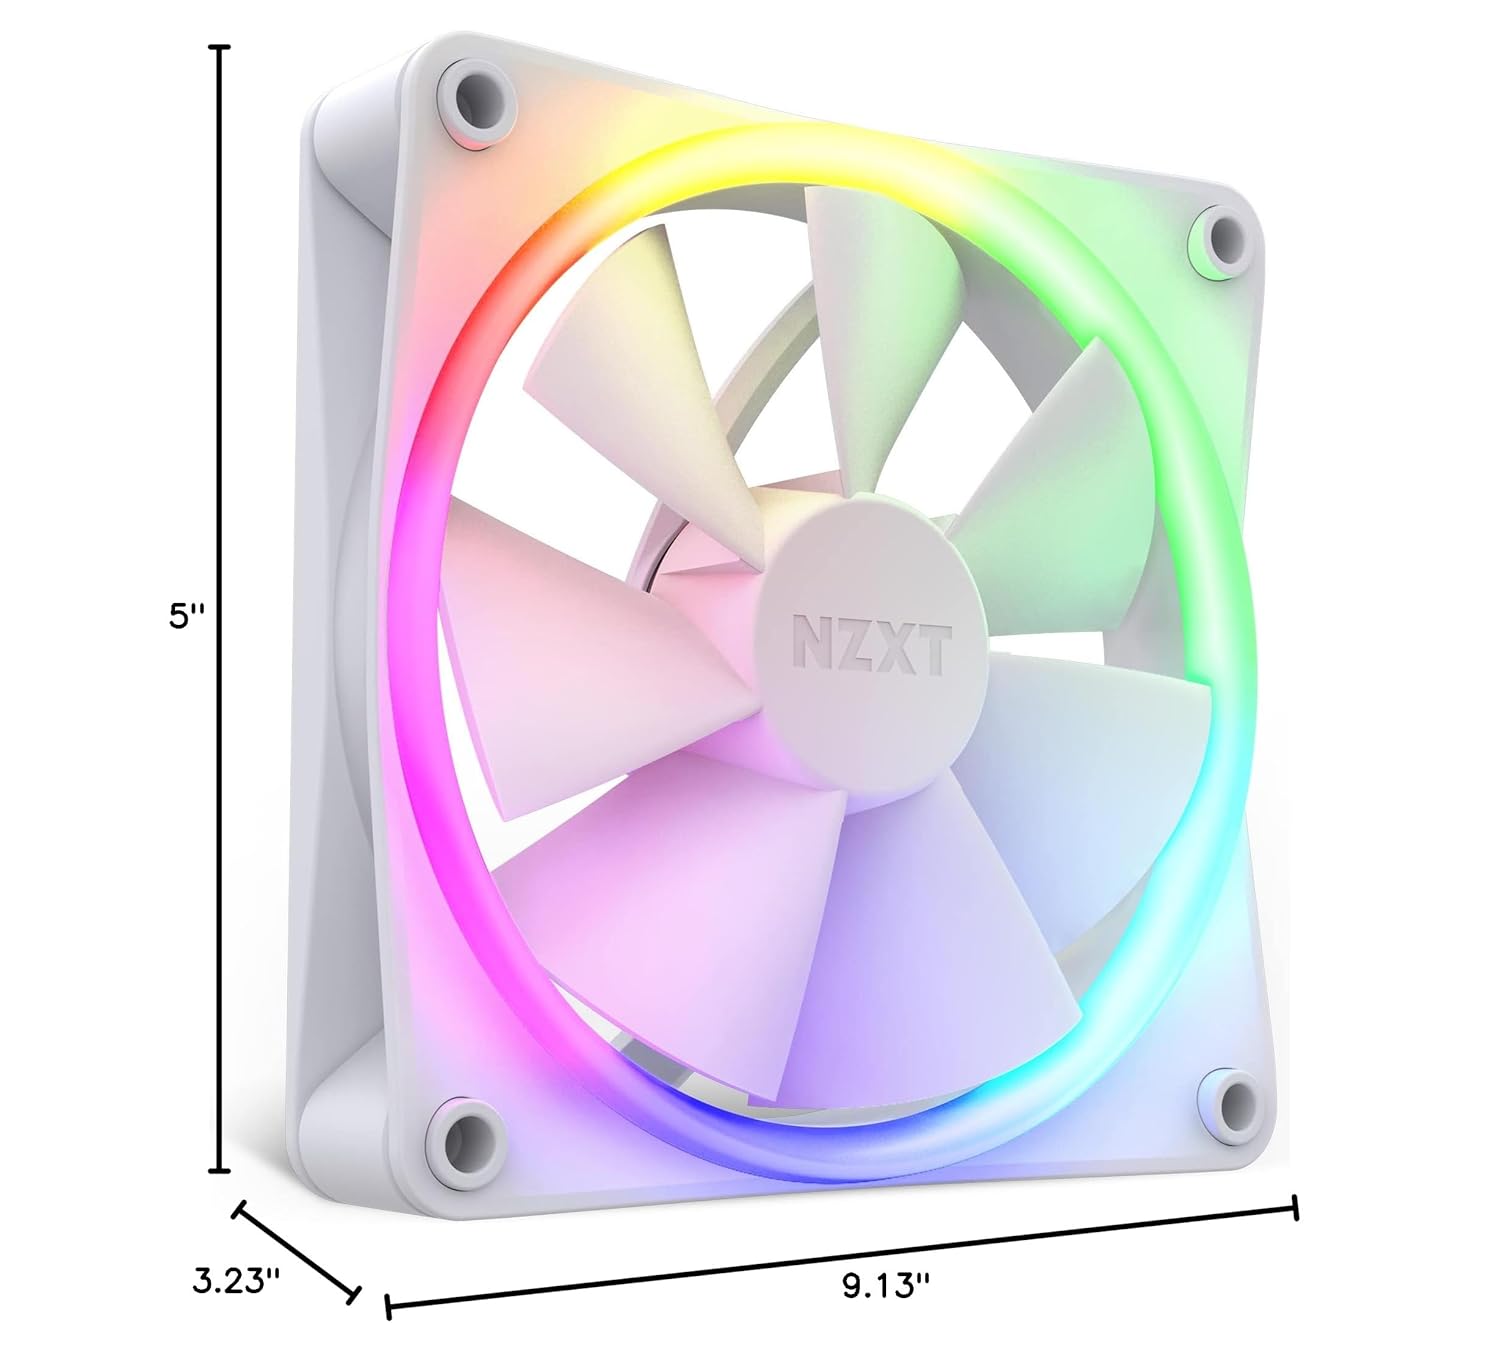
Image: A technical diagram illustrating the physical dimensions of the NZXT F120 RGB fan, providing length, width, and height measurements for installation planning.
Warranty and Support
NZXT products are designed for reliability and performance. For warranty information, please refer to the official NZXT website or the warranty card included with your product. If you require technical assistance or have questions not covered in this manual, please visit the NZXT support page at nzxt.com/support.


