
1. Product Overview
The Onforu 2 Pack 75W Flood Lights are designed for outdoor use, providing 7000 lumens of bright, 6500K daylight white illumination. These LED floodlights feature three adjustable heads, allowing for a wide lighting coverage of up to 270 degrees. Constructed from durable aluminum, they offer efficient heat dissipation and are rated IP65 waterproof for reliable performance in various weather conditions. The lights are switch-controlled, meaning they operate via a standard wall switch and do not include motion sensors, solar power, or dusk-to-dawn functionality.
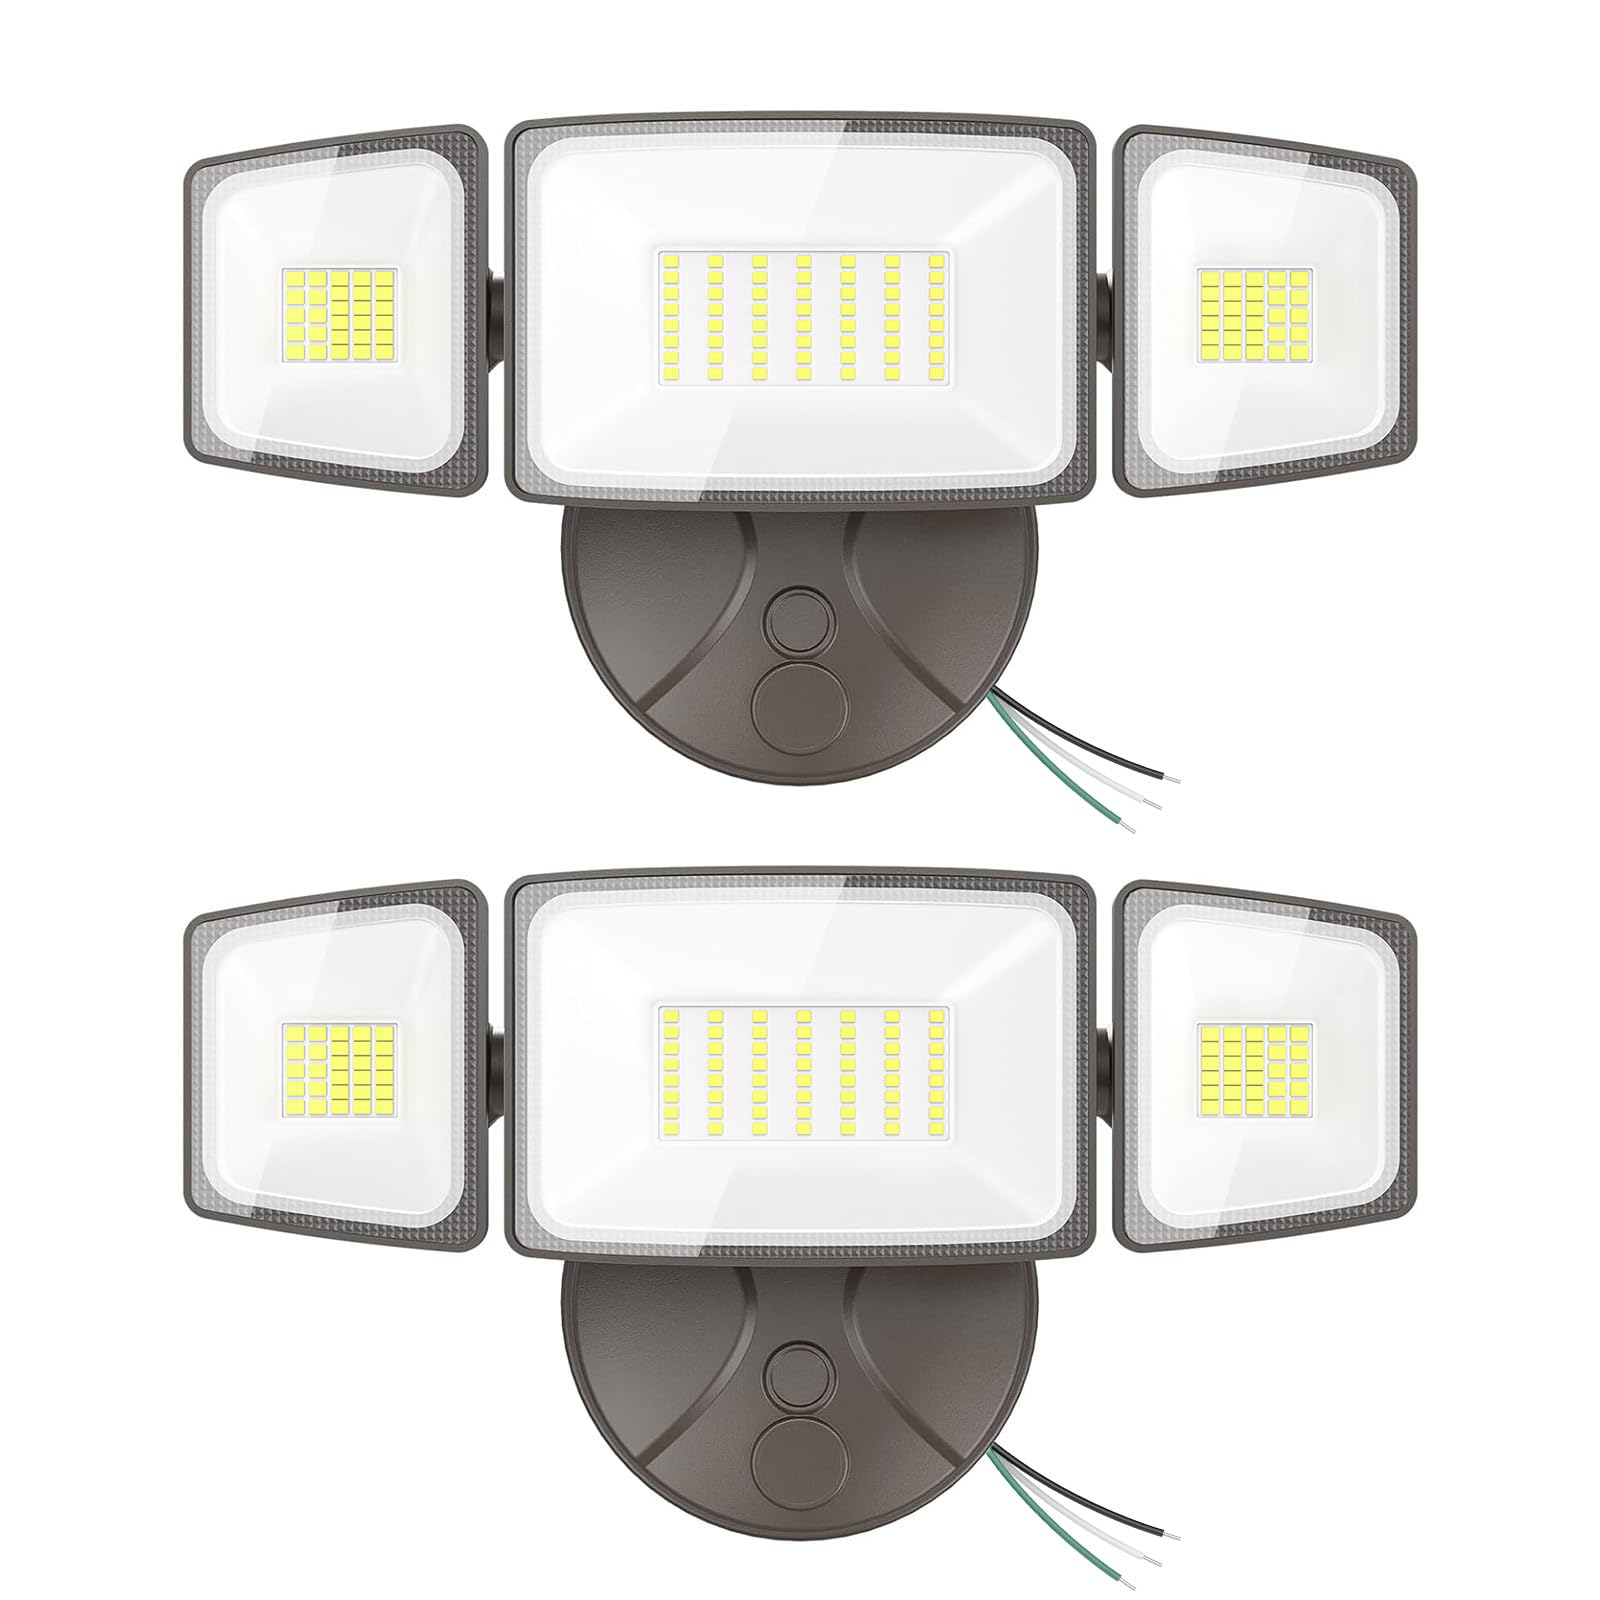
Image 1: Onforu 2 Pack 75W Flood Lights Outdoor, Brown color.
2. Package Contents
Each package contains the following items:
- 2 x Onforu 75W LED Flood Light Fixtures
- 2 x Mounting Brackets
- 1 x Instruction Manual
- Installation Hardware (screws, wire nuts)
3. Specifications
| Feature | Specification |
|---|---|
| Brand | Onforu |
| Model Name | BDBC75-3 |
| Wattage | 75 watts |
| Brightness | 7000 Lumens |
| Color Temperature | 6500 Kelvin (Daylight White) |
| Material | Aluminum |
| Water Resistance Level | IP65 Waterproof |
| Control Method | Switch Controlled |
| Installation Type | Wall Mount, Eave Mount (Soffit Mounted) |
| Product Dimensions | 10"L x 4"W x 5"H |
| Item Weight | 2 Pounds |
| Number of Light Sources | 112 LED beads |
| Coverage | 1150ft² |

Image 2: Detailed dimensions and adjustable angles of the floodlight heads.

Image 3: Illustration of the rugged metal design and efficient heat dissipation fins.
4. Safety Information
Please read and understand all safety instructions before installation and use. Failure to follow these instructions may result in electric shock, fire, or other hazards.
- WARNING: Risk of electric shock. Disconnect power at the fuse or circuit breaker before installation or servicing.
- Installation should be performed by a qualified electrician or a person familiar with the construction and operation of the product and the hazards involved.
- Ensure the supply voltage is correct (120 Volts) before connecting the fixture.
- Do not look directly into the LED light source when illuminated, as it may cause eye damage.
- Ensure all connections are secure and properly insulated to prevent water ingress.
- Do not modify the fixture or use it for purposes other than its intended use.
5. Installation
These floodlights can be installed on a wall or soffit. Follow these steps for proper installation:
5.1 Preparation
- Turn off power at the circuit breaker or fuse box.
- Carefully unpack the floodlight and all components.
- Identify the mounting location (wall or soffit) and ensure it is suitable for electrical wiring.
5.2 Mounting the Bracket
- Attach the provided mounting bracket to the junction box using the appropriate screws. Ensure the bracket is securely fastened.
5.3 Wiring
- Connect the fixture's wires to the house wiring:
- Connect the black wire (Live) from the fixture to the black wire (Live) from the junction box.
- Connect the white wire (Neutral) from the fixture to the white wire (Neutral) from the junction box.
- Connect the green wire (Ground) from the fixture to the green or bare copper wire (Ground) from the junction box.
- Secure all wire connections with the provided wire nuts and ensure they are tightly twisted.
- Carefully tuck the wires into the junction box.

Image 4: Wiring diagram for connecting the floodlight to a junction box.
5.4 Attaching the Fixture
- Align the floodlight base with the mounting bracket and secure it with the provided screws. Ensure a tight seal to maintain IP65 waterproof rating.

Image 5: Examples of wall-mounted and soffit-mounted installations, demonstrating multi-angle rotation.
6. Operation
The Onforu 75W Flood Lights are designed for simple, reliable operation.
6.1 Power Control
- These floodlights are switch-controlled only. They do not feature a motion sensor, solar power, or dusk-to-dawn sensor.
- To turn the lights ON or OFF, use the connected wall switch.

Image 6: The floodlight is controlled by a standard wall switch.
6.2 Adjusting Light Heads
The three light heads are independently adjustable, allowing you to direct light precisely where needed.
- Each side head can be rotated up to 335 degrees horizontally and 90 degrees vertically.
- The center head can be rotated up to 110 degrees vertically.
- Loosen the adjustment screws on each head, position the light as desired, and then tighten the screws to secure the position.
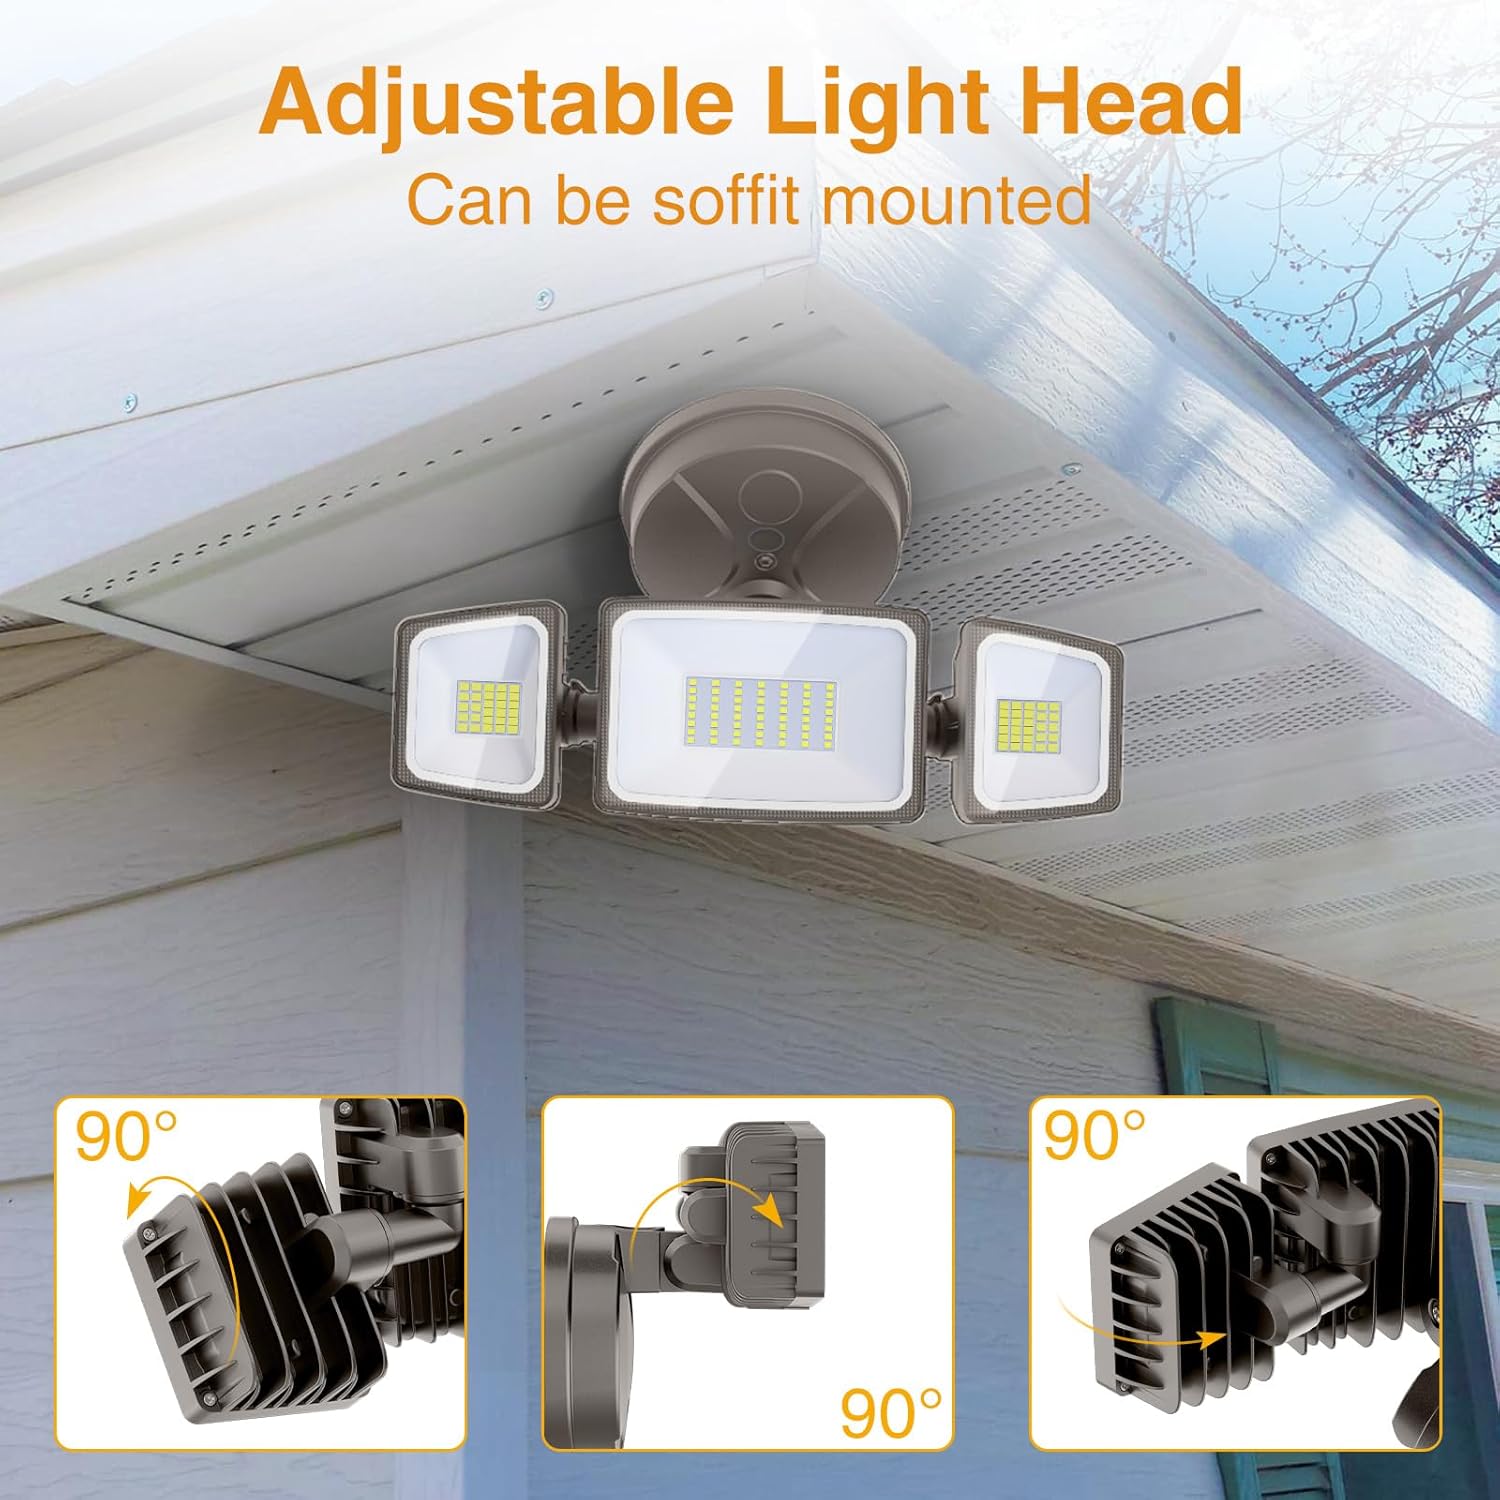
Image 7: The adjustable light heads provide flexible illumination for various outdoor areas.
7. Maintenance
Regular maintenance ensures optimal performance and longevity of your floodlights.
- Cleaning: Periodically clean the light heads with a soft, damp cloth to remove dirt and debris. Do not use abrasive cleaners or solvents.
- Inspection: Annually inspect the fixture for any signs of damage, loose wiring, or wear. Ensure all mounting screws are tight.
- Heat Dissipation: Keep the cooling fins on the back of the light heads clear of obstructions to ensure proper heat dissipation.
8. Troubleshooting
If you encounter issues with your floodlights, refer to the following common problems and solutions:
- Light does not turn ON:
- Check the power supply at the circuit breaker or fuse box.
- Ensure the wall switch is in the ON position.
- Verify all wiring connections are secure.
- Light is dim or flickering:
- Check for loose wiring connections.
- Ensure the power supply is stable.
- Confirm the fixture is receiving the correct voltage (120V).
- Water inside the fixture:
- Immediately disconnect power.
- Inspect the installation for proper sealing and ensure the mounting plate is flush with the surface.
- Contact customer support if the issue persists after re-installation.
9. Warranty and Support
Onforu provides a 2-year warranty for this product, covering defects in materials and workmanship under normal use. For warranty claims, technical assistance, or any questions regarding your Onforu floodlights, please contact Onforu customer support.
Manufacturer: Onforu
For further assistance, please visit the Onforu Store on Amazon.


