
Carrera 20063026
Carrera First Mario Kart Slot Car Race Track Instruction Manual
Model: 20063026
Introduction
This manual provides essential instructions for the assembly, operation, and maintenance of your Carrera First Mario Kart Slot Car Race Track. Designed for children aged 3 and up, this battery-powered racing set features Mario and Peach characters for an engaging racing experience.
Safety Information
WARNING: CHOKING HAZARD - SMALL PARTS NOT FOR CHILDREN UNDER 3 YEARS.
Always supervise young children during play. Ensure all track connections are secure to prevent accidental disassembly during use. Use only the recommended battery type (4 Type C batteries, not included).
What's in the Box
- Carrera First Slot Car Track (7.87 ft.)
- 2 First Slot Cars (Mario and Peach)
- 2 Electronically Regulated Speed Controllers
- Track Decor (Spinners, Mario Kart themed elements)

Image: Overview of the Carrera First Mario Kart Slot Car Race Track set, showing the track layout, two cars (Mario and Peach), controllers, and decorative elements.
Setup Instructions
- Unpack Components: Carefully remove all track pieces, cars, controllers, and decorative elements from the packaging.
- Assemble the Track: Connect the track pieces by aligning the connectors and pressing them firmly together until they click into place. Refer to the diagram on the packaging for the recommended track layout. Ensure all connections are flush and secure to maintain electrical continuity.
- Install Batteries: Locate the battery compartment on the power track section. Insert 4 Type C batteries (not included), ensuring correct polarity (+/-). Close the battery compartment securely.
- Connect Controllers: Plug the two speed controllers into the designated ports on the power track section.
- Place Cars on Track: Carefully position the Mario and Peach slot cars onto their respective lanes on the track. Ensure the guide pins on the bottom of the cars are correctly seated in the track slot.
- Add Decorative Elements: Attach the spinner elements and other Mario Kart themed decorations to the track as desired.
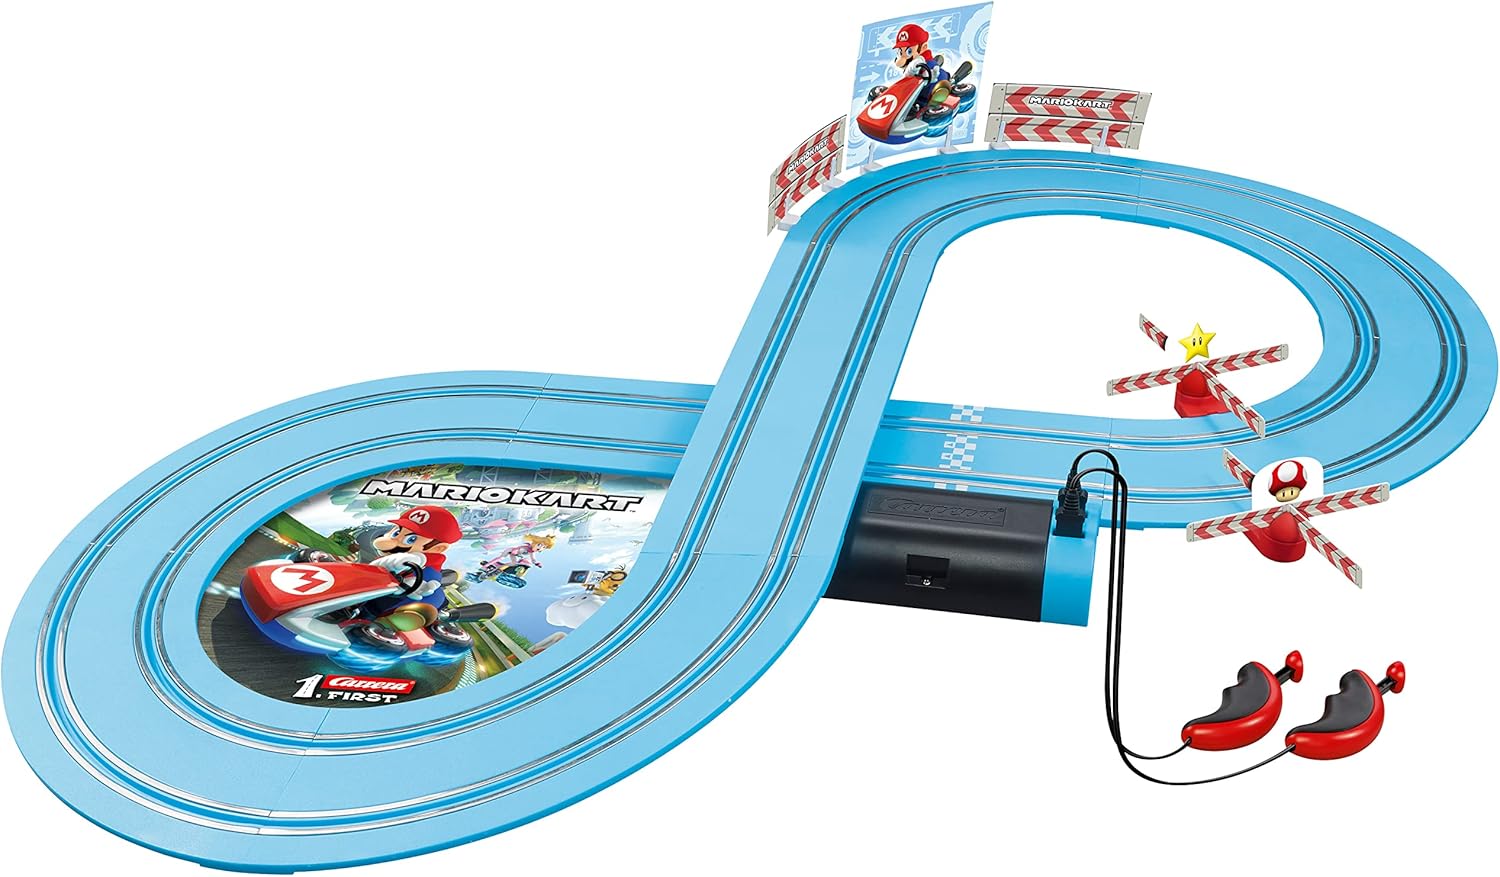
Image: An assembled Carrera First Mario Kart Race Track, showing the figure-eight layout with decorative spinners and the power track section with controller inputs.
Operating Instructions
- Power On: Ensure batteries are installed and controllers are connected. The track is ready for use once assembled.
- Control the Cars: Use the speed controllers to accelerate your chosen car. Press the trigger to increase speed and release to slow down.
- Racing: Compete against another player. The electronically regulated speed controllers are designed for easy handling by young children.
- Navigating Spinners: The track features spinner elements. Drive through them carefully to avoid derailing.
- Stopping Play: To stop racing, simply release the controller triggers. To power off completely, remove the batteries from the power track section.

Image: Close-up of the Mario slot car, showing its design and how it sits on the track.
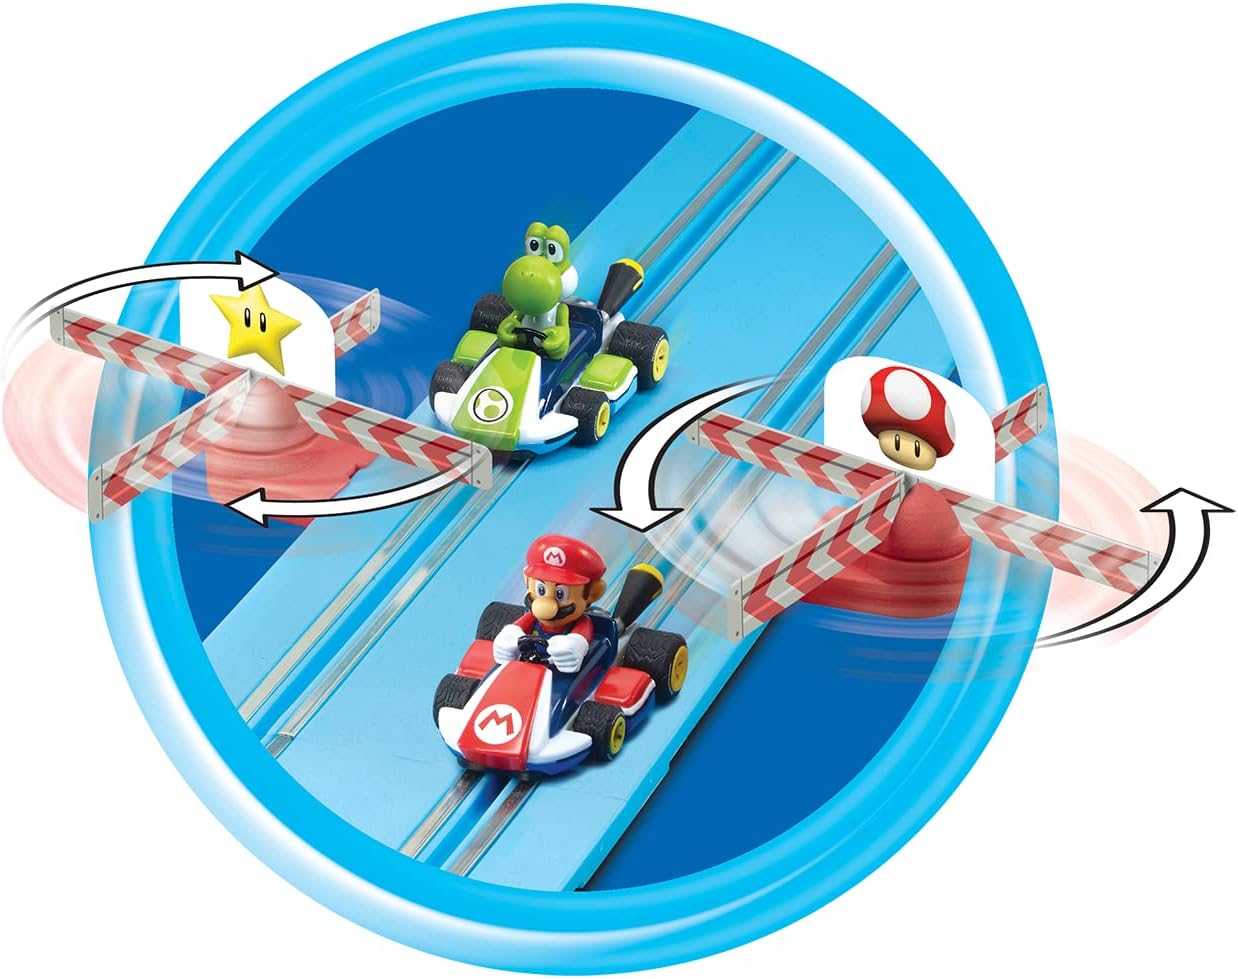
Image: Close-up of the Peach slot car, highlighting its design and placement on the track.

Image: A dynamic view of the Carrera First Mario Kart Race Track with Mario and Peach cars racing, passing by the spinning decorative elements.
Maintenance
- Cleaning: Wipe track pieces and cars with a dry, soft cloth. Avoid using water or cleaning agents, as they can damage electrical components.
- Storage: When not in use, disassemble the track and store all components in their original packaging or a suitable container to prevent damage. Remove batteries if storing for extended periods.
- Car Maintenance: Periodically check the guide pins and contact brushes on the underside of the cars for wear. Replace if necessary (replacement parts sold separately, if available).
Troubleshooting
| Problem | Possible Cause | Solution |
|---|---|---|
| Car does not move or moves intermittently. |
|
|
| Car derails frequently. |
|
|
| Track pieces separate during play. |
|
|
Specifications
- Model Number: 20063026
- ASIN: B09TV5ZZW2
- Track Length: 7.87 feet
- Scale: 1:50
- Power Source: 4 x Type C Batteries (not included)
- Product Dimensions: 22 x 15 x 3 inches
- Item Weight: 2.97 pounds
- Recommended Age: 36 months - 10 years
- Manufacturer: Carrera of America
- Release Date: February 28, 2024
Warranty and Support
Specific warranty details and direct customer support contact information are not provided in the available product data. For warranty claims or technical assistance, please refer to the product packaging or visit the official Carrera website.
You can visit the Carrera Store on Amazon for more information: Carrera Store
Related documents20063026


Ask a question about this manual
Ask about setup, troubleshooting, compatibility, parts, safety, or missing instructions. Manuals+ will review the question and use this page’s manual context to help answer it.