
1. Introduction
Thank you for choosing the inova Loft Sliding Door. This manual provides essential information for the safe and correct installation, operation, and maintenance of your new sliding door system. Please read all instructions carefully before beginning installation or use. Keep this manual for future reference.
2. Safety Instructions
- Always handle glass components with extreme care to prevent breakage and injury.
- Ensure the wall or ceiling structure is suitable and strong enough to support the weight of the door and track system. Consult a professional if unsure.
- Use appropriate safety gear, including gloves and eye protection, during installation.
- Ensure all fasteners are securely tightened before operating the door.
- Keep children and pets away from the installation area.
- Do not attempt to modify the product in any way not described in this manual.
3. Package Contents
Verify that all components are present and undamaged before beginning installation.
- Sliding Door Panel (6mm ESG Safety Glass with Black Aluminum Profile)
- Aluminum Track with Cover
- Perimeter Frame Profile for Grip
- Floor Guide
- Wall Spacers (for wall mounting)
- Soft Close Mechanism (optional, included in complete set)
- Mounting Hardware (screws, anchors, wrenches)

Figure 3.1: Overview of all included components for the inova Loft Sliding Door system.
4. Setup and Installation
4.1 Pre-Installation Checks
- Measure your opening carefully. The door dimensions are 880mm (width) x 2035mm (height).
- Ensure the wall or ceiling where the track will be mounted is level and structurally sound.
- For drywall installations, use appropriate heavy-duty anchors designed for the door's weight.
4.2 Mounting the Track
The aluminum track can be mounted to the wall or ceiling. The track length for this door model is 1810mm.
- Wall Mounting: Use the included wall spacing profile to bridge gaps up to 16mm, allowing installation even over existing door frames. The distance between the door and the wall will be 4mm without the spacer or 20mm with the spacer.
- Ceiling Mounting: Drilling into the ceiling structure will be required on-site. Ensure proper support.

Figure 4.1: Detail of the installed track and door top edge.

Figure 4.2: Example of a fully installed sliding door.

Figure 4.3: Measurement recommendations for installation.
4.3 Installing the Floor Guide
The floor guide pin is crucial for preventing the door from swaying during operation.
- Position the floor guide on the floor directly beneath the center of the door's travel path.
- Mark the drilling points.
- Drill pilot holes and secure the floor guide using the provided screws. For tiled floors, ensure proper drilling techniques to avoid cracking tiles.
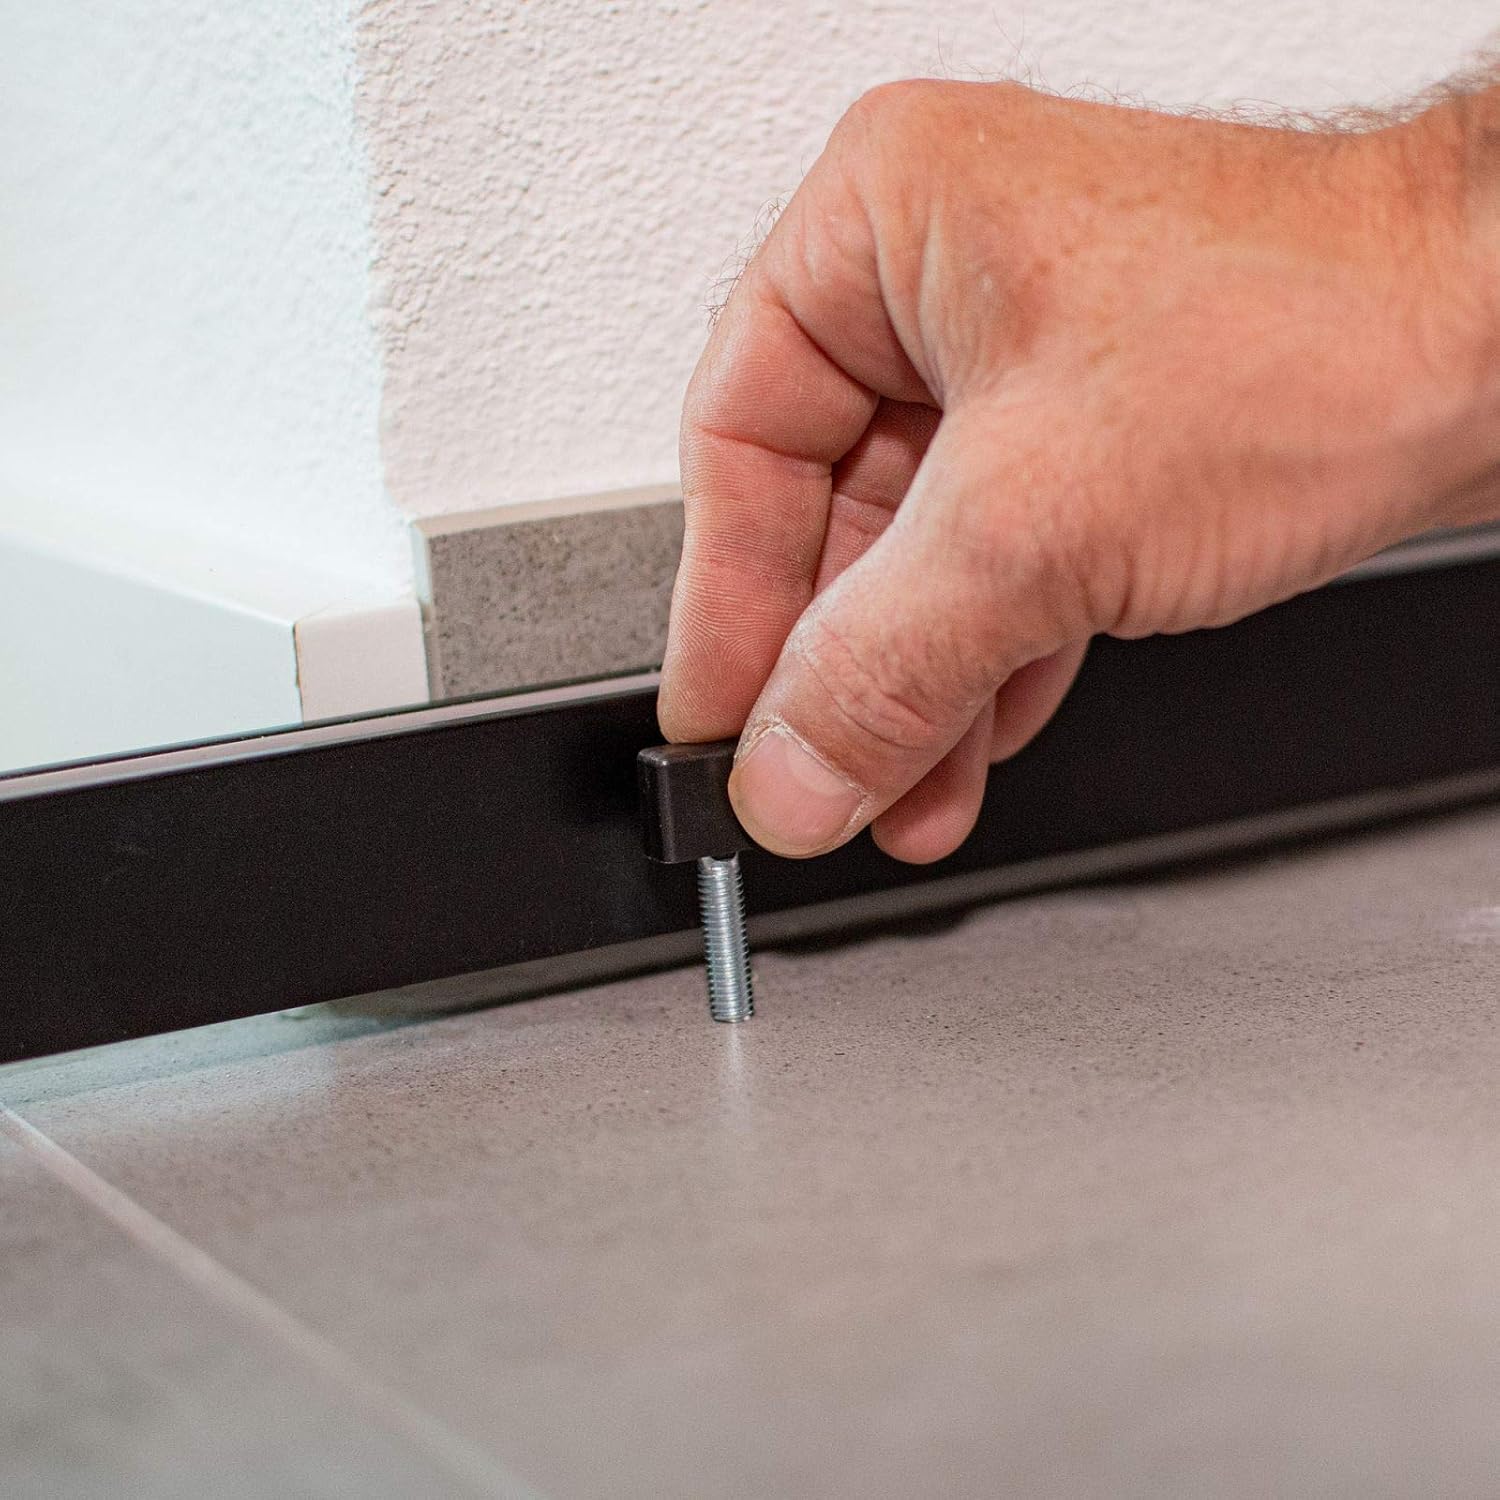
Figure 4.4: Installing the floor guide pin.

Figure 4.5: Bottom of the door with the floor guide in place.
4.4 Attaching the Door Panel
Follow the specific instructions provided with your hardware for attaching the door panel to the rollers within the track. Ensure the soft-close mechanism is correctly aligned if included.
5. Operating Instructions
Your inova Loft Sliding Door is designed for smooth and quiet operation.
- To open or close the door, gently push or pull the door panel.
- The integrated soft-close mechanism will engage automatically towards the end of the door's travel, slowing it down for a gentle stop.
- Due to the perimeter frame profile, the door panel itself can be pushed to its full extent within the track. However, the door's frame may protrude approximately 12mm into the passage when fully open or closed.
6. Maintenance
Regular maintenance ensures the longevity and smooth operation of your sliding door.
- Cleaning Glass: Use a standard glass cleaner and a soft, lint-free cloth. Avoid abrasive cleaners or tools that could scratch the glass.
- Cleaning Aluminum Profile: Wipe the aluminum frame with a damp cloth and mild detergent. Dry thoroughly.
- Track and Rollers: Periodically inspect the track for dust, debris, or obstructions. Clean the track with a vacuum cleaner or a damp cloth. Check the rollers for smooth movement and ensure they are free of debris. Do not lubricate the track unless specifically instructed by the manufacturer, as this can attract more dirt.
- Fasteners: Occasionally check all mounting screws and fasteners to ensure they remain tight. Retighten if necessary.
7. Troubleshooting
7.1 Door Not Sliding Smoothly
- Check Track: Inspect the track for any dirt, dust, or small objects obstructing the rollers. Clean thoroughly.
- Check Rollers: Ensure the rollers are clean and undamaged.
- Check Alignment: Verify that the track is level and the door is properly aligned. Minor adjustments to the rollers or track mounting might be needed.
7.2 Soft Close Not Engaging or Working Incorrectly
- Check Mechanism: Ensure the soft-close mechanism is correctly installed and positioned according to the specific instructions provided with the hardware.
- Obstructions: Look for any obstructions preventing the soft-close trigger from engaging.
- Adjustment: Some soft-close mechanisms allow for minor adjustments. Refer to the specific soft-close component manual for details.
7.3 Door Swaying
- Floor Guide: Ensure the floor guide is securely installed and properly positioned to prevent door sway.
- Track Stability: Verify that the main track is firmly mounted and not loose.
8. Specifications
| Brand | inova |
| Model | Loft Sliding Door |
| Dimensions (W x H) | 880mm x 2035mm |
| Glass Type | 6mm ESG Safety Glass (Clear) |
| Frame Material | Black Powder-Coated Aluminum Profile (RAL9005) |
| Track Length | 1810mm |
| Wall Distance (without/with spacer) | 4mm / 20mm |
| Soft Close | Included (beidseitig - both sides) |
| Assembly Required | Yes |
| Manufacturer | inova Star GmbH & Co KG |
| GTIN | 04250820209695 |
9. Warranty
This inova Loft Sliding Door system comes with a 10-year warranty, covering manufacturing defects and material faults under normal use and maintenance. Please retain your proof of purchase for warranty claims. The warranty does not cover damage due to improper installation, misuse, or unauthorized modifications.
10. Support
If you encounter any issues or have questions not covered in this manual, please contact inova customer support. You can reach us by phone or email for assistance.
For specific contact details, please refer to the packaging or the official inova website.