
1. Introduction
The INGCO VD10003-NEW is a non-contact AC voltage detector designed for safe and efficient electrical testing. This device allows users to detect the presence of AC voltage without direct contact, enhancing safety during electrical work. It features dual sensitivity ranges, an LED flashlight, and audible/visual alarms for clear indication of voltage.

Image 1.1: INGCO AC Voltage Detector VD10003-NEW showing its LED screen and voltage range.
2. Safety Information
Always read and understand all safety instructions before using this product.
- This device is designed for non-contact AC voltage detection only. Do not attempt to measure DC voltage or current.
- Always assume live circuits until proven otherwise with a reliable voltage tester.
- Do not use the device if it appears damaged or is not operating correctly.
- Keep the device dry and clean. Do not expose it to extreme temperatures or humidity.
- This device is not suitable for testing Christmas lights or similar low-power decorative lighting.
- Replace batteries promptly when the low battery indicator appears to ensure accurate readings.
3. Product Features
- Dual Range Detection: Detects standard voltage (48-1000V AC) and low voltage (12-1000V AC) for versatile applications.
- Non-Contact Operation: Safely detects AC voltage without direct contact with live conductors.
- Sound and Light Alarm: Provides clear audible beeps and visual LED indications (red light) when voltage is detected.
- LED Flashlight: Integrated flashlight for illuminating work areas in dim conditions.
- Automatic Power Off: The device automatically powers off after 3 minutes of inactivity or no signal detection to conserve battery life.
- Low Battery Indicator: Alerts the user when battery voltage is below 2.5V.
- Breakpoint Test: Capable of identifying breaks in live wires.
- Compact Design: Pen-style design with a pocket clip for portability.

Image 3.1: The detector offers dual sensitivity modes for different voltage ranges.

Image 3.2: Low battery warning indicator on the device's display.

Image 3.3: The device automatically powers off after 3 minutes of inactivity.
4. Setup
4.1 Battery Installation
The device requires batteries for operation. Follow these steps to install or replace the batteries:
- Unscrew the battery cap at the bottom of the detector.
- Insert the required batteries, ensuring correct polarity (+/-).
- Securely screw the battery cap back into place.

Image 4.1: Battery compartment for installation or replacement.
5. Operating Instructions
5.1 Powering On/Off
- Press the power button (G) to turn the device on. The LED screen will illuminate.
- Press and hold the power button (G) to turn the device off.
5.2 Adjusting Sensitivity (Dual Range)
- The detector has two sensitivity ranges: 12-1000V AC (high sensitivity) and 48-1000V AC (standard sensitivity).
- Press the 'S' button to switch between sensitivity modes. The display will indicate the current mode.
- Use high sensitivity (12-1000V AC) for detecting lower voltages, such as those found in doorbells, thermostats, or irrigation wiring.
5.3 Detecting AC Voltage
To detect AC voltage:
- Turn on the device.
- Hold the detector with the tip near the wire, outlet, or circuit breaker you wish to test.
- If AC voltage is present, the tip of the detector will glow red, and an audible alarm will sound. The intensity of the alarm and the number of illuminated bars on the display may vary with voltage strength.
- The device can help distinguish between live and neutral lines by providing a stronger indication on the live line.
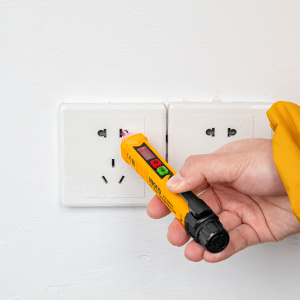
Image 5.1: Non-contact voltage detection at an electrical outlet.

Image 5.2: Non-contact voltage detection on exposed wires.
5.4 Using the LED Flashlight
- Press the flashlight button (LED icon) to turn the LED flashlight on or off.
- The flashlight operates independently of the voltage detection function.
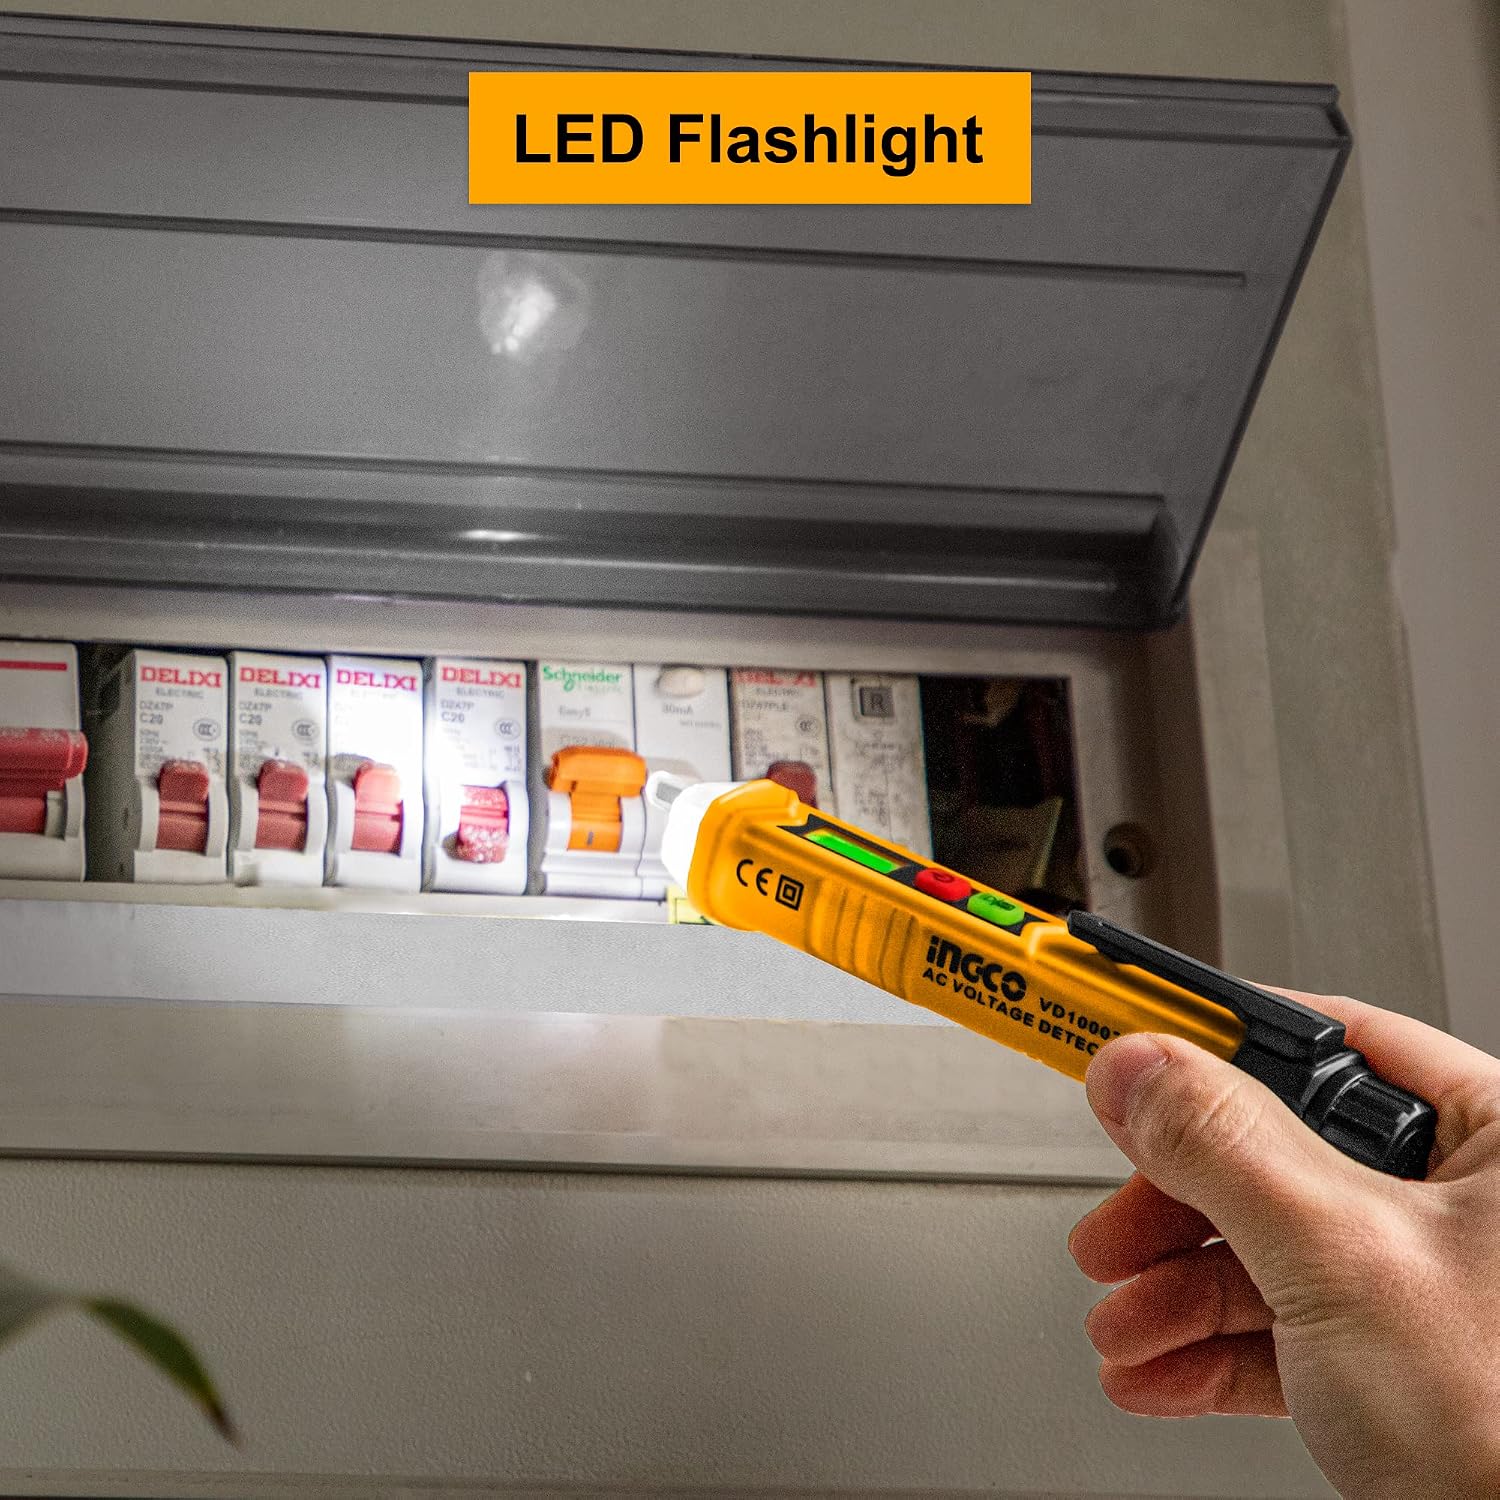
Image 5.3: Using the integrated LED flashlight to illuminate a dark area.
5.5 Breakpoint Test
To perform a breakpoint test:
- Ensure the wire you are testing is connected to a live AC power source.
- Slowly move the detector along the length of the insulated wire.
- The detector will indicate voltage up to the point of the break. The alarm and light will cease at the point where the circuit is interrupted.

Image 5.4: Performing a breakpoint test to locate a break in a wire.
6. Maintenance
- Clean the device with a dry, soft cloth. Do not use abrasive cleaners or solvents.
- Store the device in a cool, dry place away from direct sunlight and extreme temperatures.
- Remove batteries if the device will not be used for an extended period to prevent leakage.
7. Troubleshooting
| Problem | Possible Cause | Solution |
|---|---|---|
| Device does not power on. | Dead or incorrectly installed batteries. | Check battery polarity or replace batteries. |
| No voltage detection, but power is present. | Low battery; incorrect sensitivity setting; device malfunction. | Replace batteries; switch to high sensitivity (12-1000V AC); if problem persists, contact support. |
| False positives (detects voltage when none is present). | High sensitivity in an electromagnetically noisy environment. | Switch to standard sensitivity (48-1000V AC). |
8. Specifications
| Specification | Value |
|---|---|
| Brand | Ingco |
| Model Number | VD10003-NEW |
| Measurement Type | Voltmeter |
| Minimum Operating Voltage | 12 Volts AC |
| Maximum Operating Voltage | 1000 Volts AC |
| Power Source | Battery Powered |
| Item Weight | 0.1 Kilograms |
| Item Dimensions | 20 x 6 x 3 Centimeters |
| Safety Standard | CE |
9. What's in the Box
- 1 x INGCO AC Voltage Detector (VD10003-NEW)
10. Warranty and Support
This INGCO product comes with a 6-month warranty from the date of purchase.
For technical support or warranty claims, please contact:
- Manufacturer: INGCO
- Importer/Packer Contact: ingco
- Online Support: ONLINESUPPORT@INGCO.COM
Please retain your proof of purchase for warranty validation.