
1. Introduction
Thank you for purchasing the Adler AD 1184 Portable Digital Radio. This manual provides essential information for the safe and efficient operation of your device. Please read it thoroughly before use and keep it for future reference.
2. Safety Instructions
To ensure safe operation and prevent damage, please observe the following safety precautions:
- Do not expose the radio to rain, moisture, or extreme temperatures.
- Avoid placing the unit near heat sources such as radiators, stoves, or other heat-producing appliances.
- Ensure adequate ventilation around the unit. Do not block any ventilation openings.
- Use only the power adapter supplied with the unit.
- Do not attempt to disassemble or modify the unit. Refer all servicing to qualified personnel.
- Clean the unit only with a soft, dry cloth. Do not use liquid cleaners or aerosol sprays.
- Keep the unit away from strong magnetic fields.
3. Product Overview
3.1 Front Panel and Remote Control
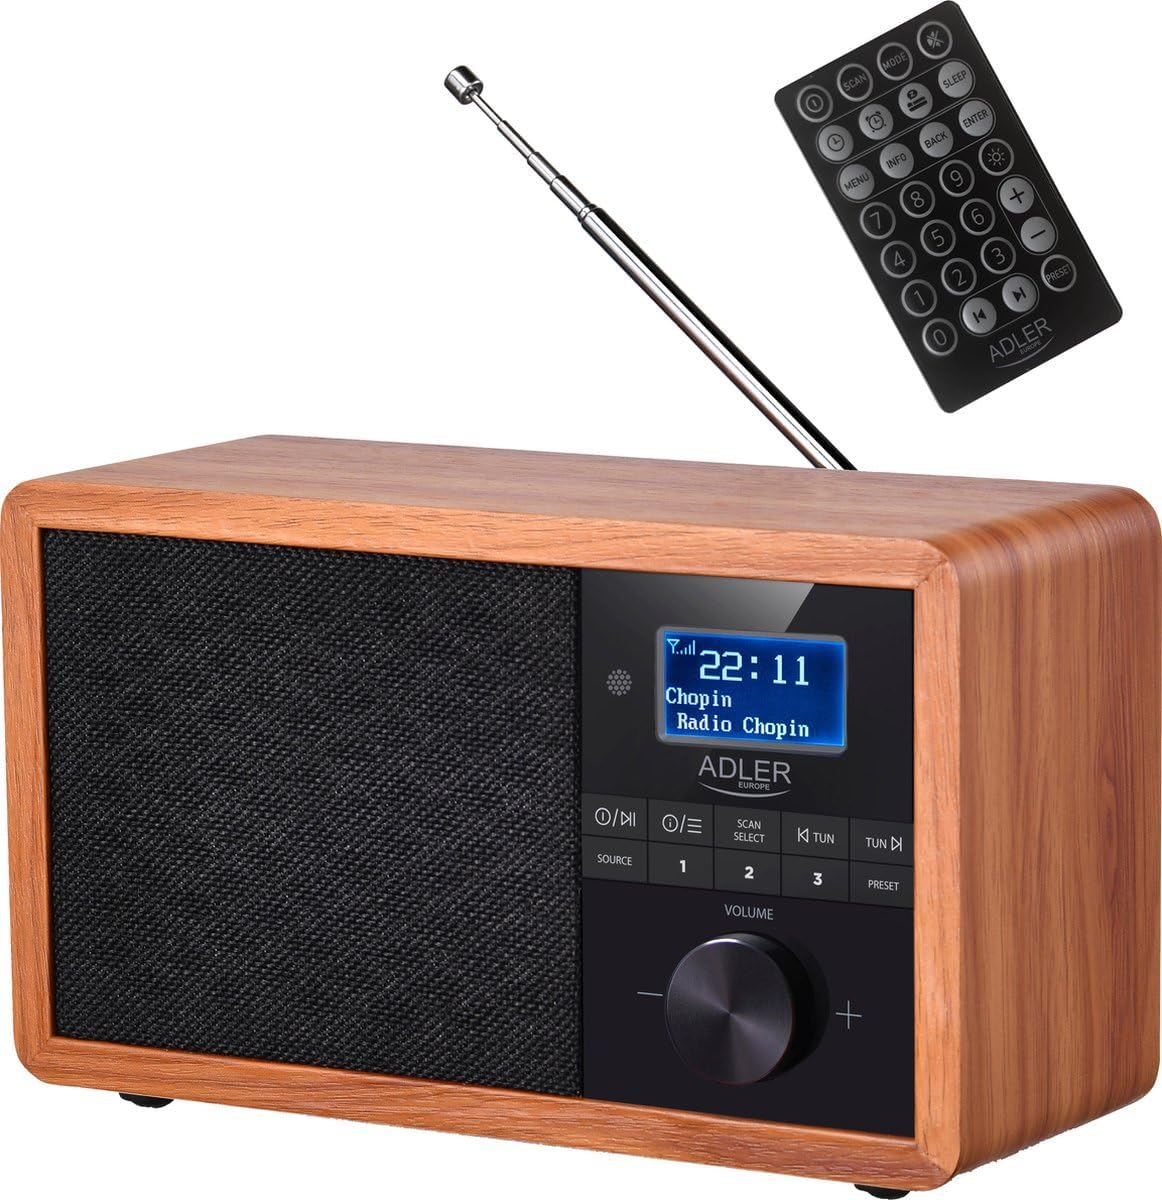
Front view of the Adler AD 1184 Digital Radio, showcasing the display, control knobs, speaker grille, and the included remote control.
3.2 Rear Panel

Rear view of the Adler AD 1184 Digital Radio, showing the telescopic antenna, power input, and product information label.
3.3 Included Accessories
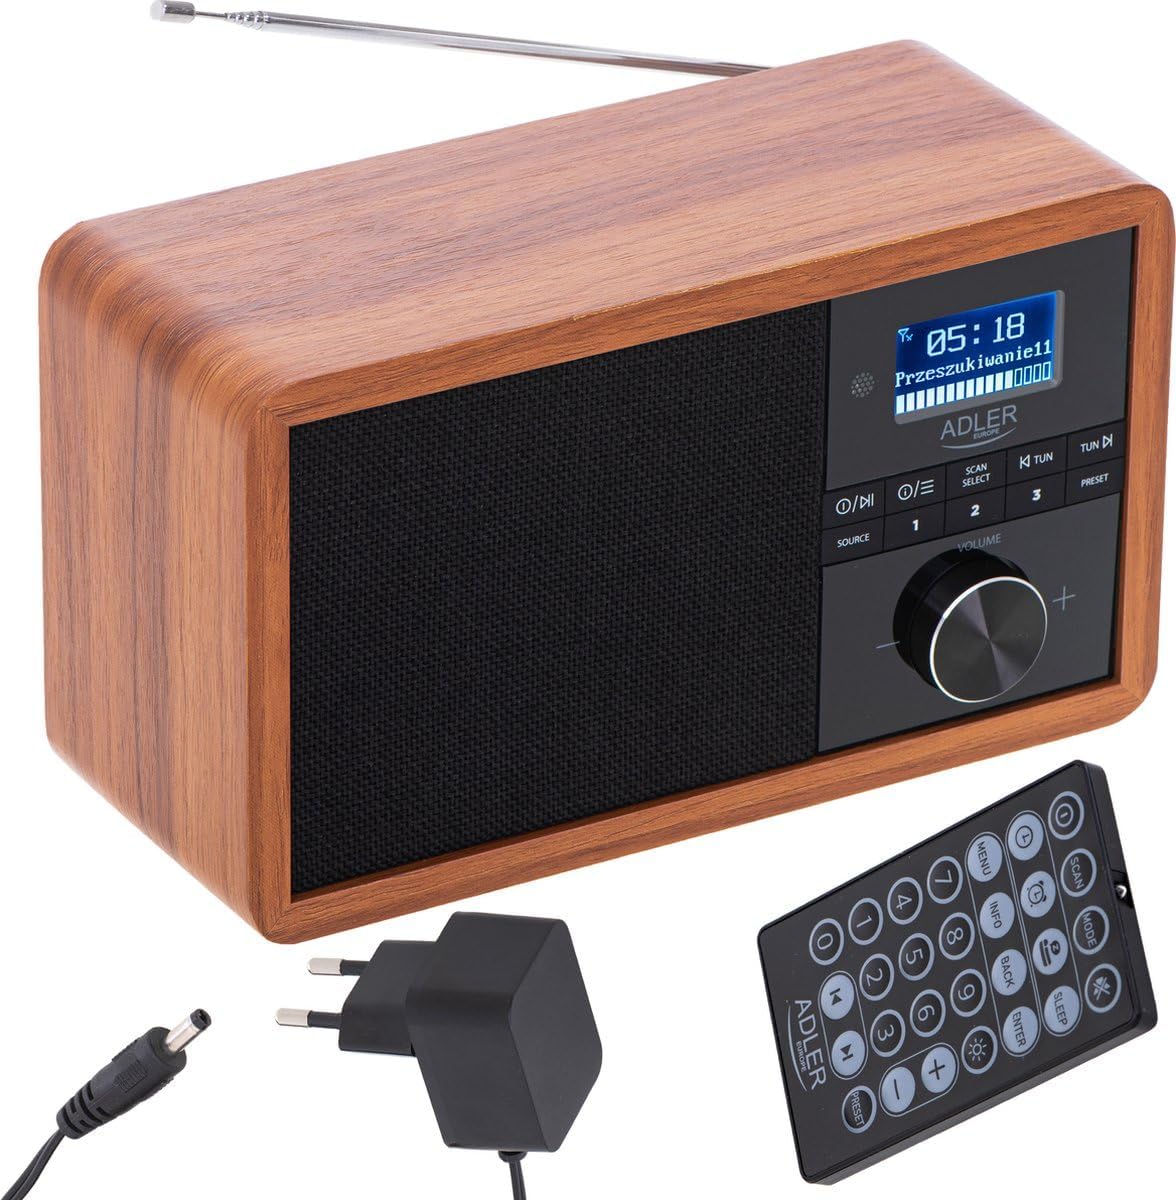
The Adler AD 1184 Digital Radio with its remote control and power adapter, illustrating the complete package.
4. Setup
4.1 Unpacking
Carefully remove the radio and all accessories from the packaging. Retain the packaging for future transport or storage.
4.2 Power Connection
- Insert the DC plug of the power adapter into the DC IN socket on the rear of the radio.
- Plug the power adapter into a standard wall outlet.
4.3 Antenna Setup
Extend the telescopic antenna fully for optimal FM and DAB/DAB+ reception. Adjust its position for the best signal quality.
4.4 Initial Power On
Press the POWER button on the front panel or remote control to turn on the radio. The display will light up.
5. Operating Instructions
5.1 Basic Controls
- POWER Button: Turns the unit on or off.
- VOLUME Knob: Rotate to adjust the sound level.
- SOURCE Button: Press to cycle through available modes (DAB, FM, Bluetooth).
- MENU Button: Accesses the menu options for the current mode.
- SCAN/SELECT Button: Initiates a scan for radio stations or confirms a selection in the menu.
- TUN-/TUN+ Buttons: Used for manual tuning or navigating through lists.
- PRESET Buttons (1-3): Quickly recall stored favorite stations.
5.2 DAB/DAB+ Radio Operation
- Press the SOURCE button until DAB mode is selected.
- The radio will automatically perform a full scan for available DAB/DAB+ stations on first use. If not, press SCAN.
- Use the TUN-/TUN+ buttons to navigate through the list of available stations.
- Press SELECT to choose a station.
- To store a station as a preset, press and hold one of the PRESET buttons (1-3) until the display confirms.
5.3 FM Radio Operation
- Press the SOURCE button until FM mode is selected.
- To auto-scan for stations, press SCAN. The radio will scan and stop at the next strong station.
- For manual tuning, use the TUN-/TUN+ buttons.
- To store a station as a preset, press and hold one of the PRESET buttons (1-3) until the display confirms.
5.4 Bluetooth Mode
- Press the SOURCE button until Bluetooth mode is selected. The display will show "Pairing" or similar.
- On your Bluetooth-enabled device (smartphone, tablet, laptop), enable Bluetooth and search for available devices.
- Select "AD 1184" from the list of devices.
- Once paired, you can play audio from your device through the radio.
- Use your connected device or the radio's controls to adjust volume and playback.
5.5 Setting Time and Date
The radio typically synchronizes time and date automatically via DAB signal. If manual setting is required, access the System Settings menu (usually via the MENU button) and navigate to Time/Date options.
5.6 Alarm and Sleep Timer
Refer to the remote control for dedicated ALARM and SLEEP buttons. Press the ALARM button to set an alarm time and source. Press the SLEEP button to set a timer for the radio to automatically turn off.
5.7 Using the Remote Control
The remote control provides full functionality for the radio. Ensure the remote's battery is inserted correctly. Point the remote towards the front of the radio for optimal response.
6. Maintenance and Care
- Always unplug the radio from the power outlet before cleaning.
- Use a soft, dry cloth to wipe the exterior surfaces.
- Do not use abrasive cleaners, waxes, or solvents as they may damage the finish.
- Keep the unit free from dust and debris.
7. Troubleshooting
| Problem | Possible Cause | Solution |
|---|---|---|
| No power | Power adapter not connected; Power outlet faulty. | Check power adapter connection; Try a different outlet. |
| Poor radio reception | Antenna not extended; Weak signal; Interference. | Extend and adjust antenna; Relocate the radio; Perform a full scan. |
| Bluetooth pairing failed | Radio not in pairing mode; Device too far; Bluetooth off on device. | Ensure radio is in Bluetooth mode; Move device closer; Enable Bluetooth on your device. |
| No sound | Volume too low; Mute activated; Incorrect source selected. | Increase volume; Check mute status; Select correct source. |
8. Technical Specifications
- Brand: Adler
- Model Number: AD 1184
- Color: Black (Wood finish)
- Connectivity: Bluetooth
- Special Features: Wireless
- Compatible Devices: Smartphone, tablet, laptop
- Dimensions (L x W x H): 24.1 x 21.5 x 12 cm
- Tuning Technology: FM, DAB/DAB+ (Digital Radio)
- Display Technology: LCD/LED
9. Warranty and Support
For warranty information and technical support, please refer to the warranty card included with your product or contact your local retailer or the manufacturer's customer service. Keep your proof of purchase for any warranty claims.

