
DROK DC 0-48V 0-10A 480W
DROK Switching Power Supply User Manual
Model: DC 0-48V 0-10A 480W
Brand: DROK
1. Introduction
Thank you for choosing the DROK Adjustable Switching Power Supply. This device is designed to provide a stable and adjustable DC power source for a wide range of applications, including DC equipment, motor speed control, LED dimming, chemical electrolysis, research, and educational experiments. It features an input voltage range of AC 110/220V and an adjustable output of DC 0-48V with a maximum current of 10A. Equipped with advanced protection mechanisms and a high-precision LED display, this power supply offers reliability and ease of use for both professionals and DIY enthusiasts.
2. Safety Precautions
Please read and understand all safety instructions before operating this device. Failure to follow these instructions may result in electric shock, fire, or serious injury.
- Input Voltage Selection: Before powering on, ensure the input voltage switch (located on the right side of the unit) is set correctly to either 110V or 220V, matching your local power supply. Incorrect selection can cause severe damage to the unit.
- Ventilation: Ensure adequate ventilation around the power supply. Do not block the cooling fan or ventilation openings.
- Environment: Operate the device in a dry, well-ventilated area, away from moisture, dust, and direct sunlight.
- Overload Protection: This unit has overload protection. Do not exceed the maximum rated output current of 10A. Exceeding this limit can trigger protection or damage the device.
- Wiring: All wiring should be performed by a qualified individual. Ensure all connections are secure and correct before applying power.
- Grounding: The power supply must be properly grounded to prevent electric shock.
- Maintenance: Do not attempt to open or repair the unit yourself. Refer all servicing to qualified personnel.
3. Product Overview
3.1 Key Features
- Adjustable Output: DC 0-48V voltage and 0-10A current, steplessly adjustable.
- High-Precision LED Display: Real-time monitoring of output voltage and current.
- Robust Design: Superior aluminum casing for durability and heat dissipation.
- Comprehensive Protection: Built-in overload, overvoltage, and short-circuit protection.
- Intelligent Cooling: Temperature-controlled cooling fan activates automatically when needed.
3.2 Components and Controls

Figure 3.2.1: Overall view of the power supply, highlighting the digital display for voltage and current readings.

Figure 3.2.2: Detailed view of the input/output terminals and the voltage/current adjustment knobs.

Figure 3.2.3: Illustration of the high-accuracy LCD display and the adjustable DC output range.
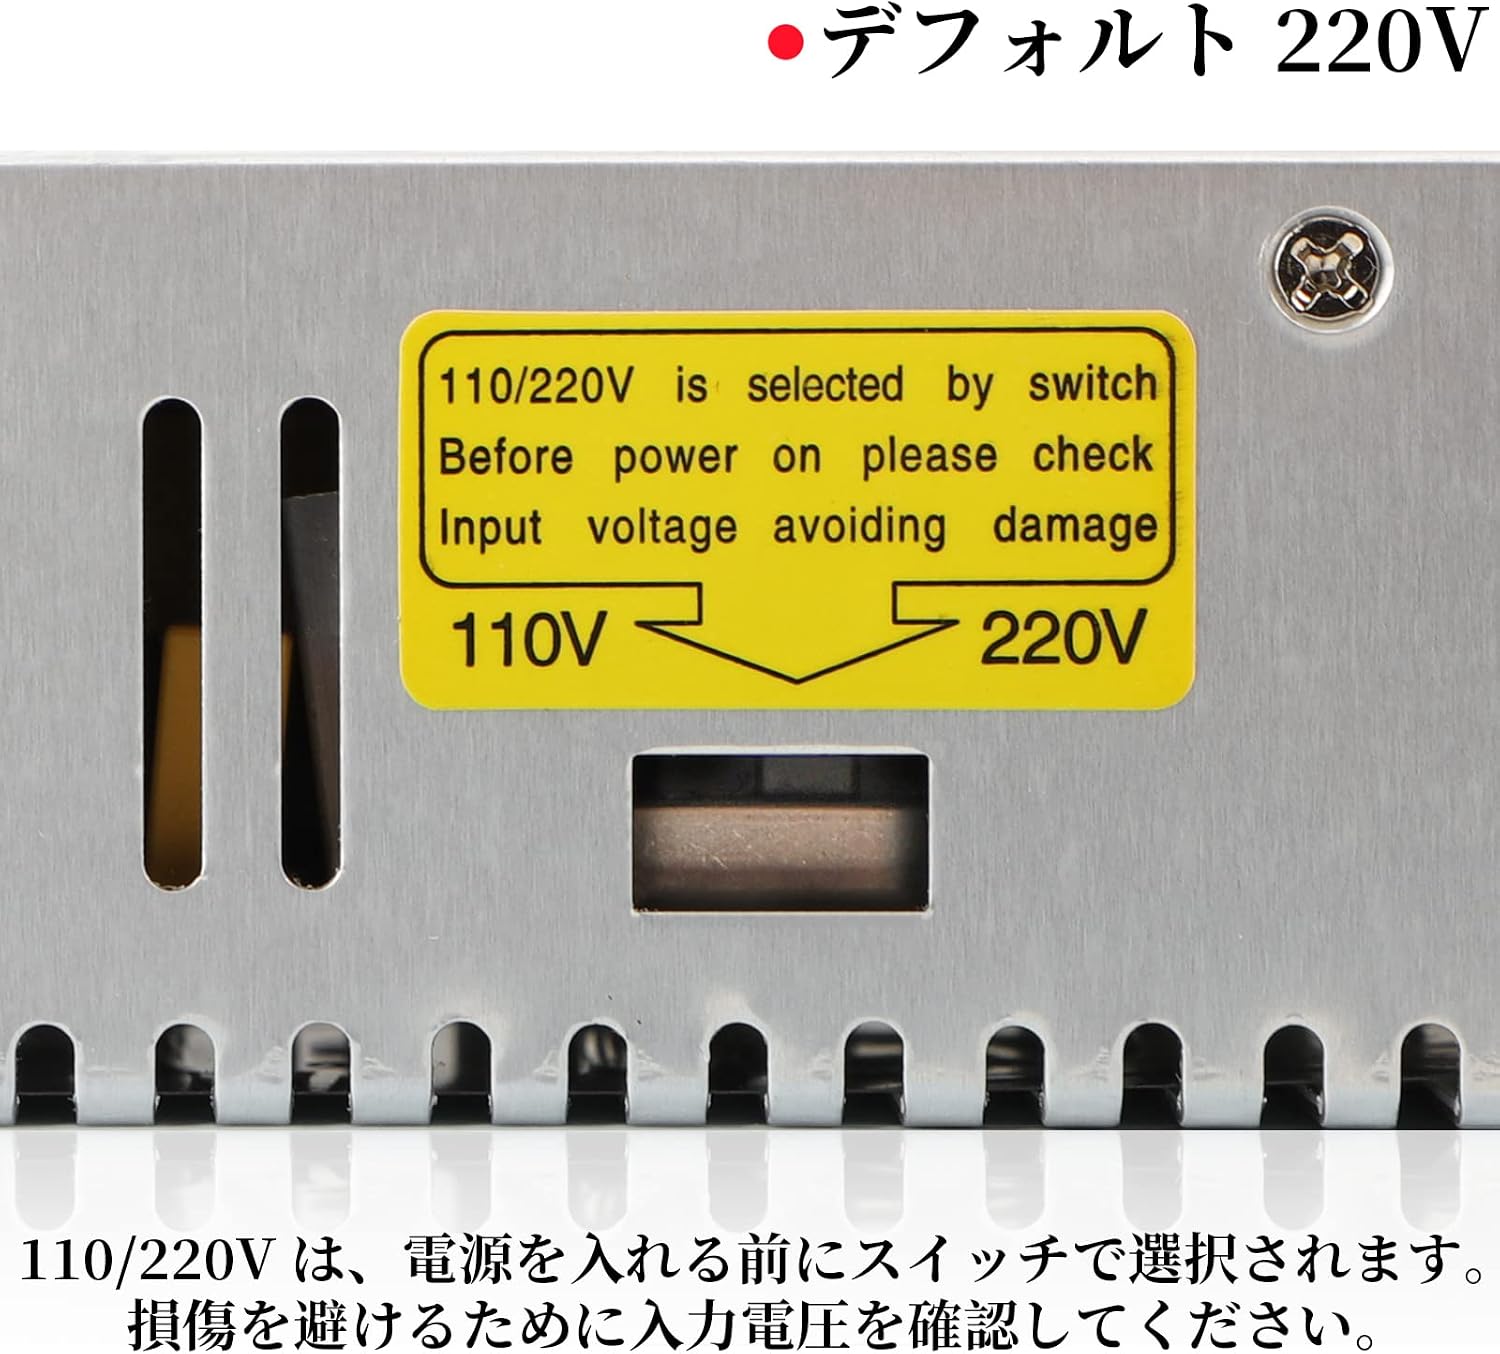
Figure 3.2.4: Important switch for selecting input voltage between 110V and 220V.
4. Setup
4.1 Input Voltage Selection
Before connecting the power supply to the AC mains, it is crucial to select the correct input voltage (110V or 220V) using the switch located on the right side of the unit.
- Locate the red switch on the right side panel of the power supply.
- Using a small screwdriver or similar tool, slide the switch to match your local AC mains voltage (110V for North America, Japan; 220V for Europe, etc.).
- Verify the selection before proceeding to avoid damage.
Figure 4.1.1: Input voltage selection switch. Ensure it matches your local power supply.
4.2 Wiring Instructions
Connect the power supply to your load and AC mains as follows:
- AC Input: Connect your AC power cord to the 'L' (Live), 'N' (Neutral), and '⏚' (Ground) terminals. Refer to Figure 4.2.1 for terminal layout.
- DC Output: Connect your DC load to the '+V' (Positive) and '-V' (Negative) terminals. There are multiple '+V' and '-V' terminals for convenience.
- Ensure all connections are tight and secure to prevent loose contacts and potential hazards.
Figure 4.2.1: Terminal block for AC input and DC output connections.
5. Operating Instructions
5.1 Power On/Off
Once all connections are secure and the input voltage is correctly selected, connect the AC power cord to the mains outlet. The unit will power on, and the LED display will illuminate.
5.2 Adjusting Voltage and Current
The power supply features two potentiometers for precise adjustment of output voltage and current.
- Voltage Adjustment: Use the potentiometer labeled for voltage (typically on the left side, near the 'V' display) to adjust the output voltage from 0V to 48V.
- Current Adjustment: Use the potentiometer labeled for current (typically on the right side, near the 'A' display) to adjust the output current from 0A to 10A.
- The high-precision LED display will show the real-time output voltage and current values.
Figure 5.2.1: Adjusting voltage and current using the dedicated knobs and monitoring with the LED display.
6. Maintenance
Proper maintenance ensures the longevity and optimal performance of your DROK power supply.
- Cleaning: Keep the unit clean and free from dust. Use a soft, dry cloth for cleaning. Do not use liquid cleaners.
- Cooling Fan: The intelligent temperature-controlled cooling fan will activate automatically when the internal temperature rises. Ensure the fan vents are not obstructed.
- Storage: When not in use for extended periods, store the power supply in a cool, dry place.

Figure 6.1.1: Location of the intelligent cooling fan.
7. Troubleshooting
If you encounter issues with your power supply, refer to the following common problems and solutions:
| Problem | Possible Cause | Solution |
|---|---|---|
| No output voltage/current, or unit does not power on. |
|
|
| Output voltage is lower than expected. |
|
|
| Unit gets excessively hot. |
|
|
If the problem persists after trying these solutions, please contact DROK customer support.
8. Specifications
| Parameter | Value |
|---|---|
| Brand | DROK |
| Model | DC 0-48V 0-10A 480W |
| Input Voltage Range | AC 110/220V ±15% (Switchable) |
| Output Voltage Range | DC 0-48V (Adjustable) |
| Output Current Range | 0-10A (Adjustable) |
| Rated Power | 480W |
| Cooling Method | Air Cooling (Intelligent Fan) |
| Dimensions | 27.5 x 20.3 x 7.3 cm |
| Weight | 910 g |
| Protection Features | Overload Protection, Overvoltage Protection, Short Circuit Protection |

Figure 8.1.1: Product dimensions.
9. Warranty and Support
DROK offers a comprehensive after-sales service for this product.
- Initial Defects: For any initial defects within 6 months of arrival, we offer product replacement or a full refund.
- Customer Support: If you have any questions, concerns, or require technical assistance, please do not hesitate to contact DROK customer support. We are committed to providing prompt and helpful service.
Related documentsDC 0-48V 0-10A 480W


Ask a question about this manual
Ask about setup, troubleshooting, compatibility, parts, safety, or missing instructions. Manuals+ will review the question and use this page’s manual context to help answer it.