
Deerma DX1000
Deerma DX1000 2-in-1 Vacuum Cleaner User Manual
Model: DX1000
1. Introduction
Thank you for choosing the Deerma DX1000 2-in-1 Vacuum Cleaner. This manual provides essential information for the safe and efficient operation, maintenance, and troubleshooting of your new appliance. Please read this manual thoroughly before first use and keep it for future reference.

Image: The Deerma DX1000 vacuum cleaner shown in its full upright configuration, highlighting its sleek blue design.
2. Product Components
The Deerma DX1000 vacuum cleaner comes with the following components:
- 1 x Vacuum Cleaner Main Unit (Handheld)
- 1 x Extension Tube
- 1 x Floor Brush (Slim Floor Brush)
- 1 x Flat Suction Nozzle
- 1 x Brush Suction Head

Image: An exploded view of the Deerma DX1000 showing the main unit, extension tube, floor brush, and additional nozzles. Icons illustrate key features like 16kPa suction, 0.6L dust bin, and washable HEPA filter.
3. Setup and Assembly
The Deerma DX1000 can be assembled in two configurations: upright and handheld.
3.1 Upright Vacuum Cleaner Assembly
- Insert the extension tube firmly into the main vacuum cleaner unit until it clicks into place.
- Attach the floor brush to the other end of the extension tube, ensuring it is securely fastened.
- Ensure all connections are tight before plugging the vacuum cleaner into a power outlet.
3.2 Handheld Vacuum Cleaner Assembly
- For handheld use, detach the extension tube and floor brush from the main unit.
- Select the desired brush head (Flat Suction Nozzle or Brush Suction Head) and attach it directly to the main vacuum cleaner unit.
- Ensure the chosen attachment is securely fitted.
4. Operating Instructions
The Deerma DX1000 offers versatile cleaning options with its 2-in-1 design and multiple brush heads.
4.1 Powering On/Off
- Plug the power cord into a suitable electrical outlet.
- Press the power button located on the handle of the main unit to turn the vacuum cleaner on.
- Press the power button again to turn the vacuum cleaner off.
4.2 Suction Modes
The vacuum cleaner is equipped with two gear suction modes:
- Standard Gear: Ideal for daily cleaning and light debris.
- High Gear: Provides stronger suction for deep cleaning and stubborn dirt.
Switch between modes using the designated button on the main unit.
4.3 Using Different Brush Heads
- Slim Floor Brush: Suitable for marble, tile, and wooden floors. Its flexible design allows for easy maneuverability under furniture.
- Flat Suction Nozzle: Excellent for sweeping away long-standing dust in narrow gaps, corners, and crevices.
- Brush Suction Head: Designed for cleaning delicate surfaces, upholstery, and keyboard gaps.

Image: Demonstrates the Deerma DX1000 being used in both upright and handheld configurations, showcasing its versatility for different cleaning tasks and postures.

Image: Illustrates the two suction gears (Standard and High) and the three main brush heads: Slim Floor Brush, Flat Suction Nozzle, and Brush Suction Head, with examples of their use.
5. Maintenance
Regular maintenance ensures optimal performance and extends the lifespan of your Deerma DX1000 vacuum cleaner.
5.1 Emptying the Dust Cup
- The 0.6L independent dust cup should be emptied regularly, especially when the dust level reaches the MAX line.
- To empty, twist the dust cup to detach it from the main unit.
- Carefully dispose of the collected dust and debris into a waste bin.
5.2 Cleaning the Filter
- The Deerma DX1000 features a triple filtration system, including a washable HEPA filter.
- After emptying the dust cup, remove the filter components.
- Rinse the filter under running water until clean. Do not use detergents.
- Allow the filter to air dry completely for at least 24 hours before reassembling. Ensure it is completely dry to prevent damage to the motor.
5.3 General Cleaning
- Wipe the exterior of the vacuum cleaner with a soft, damp cloth. Do not use abrasive cleaners or solvents.
- Check the brush heads for any tangled hair or debris and remove them as necessary.
- Ensure the air ducts are unobstructed for efficient suction.
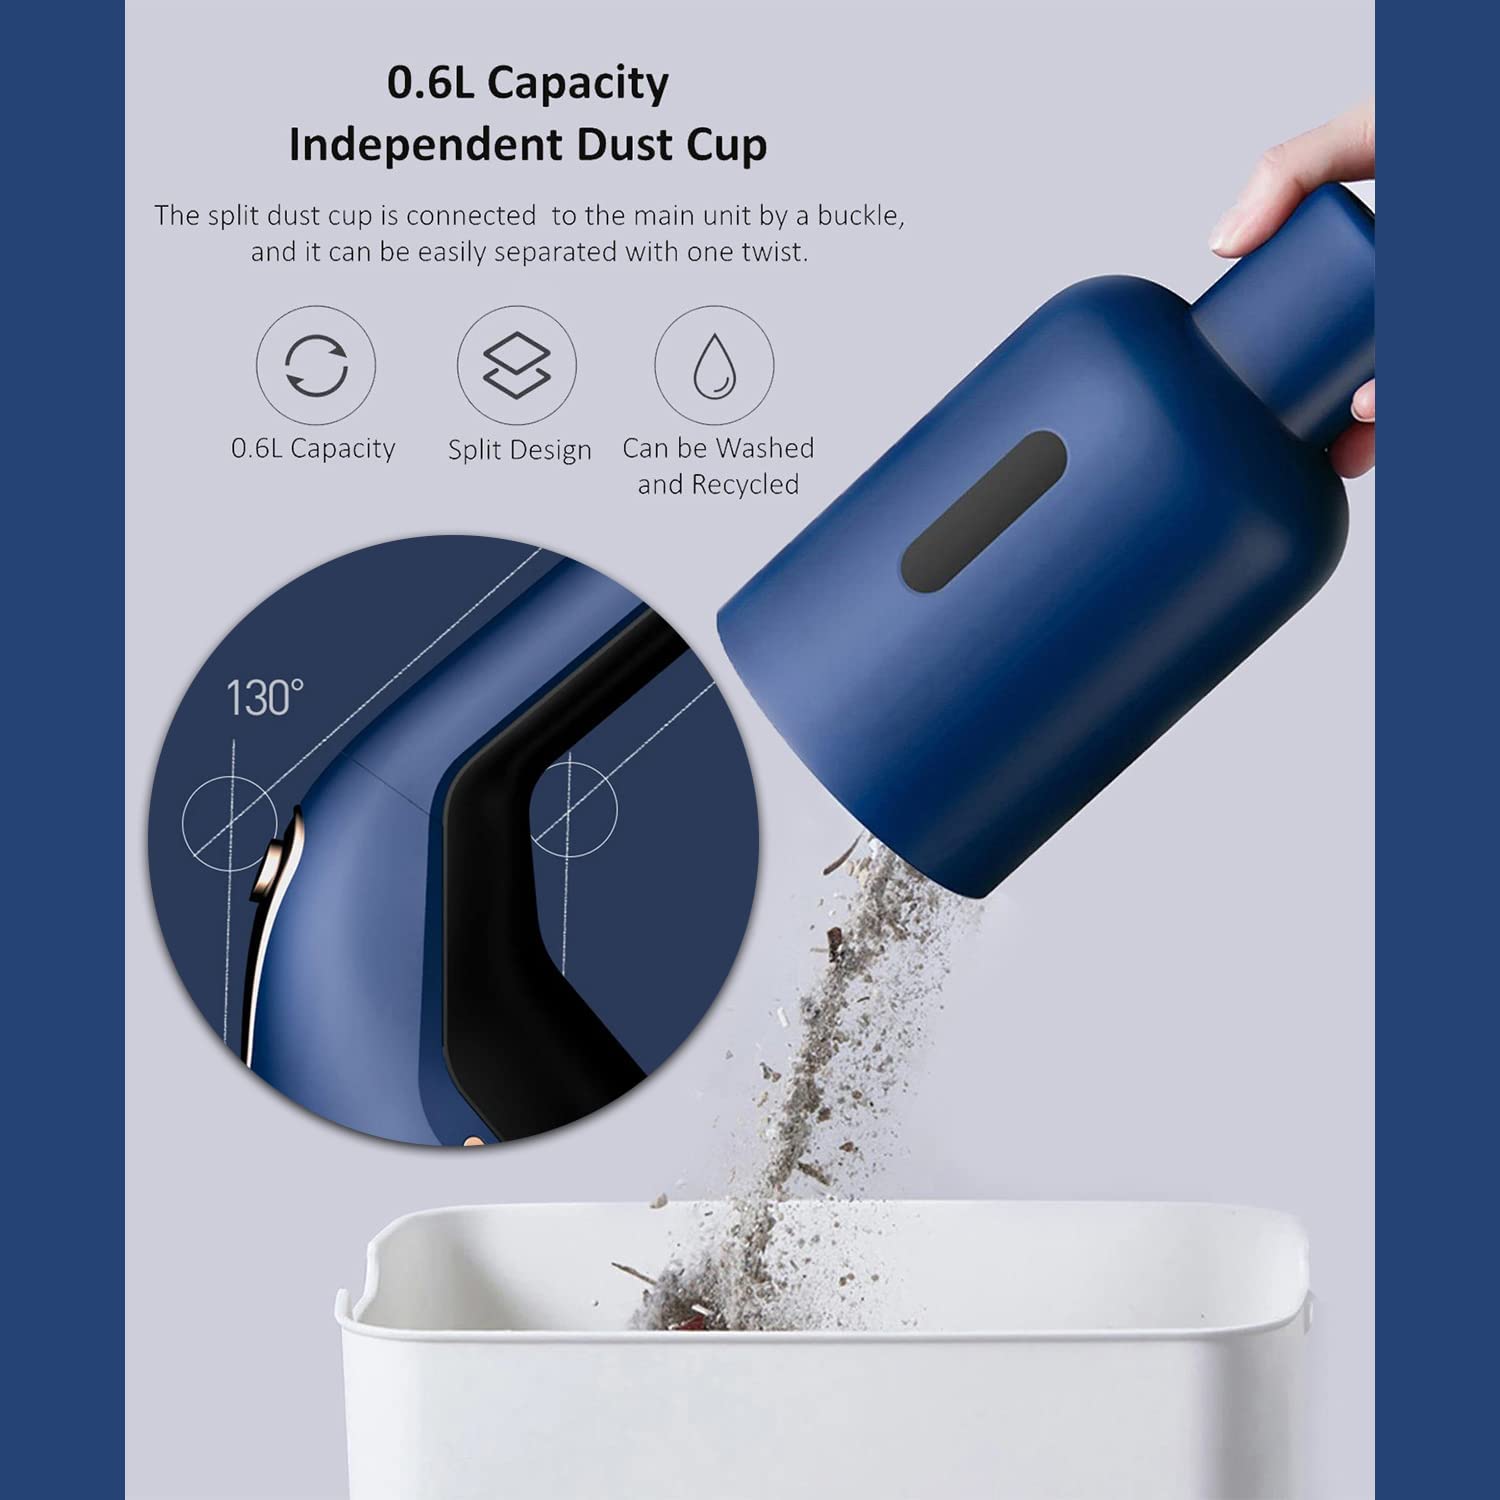
Image: A close-up view demonstrating how to detach and empty the 0.6L capacity dust cup, showing dust being poured into a waste bin.
6. Troubleshooting
If you encounter issues with your Deerma DX1000, please refer to the following common problems and solutions:
| Problem | Possible Cause | Solution |
|---|---|---|
| Vacuum cleaner does not turn on. | Not plugged in; Power outlet fault; Power button not pressed. | Ensure power cord is securely plugged in. Test the outlet with another appliance. Press the power button firmly. |
| Reduced suction power. | Dust cup full; Filter clogged; Nozzle/tube blocked. | Empty the dust cup. Clean or replace the filter. Check and clear any blockages in the nozzle, extension tube, or main unit. |
| Unusual noise during operation. | Blockage in brush head or tube; Loose component. | Turn off and unplug the vacuum. Check for and remove any foreign objects. Ensure all components are securely assembled. |
| Dust escaping from vacuum. | Dust cup not properly sealed; Filter not installed correctly or damaged. | Ensure the dust cup is securely attached. Reinstall the filter correctly or replace if damaged. |
7. Specifications
| Feature | Detail |
|---|---|
| Brand | Deerma |
| Model Name | DX1000 |
| Special Feature | Lightweight, 2-in-1 Design |
| Filter Type | Cartridge (Triple Filter, Washable HEPA) |
| Included Components | 1 x Vacuum Cleaner Main Unit, Extension Tube, Floor Brush, Flat Suction Nozzle, Brush Suction Head |
| Cordless? | No (Corded) |
| Dust Cup Capacity | 0.6 Liters |
| Wattage | 600 Watts |
| Recommended Use | Indoor |
| Form Factor | Handheld, Upright |
| Colour | Blue |
| Product Dimensions | 62L x 18W x 18H Centimeters |
| Noise Level | 80 dB |
| Motor Horsepower | 2.5 Horsepower |
| Controller Type | Push Button |
8. Warranty and Support
For warranty information and customer support, please contact the authorized importer in your region.
Importer Details:
ALLIN IMPEX SERVICES PVT LTD
C-38, SECTOR-63, NOIDA, UP, 201301, India
Mobile: 9313132789
Email: sales@allinexporters.com
Please retain your purchase receipt as proof of purchase for any warranty claims.
Related documentsDX1000


Ask a question about this manual
Ask about setup, troubleshooting, compatibility, parts, safety, or missing instructions. Manuals+ will review the question and use this page’s manual context to help answer it.