
1. Safety Instructions
Please read all safety instructions carefully before operating the ultrasonic cleaner. Failure to follow these instructions may result in electric shock, fire, or serious injury.
- Always ensure the unit is placed on a stable, level surface to prevent tipping.
- Do not operate the unit without liquid in the tank, as this can damage the ultrasonic transducers.
- Ensure the power cord is securely plugged into a grounded outlet. Do not use extension cords or adapters.
- Keep the unit away from water splashes or wet hands to avoid electric shock.
- Do not immerse the main body of the cleaner in water or other liquids.
- Always unplug the unit from the power outlet before cleaning, filling, or draining.
- Allow the unit to cool down before handling or storing, especially after using the heating function.
- Keep out of reach of children and pets.
- Use appropriate cleaning solutions. Avoid flammable, corrosive, or abrasive chemicals.
- Do not touch the tank or solution when the heating function is active, as temperatures can reach up to 80°C.
2. Product Overview
The CREWORKS 30L Industrial Ultrasonic Cleaner is designed for efficient and thorough cleaning of various items using high-frequency sound waves. It features a durable stainless steel construction and precise controls for temperature and time.
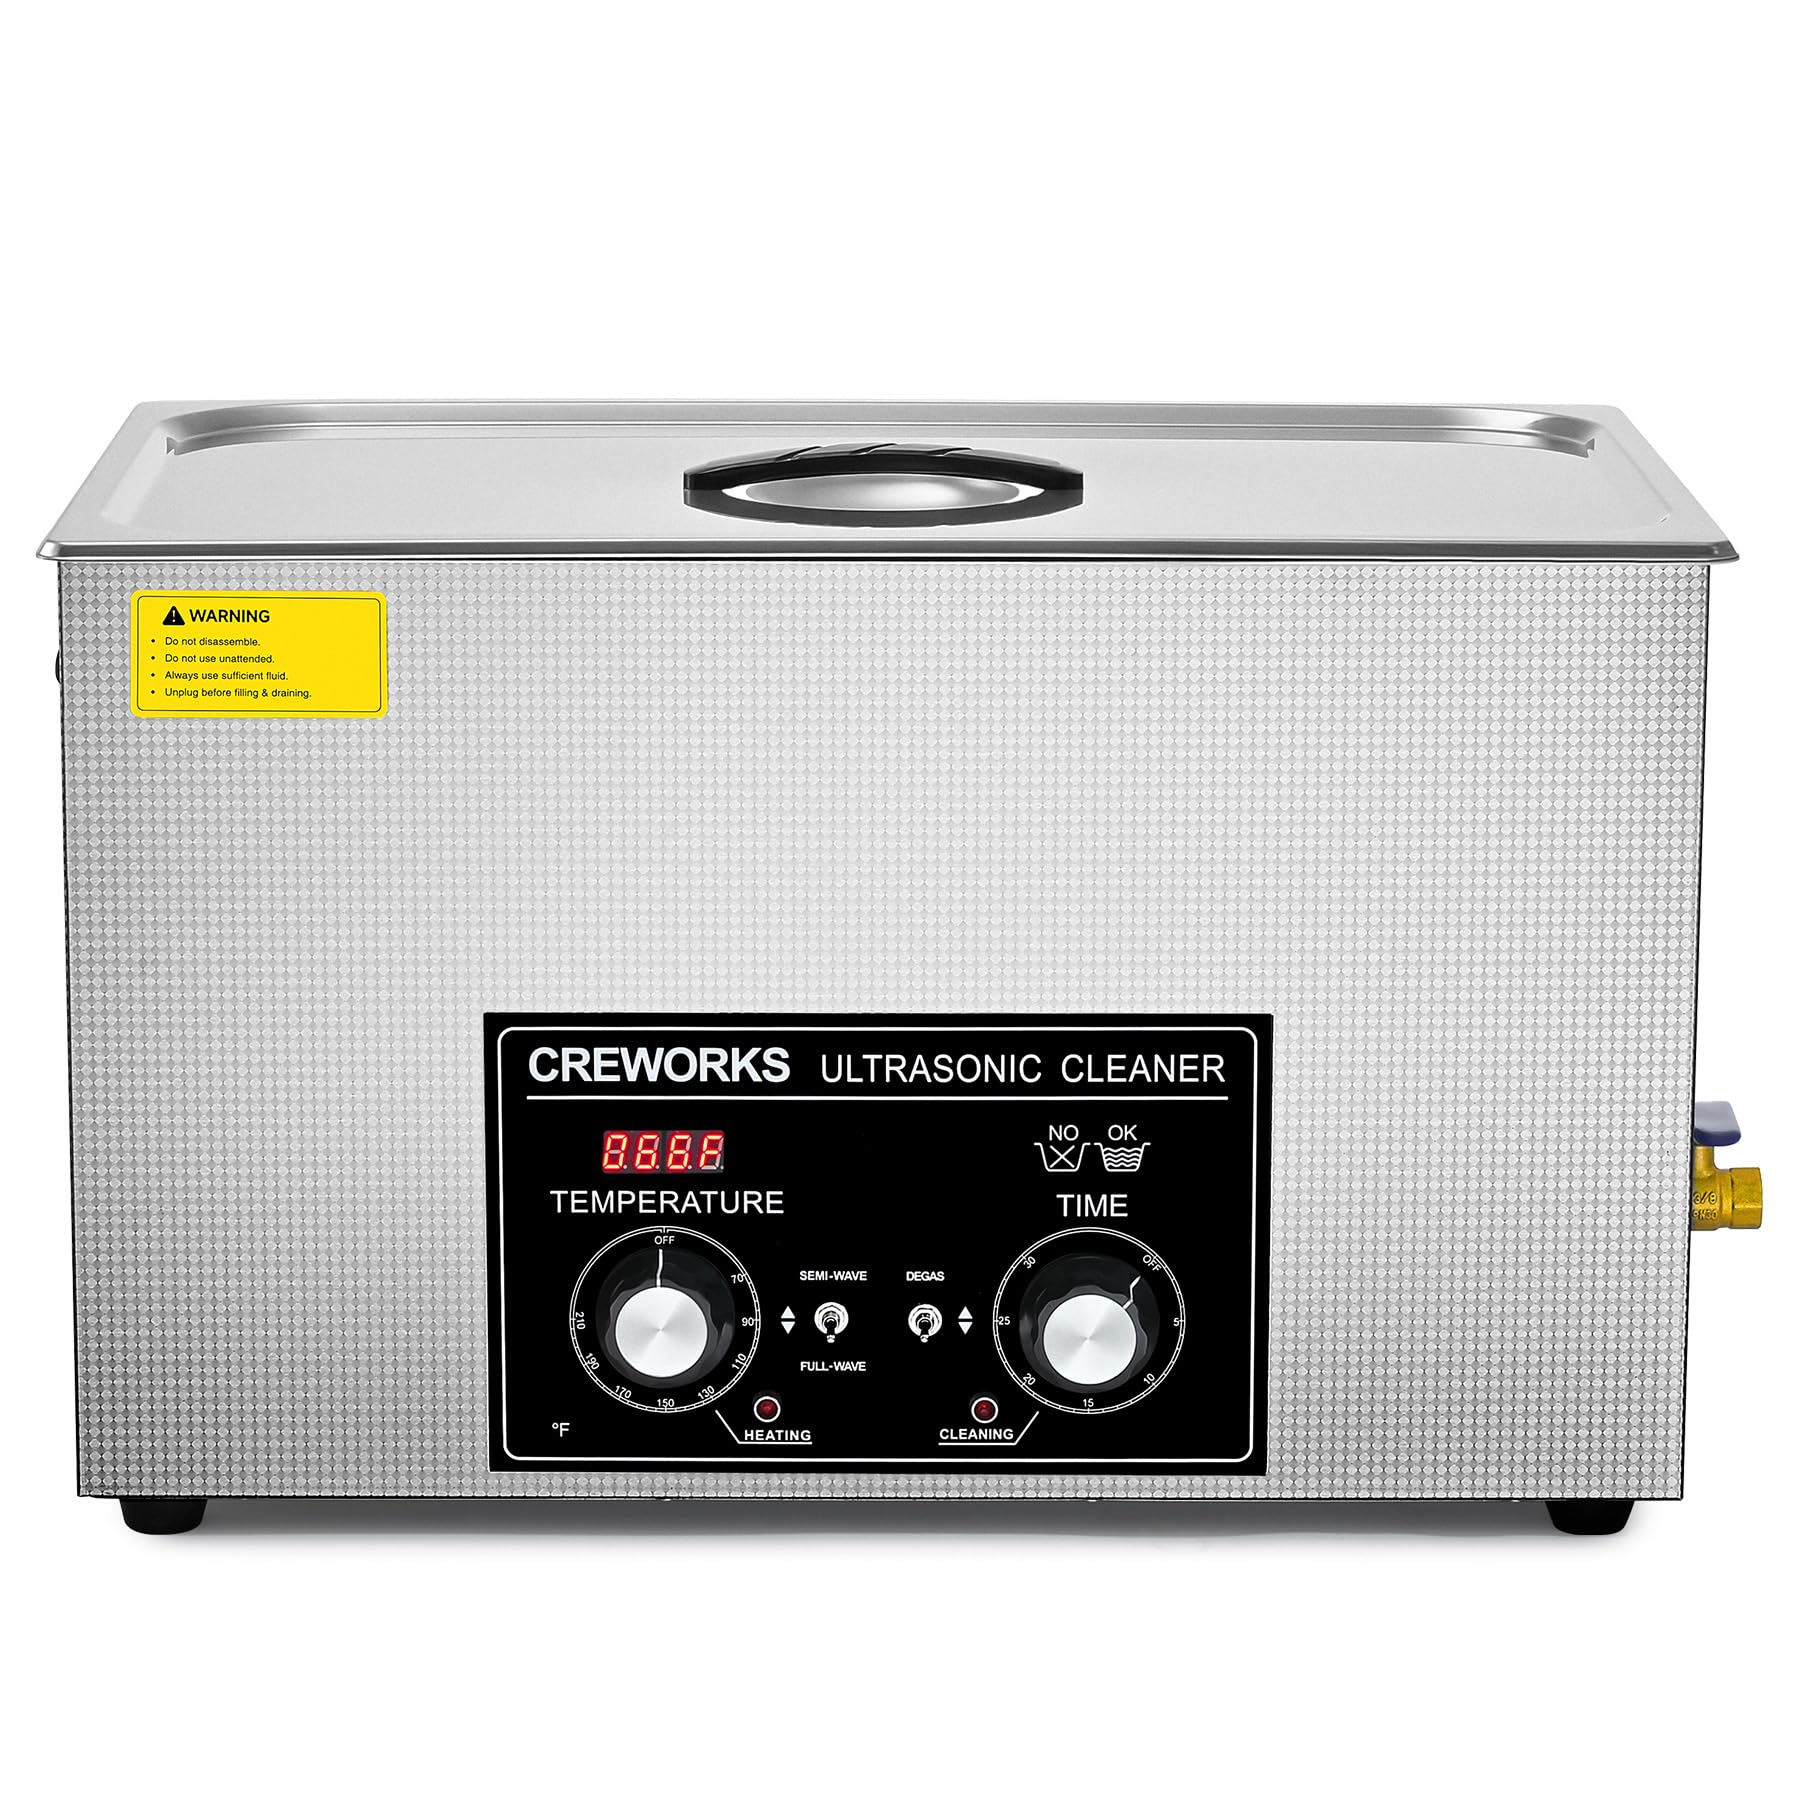
Figure 2.1: Overview of the CREWORKS 30L Industrial Ultrasonic Cleaner.
Key Components:
- Stainless Steel Tank: 30-liter capacity, constructed from durable 304 stainless steel for longevity and resistance to cleaning solutions.
- Control Panel: Features rotary knobs for precise temperature and time settings, along with indicator lights for heating and cleaning status.
- Ultrasonic Transducers: Multiple transducers (10 units) generate 40kHz ultrasonic waves for powerful cavitation.
- Heating Element: Integrated 600W heater allows for adjustable liquid temperatures from 20°C to 80°C.
- Drain Valve: Conveniently located for easy draining of the tank.
- Cleaning Basket: A stainless steel mesh basket is included to hold items during cleaning and protect the tank.
- Lid: Stainless steel lid helps contain heat and reduce noise during operation.

Figure 2.2: Close-up of the control panel with temperature and timer knobs.
3. Setup
3.1 Unpacking
- Carefully remove the ultrasonic cleaner and all accessories from the packaging.
- Inspect the unit for any signs of damage during transit. If damaged, do not operate and contact customer support.
- Retain the original packaging for future storage or transport.
3.2 Placement
- Place the unit on a firm, level, and dry surface capable of supporting its weight when filled.
- Ensure adequate ventilation around the unit.
- Keep the unit away from direct sunlight, heat sources, and areas with high humidity.
3.3 Filling the Tank
- Ensure the drain valve is closed.
- Fill the stainless steel tank with water or an appropriate ultrasonic cleaning solution.
- The liquid level should be between the 'MIN' and 'MAX' marks inside the tank. Do not overfill or underfill.

Figure 3.1: Filling the tank with cleaning solution.
4. Operating Instructions
4.1 Basic Cleaning Procedure
- After filling the tank (Section 3.3), plug the power cord into a grounded electrical outlet.
- Place the items to be cleaned into the cleaning basket. Ensure items are not directly touching the bottom of the tank.

Figure 4.1: Items placed in the cleaning basket.
- Lower the basket into the tank. Ensure the items are fully submerged in the cleaning solution.
- Set Temperature: Turn the 'TEMPERATURE' knob to select the desired cleaning temperature between 20°C and 80°C. The 'HEATING' indicator light will illuminate.
- Set Timer: Turn the 'TIME' knob to select the desired cleaning duration, from 1 to 30 minutes.
- Press the 'ON/OFF' button to start the ultrasonic cleaning process. The 'CLEANING' indicator light will illuminate.
- Once the set time expires, the unit will automatically stop. Carefully remove the basket and rinse the cleaned items with clean water.
- Unplug the unit after use.
4.2 Degas Mode
The Degas mode helps to remove dissolved gases from the cleaning solution. This improves the efficiency of ultrasonic cavitation and prevents oxidation of cleaned items. To activate, press the 'DEGAS' button. This mode is typically used for a few minutes at the beginning of a cleaning cycle, especially with fresh solution.
4.3 Gentle Mode
The Gentle mode reduces the intensity of the ultrasonic cleaning, making it suitable for delicate items that might be damaged by full-power cavitation. To activate, press the 'GENTLE' button. This mode is ideal for jewelry with soft stones, antique items, or sensitive electronic components.

Figure 4.2: Degas and Gentle cleaning modes explained.
5. Maintenance
5.1 Draining the Tank
- After each use, or when the cleaning solution is dirty, unplug the unit.
- Place a suitable container under the drain valve.
- Open the drain valve to empty the tank.
- Close the drain valve once the tank is empty.

Figure 5.1: Drain valve for easy liquid removal.
5.2 Cleaning the Unit
- Wipe the exterior of the unit with a soft, damp cloth. Do not use abrasive cleaners or immerse the unit in water.
- Clean the inside of the tank with a soft cloth and mild detergent. Rinse thoroughly and dry completely before next use or storage.
- Regularly check the power cord for any damage.
5.3 Storage
- Store the unit in a cool, dry place, away from direct sunlight and extreme temperatures.
- Ensure the tank is empty and dry before storage.
6. Troubleshooting
| Problem | Possible Cause | Solution |
|---|---|---|
| Unit does not power on | No power supply Power cord not connected Blown fuse | Check power outlet Ensure power cord is securely plugged in Check and replace fuse if necessary |
| No ultrasonic action | Insufficient liquid in tank Timer not set Unit not started | Fill tank to appropriate level Set the timer Press the 'ON/OFF' button |
| Poor cleaning results | Incorrect cleaning solution Insufficient cleaning time Low temperature Items too crowded Solution needs degas | Use appropriate ultrasonic cleaning solution Increase cleaning time Increase temperature (up to 80°C) Clean items in smaller batches Run Degas mode for a few minutes |
| Heating not working | Temperature not set Heating element malfunction | Set desired temperature Contact customer support |
7. Specifications
| Feature | Specification |
|---|---|
| Model | 30L 600W |
| Brand | CREWORKS |
| Tank Volume | 30 Liters |
| Ultrasonic Power | 600W |
| Heating Power | 600W |
| Ultrasonic Frequency | 40 kHz |
| Number of Transducers | 10 |
| Timer Setting | 1-30 minutes |
| Temperature Setting | 20-80°C |
| Tank Material | 304 Stainless Steel |
| Exterior Material | 201 Stainless Steel |
| Tank Dimensions (L x W x H) | 48.8 x 28.8 x 20 cm |
| Overall Dimensions (L x W x H) | 52 x 32.5 x 32.5 cm |

Figure 7.1: Product dimensions and tank capacity.
8. Warranty and Support
This CREWORKS product is covered by a manufacturer's warranty. For specific warranty terms and conditions, please refer to the documentation included with your purchase or contact CREWORKS customer support.
If you encounter any issues or have questions regarding the operation, maintenance, or troubleshooting of your ultrasonic cleaner, please contact our customer support team for assistance. Our dedicated team is available to help you.


