
ThermoPro IC369-BL-2
ThermoPro TM02 Digital Kitchen Timer Instruction Manual
Model: IC369-BL-2 | Brand: ThermoPro
Introduction
The ThermoPro TM02 Digital Kitchen Timer is designed for precise time management in various settings, including cooking, baking, studying, and general household tasks. It features a unique dual countdown/count-up function, a large backlit LCD display for easy readability, adjustable alarm volume, and versatile placement options.
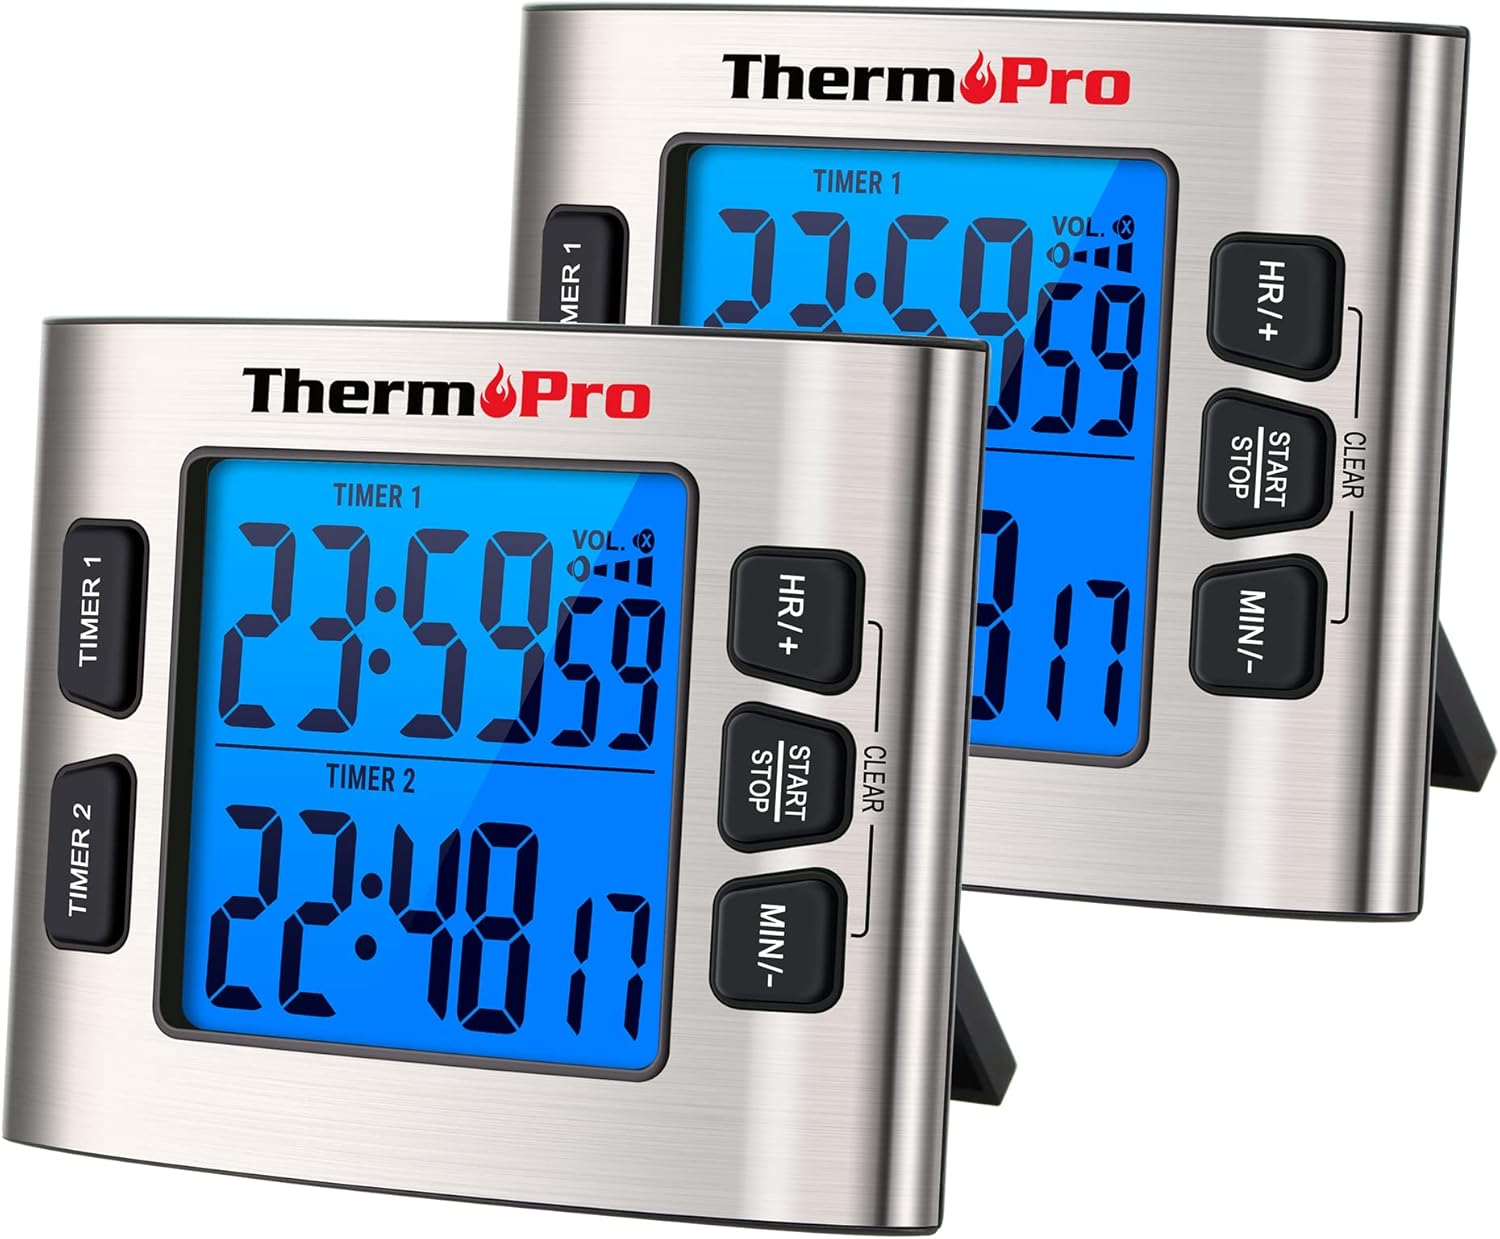
Figure 1: Two ThermoPro TM02 Digital Kitchen Timers. Each timer features a large backlit display, dual timer functionality, and control buttons for setting hours, minutes, and starting/stopping the timer. The timers are shown with their integrated stands extended.
Setup
Battery Installation
The ThermoPro TM02 timer requires batteries for operation. Locate the battery compartment on the back of the unit. Insert the required batteries, ensuring correct polarity (+/-) as indicated inside the compartment. Close the battery compartment securely.
Placement Options
The timer offers multiple placement options for convenience:
- Magnetic Backing: The timer features strong embedded magnets with anti-slip pads, allowing it to be securely attached to metallic surfaces such as refrigerators or oven doors without scratching.
- Tabletop Stand: An integrated foldable stand on the back of the unit allows the timer to be placed upright on any flat surface, such as a kitchen counter or desk.

Figure 2: The ThermoPro TM02 timer demonstrating its magnetic attachment to a refrigerator and its use with the tabletop stand on a counter.
Operating Instructions
Overview of Controls
The ThermoPro TM02 timer features a clear LCD display and intuitive buttons for operation:
- TIMER 1 / TIMER 2 Buttons: Selects which of the two independent timers to set or view.
- HR/+ Button: Adjusts hours or increases value.
- MIN/- Button: Adjusts minutes or decreases value.
- START/STOP Button: Starts or stops the selected timer. Also used to clear the timer.
- VOL. Button: Adjusts alarm volume.
- CLOCK/TIMER Switch: Located on the side/back, switches between Timer mode and Clock mode.
Setting and Using the Timers (Countdown/Count-Up)
The TM02 features two independent timers, Timer 1 and Timer 2, which can operate simultaneously as countdown or count-up timers.
- Switch to Timer Mode: Ensure the CLOCK/TIMER switch on the side/back of the unit is set to "TIMER".
- Select a Timer: Press the TIMER 1 or TIMER 2 button to select the desired timer. The selected timer's display will become active.
- Set Countdown Time:
- Press HR/+ to set the hours.
- Press MIN/- to set the minutes.
- To clear the set time, press and hold the START/STOP button.
- Start Timer: Press the START/STOP button to begin the countdown. The timer will beep and flash when it reaches zero.
- Count-Up Function: If you press START/STOP without setting a time, the timer will begin counting up from 00:00.
- Pause/Resume: Press START/STOP during operation to pause the timer. Press again to resume.
- Stop Alarm: When the alarm sounds, press any button to stop it. The timer will automatically reset to the last set time for quick re-use.

Figure 3: The dual timer functionality of the ThermoPro TM02, illustrating simultaneous count-up and countdown operations for different tasks.

Figure 4: Step-by-step guide for setting and starting the timers, including switching to timer mode and clearing the display.
Adjusting Alarm Volume
The TM02 offers four volume modes to suit different environments:
- High: For noisy environments like a busy kitchen.
- Medium: Standard volume for general use.
- Low: For quiet settings.
- Silent: The alarm will not sound, but the digits on the display will flash to indicate time is up. Ideal for studying or meetings.
Press the VOL. button repeatedly to cycle through the volume modes.

Figure 5: Illustration of the volume control feature, showing the timer's adaptability for both loud and silent environments.
Using Calendar Clock Mode
The TM02 can also function as a calendar clock, displaying the current time, month, date, and year.
- Switch to Clock Mode: Ensure the CLOCK/TIMER switch on the side/back of the unit is set to "CLOCK".
- Set Time and Date:
- In Clock mode, press and hold the START/STOP button to enter setting mode.
- Use HR/+ and MIN/- to adjust the values (Year, Month, Date, Hour, Minute).
- Press START/STOP to confirm each setting and move to the next.
- To switch between 12-hour and 24-hour format, short press START/STOP when setting the hour.
- Exit Setting Mode: The timer will automatically exit setting mode after a few seconds of inactivity, or you can press the CLOCK/TIMER switch to "TIMER" and then back to "CLOCK".

Figure 6: The ThermoPro TM02 operating in Calendar Clock Mode, showing the display of time and date information.
Maintenance
Cleaning
To clean the ThermoPro TM02 timer, wipe it with a soft, damp cloth. Do not immerse the unit in water or use abrasive cleaners, as this can damage the electronic components and the stainless steel casing.
Battery Replacement
When the display dims or the timer functions become erratic, it is time to replace the batteries. Follow the battery installation steps outlined in the Setup section.
Storage
Store the timer in a cool, dry place when not in use for extended periods. Remove batteries if storing for several months to prevent leakage.

Figure 7: The durable stainless steel casing of the ThermoPro TM02, designed for longevity and easy cleaning.
Troubleshooting
| Problem | Possible Cause | Solution |
|---|---|---|
| Display is dim or blank. | Low or dead batteries. | Replace batteries with new ones, ensuring correct polarity. |
| Alarm is not sounding. | Timer is in Silent mode. | Press the VOL. button to cycle through volume modes until an audible level is selected. Check for flashing digits. |
| Timer not responding to button presses. | Unit may be frozen or batteries are critically low. | Remove and reinsert batteries to reset the unit. If issue persists, replace batteries. |
| Magnetic backing not holding securely. | Surface is not metallic or is uneven. | Ensure the surface is flat and made of a magnetic material. Use the tabletop stand if magnetic attachment is not feasible. |
Specifications
- Model: IC369-BL-2
- Material: Stainless Steel
- Color: Silver
- Screen Size: 2.6 Inches
- Item Weight: 0.26 Kilograms (9.2 ounces)
- Package Dimensions: 4.45 x 3.5 x 2.28 inches
- Number of Timers: 2
- Timer Range: Up to 23 hours, 59 minutes, 59 seconds (for countdown/count-up)
- Alarm Volume Modes: High, Medium, Low, Silent
- Power Source: Batteries (type not specified in input)
- Features: Dual Timer, Countdown/Count-up, Calendar Clock Mode, Backlit LCD, Magnetic Backing, Tabletop Stand
Warranty and Support
For warranty information, product registration, or technical support, please visit the official ThermoPro website or contact their customer service. Details are typically provided in the product packaging or on the manufacturer's website.
Official ThermoPro Store: Visit ThermoPro Store on Amazon
Related documentsIC369-BL-2


Ask a question about this manual
Ask about setup, troubleshooting, compatibility, parts, safety, or missing instructions. Manuals+ will review the question and use this page’s manual context to help answer it.