1. Introduction
This manual provides comprehensive instructions for the setup, operation, and maintenance of your NADAMOO Wireless 1D Barcode Scanner, Model Bur3003. This device is designed for efficient and reliable barcode scanning in various environments such as retail, supermarkets, and warehouses.
The scanner features long-distance wireless transmission, a high-capacity battery, and multiple operating modes to enhance productivity.
2. Product Overview
2.1 Components
- NADAMOO Wireless Barcode Scanner
- USB Receiver
- USB Charging Cable
2.2 Key Features
- Long Distance Wireless Transmission: Achieves up to 400m (437 yd) in open air and 100m (328 ft) indoors.
- High Capacity Battery: Equipped with a 2600mAh battery, providing approximately 30 days of continuous scanning (2000 barcodes/day) on a full charge.
- Two Pairing Modes:
- One-to-One Mode: One scanner transmits to one USB receiver. Multiple units can operate independently in the same area.
- Multiple-to-One Mode: Up to 32 scanners can transmit to a single USB receiver, suitable for environments where multiple users scan to one computer.
- Two Working Modes:
- Instant Upload Mode: Barcodes are uploaded synchronously to your device immediately after scanning.
- Storage Mode: Barcodes are stored in the scanner's internal memory (up to 100,000 codes) and can be uploaded later when within range of the receiver.
- Two Scanning Modes:
- Key Trigger Mode: Scan by pressing the trigger button.
- Automatic Mode: Continuous scanning without pressing the trigger.
- Connectivity: Supports both wireless connection via USB dongle and wired connection via USB cable.
- Compatibility: Works with Windows, Mac OS, and Linux operating systems. Requires an USB port.
- Adjustable Settings: Includes adjustable beep volume, scanning speed, and intelligent data editing features (prefix/suffix, character deletion).

Image 2.1: The NADAMOO Wireless Barcode Scanner with its USB receiver.
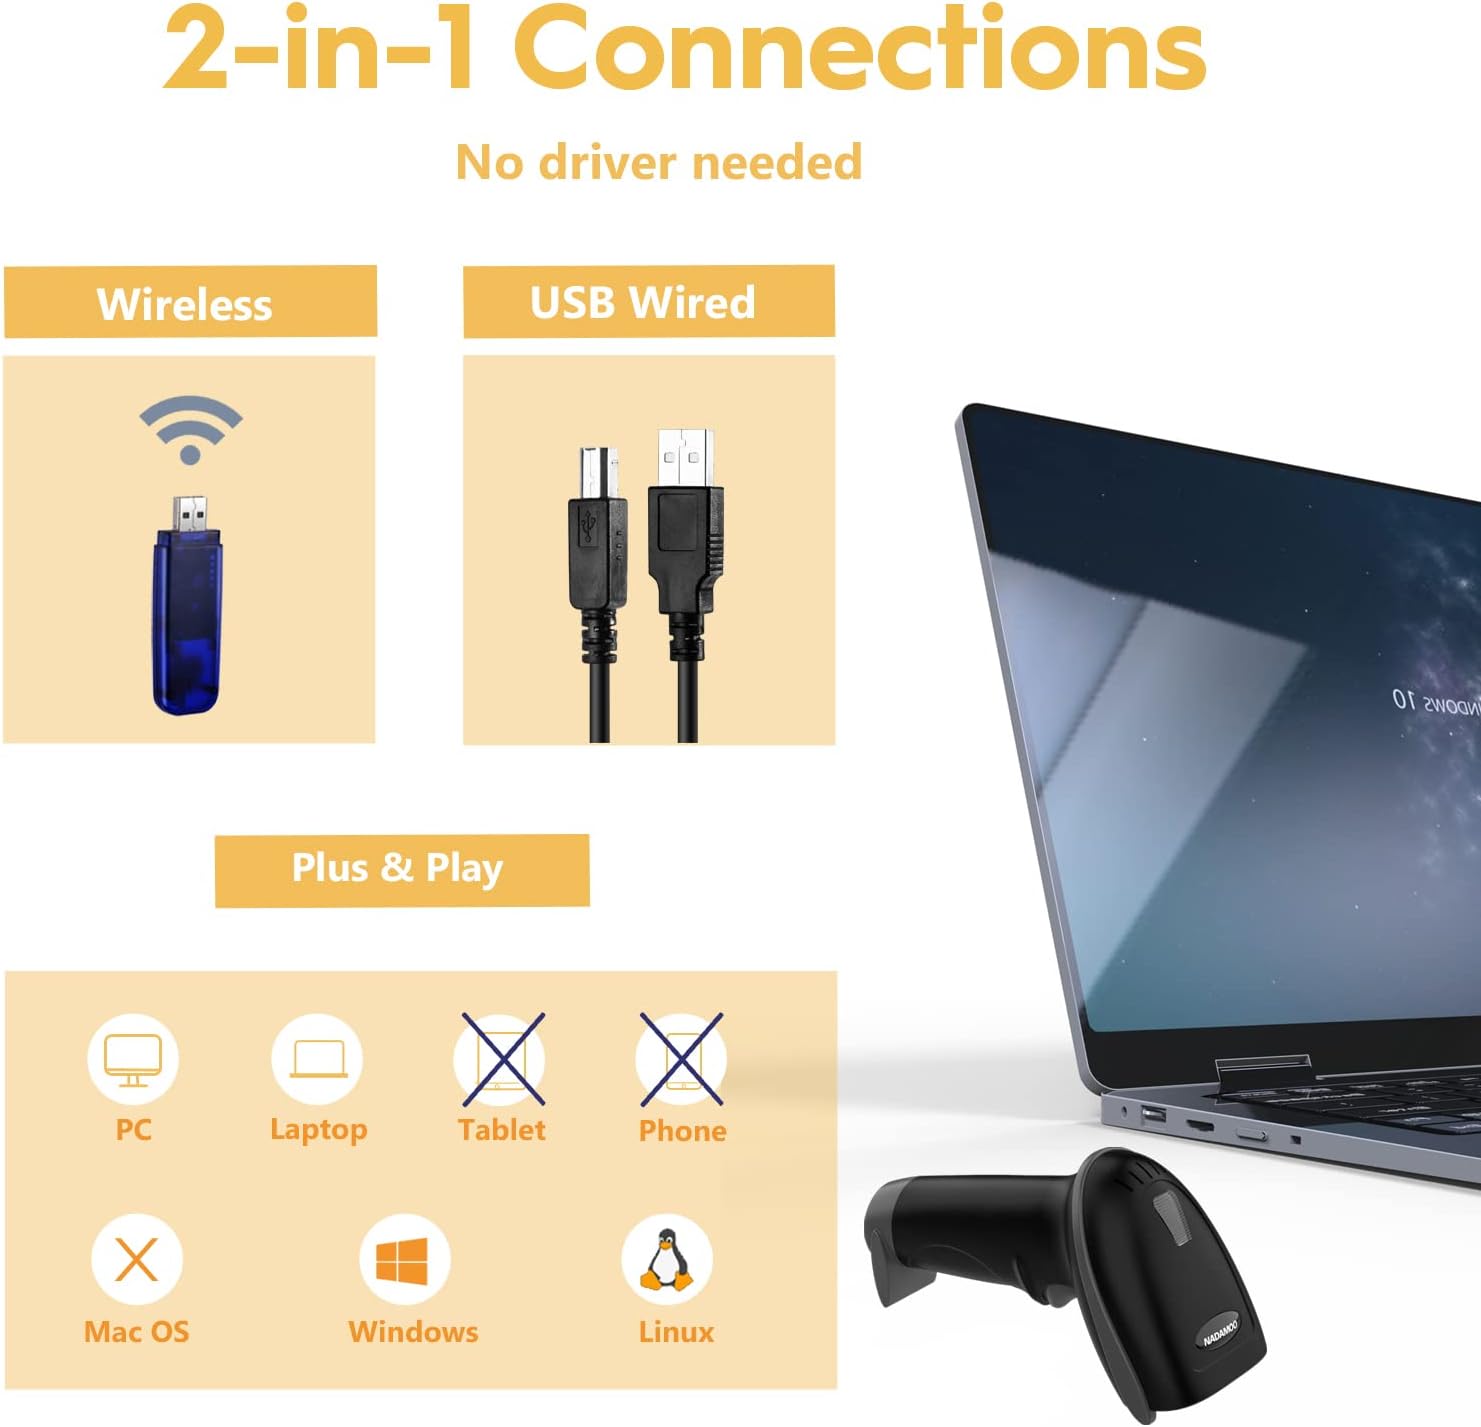
Image 2.2: Illustration of the scanner's 2-in-1 connection options (wireless and wired) and operating system compatibility.

Image 2.3: Visual representation of the scanner's long transmission range under different environmental conditions.
3. Setup Instructions
3.1 Initial Charging
Before first use, ensure the scanner has sufficient power. The red indicator light on top of the scanner will flash three times if the power is below 30%. Please charge the scanner immediately.
- Connect the scanner to a USB power source using the provided USB charging cable.
- During charging, the red indicator light will flash continuously.
- The light will turn off when the scanner is fully charged.
3.2 Connecting and Pairing the Scanner
- Plug the USB receiver into an available USB port on your computer.
- Within 30 seconds of plugging in the receiver, scan the following configuration barcodes in order:
1. Restore Default:
2. Match:
3. Instant Upload Mode:
4. USB HID:Image 3.1: Barcodes for initial setup and pairing. Scan these in sequence.
- Open a text editor (e.g., Notepad, Word) on your computer, place the cursor, and scan any barcode to test if the scanner is working correctly.
NOTE:
- If the pairing fails after 30 seconds, unplug the USB receiver, plug it back in, and then scan the "Match" barcode again.
- If you hear a "di-en" sound, it indicates a pairing issue.
Image 3.2: Visual guide for connecting the receiver and scanning initial setup codes.
4. Operating Instructions
4.1 Scanning Barcodes
Point the scanner's laser at the barcode you wish to scan. Depending on your configured scanning mode:
- Key Trigger Mode: Press the trigger button to activate the laser and scan the barcode.
- Automatic Mode: The scanner will continuously emit a laser and scan barcodes automatically when detected.
4.2 Working Modes
The scanner supports two primary working modes:
- Instant Upload Mode: Scanned data is immediately transmitted to the connected device. This is the default mode after initial setup.
- Storage Mode: Scanned data is saved internally. To upload stored data, scan the appropriate command barcode (refer to the full user manual for specific barcodes).

Image 4.1: Explanation of Instant Upload and Storage modes.
4.3 Advanced Settings
The scanner offers various configurable options by scanning specific command barcodes found in the comprehensive user manual:
- Adjustable Beep: Change the volume of the scan confirmation beep (High, Medium, Low, Off).
- Adjustable Speed: Configure the scanning speed.
- Intelligent Data Editing: Add prefixes/suffixes, delete characters, or embed characters based on barcode type or location.
- Language Support: Supports 25 languages for keyboard output.

Image 4.2: Intelligent data editing capabilities.

Image 4.3: Adjustable scanning speed feature.
Image 4.4: Adjustable beep volume settings.
5. Maintenance
5.1 Battery Management
- Charge the scanner using the provided USB cable when the low battery indicator appears.
- A full charge typically takes 4 to 5 hours.
- Avoid completely draining the battery frequently to prolong its lifespan.

Image 5.1: Battery capacity and typical usage duration.
5.2 General Care
- Keep the scanner clean by wiping it with a soft, dry cloth.
- Avoid exposing the scanner to extreme temperatures, moisture, or direct sunlight.
- Do not drop the scanner or subject it to strong impacts.
6. Troubleshooting
6.1 Barcode Reading Issues
- Incorrect Barcode Output: If the scanner reads a barcode incorrectly (e.g., missing digits, extra characters), refer to the full user manual for specific configuration barcodes to adjust settings like "UPC/EAN extra code-ON" or "Code 39 FULL ASCII-ON".
- Unreadable Barcodes:
- The scanner is designed for 1D linear barcodes and is not suitable for 2D codes (e.g., QR Code, DataMatrix, PDF417, Aztec).
- Ensure barcodes are clearly printed without skipping lines or burned-out pixels.
- Observe "Quiet Zones" (clear space around the barcode). Insufficient quiet zones can prevent scanning.
- Some barcodes include check digits. If your scanner is configured to expect a check digit and the barcode lacks one, it may fail to scan.
- Certain barcode types may require activation via specific command barcodes in the manual.
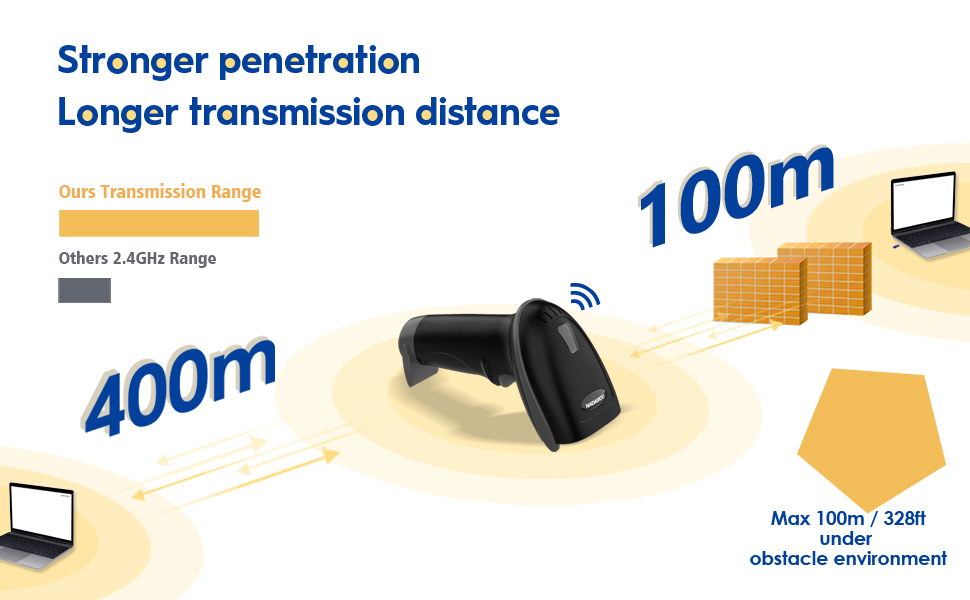
Image 6.1: Solutions for common barcode reading inaccuracies.

Image 6.2: Reasons why certain barcodes may not be scannable.
6.2 Software Compatibility
- Square POS: The scanner is not fully compatible with Square POS. While it can scan item barcodes into the search box, you may need to manually select the item to add it to the bill.
- Inventory Software: The scanner functions like a keyboard. It does not interpret barcode data but transmits it. For integration with inventory software, you may need to configure the software to interpret the scanner's output or use an internal inventory system to assign scanned barcodes to specific products.
7. Specifications
| Feature | Specification |
|---|---|
| Brand | NADAMOO |
| Model Number | Bur3003 |
| Item Weight | 10.8 ounces |
| Package Dimensions | 7.01 x 4.21 x 3.39 inches |
| Batteries | 1 Lithium Ion battery (included) |
| Color | Black |
| Compatible Devices | Desktop, Laptop |
| Power Source | Battery Powered, Corded Electric |
| Connectivity Technology | Wireless Transmission Technology |
8. Warranty and Support
For any technical assistance, troubleshooting beyond this manual, or warranty inquiries, please contact NADAMOO Customer Service. Keep your purchase receipt for warranty validation.
Contact information can typically be found on the product packaging or the official NADAMOO website.


