
1. Introduction
The KAIWEETS ST600X is a smart digital multimeter designed for accurate and safe electrical measurements. It features auto-ranging capabilities, a large backlit display, and a robust design for various applications, from household electrical work to automotive diagnostics.
2. Safety Information
Important Safety Precautions:
- This device is IEC CAT IV 600V rated, CE, and RoHS compliant, ensuring high safety standards.
- Always inspect the multimeter and test leads for any damage before use.
- Ensure proper connection of test leads to the correct input jacks for the intended measurement.
- Do not attempt to measure voltages or currents exceeding the specified maximum ratings.
- Avoid using the multimeter in wet conditions or in the presence of explosive gases or dust.
- Refer to the full safety guidelines in the printed manual for detailed information.
3. What's in the Box
Upon opening your KAIWEETS ST600X package, you should find the following items:
- 1x KAIWEETS ST600X Smart Digital Multimeter
- 1x Storage Bag
- 2x Test Leads (Red and Black)
- 1x Thermocouple (for temperature measurement)
- 4 x 1.5V AAA batteries
- 1x Instruction Manual (this document)

Image 3.1: KAIWEETS ST600X Multimeter, storage bag, test leads, and batteries.
4. Product Overview
The KAIWEETS ST600X features a user-friendly design with a large display and intuitive controls. Key components include:
- Large Backlit Display: Provides clear readings in various lighting conditions.
- Function Buttons: Replaces traditional rotary knobs for mode selection.
- Input Jacks: Clearly labeled ports for test lead connection.
- Built-in Flashlight: Assists in dimly lit environments.
- Protective Rubber Case: Enhances durability and provides drop protection.
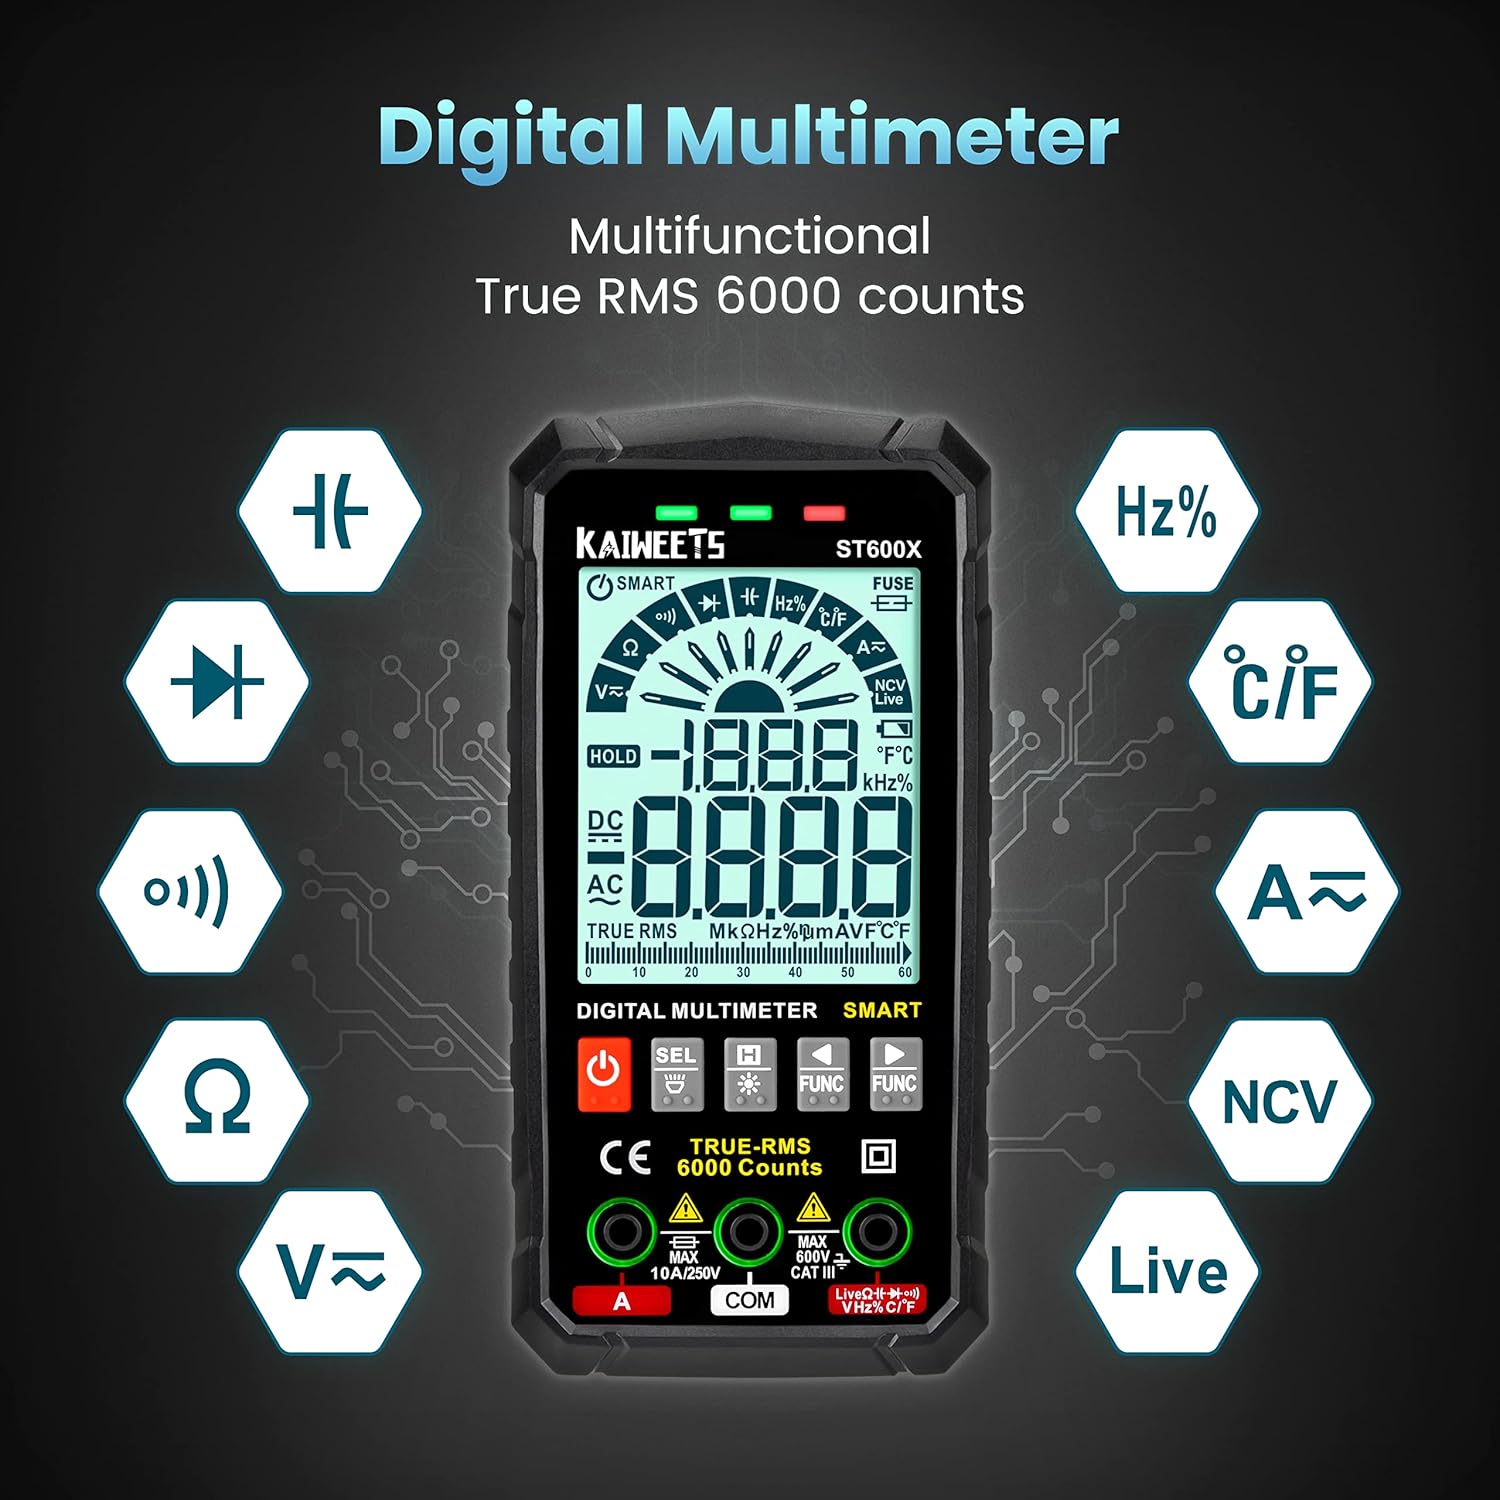
Image 4.1: Overview of the KAIWEETS ST600X Digital Multimeter highlighting its multifunctional capabilities.

Image 4.2: Detailed view of the large backlit display and input jacks for fast measurement.
5. Setup
5.1 Battery Installation
The multimeter requires 4 AAA batteries. To install or replace batteries, locate the battery compartment on the rear of the device. Use a screwdriver to open the compartment, insert the batteries according to the polarity markings, and secure the cover.
5.2 Connecting Test Leads
Connect the red test lead to the "VΩHz" or "A" input jack and the black test lead to the "COM" input jack. Ensure the leads are securely inserted. The multimeter may indicate the correct lead connection for specific functions with a blinking green light.
Video 5.1: This video demonstrates the unboxing, connecting test leads, and initial power-on sequence of the KAIWEETS ST600X multimeter.
6. Operating Modes and Measurements
The KAIWEETS ST600X offers both Smart Mode (Auto-ranging) and Manual Mode for various electrical measurements.
6.1 Smart Mode (Auto-ranging)
In 'Auto' mode, the multimeter automatically detects and responds to common measurements such as DC/AC voltage, resistance, or continuity. Simply attach the probes, and the device will identify the measurement type and display the reading with the best resolution.

Image 6.1: The multimeter displaying "Auto" mode, indicating automatic detection for voltage, resistance, and continuity tests.
6.2 Manual Mode and Function Selection
For specific measurements not automatically detected or to override Smart Mode, you can manually select functions using the "FUNC" buttons. Pressing the "FUNC" buttons allows you to cycle through available measurement types from left to right or right to left.

Image 6.2: Illustration of using the "FUNC" buttons to manually select measurement functions.
6.3 Specific Measurement Procedures
The following procedures demonstrate how to perform various tests using the KAIWEETS ST600X multimeter. Many of these are covered in the video below.
Video 6.3: This video provides a comprehensive demonstration of various measurement functions of the KAIWEETS ST600X, including DC Voltage, Resistance, Continuity, Diode, Capacitance, Live Wire, NCV, and Temperature tests.
6.3.1 DC Voltage Test
To measure DC voltage, ensure the multimeter is in Smart Mode or manually select DC Voltage. Connect the red probe to the positive terminal and the black probe to the negative terminal of the DC source. The display will show the voltage reading.

Image 6.3.1: Measuring the DC voltage of a car battery using the multimeter.
6.3.2 Resistance Test
For resistance measurement, select the resistance function (Ω) or use Smart Mode. Ensure the circuit is de-energized before connecting the probes across the component to be measured. The display will show the resistance in Ohms.
6.3.3 Continuity Test
Select the continuity function (buzzer icon) or use Smart Mode. Place the probes on two points of a circuit. If there is continuity (a complete path), the multimeter will emit an audible beep and display a low resistance value.
6.3.4 Diode Test
Select the diode test function. Connect the red probe to the anode and the black probe to the cathode of the diode. The display will show the forward voltage drop. Reverse the probes to check for open circuit (OL) in the reverse direction.
6.3.5 Capacitance Test
Select the capacitance function. Ensure the capacitor is discharged before testing. Connect the probes across the capacitor terminals. The display will show the capacitance value in Farads.

Image 6.3.5: Performing a capacitance test on a component.
6.3.6 Live Wire Test
Select the Live Wire function. Insert the red probe into the live wire or socket. The multimeter will indicate the presence of live voltage with an audible and visual alert.
6.3.7 Non-Contact Voltage (NCV) Test
Select the NCV function. Hold the top of the multimeter near an AC voltage source without direct contact. The device will detect the electromagnetic field and indicate voltage presence with beeps and visual signals.

Image 6.3.7: Performing a Non-Contact Voltage (NCV) test.
6.3.8 Temperature Test
Connect the thermocouple to the appropriate input jacks and select the temperature function. Place the thermocouple tip on or in the object whose temperature you wish to measure. The display will show the temperature in Celsius or Fahrenheit.

Image 6.3.8: Performing a temperature test using the included thermocouple.
6.3.9 AC/DC Current, Frequency, and Duty-Cycle
The ST600X can measure up to 10A AC/DC current, frequency, and duty-cycle. Refer to the detailed instructions in the full manual for specific connection and measurement procedures for these functions, as they often require breaking the circuit to measure current.
7. Additional Features
7.1 Flashlight and Backlight
The ST600X is equipped with a large backlit display for easy reading in low-light conditions. A small LED flashlight is also integrated on the rear of the device to illuminate the work area. Activate these features using the dedicated buttons.

Image 7.1: The multimeter's flashlight in use, illuminating a dark area.
7.2 Automatic Power Off
To conserve battery life, the multimeter will automatically turn off after approximately 15 minutes of inactivity. This feature helps prevent accidental battery drain.
7.3 Protective Design
The multimeter is encased in a durable rubber case, providing protection against drops and impacts, enhancing its longevity and safety during use.
8. Maintenance
- Cleaning: Use a soft, damp cloth to clean the device. Do not use abrasive cleaners or solvents.
- Battery Replacement: Replace batteries when the low battery indicator appears on the display.
- Fuse Replacement: If the fuse prompt appears, refer to the full manual for instructions on replacing the internal fuse.
- Storage: Store the multimeter in its provided storage bag in a cool, dry place when not in use.
9. Troubleshooting
If you encounter issues with your KAIWEETS ST600X multimeter, consider the following common troubleshooting steps:
- No Display/Power: Check battery installation and ensure batteries are not depleted. Replace if necessary.
- Incorrect Readings: Verify test lead connections are secure and in the correct jacks for the selected function. Ensure the correct measurement mode is selected (Smart Mode or Manual).
- "OL" or "Open Loop" Display: This typically indicates an open circuit (no continuity) or a measurement exceeding the device's range.
- Damaged Fuse Prompt: If the "FUSE" indicator appears, the internal fuse may be blown. Refer to the detailed manual for replacement instructions.
- Inaccurate Readings: While designed for general use, for applications requiring extreme precision, ensure the device is within its operating temperature range and consider professional calibration if critical accuracy is required.
10. Specifications
| Feature | Detail |
|---|---|
| Model | ST600X |
| Brand | KAIWEETS |
| Product Dimensions | 2.88 x 1 x 5.75 inches |
| Item Weight | 14.07 ounces |
| Power Source | Battery Powered (4 x 1.5V AAA batteries) |
| Safety Rating | IEC CAT IV 600V, CE, RoHS compliant |
| Display Counts | 6000 Counts |
| Voltage Measurement | Up to 600V AC/DC |
| Current Measurement | Up to 10A AC/DC |
| Resistance Measurement | Up to 60M Ohms |
| Additional Measurements | Temperature, Capacitance, Frequency, Duty-cycle, Wire on/off, Diodes, Continuity, NCV, Live Wire |
| Manufacturer | KAIWEETS |
| First Available Date | November 8, 2021 |
11. Warranty and Support
KAIWEETS provides three years of after-sale support and technical assistance for the ST600X Smart Digital Multimeter. For any inquiries or support needs, please refer to the contact information provided in your product packaging or visit the official KAIWEETS website.
For more information about KAIWEETS products, visit the KAIWEETS Store on Amazon.


