
EUGAD 0020WL
EUGAD Indoor Small Animal Enclosure User Manual
Model: 0020WL
1. Introduction
Thank you for choosing the EUGAD Indoor Small Animal Enclosure. This modular DIY system is designed to provide a safe, spacious, and comfortable environment for your small pets, such as guinea pigs, rabbits, hamsters, and cat pups. Its flexible design allows for various configurations to suit your space and your pet's needs. This manual provides essential information for assembly, operation, maintenance, and safety to ensure optimal use of your new enclosure.
2. Safety Instructions
- Read all instructions carefully before assembly and use.
- Keep all packaging materials away from children and pets to prevent choking hazards.
- Ensure all connectors are securely fastened during assembly to maintain stability.
- This enclosure is designed for indoor use only. Prolonged exposure to sun and rain outdoors can damage plastic components.
- Do not allow children to climb on or play inside the enclosure.
- Regularly inspect the enclosure for any signs of wear or damage. Replace damaged parts immediately.
- Ensure the enclosure is placed on a flat, stable surface.
3. Package Contents
Please verify that all components listed below are present before beginning assembly:
- 38 x Panels (35x35 cm, metal grid and PP plates)
- 1 x Ladder
- Connectors (ABS)
- Cable Ties
- Anti-slip Stickers
- 1 x Wooden Hammer
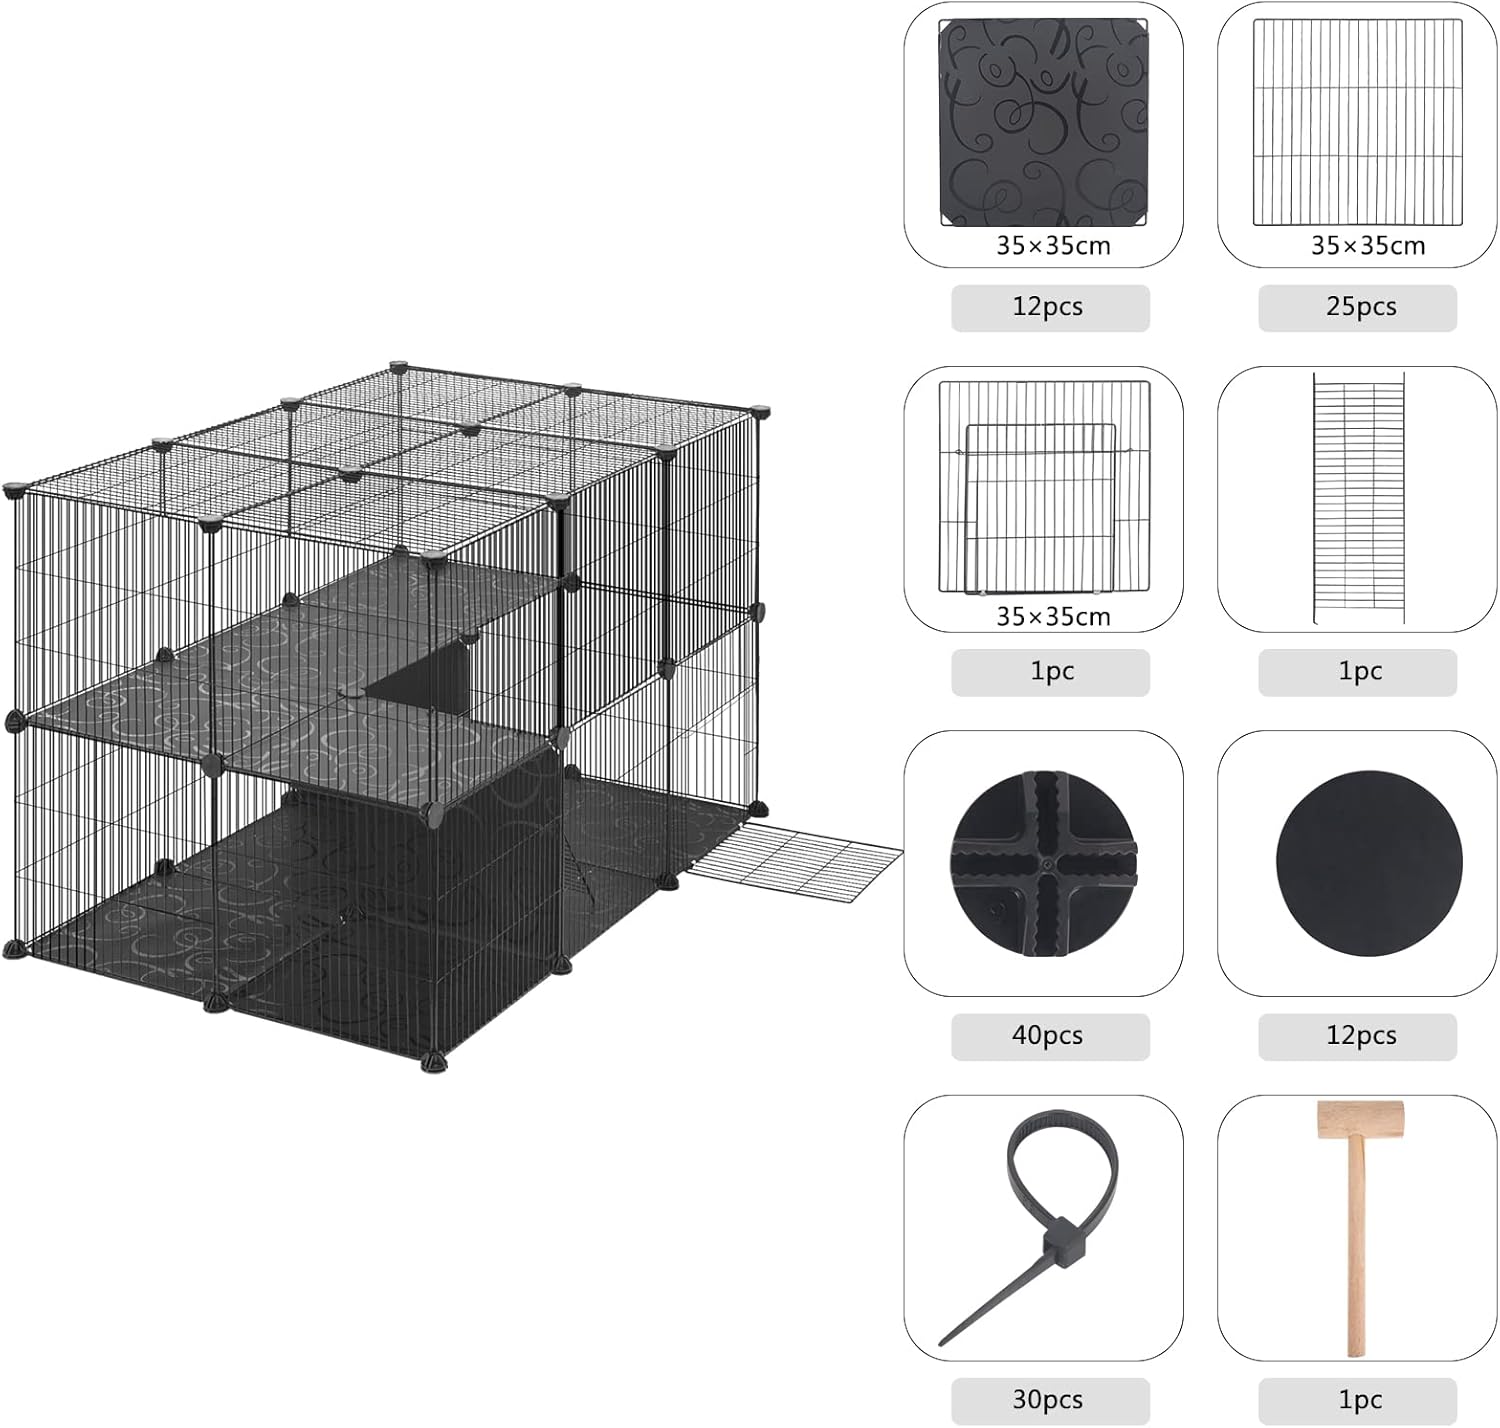
Image: All included components for assembly.
4. Setup and Assembly
Follow these steps to assemble your EUGAD Small Animal Enclosure. The modular design allows for various configurations; these steps provide a general guide.
Step 1: Prepare Anti-slip Stickers
Peel off the protective film from the anti-slip stickers and apply them to the bottom of the connectors that will be in contact with the floor. This prevents the enclosure from sliding.

Image: Applying anti-slip stickers.
Step 2: Connect Panels
Insert the corners of the metal grid panels and PP plates into the slots of the ABS connectors. Ensure they are fully seated for a secure connection. Use the included wooden hammer to gently tap the panels into the connectors if needed, ensuring a tight fit.

Image: Securing panels with the hammer.
Step 3: Reinforce with Cable Ties
For added stability, use the provided cable ties to secure adjacent panels together, especially at the corners and along longer edges. Thread the cable ties through the grid openings and tighten them firmly.
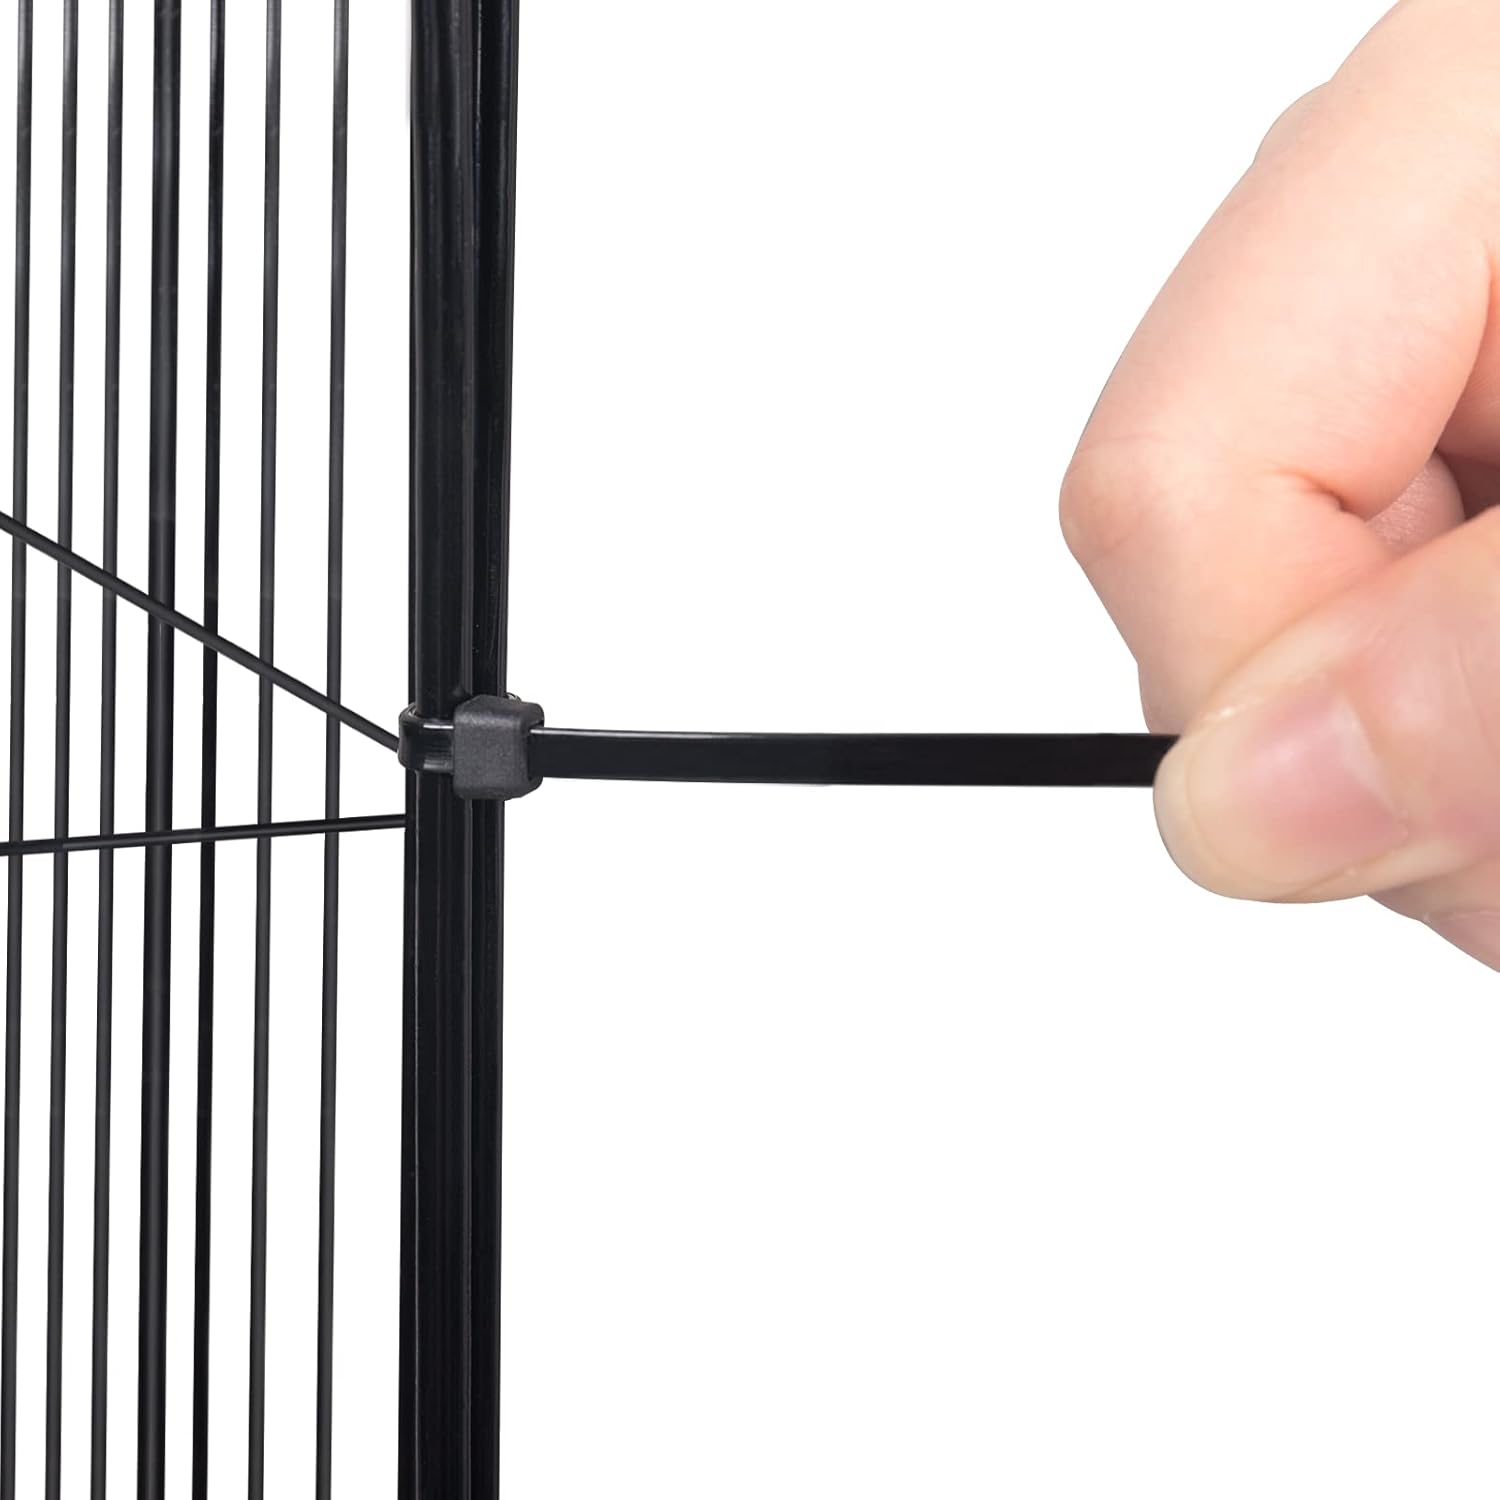
Image: Reinforcing connections with cable ties.
Step 4: Configure and Add Ladder
Arrange the panels to create your desired enclosure shape and size. If building a multi-level structure, integrate the ladder to allow your pet access between levels. Ensure the ladder is stable and securely placed.

Image: Example of a multi-level enclosure configuration.
5. Operating Instructions
The EUGAD Small Animal Enclosure offers a versatile space for your pets. Once assembled, you can customize the interior with bedding, food and water bowls, toys, and shelters suitable for your specific animal.
- Placement: Position the enclosure in a quiet, safe indoor area away from direct sunlight, drafts, and extreme temperatures.
- Ventilation: The metal grid design ensures optimal air circulation, providing a healthy environment for your pet.
- Visibility: The open grid allows for easy observation and interaction with your pet.
- Access: Depending on your configuration, you can create access points by leaving certain panels unattached or by using the ladder for multi-level access.
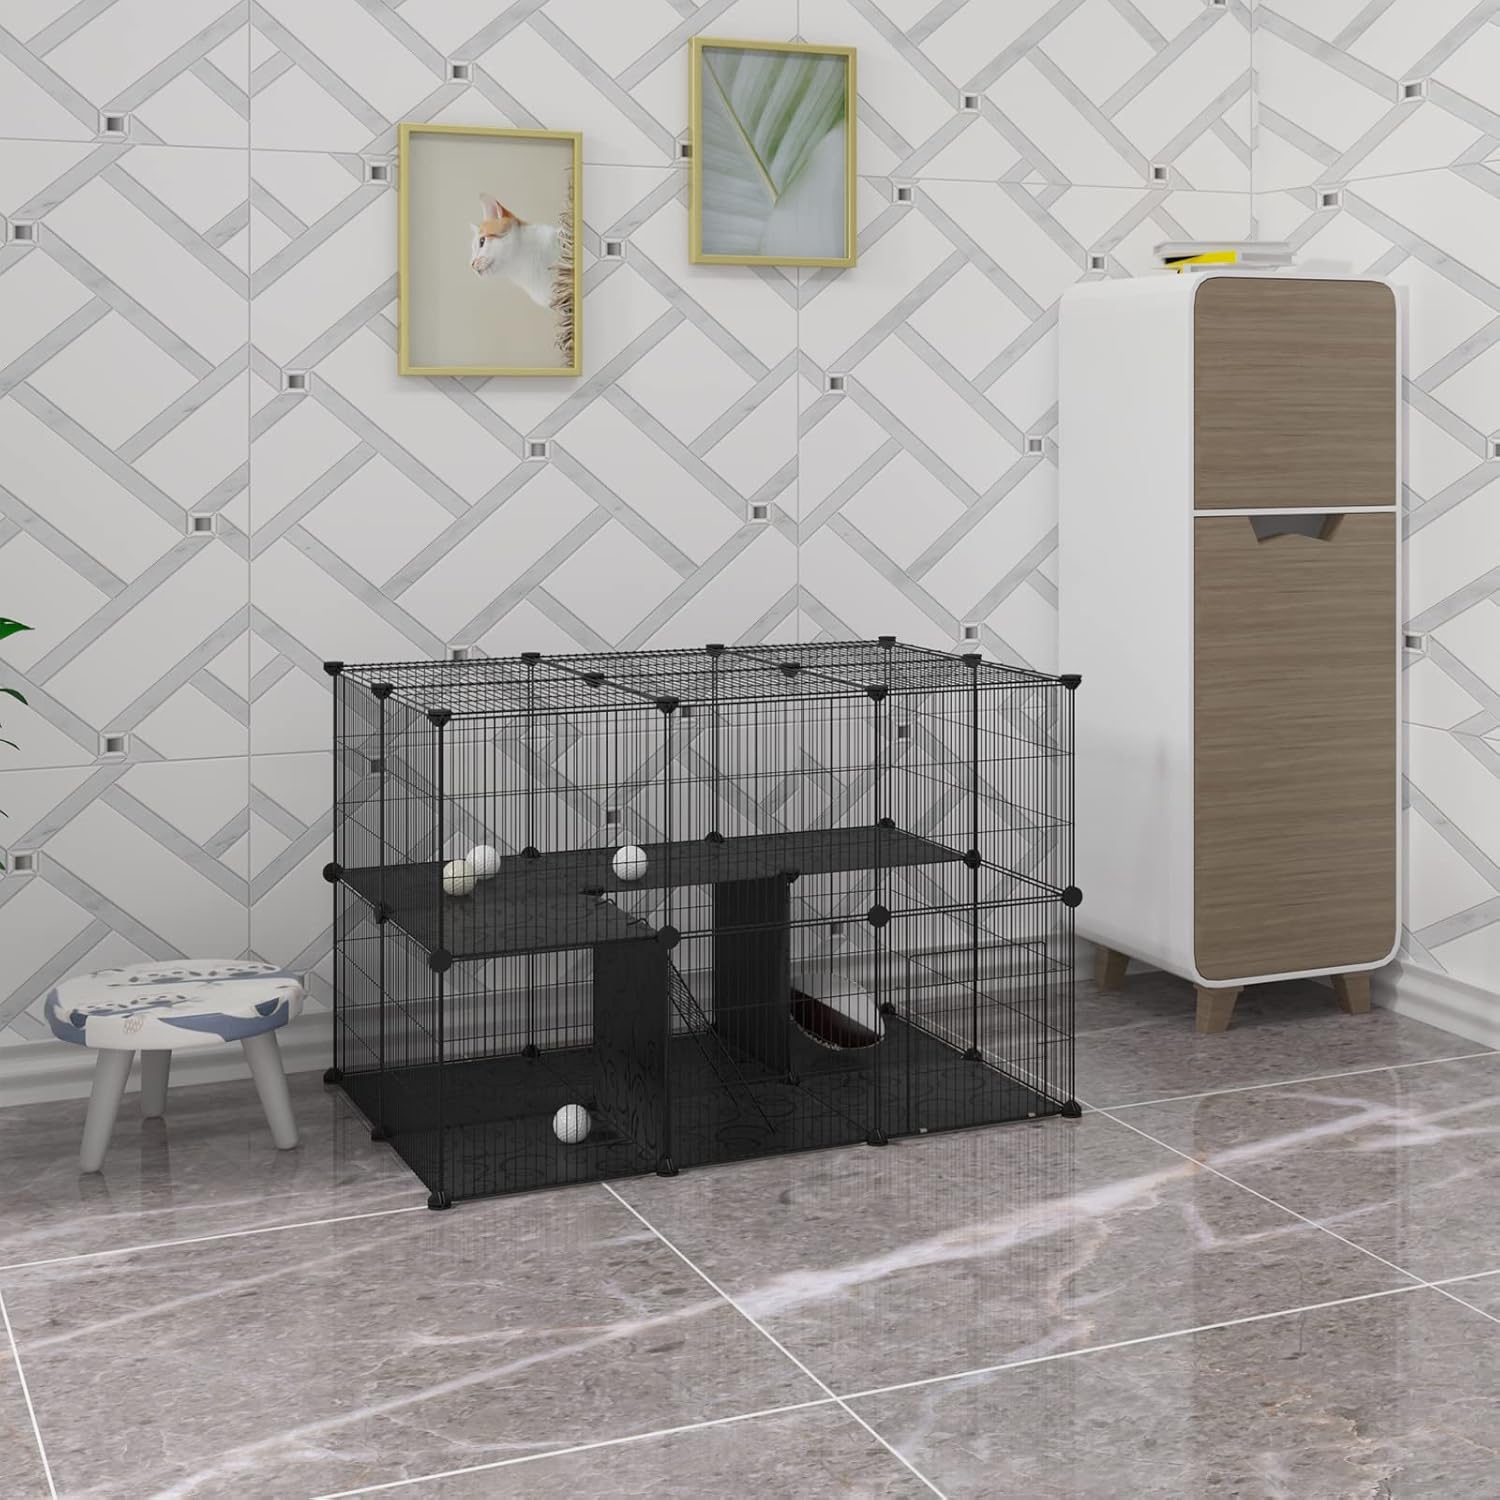
Image: Enclosure in a room setting.

Image: Enclosure with pet inside.
6. Maintenance
Regular cleaning and maintenance will extend the life of your enclosure and ensure a hygienic environment for your pet.
- Cleaning: The PP plates are easy to clean. Wipe down all surfaces with a damp cloth and mild, pet-safe detergent. Rinse thoroughly and dry completely before reintroducing your pet.
- Metal Grid: The painted metal grid can be wiped clean with a damp cloth. Avoid abrasive cleaners that may damage the paint.
- Inspection: Periodically check all connectors and cable ties to ensure they remain tight and secure. Replace any worn or broken parts.
- Ventilation: Ensure the grid remains clear of obstructions to maintain proper airflow.
7. Troubleshooting
- Enclosure feels unstable: Ensure all panels are fully inserted into the connectors. Use the wooden hammer to tap them firmly into place. Add more cable ties at connection points for increased rigidity.
- Panels not fitting: Double-check that you are using the correct panels for the desired configuration. Ensure connectors are oriented correctly.
- Pet escaping: Verify that the wire spacing (1.5 cm) is appropriate for your pet's size. Ensure there are no gaps or unsecured panels that your pet can squeeze through. Add a top cover if necessary.
- Damage from outdoor use: As stated, this product is for indoor use only. Damage from prolonged exposure to sun and rain is not covered by warranty.
8. Specifications
| Feature | Specification |
|---|---|
| Brand | EUGAD |
| Model Number | 0020WL |
| Color | Black |
| Product Dimensions (L x W x H) | 105 x 70 x 70 cm |
| Weight | 9.8 kg |
| Material | Metal (painted grid), PP (polypropylene) plates |
| Wire Spacing | 1.5 cm |
| Recommended Use | Indoor use for small animals (guinea pigs, rabbits, hamsters, cat pups) |
| Included Components | 38 panels, 1 ladder, connectors, cable ties, anti-slip stickers, wooden hammer |
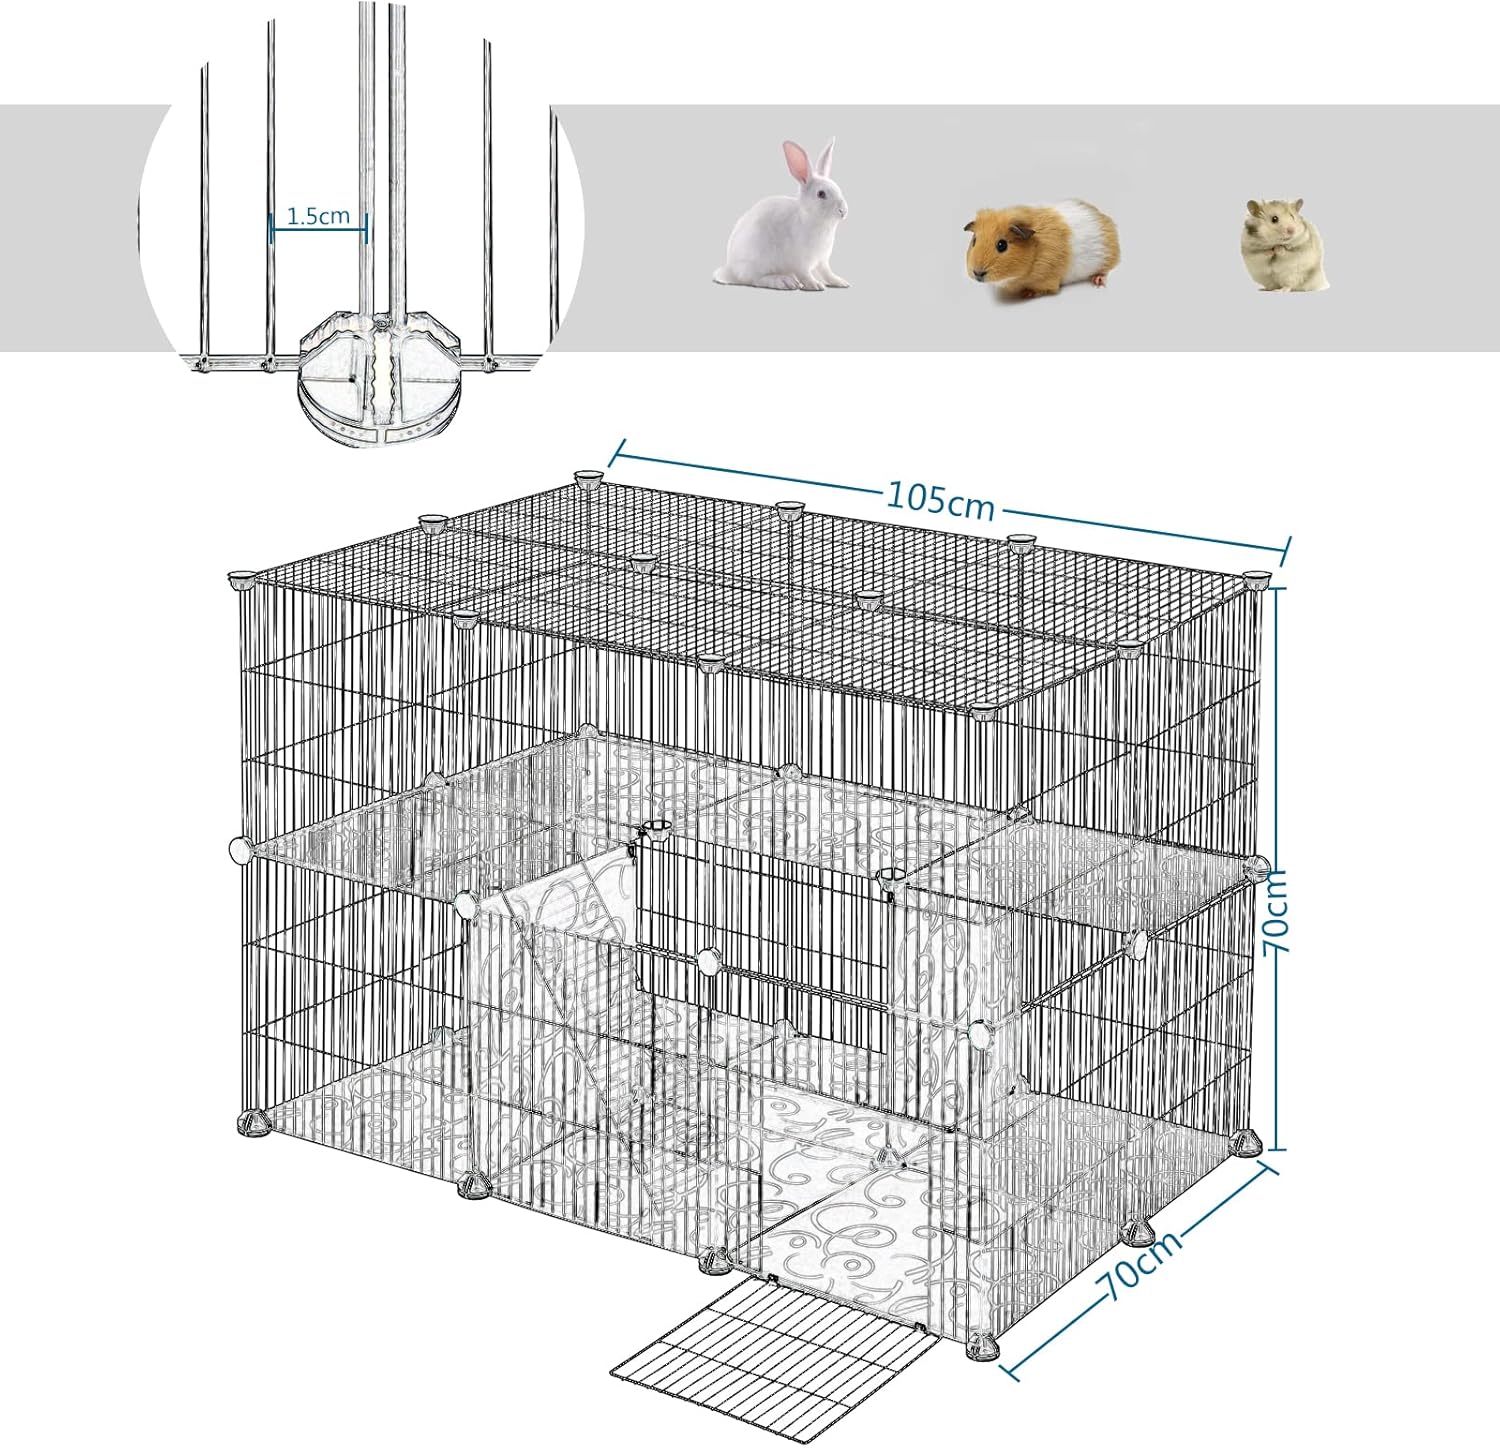
Image: Product dimensions and wire spacing detail.
9. Warranty and Support
EUGAD products are manufactured to high-quality standards. For specific warranty information and terms, please refer to the purchase documentation or contact your retailer. In most regions, consumer rights provide a minimum period of warranty for manufacturing defects.
For product support, missing parts, or any inquiries, please contact EUGAD customer service through the retailer's platform or visit the official EUGAD brand store:
Ask a question about this manual
Ask about setup, troubleshooting, compatibility, parts, safety, or missing instructions. Manuals+ will review the question and use this page’s manual context to help answer it.