
1. Safety Information
WARNING: Always prioritize safety when operating this equipment. Failure to follow safety instructions can result in serious injury or death.
- Always wear appropriate protective gear, including gloves and safety glasses, when operating the tiller.
- Be cautious of moving parts and debris thrown by the tines. Keep bystanders, especially children and pets, at a safe distance.
- Never refuel the tiller while the engine is running or hot. Always turn off the engine and allow it to cool before refueling.
- Keep the tiller clean and free of debris to prevent fires and ensure proper operation.
- Operate the tiller only in well-ventilated areas.
- Before starting, ensure all guards and shields are in place and securely fastened.
- Inspect the work area for rocks, roots, or other objects that could be thrown by the tines or damage the equipment.
2. Product Overview
The TFCFL 52cc 2-Stroke Gas Powered Tiller Cultivator is designed for efficient soil preparation in gardens, flower beds, and small farm plots. Its powerful 52cc engine and four high-hardness blades make light work of turning over soil, improving work efficiency, and saving time and effort. This mini tiller is suitable for various applications including field cultivation, plastic greenhouses, nurseries, orchards, and tea gardens.
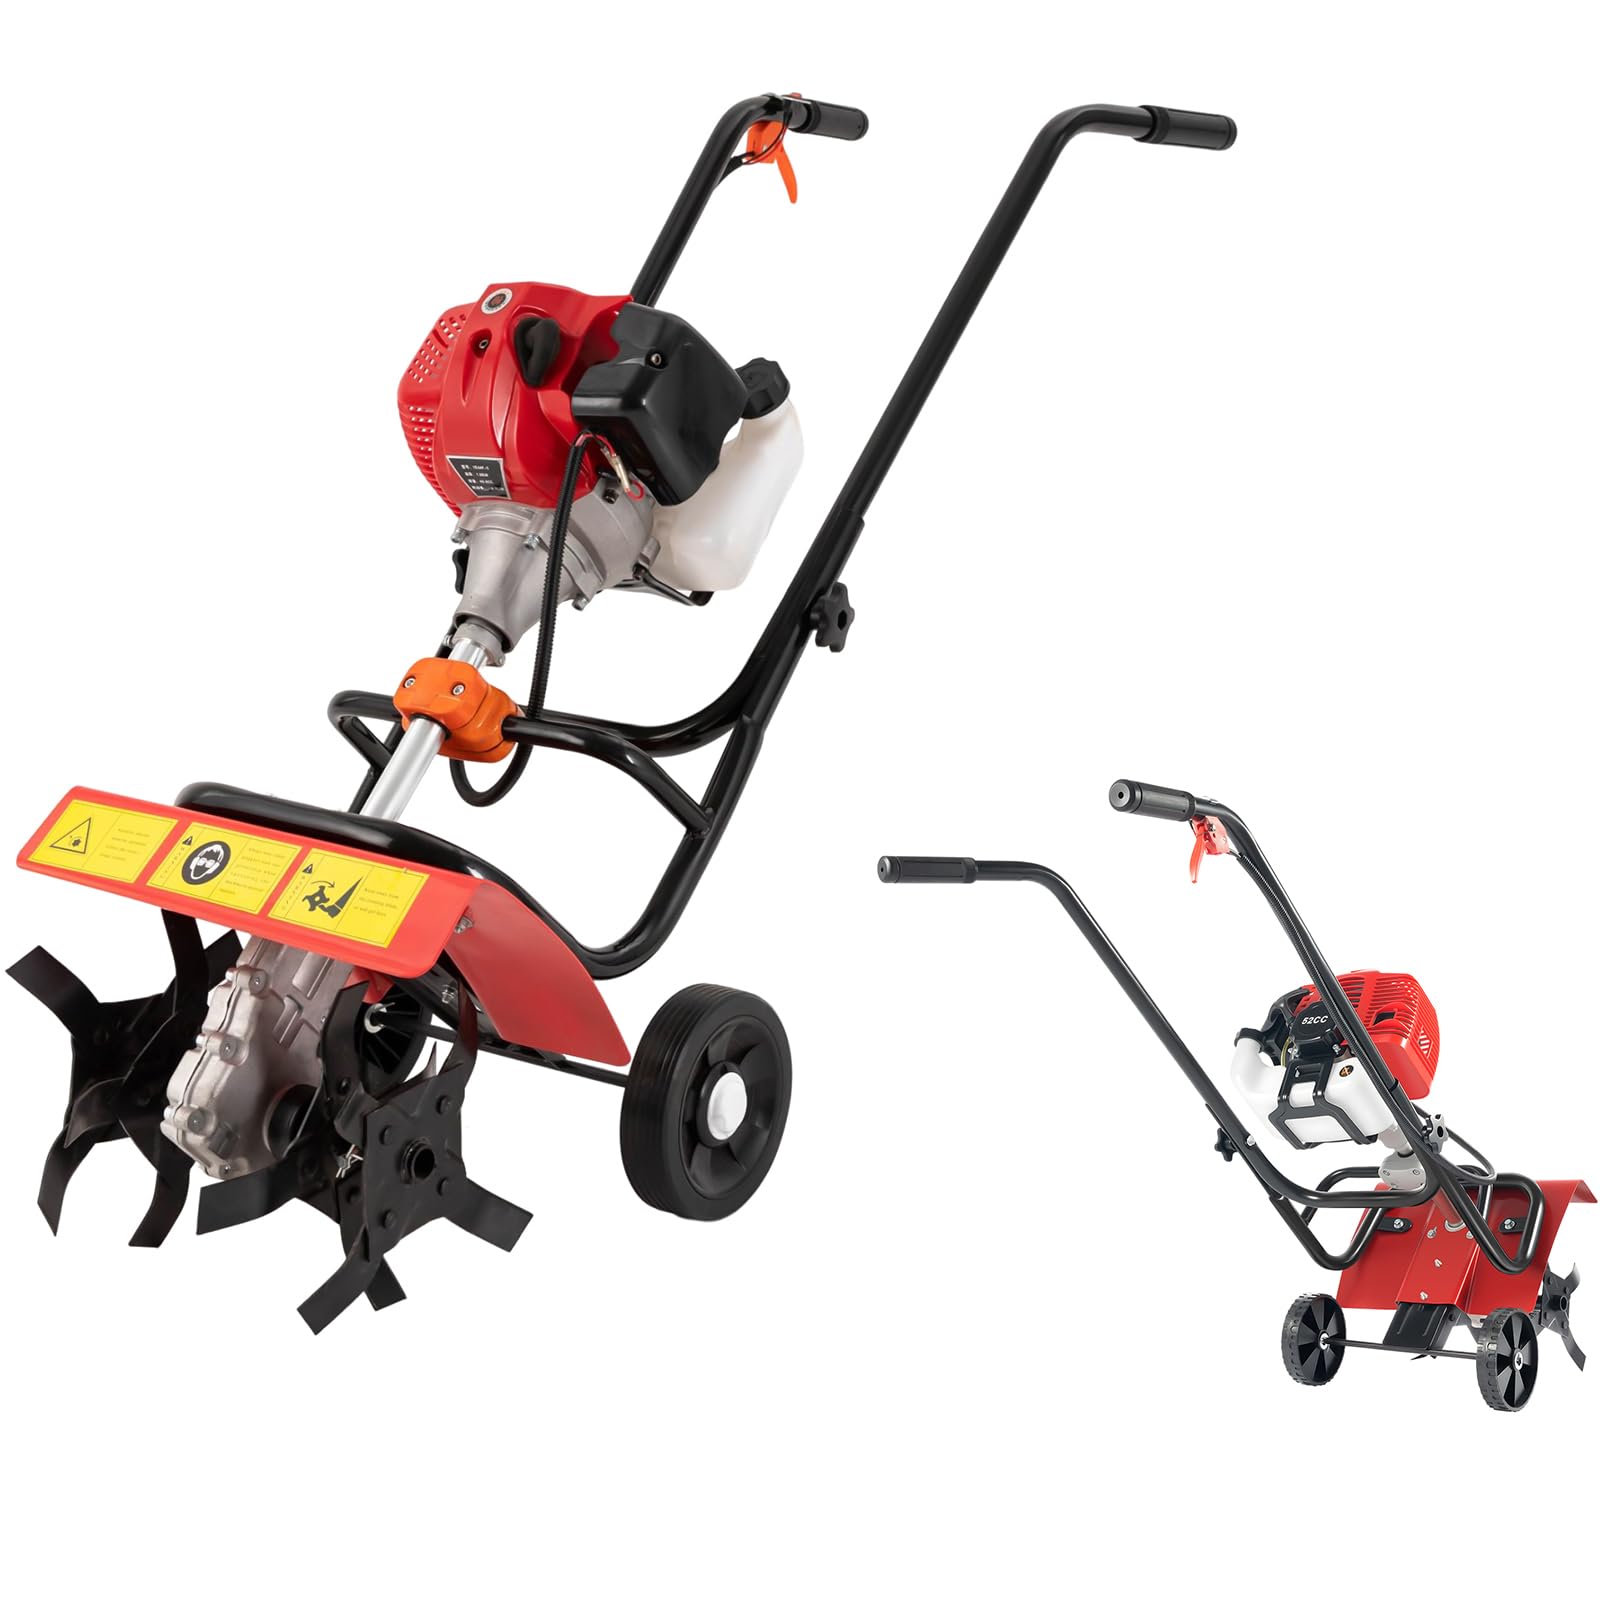
Figure 2.1: The TFCFL 52cc 2-Stroke Gas Powered Tiller Cultivator. This image shows the overall design of the tiller, highlighting its compact size and robust construction.
Key Features:
- Powerful 52cc Engine: Provides ample power for effective soil cultivation.
- 4 High-Hardness Blades: Equipped with 24cm diameter blades for efficient tilling.
- Easy Control: Features hand-held control with one-button start/stop, one-hand throttle, and flameout switch.
- Humanized Design: Rear wheel for convenient operation and narrow knife design for field work.
- Strengthened Anti-Collision Bar: Enhanced protection for the engine.
- Compact and Lightweight: Easy to maneuver and transport.

Figure 2.2: Product Dimensions. This image illustrates the overall dimensions of the tiller, including its height, width, and depth, providing a clear understanding of its size.

Figure 2.3: Clever Design Features. This image highlights key design elements such as multiple cooling holes for the engine, narrow-profile blades suitable for field operations, and widened rear wheels for slip prevention and easier pushing.
3. Assembly Instructions
Follow these steps to assemble your TFCFL 52cc Tiller Cultivator. Ensure all parts are present before beginning assembly.

Figure 3.1: Tiller Components. This image displays all the parts included in the package, such as the main engine unit, handles, wheels, and toolkit, before assembly.
- Attach the Rear Wheel Assembly:
Locate the rear wheel assembly. Align the wheel bracket with the designated slots on the main tiller body. Insert the securing pin and fasten it with the provided nut or clip.
Video 3.1: Assembly Demonstration. This video demonstrates the step-by-step assembly process of the tiller, including attaching the wheels and handles, and connecting the control cables.
- Install the Handlebars:
Connect the lower handlebar section to the main tiller frame using the provided bolts and knobs. Ensure the handlebars are securely tightened.
- Connect Control Cables:
Carefully connect the throttle cable and the engine stop switch wires to their respective points on the engine and handlebar controls. Ensure connections are firm and correct.
- Final Checks:
Before operation, double-check all connections and fasteners to ensure they are tight and secure. Verify that the tines rotate freely and the engine stop switch functions correctly.
4. Operating Instructions
Proper operation ensures efficiency and extends the life of your tiller. Always refer to the safety guidelines before starting.
4.1 Fueling the Tiller
- This tiller uses a 2-stroke engine. Mix unleaded gasoline with 2-stroke engine oil at the ratio specified in the engine manual (typically 25:1 or 50:1, refer to engine specifications).
- Carefully pour the mixed fuel into the fuel tank. Do not overfill.
- Securely replace the fuel cap.

Figure 4.1: Fuel Tank. This image shows the 0.2-gallon fuel tank, indicating its capacity for continuous work without frequent refills.
4.2 Starting the Engine
- Ensure the engine stop switch on the handlebar is in the "ON" position.
- If the engine is cold, engage the choke.
- Press the primer bulb several times until fuel is visible.
- Hold the tiller firmly with one hand on the handle. With the other hand, pull the starter cord with a quick, firm motion until the engine starts.
- Once the engine starts, gradually disengage the choke.
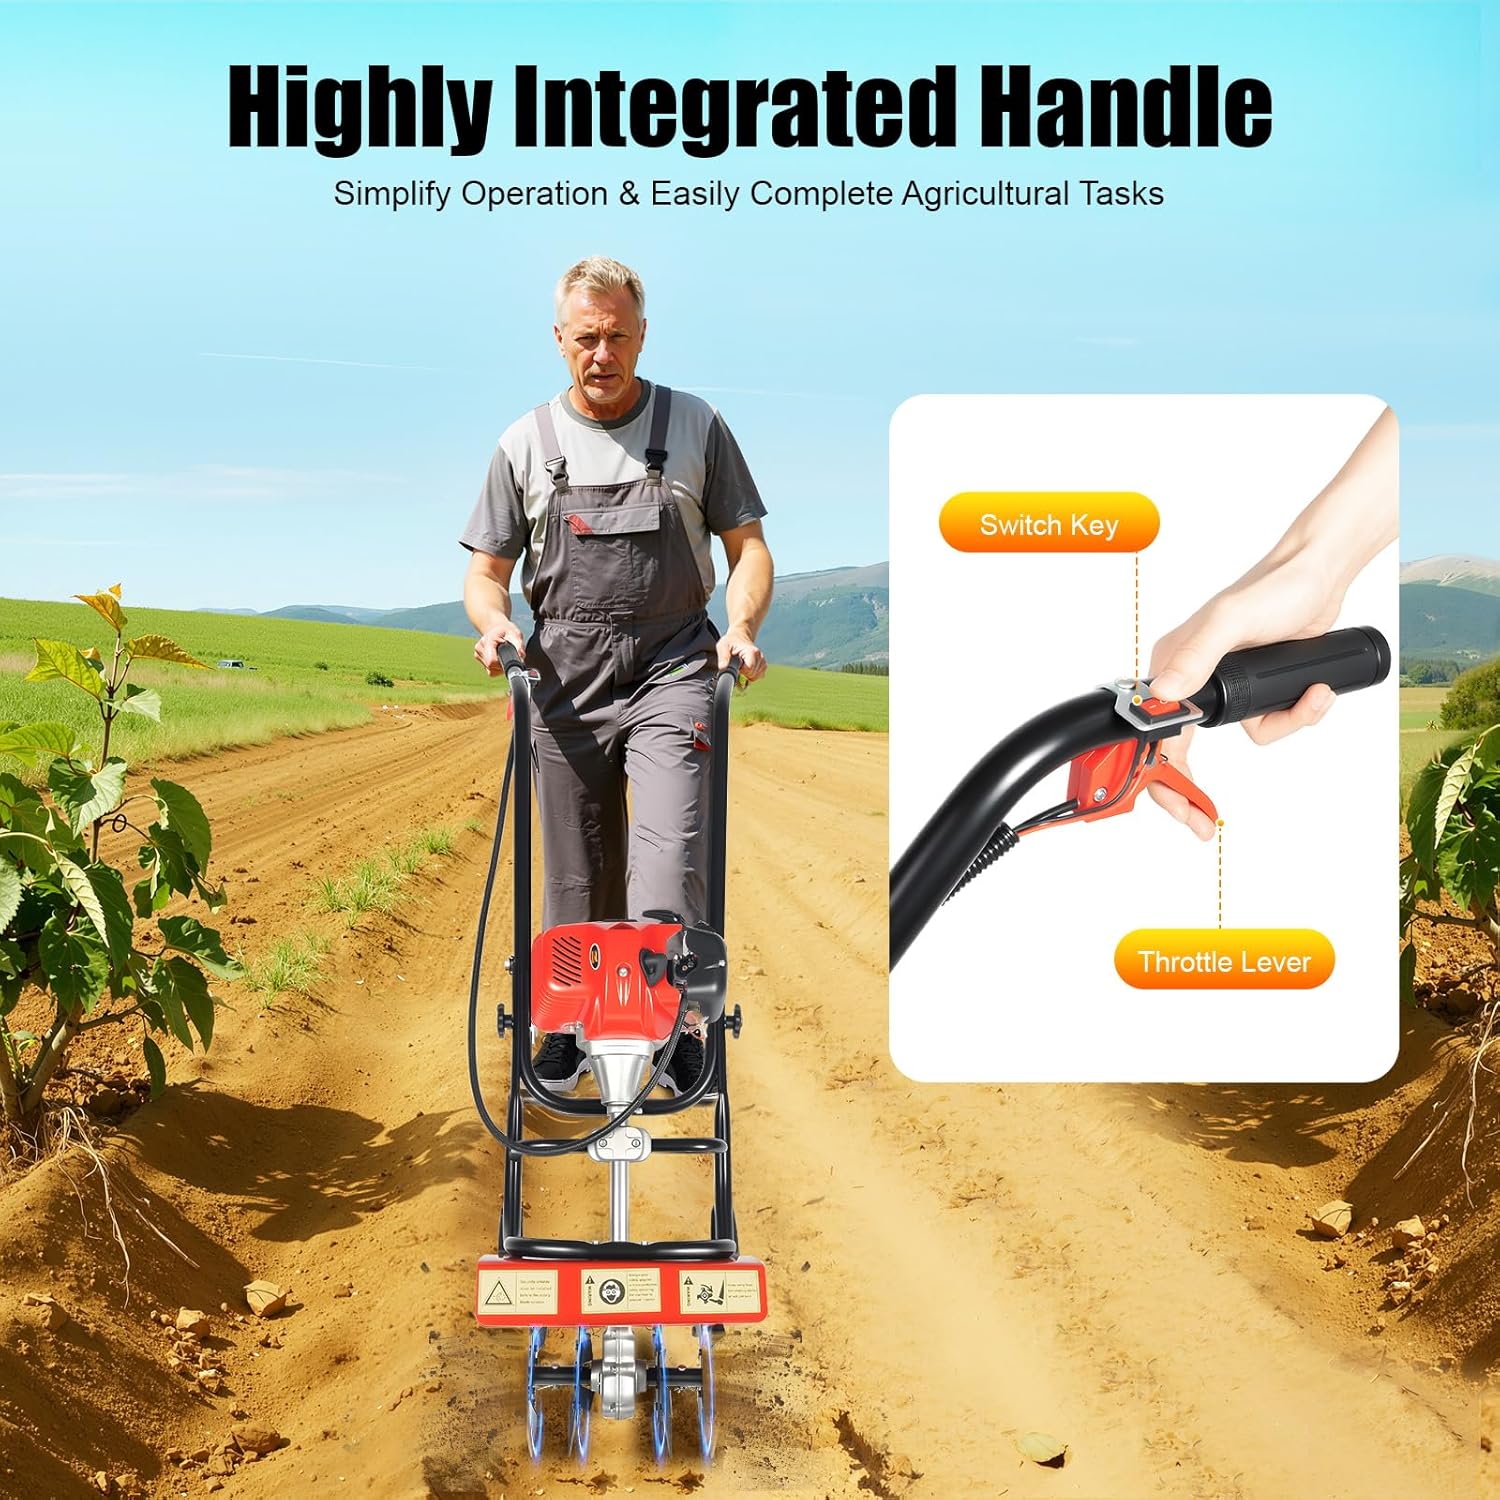
Figure 4.2: Highly Integrated Handle. This image shows the handlebar with the switch key and throttle lever, designed to simplify operation and easily complete agricultural tasks.
4.3 Tilling Operation
- Allow the engine to warm up for a few moments.
- Engage the throttle to begin rotating the tines.
- Guide the tiller slowly and steadily across the area to be cultivated. The rear wheel assists in maintaining depth and stability.
- For deeper tilling, make multiple passes, gradually increasing the depth with each pass.
- Avoid operating the tiller on excessively hard or rocky ground, which can damage the blades or engine.

Figure 4.3: Wide Cultivation Area. This image demonstrates the tiller in action, highlighting its ability to rapidly complete large-scale cultivation tasks with a cultivated land width of 14.17 inches and depth of 1.97-3.94 inches.

Figure 4.4: Robust Power Output. This image shows a user operating the tiller, emphasizing its 1.9KW strong power, 52cc displacement, and 7000rpm high speed for effective soil turning.
4.4 Stopping the Engine
To stop the engine, simply move the engine stop switch to the "OFF" position.
5. Maintenance
Regular maintenance is crucial for the longevity and optimal performance of your tiller. Always ensure the engine is off and cool before performing any maintenance.
- Clean After Each Use: Remove soil, debris, and plant matter from the tines, engine, and housing. This prevents buildup and corrosion.
- Inspect Tines: Regularly check the tines for wear, damage, or bending. Replace worn or damaged tines promptly.
- Check Air Filter: Clean or replace the air filter as needed, especially in dusty conditions, to ensure proper engine breathing.
- Spark Plug: Inspect the spark plug periodically. Clean or replace it if it's fouled or worn.
- Fuel System: At the end of the season or before long-term storage, drain the fuel tank and run the engine until it stops to clear the carburetor of fuel. This prevents fuel degradation issues.
- Lubrication: Refer to the engine manual for specific lubrication points and schedules.
- Storage: Store the tiller in a clean, dry, and well-ventilated area, away from direct sunlight and extreme temperatures.
6. Troubleshooting
This section provides solutions to common issues you might encounter with your tiller.
| Problem | Possible Cause | Solution |
|---|---|---|
| Engine does not start |
|
|
| Engine runs poorly or stalls |
|
|
| Tines do not rotate |
|
|
If you encounter problems not listed here or if solutions do not resolve the issue, please contact customer support.
7. Specifications
| Feature | Detail |
|---|---|
| Brand | TFCFL |
| Model Number | 1F44F-5 |
| Engine Type | 52cc 2-Stroke, Single-Cylinder Air-Cooled Gasoline Engine |
| Power | 1.9 KW |
| Rated Speed | 6500-7000 r/min |
| Carburetor Type | Diaphragm Type |
| Start Mode | Pull Start |
| Tiller/Cultivator Size | Approx. 40 x 29.5 x 120 cm (15.7 x 11.6 x 47.2 inches) |
| Product Dimensions (D x W x H) | 14.57"D x 11.81"W x 31.5"H |
| Fuel Tank Capacity | 200 ML (0.05 Gallons / 0.2 Liters) |
| Number of Blades | 4 pieces |
| Blade Diameter | 24 cm (9.45 inches) |
| Cultivated Land Width | Approx. 14.17 inches |
| Cultivated Land Depth | Approx. 1.97-3.94 inches |
| Material | Plastic (housing), Metal (frame, blades) |
8. Warranty and Support
For warranty information, technical support, or to order replacement parts, please contact TFCFL customer service. Keep your purchase receipt and model number handy for faster service.
Customer Service Contact: Refer to the contact information provided with your product packaging or visit the official TFCFL website.