1. Safety Information
WARNING: Laser Class 4 Product. Always wear eye protection when operating.
General Safety Precautions:
- Do NOT operate laser without eye protection (Laser goggles).
- Set up laser engraver in a fireproofing area with good ventilation.
- Keep minors (especially kids younger than 14 years old) away from this laser engraver. Minors of any age should not use this laser without direct adult supervision and proper eye protection.
- Avoid strong impacts on the machine.
- Do not touch the laser beam with your hands or any other objects you do not wish to engrave/burn/cut. Serious physical harm is possible if used improperly.
- Do not touch the heat sink when the laser engraver has just stopped working, as it may cause burns.
- Use the laser engraver in a room that can be closed by a door and ensure that neither laser beams nor stray light can penetrate through windows.
- While using the laser engraver, use door signs or a warning light on the door that indicates the laser engraver is in operation.
Integrated Safety Protections:
- Active Position Protection: When the engraving machine is displaced or tilted, it will automatically stop the laser to prevent damage to the target from the laser.
- Laser Beam Safety Guard: If the USB signal transmission fails, the laser will stop working immediately.
- Exposure Duration Detection and Limitation: If the engraving machine is turned on but there is no movement for a long time, it will be protected, and the laser will be turned off automatically.
- Power Control System: If the engraving machine or computer crashes, the laser will stop working immediately to prevent continuous fire.
- Flame Detector + Buzzer: When the laser engraver detects flame, it will automatically stop and beep.
- Emergency Stop Button: A dedicated button for immediate shutdown in case of emergency.
- Eye-protection Cover Design: The laser filter cover filters 98% of ultraviolet light. Protective safety glasses are also included.
2. Product Overview
The Ortur Laser Master 2 Pro S2-SF is a high-performance laser engraver and cutter designed for precision and versatility. It features a 5.5W (10000mW output) laser module with advanced compressed focal spot technology, enabling fine detail engraving and efficient cutting across a wide range of materials.

Figure 2.1: Ortur Laser Master 2 Pro S2-SF Laser Engraver with its main components.
Key Features:
- 5.5W Laser Power & Enhanced Engraving: Equipped with an LU2-4-SF laser module utilizing FAC laser technology for a concentrated, ultra-fine 0.01mm high-precision compressed spot (0.17*0.25mm). Engraving speed up to 10000mm/min.
- 32-bit Motherboard: Features the latest OLM-MAXUP-V10 Motherboard with a 32-bit MCU, supporting 1.8 series firmware for faster execution, higher resolution, and improved system reliability.
- Solid Structure: All-aluminum alloy structure design for durability and improved engraving accuracy. Includes 4 POM wheels for stable and smooth operation.
- Wide Material Compatibility: Capable of working on over a hundred materials including wood, bamboo, metal, acrylic, stainless steel, leather, rubber, glass, ceramics, food, paper, and fabric.
- User-Friendly Design: Easy to assemble with provided instructions and videos, typically taking 10-20 minutes.

Figure 2.2: Product dimensions (400x400mm working area) and highlighted features including safety emergency stop, limit switch, and 32-bit motherboard.
3. Setup & Assembly
The Ortur Laser Master 2 Pro S2-SF is designed for straightforward assembly. Follow the steps below or refer to the official assembly tutorial video for visual guidance.
Assembly Video Tutorial:
Video 3.1: Official OLM2Pro-S2-LU2-4-SF Assembly Tutorial. This video provides a step-by-step guide to assembling your laser engraver.
General Assembly Steps:
- Unpack Components: Carefully remove all parts from the packaging and verify against the packing list.
- Assemble the Frame: Connect the aluminum profiles to form the main frame of the engraver. Ensure all screws are tightened securely.
- Install X-Axis and Y-Axis: Attach the X-axis and Y-axis components, including the stepper motors and guide rails.
- Mount the Control Box: Secure the control box to the frame, ensuring easy access to ports and buttons.
- Attach the Laser Module: Carefully mount the LU2-4-SF laser module to the X-axis carriage.
- Connect Wiring: Connect all necessary cables (power, motor, limit switches, laser module) to the control box. Ensure connections are firm and correctly oriented.
- Adjust Laser Focus: Use the provided focusing tool or method to set the correct focal distance for your laser module.

Figure 3.1: Diagram illustrating the various safety protection systems integrated into the Ortur Laser Master 2 Pro S2-SF.
4. Operating Instructions
The Ortur Laser Master 2 Pro S2-SF is compatible with various engraving software. This section provides general operating guidelines.
Software Compatibility:
The laser engraver is compatible with popular software such as LaserGRBL (free) and LightBurn (paid). It supports Windows XP/7/8/10, macOS, and Linux systems (LightBurn required for macOS/Linux). Supported file formats include JPG, PNG, BMP, JPEG, SVG, etc.
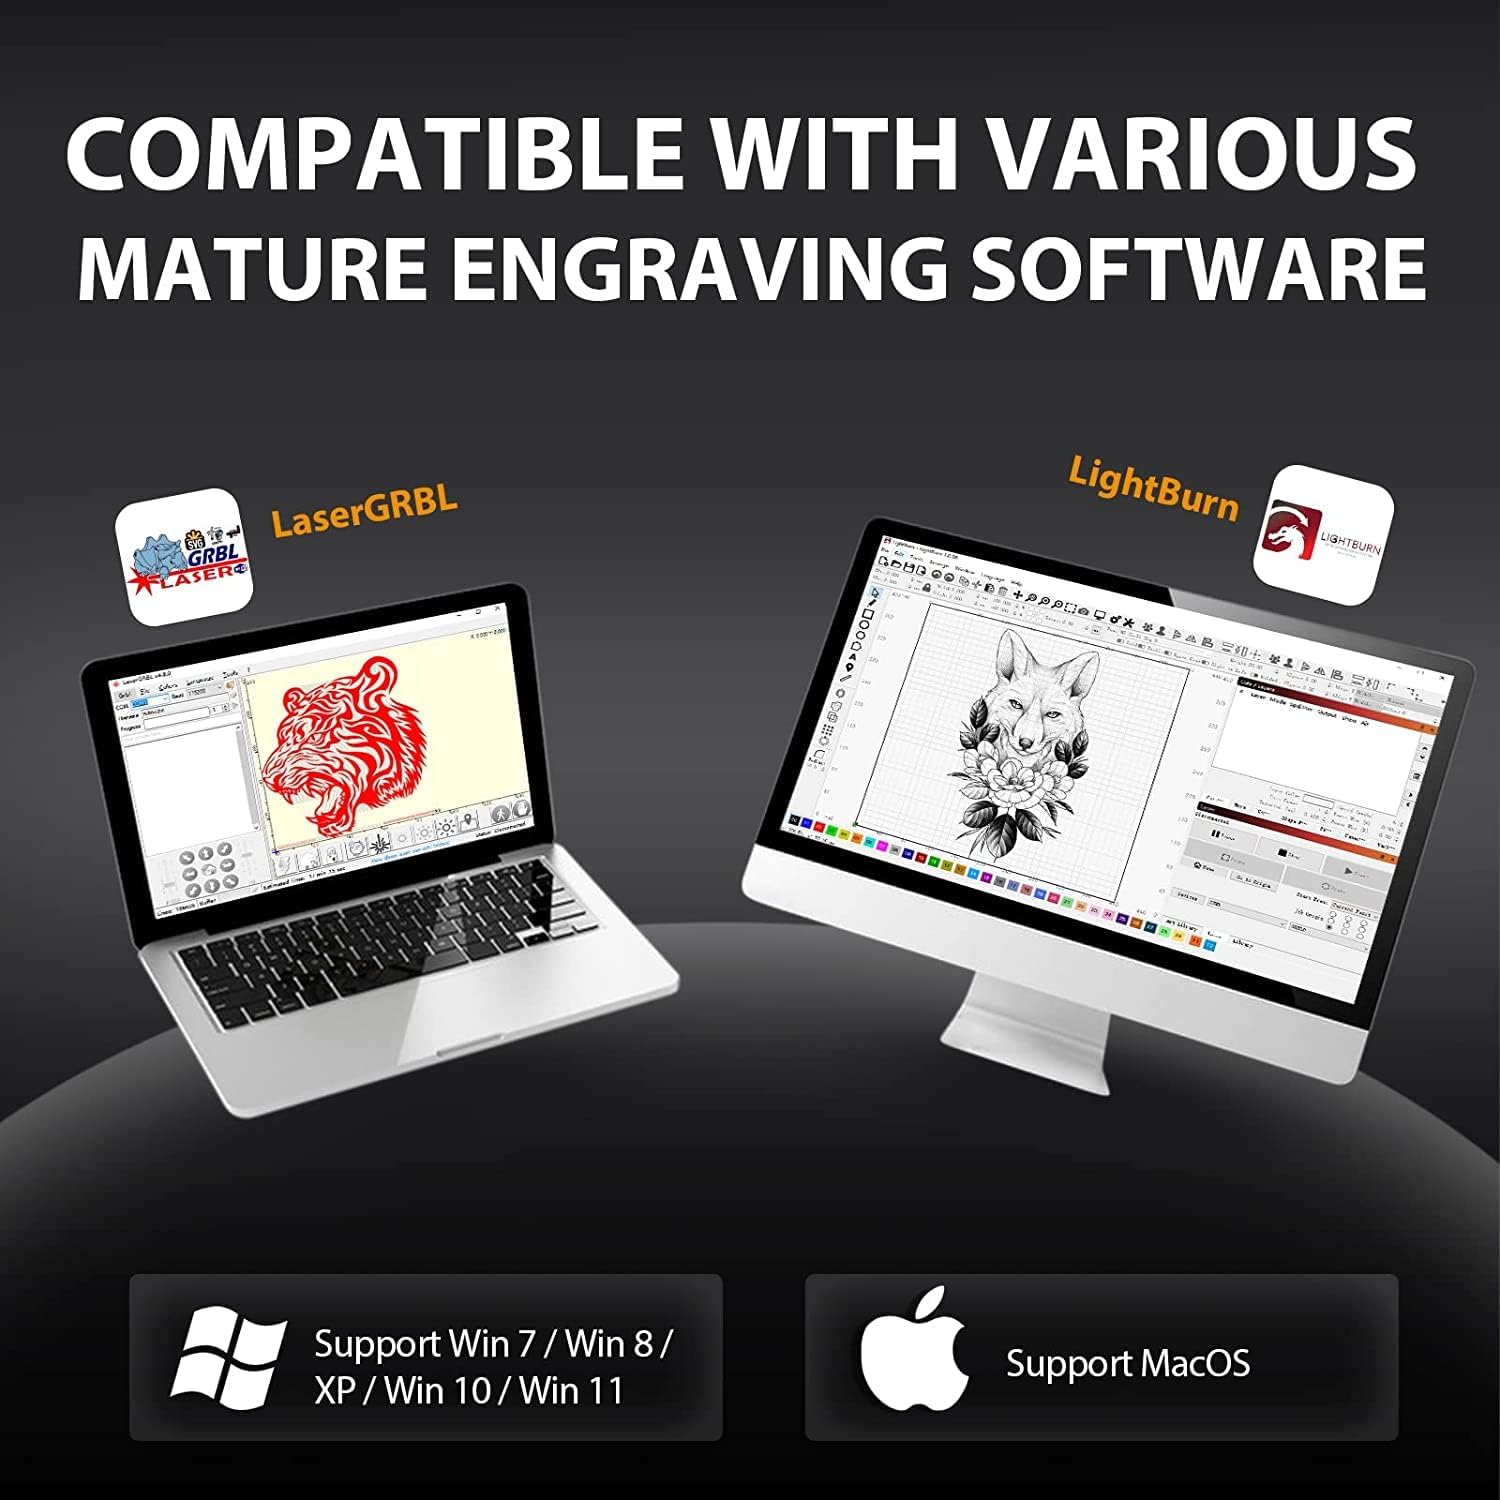
Figure 4.1: The Ortur Laser Master 2 Pro S2-SF is compatible with various engraving software like LaserGRBL and LightBurn, supporting Windows, macOS, and Linux.
Basic Operation Steps:
- Power On: Connect the power adapter and turn on the machine.
- Connect to Computer: Connect the engraver to your computer via USB.
- Launch Software: Open your preferred engraving software (e.g., LaserGRBL or LightBurn).
- Load Image/Design: Import your desired image or design into the software.
- Adjust Settings: Set engraving parameters such as speed, power, and number of passes based on your material and desired effect.
- Position Material: Place your material on the working area. Use the ruler markings on the frame for precise positioning.
- Frame Preview: Use the software's framing function to preview the engraving area on your material with the laser (low power).
- Start Engraving: Once satisfied with the positioning and settings, initiate the engraving process from the software.
- Monitor Progress: Supervise the engraving process at all times.
Example Engraving Projects:
Video 4.2: Engraving Leather Throw Pillows with Ortur Laser Engraver. This video demonstrates the process of engraving designs onto leather material.
Video 4.3: DIY Projects with Ortur Laser Master 2 Pro S2-SF Laser Engraver. This video showcases various DIY engraving and cutting projects possible with the machine.

Figure 4.2: Examples of various materials compatible with the Ortur Laser Master 2 Pro S2-SF, including wood, leather, acrylic, and stainless steel.
5. Maintenance
Regular maintenance ensures optimal performance and longevity of your Ortur Laser Master 2 Pro S2-SF.
- Clean the Lens: Periodically clean the laser lens with a soft, lint-free cloth and lens cleaning solution to maintain beam quality.
- Lubricate Guide Rails: Apply a small amount of lubricant to the guide rails to ensure smooth movement of the laser module.
- Check Belts: Inspect the timing belts for tension and wear. Adjust or replace if necessary.
- Clean Working Area: Remove debris and dust from the working area and honeycomb bed (if applicable) after each use to prevent fire hazards and ensure clear engraving.
- Inspect Wiring: Regularly check all electrical connections for any signs of wear or damage.
6. Troubleshooting
This section addresses common issues you might encounter with your laser engraver.
Common Issues and Solutions:
- Laser Not Firing:
- Check power connection and ensure the machine is turned on.
- Verify USB connection to the computer.
- Ensure the emergency stop button is not pressed.
- Check software settings for laser power (S-Max) and speed.
- Poor Engraving Quality:
- Adjust laser focus. An out-of-focus laser will produce blurry results.
- Clean the laser lens.
- Adjust engraving speed and power settings. Different materials require different settings.
- Ensure the material is flat and securely positioned.
- Machine Not Responding:
- Restart the software and the laser engraver.
- Check the COM port selection in your software.
- Verify USB cable integrity.
- Flame Detector Alarm:
- Immediately stop the machine.
- Check for actual flames or excessive smoke. Ensure proper ventilation.
- If no flame, ensure the flame detector sensor is clean and not obstructed.
7. Specifications
| Feature | Detail |
|---|---|
| Model | Laser Master 2 Pro S2-SF |
| Laser Output Power | 10000mW (5.5W optical) |
| Laser Module | LU2-4-SF (Compressed Focal Spot Technology) |
| Focal Spot Size | 0.12x0.15mm (ultra-fine 0.01mm precision) |
| Engraving Speed | Up to 10000mm/min |
| Motherboard | OLM-MAXUP-V10 (32-bit MCU) |
| Working Area | 400x400mm (15.75x15.75 inches) |
| Connectivity | USB |
| Software Compatibility | LaserGRBL, LightBurn |
| Operating Systems | Windows XP/7/8/10, macOS, Linux |
| Supported File Formats | JPG, PNG, BMP, JPEG, SVG, etc. |
| Safety Features | Active Position Protection, Laser Beam Safety Guard, Exposure Duration Detection, Power Control System, Flame Detector+Buzzer, Emergency Stop Button, Eye-protection Cover |
| Item Weight | 10.53 pounds |
| Package Dimensions | 25.9 x 10.3 x 4.5 inches |
8. Warranty & Support
For warranty information, technical support, or service inquiries, please refer to the official Ortur website or contact their customer service directly.
- Official Website: Visit the Ortur Store for the latest product information, FAQs, and support resources.
- Customer Service: Contact details for customer support can typically be found on the product packaging or the official website.


