
1. Introduction
The JVC HA-A5T Gumy Mini True Wireless Earbuds are designed for convenient, high-quality audio on the go. These compact and lightweight earbuds feature a Neodymium magnet driver for clear sound, Bluetooth 5.1 for stable wireless connection, and an IPX4 rain-proof rating for durability. They offer hands-free calling with voice assistant compatibility and simple one-button control.
Key Features:
- Compact and lightweight design
- High sound quality with Neodymium magnet driver
- Bluetooth Version 5.1 for stable wireless connectivity
- Rain Proof (IPX4) for protection against splashes and sweat
- Up to 15 hours of total battery life (including charging case)
- Hands-free microphone with Voice Assistant compatibility
- One-button control for easy operation
- Auto on/off/connect function
- Compatible with iOS, Android, and Windows devices
2. Package Contents
Please ensure all items are present in the package:
- JVC HA-A5T True Wireless Earbuds (Left and Right)
- Charging Case
- Regular Silicon Earpieces (S/M/L sizes)
- USB Charging Cable

Image: The retail packaging for the JVC HA-A5T Gumy Mini True Wireless Earbuds, showing the earbuds and charging case.
3. Setup
3.1 Charging the Earbuds and Case
Before first use, fully charge the earbuds and the charging case. The charging case provides additional power to the earbuds, extending their usage time.
- Place the earbuds into their respective slots in the charging case. Ensure they are seated correctly.
- Connect the supplied USB charging cable to the charging port on the case and to a USB power source (e.g., computer, USB wall adapter).
- The indicator lights on the case will show the charging status. Refer to the indicator light section for details.
- Once fully charged, disconnect the USB cable. The earbuds and case together provide up to 15 hours of playback.

Image: The JVC HA-A5T earbuds placed inside their open charging case, ready for charging.
3.2 Pairing with a Bluetooth Device
The earbuds feature an auto on/off/connect function for seamless pairing.
- Open the charging case. The earbuds will automatically power on and enter pairing mode.
- On your Bluetooth device (smartphone, tablet, etc.), enable Bluetooth and search for available devices.
- Select "JVC HA-A5T" from the list of found devices.
- Once connected, a confirmation sound or indicator will notify you. The earbuds will automatically reconnect to the last paired device when taken out of the case.
3.3 Selecting the Right Earpieces
For optimal sound quality and comfort, choose the silicone earpieces that best fit your ears. The package includes Small (S), Medium (M), and Large (L) sizes.
- Try each size to find the one that creates a snug seal in your ear canal. A good seal enhances bass response and noise isolation.
- Gently insert the earbud into your ear and twist slightly until it feels secure and comfortable.
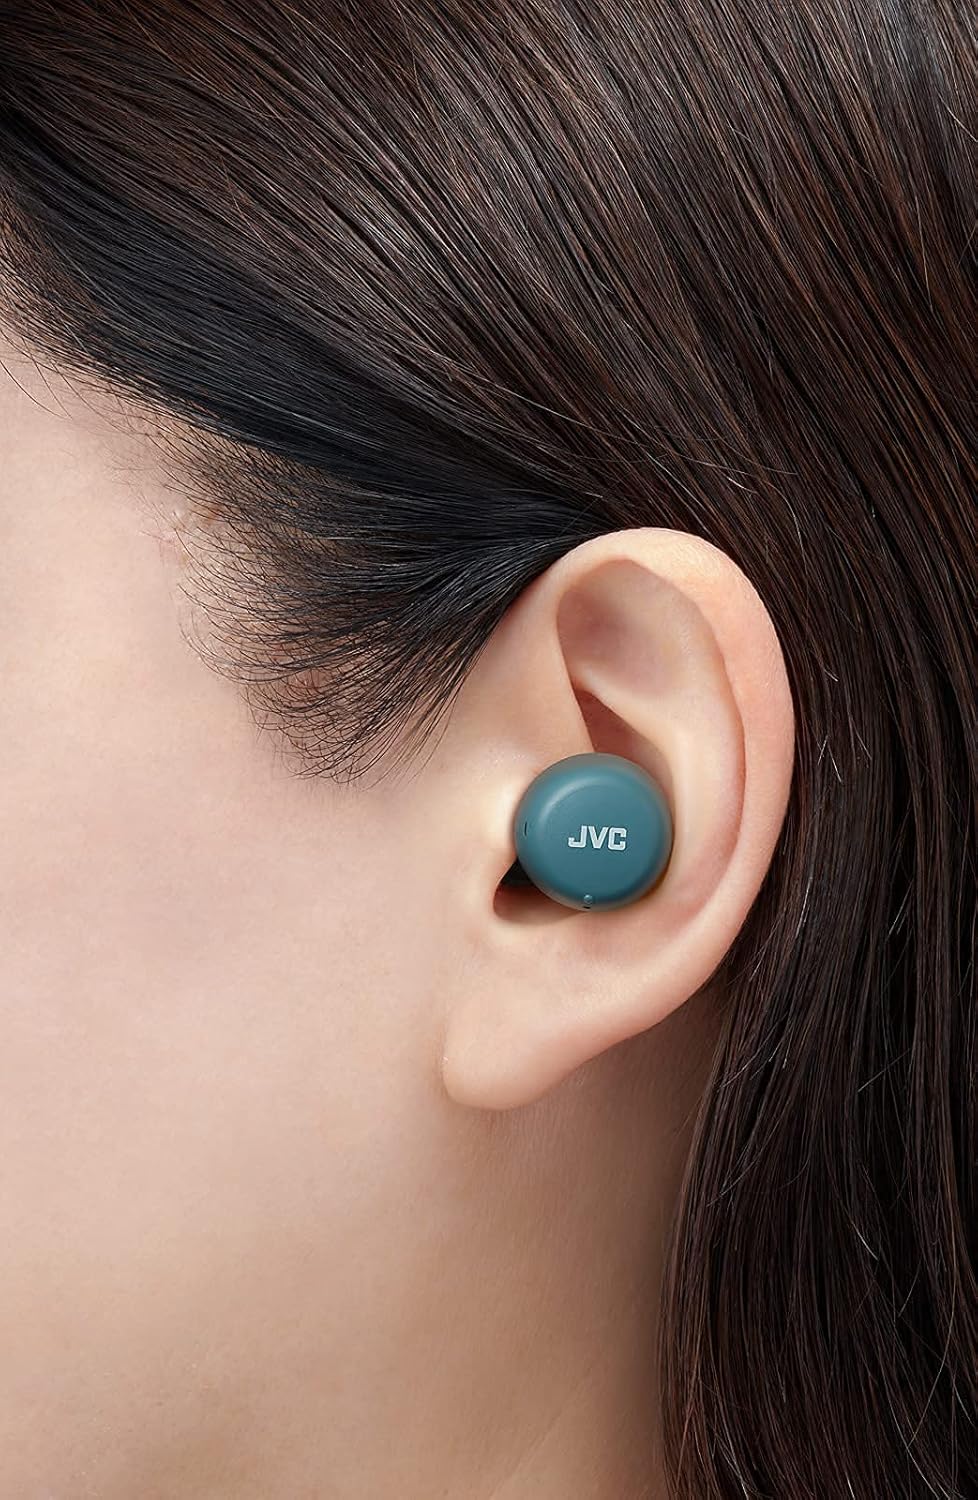
Image: A close-up view of a JVC HA-A5T earbud correctly positioned in a user's ear, demonstrating proper fit.
4. Operating the Earbuds
4.1 Power On/Off
- Power On: Open the charging case or press and hold the button on each earbud for approximately 2 seconds.
- Power Off: Place the earbuds back into the charging case and close the lid, or press and hold the button on each earbud for approximately 5 seconds.
4.2 Basic Controls (One-Button Operation)
Each earbud features a multi-function button for controlling playback and calls.
| Function | Action |
|---|---|
| Play/Pause | Press the button on either earbud once. |
| Next Track | Press the button on the right earbud twice. |
| Previous Track | Press the button on the left earbud twice. |
| Answer/End Call | Press the button on either earbud once during an incoming call or active call. |
| Reject Call | Press and hold the button on either earbud for approximately 2 seconds during an incoming call. |
| Activate Voice Assistant | Press the button on either earbud three times. |
4.3 Single Earbud Use
The JVC HA-A5T earbuds support single earbud use, specifically with the left earbud. This allows you to use one earbud while the other is charging or stored.
- To use only the left earbud, simply take it out of the case. It will automatically connect to your device if previously paired.
- The right earbud cannot be used independently for calls or music playback.
4.4 Voice Assistant
Activate your smartphone's voice assistant (e.g., Siri, Google Assistant) directly from the earbuds.
- Press the multi-function button on either earbud three times to activate the voice assistant.
- Speak your command after the prompt.

Image: A woman wearing JVC HA-A5T earbuds, demonstrating their use for listening to audio.
5. Maintenance
5.1 Cleaning
Regular cleaning helps maintain the performance and longevity of your earbuds.
- Gently wipe the earbuds and charging case with a soft, dry, lint-free cloth.
- Remove the silicone earpieces and clean them with a mild soap solution if necessary. Rinse thoroughly and dry completely before reattaching.
- Do not use harsh chemicals, abrasive materials, or immerse the earbuds or case in water.
5.2 Storage
When not in use, store the earbuds in their charging case to protect them from dust, damage, and to keep them charged.
- Store in a cool, dry place, away from direct sunlight and extreme temperatures.
5.3 Water Resistance (IPX4)
The earbuds are rated IPX4, meaning they are protected against splashing water from any direction. This makes them suitable for workouts and light rain.
- Do not submerge the earbuds in water.
- Ensure the earbuds are dry before placing them back into the charging case to prevent damage to the charging contacts.

Image: A woman engaged in physical activity while wearing the JVC HA-A5T earbuds, highlighting their sweat and rain-proof capabilities.
6. Troubleshooting
If you encounter issues with your JVC HA-A5T earbuds, refer to the following common solutions:
| Problem | Possible Cause | Solution |
|---|---|---|
| Earbuds do not power on. | Low battery. | Place earbuds in the charging case and charge fully. |
| Cannot pair with device. | Bluetooth is off on device; earbuds not in pairing mode; previously paired device interfering. | Ensure Bluetooth is enabled on your device. Place earbuds in case, close, then open to re-enter pairing mode. Forget "JVC HA-A5T" from your device's Bluetooth list and try pairing again. |
| No sound or low volume. | Volume too low on device; earbuds not properly seated; poor earpiece fit. | Increase volume on your connected device. Ensure earbuds are properly inserted. Try different earpiece sizes for a better seal. |
| Intermittent connection or audio dropouts. | Distance from device; interference; low earbud battery. | Keep earbuds within 10 meters (33 feet) of your device. Avoid areas with strong Wi-Fi or other Bluetooth signals. Charge earbuds fully. |
| Microphone not working. | Microphone blocked; device settings. | Ensure the microphone port is not obstructed. Check your device's audio input settings to confirm "JVC HA-A5T" is selected. |
7. Specifications
| Feature | Specification |
|---|---|
| Model Name | HA-A5T |
| Connectivity Technology | Bluetooth, Wireless |
| Bluetooth Version | 5.1 |
| Water Resistance Level | IPX4 (Rain Proof) |
| Battery Life | Up to 15 Hours (with charging case) |
| Power Source | Battery-Powered (2 Lithium Polymer batteries included) |
| Microphone Format | Built-In |
| Control Type | One-button control, Voice Control |
| Material | Plastic |
| Form Factor | In Ear |
| Impedance | 16 Ohms |
| Item Weight | 90 g |
| Product Dimensions | 40 x 47 x 23 Centimeters |
| Included Components | Regular Silicon Earpieces (S/M/L), USB charging cable, Charging case |
8. Warranty and Support
For warranty information and customer support, please refer to the warranty card included with your product or visit the official JVC website. Keep your proof of purchase for any warranty claims.
- Online Support: Visit the JVC official website for FAQs, driver downloads, and contact information.
- Contact Information: Refer to your product packaging or the JVC website for regional customer service contact details.


