
Redragon GC-PS003
Redragon RGPS GC-PS003 600W 80 Plus Bronze Fully Modular PSU User Manual
Model: GC-PS003
Introduction
This manual provides detailed instructions for the installation, operation, and maintenance of your Redragon RGPS GC-PS003 600W 80 Plus Bronze Fully Modular Power Supply Unit (PSU). Please read this manual thoroughly before installation and operation to ensure proper functionality and safety.

Figure 1: Redragon RGPS GC-PS003 600W PSU. This image shows the overall design of the power supply unit, highlighting its compact form factor and the fan grill on the top surface.
Safety Information
- Always disconnect the power cord from the wall outlet before installing, removing, or cleaning the PSU.
- Do not open the PSU casing. High voltages are present inside, which can cause electric shock. There are no user-serviceable parts inside.
- Install the PSU in a well-ventilated area, away from heat sources, direct sunlight, and moisture.
- Ensure all cables are securely connected to prevent damage to components.
- Use only the modular cables provided with this PSU. Using third-party cables may cause damage.
Package Contents
Verify that all items are present in the package:
- Redragon RGPS GC-PS003 600W PSU
- Modular Cable Set (PCI-E, SATA, Peripheral, CPU, Motherboard)
- AC Power Cord
- Mounting Screws
- User Manual (this document)
Setup
1. PSU Installation
- Ensure your computer case is compatible with ATX PSUs.
- Locate the PSU mounting bay in your computer case, typically at the bottom or top rear.
- Carefully slide the PSU into the bay, ensuring the fan faces the correct direction (usually downwards for bottom-mount cases, or upwards for top-mount cases, depending on case design for optimal airflow).
- Secure the PSU to the case using the provided mounting screws.

Figure 2: Rear view of the PSU. This image displays the AC power input socket and the main power switch, which are crucial for connecting the PSU to the wall outlet and controlling its power state.
2. Cable Connections
As a fully modular PSU, connect only the cables required for your system components. This reduces cable clutter and improves airflow.
- 24-Pin ATX Motherboard Cable: Connect to the main power port on your motherboard.
- 4+4 Pin EPS/ATX 12V CPU Cable: Connect to the CPU power port on your motherboard.
- 6+2 Pin PCI-E Cables: Connect to your graphics card(s) if they require external power.
- SATA Power Cables: Connect to SATA devices such as SSDs, HDDs, and optical drives.
- Peripheral (Molex) Cables: Connect to older components or case fans that use Molex connectors.

Figure 3: PSU with modular cables. This image illustrates the modular design of the PSU, showing the various cables that can be connected or disconnected as needed for different components.
Ensure all connections are firm and correctly oriented. Improper connections can damage components.
Operating
Powering On Your System
- After all internal components are connected and the PSU is secured, connect the AC power cord to the PSU's input socket.
- Plug the other end of the AC power cord into a grounded wall outlet or surge protector.
- Flip the main power switch on the back of the PSU to the "ON" (I) position.
- Press the power button on your computer case to start the system.

Figure 4: PSU Power Input and Switch. This close-up view highlights the AC power input and the toggle switch, indicating the "ON" (I) and "OFF" (O) positions for controlling the power flow to the system.
Powering Off Your System
Always shut down your operating system normally before turning off the PSU's main switch or unplugging the power cord.
Maintenance
Cleaning
Regular cleaning helps maintain optimal performance and extends the lifespan of your PSU.
- Frequency: Clean your PSU every 3-6 months, or more frequently if operating in a dusty environment.
- Procedure:
- Ensure the PSU is powered off and disconnected from the wall outlet.
- Use compressed air to blow dust out of the fan grill and ventilation openings. Hold the fan blades gently to prevent over-spinning, which can damage the fan bearings.
- Wipe the exterior of the PSU with a dry, lint-free cloth. Do not use liquid cleaners.

Figure 5: PSU Fan View. This image provides a clear view of the 120mm cooling fan, emphasizing the importance of keeping this area clear of dust for efficient heat dissipation.
Troubleshooting
If you encounter issues with your PSU, refer to the following common problems and solutions:
| Problem | Possible Cause | Solution |
|---|---|---|
| System does not power on. |
|
|
| System powers on but shuts down immediately. |
|
|
| Loud fan noise from PSU. |
|
|
If the problem persists after trying these solutions, please contact Redragon customer support for further assistance.
Specifications
Key technical specifications for the Redragon RGPS GC-PS003 600W PSU:
| Feature | Detail |
|---|---|
| Model | GC-PS003 |
| Brand | Redragon |
| Output Wattage | 600 Watts |
| Efficiency Rating | 80 Plus Bronze |
| Power Supply Design | Fully Modular |
| Cooling Method | Air (120mm Fan) |
| Minimum Input Voltage | 100 Volts |
| Maximum Input Voltage | 230 Volts |
| Item Weight | 2.31 Kilograms |
| Package Dimensions | 30.5 x 19.8 x 12.4 cm |
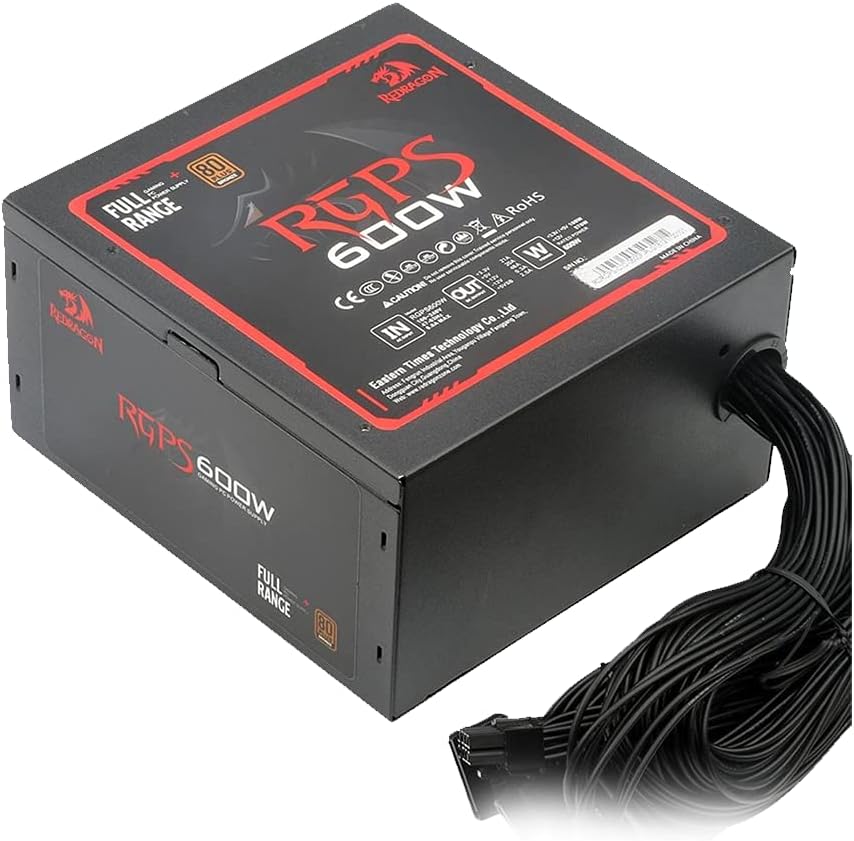
Figure 6: PSU Side Label. This image shows the product label on the side of the PSU, which lists detailed electrical specifications and certifications.
Warranty and Support
For warranty information and technical support, please refer to the official Redragon website or contact their customer service department. Keep your purchase receipt as proof of purchase for warranty claims.
Redragon Official Website: www.redragonzone.com
Related documentsGC-PS003

Ask a question about this manual
Ask about setup, troubleshooting, compatibility, parts, safety, or missing instructions. Manuals+ will review the question and use this page’s manual context to help answer it.