
Wellue DUOEK-S
Wellue DUOEK-S Bluetooth Heart Monitoring Device User Manual
Model: DUOEK-S
Brand: Wellue
1. Introduction
The Wellue DUOEK-S Bluetooth Heart Monitoring Device is designed for personal heart health tracking at home. This portable device allows users to record electrocardiogram (ECG) data and view heart rate information. It connects wirelessly to a smartphone or tablet application for data management and analysis. This manual provides essential instructions for proper setup, operation, and maintenance of your DUOEK-S device.

Image 1.1: The Wellue DUOEK-S Heart Monitoring Device.
Important Note:
- This device is for informational purposes only and should not be used to diagnose or treat any medical condition.
- It is not applicable to individuals with pacemakers or defibrillators.
- Always consult a healthcare professional for medical advice.
2. Package Contents
Upon opening the package, verify that all components are present:
- Wellue DUOEK-S Heart Monitoring Device
- Charging Cable
- User Manual (this document)
Video 2.1: Unboxing and initial setup of the Wellue DUOEK-S device. This video demonstrates the contents of the package and the first steps of preparing the device for use, including charging.
3. Device Overview
Familiarize yourself with the main components of your DUOEK-S device:

Image 3.1: Labeled diagram of the Wellue DUOEK-S device showing the display screen, LED indicator, charge port, left electrode, right electrode, left base, and right base.
- Display Screen: Shows real-time ECG waveform, heart rate, and device status.
- LED Indicator: Provides visual feedback on device status (e.g., charging, connected).
- Charge Port: Used to connect the charging cable.
- Left Electrode (L): Contact point for ECG measurement.
- Right Electrode (R): Contact point for ECG measurement.
4. Setup
4.1 Initial Charging
Before first use, fully charge the DUOEK-S device. Connect the charging cable to the device's charge port and a USB power source. The LED indicator will show charging status.
4.2 App Installation and Connection
- Download the "Vihealth" app from your device's app store (compatible with iOS and Android).
- Ensure Bluetooth is enabled on your smartphone or tablet.
- Open the Vihealth app and follow the on-screen instructions to pair your DUOEK-S device. You may need to grant location and file access permissions for Bluetooth connection and data storage.
- To initiate pairing, touch both electrodes on the device for a few seconds.

Image 4.1: The Vihealth app icon, used for connecting and managing data from your Wellue DUOEK-S device.
5. Operating the Device
5.1 Taking an ECG Measurement
The DUOEK-S device supports both handheld and wearable measurements (with a chest strap, if applicable). For handheld measurements:
- Ensure the device is charged and powered on.
- Place your index fingers on both the Left (L) and Right (R) electrodes.
- Remain still during the measurement. The device will display the ECG waveform and heart rate.
- Measurements typically last between 30 seconds and 5 minutes.

Image 5.1: Proper hand placement on the Wellue DUOEK-S electrodes for an ECG measurement.
5.2 Viewing and Saving Data
After a measurement, the data is automatically saved to the device. To view and manage your history:
- Open the Vihealth app on your connected smartphone or tablet.
- The device will sync its history with the app.
- You can review detailed ECG waveforms, heart rate trends, and other relevant data within the app.
- The app allows for exporting reports, such as PDF files, which can be shared with healthcare providers.
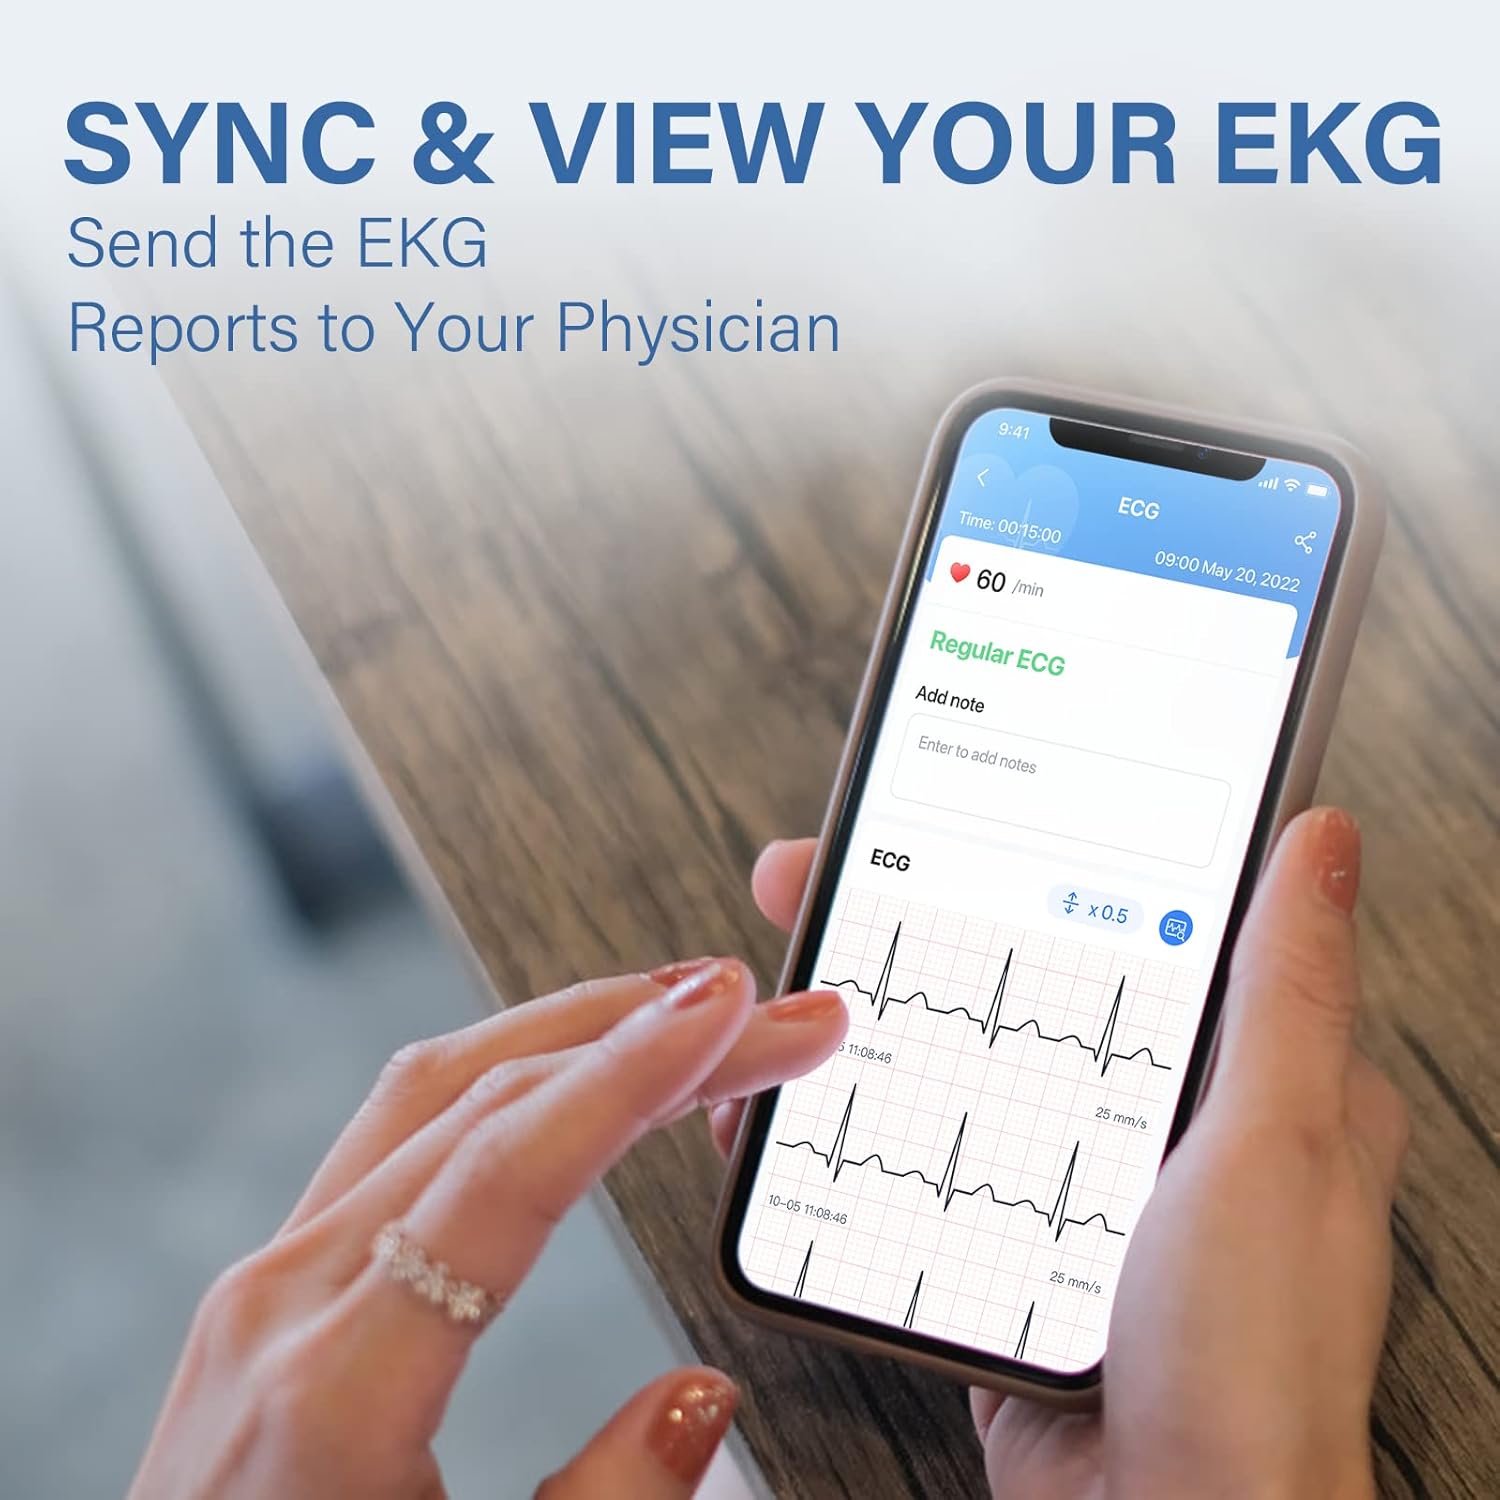
Image 5.2: The Vihealth app interface showing a detailed EKG report on a smartphone.

Image 5.3: Screenshot of the Vihealth app demonstrating the option to share an EKG report, likely as a PDF.
6. Maintenance
- Keep the device clean and dry. Use a soft, dry cloth to wipe the electrodes and device body.
- Avoid exposing the device to extreme temperatures, humidity, or direct sunlight.
- Store the device in a safe place when not in use to prevent damage.
- Ensure the device is regularly charged to maintain battery health.
7. Troubleshooting
| Problem | Possible Cause | Solution |
|---|---|---|
| Device does not power on. | Low battery. | Charge the device using the provided cable. |
| Cannot connect to Vihealth app. | Bluetooth is off; app permissions not granted; incorrect pairing procedure. |
|
| Inaccurate or erratic ECG readings. | Movement during measurement; improper electrode contact; dry skin. |
|
8. Specifications
| Feature | Detail |
|---|---|
| Model | DUOEK-S |
| Connectivity Technology | Bluetooth |
| Wireless Communication Standard | Bluetooth |
| Compatible Devices | Tablet, Smartphone (iOS, Android) |
| Operating System | Android, iOS |
| Control Method | App |
| Recommended Uses | Home Use |
| Special Feature | Hand-held and wearable with the chest strap |
| Item Weight | 8.8 ounces |
| Package Dimensions | 6.8 x 4.6 x 2.4 inches |
9. Warranty and Support
For warranty information, technical support, or further inquiries regarding your Wellue DUOEK-S device, please visit the official Wellue website or contact their customer service directly.
Official Wellue Website: www.getwellue.com
Ask a question about this manual
Ask about setup, troubleshooting, compatibility, parts, safety, or missing instructions. Manuals+ will review the question and use this page’s manual context to help answer it.