1. Introduction
Thank you for choosing the Baseus Super Energy Pro Car Jump Starter. This device is designed to provide a reliable and powerful solution for jump-starting vehicles with dead batteries, as well as serving as a portable power bank for your electronic devices. Please read this manual thoroughly before use to ensure safe and optimal operation.
2. Product Overview
2.1 Package Contents
- Baseus Super Energy Pro Car Jump Starter
- Smart Jumper Cables (with crocodile clips)
- USB to USB-C Charging Cable
- User Manual
2.2 Device Features
- High Peak Current: 1000A peak current for effective jump-starting.
- Large Capacity: 12000mAh battery capacity (44.4Wh).
- Multi-functional: Functions as a car jump starter, power bank, and LED flashlight.
- Digital Display: Built-in display shows battery level.
- Safety Protections: Integrated protections against reverse polarity, over-current, over-charge, and short-circuit.
- Low Power Consumption: Maintains charge for extended periods in standby mode.
2.3 Product Components
Familiarize yourself with the main components of your jump starter:

Image: Top view of the Baseus Super Energy Pro Car Jump Starter, showing the digital display and power button.

Image: Angled view of the jump starter, highlighting its compact design and the side ports.

Image: Side view of the jump starter, showing the input/output ports and the power button.
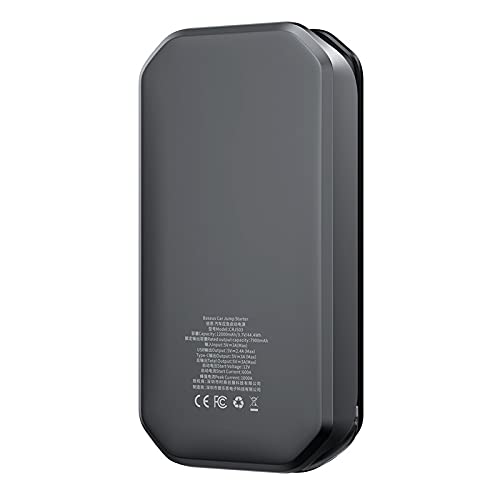
Image: Rear view of the jump starter, displaying product specifications and certifications.

Image: Exploded view showing the internal components, including the battery cells and circuit board.
3. Setup
3.1 Charging the Jump Starter
Before initial use, fully charge the Baseus Super Energy Pro Car Jump Starter. It is recommended to keep the device charged above 50% for optimal performance and longevity.
- Connect the provided USB to USB-C charging cable to the Type-C input port on the jump starter.
- Connect the other end of the USB cable to a 5V/3A USB wall adapter (not included) or a car charger.
- The digital display will show the charging progress. The device is fully charged when the display shows "100%".
Note: The jump starter has a low power consumption in standby mode, retaining up to 85% of its charge a year after full charging if unused.
3.2 Connecting Jumper Cables
The smart jumper cables are designed with safety features. Ensure the jump starter is adequately charged before connecting.
- Locate the jump starter port on the device.
- Insert the blue plug of the smart jumper cables firmly into the jump starter port. Ensure a secure connection.
- The smart clamp indicator light will illuminate, indicating readiness.
4. Operating Instructions
4.1 Jump Starting a Vehicle
Follow these steps carefully to jump-start your vehicle:
- Prepare the Vehicle: Ensure the vehicle's ignition is off and all accessories (lights, radio, AC) are turned off. Engage the parking brake.
- Connect to Battery:
- Connect the red (+) clamp of the jumper cables to the positive (+) terminal of the vehicle's dead battery.
- Connect the black (-) clamp of the jumper cables to the negative (-) terminal of the vehicle's dead battery.
Important: Ensure the clamps make good contact with the battery terminals. Avoid touching the red and black clamps together.
- Check Indicator: Observe the indicator light on the smart jumper cable.
- Solid Green: Ready to jump start.
- Solid Red with Beep: Reverse polarity detected. Disconnect and re-connect correctly.
- Flashing Green: Battery voltage too low. Press the BOOST button (if available on your cable) for 3 seconds, then jump start within 30 seconds.
- Start the Vehicle: Once the indicator is solid green, start your vehicle's engine. If it doesn't start immediately, wait 30 seconds before trying again. Do not attempt more than 3 consecutive starts.
- Disconnect Cables: Once the vehicle starts, immediately disconnect the black (-) clamp first, then the red (+) clamp from the vehicle battery. Finally, disconnect the jumper cables from the jump starter.
Note: After jump-starting, allow your vehicle's engine to run for at least 15-20 minutes to recharge its battery.
4.2 Using as a Power Bank
The jump starter can charge various electronic devices via its USB and Type-C output ports.
- Connect your device's charging cable to the appropriate USB (5V-2.4A Max) or Type-C (5V-3A) output port on the jump starter.
- The jump starter will automatically begin charging your device.
- Monitor the jump starter's digital display for its remaining battery level.
4.3 Using the LED Flashlight
The built-in LED light can be used as a flashlight for emergencies or low-light situations.
- To Turn On/Off: Press and hold the power button for 3 seconds to turn the flashlight on or off.
- Cycle Modes: Short press the power button to cycle through different light modes (e.g., steady light, SOS, strobe).
5. Safety Precautions
WARNING: Improper use may result in injury, damage to the device, or property damage.
- Do not allow the red and black clamps to touch each other, as this can cause sparks, short circuits, or damage.
- Do not jump-start a vehicle if the jump starter's battery level is below 20%.
- Do not attempt to jump-start vehicles with a battery voltage other than 12V.
- Do not use the jump starter if the cables or clamps are damaged.
- Keep the device away from children.
- Do not expose the device to extreme temperatures (above 60°C / 140°F or below -20°C / -4°F) or direct sunlight for prolonged periods.
- Do not disassemble, modify, or attempt to repair the device yourself. Contact customer support for assistance.
- Ensure proper ventilation during use and charging.
- Remove the jump starter from the vehicle battery immediately after the vehicle starts.
- Do not use the jump starter to charge household appliances.
6. Maintenance
6.1 Cleaning
Wipe the device with a soft, dry cloth. Do not use harsh chemicals or abrasive cleaners. Ensure all ports are free of dust and debris.
6.2 Storage
- Store the jump starter in a cool, dry place, away from direct sunlight and moisture.
- For long-term storage, it is recommended to charge the device every 3-6 months to maintain battery health.
- Keep the device in its original packaging or a protective case to prevent damage.
7. Troubleshooting
| Problem | Possible Cause | Solution |
|---|---|---|
| Vehicle does not start. |
|
|
| Jump starter not charging. |
|
|
| Device not turning on. |
|
|
8. Specifications
| Feature | Specification |
|---|---|
| Model Number | CRJS03-01 |
| Battery Capacity | 12000mAh / 3.7V / 44.4Wh |
| Initial Voltage | 12V |
| Rated Capacity | 7900mAh |
| Starting Current | 600A |
| Peak Current | 1000A |
| Input (Type-C) | 5V-3A (Max) |
| USB Output | 5V-2.4A (Max) |
| Type-C Output | 5V-3A |
| Dimensions | 23.9 x 17.3 x 6.7 cm |
| Weight | 890 g |
9. Warranty and Support
Baseus products are designed and manufactured to the highest quality standards. For specific warranty information, please refer to the warranty card included with your product or visit the official Baseus website.
If you encounter any issues or have questions regarding your Baseus Super Energy Pro Car Jump Starter, please contact Baseus customer support through their official channels or the retailer from whom you purchased the product.
Please have your model number (CRJS03-01) and purchase details ready when contacting support.


