
1. Introduction
This manual provides instructions for the safe and efficient use of your Monzana Solar Pool Heater MZSP116. This environmentally friendly solar panel is designed to heat your swimming pool or outdoor pool using solar energy, reducing reliance on conventional electrical heating methods.
Please read these instructions carefully before installation and operation. Keep this manual for future reference.
2. Safety Instructions
- Always ensure the solar heater is installed on a stable, level surface.
- Do not operate the solar heater if any part is damaged.
- Ensure all connections are secure and watertight to prevent leaks.
- Keep children and pets away from the solar heater during operation.
- Disconnect the solar heater from the pool filtration system before performing any maintenance or cleaning.
- The maximum working pressure for this unit is 3 bar. Do not exceed this pressure.
- Protect the solar heater from freezing temperatures during winter by draining all water and storing it indoors.
3. Package Contents
Verify that all components are present and undamaged before proceeding with installation.

Image: Included components for the solar pool heater, featuring hose connectors, stainless steel clamps, sealing rings, and Teflon tape.
- Monzana Solar Pool Heater Panel (1 unit)
- Adjustable Aluminum Feet (2 units)
- Hose Connectors (38 mm)
- Stainless Steel Clamps
- Sealing Rings
- Teflon Tape
- Instruction Manual
4. Setup and Installation
4.1 Choosing a Location
For optimal heating performance, place the solar heater in an area that receives the maximum amount of direct sunlight throughout the day. The panel should be positioned to face the sun directly for as long as possible.
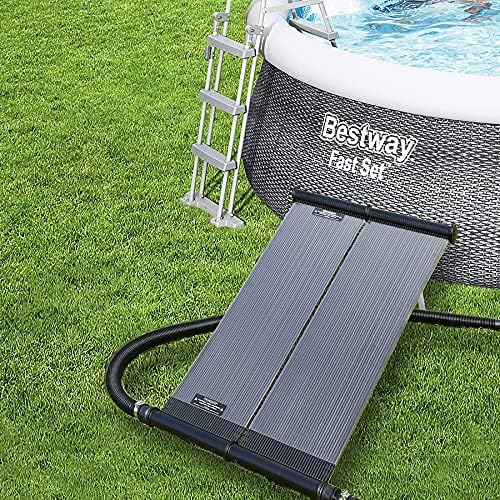
Image: The solar pool heater positioned on a grassy area adjacent to a swimming pool, illustrating a typical setup location.
4.2 Assembling the Adjustable Feet
Attach the adjustable aluminum feet to the solar panel. These feet allow you to adjust the angle of the panel to optimize its exposure to the sun. The recommended angle range for maximum efficiency is between 15° and 22°.

Image: Detail of the adjustable leg, showing how to modify the height and angle of the solar panel for optimal sun exposure.

Image: Illustration demonstrating the adjustable angle feature of the solar panel, allowing for settings between 15° and 22° to maximize solar absorption.
4.3 Connecting to the Pool Filtration System
The solar heater connects to your pool's existing filtration system. Water is pumped from the pool, through the solar panel where it is heated, and then returned to the pool.
- Ensure your pool pump is turned off before making any connections.
- Connect the inlet of the solar heater to the outlet of your pool pump (water flowing from the pump).
- Connect the outlet of the solar heater to the return inlet of your pool (water flowing back to the pool).
- Use the provided 38 mm hose connectors and stainless steel clamps to secure all connections. Apply Teflon tape to threaded connections for a watertight seal.

Image: Schematic diagram showing the circulation of water from the pool, through the pump, into the solar heater, and then back into the pool.

Image: Detailed view of a hose securely connected to the solar panel using a stainless steel clamp, ensuring a leak-free connection.
4.4 Multiple Solar Heaters (Series Connection)
For larger pools or increased heating power, multiple solar heaters can be connected in series. This configuration doubles the heating capacity. When connecting multiple units, ensure that your pump has sufficient power to maintain adequate flow.
Note: The water flow rate through the solar panel is important. A PoolBypassSet (sold separately) can help reduce the water flow through the solar panel, increasing the water's residence time and thus heating the pool water more effectively.
5. Operating Instructions
5.1 Initial Start-up
- After all connections are secure and checked for leaks, turn on your pool pump.
- Allow water to circulate through the solar heater. You may hear air escaping as the system fills.
- Monitor for any leaks and tighten connections if necessary.
5.2 Daily Operation
The solar heater operates passively by absorbing solar energy. For best results, run your pool pump during the sunniest hours of the day. The longer the water circulates through the solar panel during peak sunlight, the warmer your pool water will become.
Adjust the angle of the solar panel's feet periodically to maintain optimal sun exposure as the sun's position changes throughout the day or season.
6. Maintenance
6.1 Regular Cleaning
Periodically clean the surface of the solar panel to ensure maximum sunlight absorption. Use a soft cloth and mild soapy water. Avoid abrasive cleaners or brushes that could scratch the panel surface.
6.2 Winterization
Before the first frost, it is crucial to properly winterize your solar pool heater to prevent damage from freezing water.
- Turn off the pool pump and disconnect the solar heater from the filtration system.
- Completely drain all water from the solar panel. Tilt the panel to ensure all water escapes.
- Store the solar heater in a dry, frost-free location, such as a garage or shed.
- Inspect all hoses and connections for wear or damage before storing. Replace any worn parts.
7. Troubleshooting
| Problem | Possible Cause | Solution |
|---|---|---|
| No or insufficient heating |
|
|
| Water leaks from connections |
|
|
| Reduced water flow |
|
|
8. Specifications
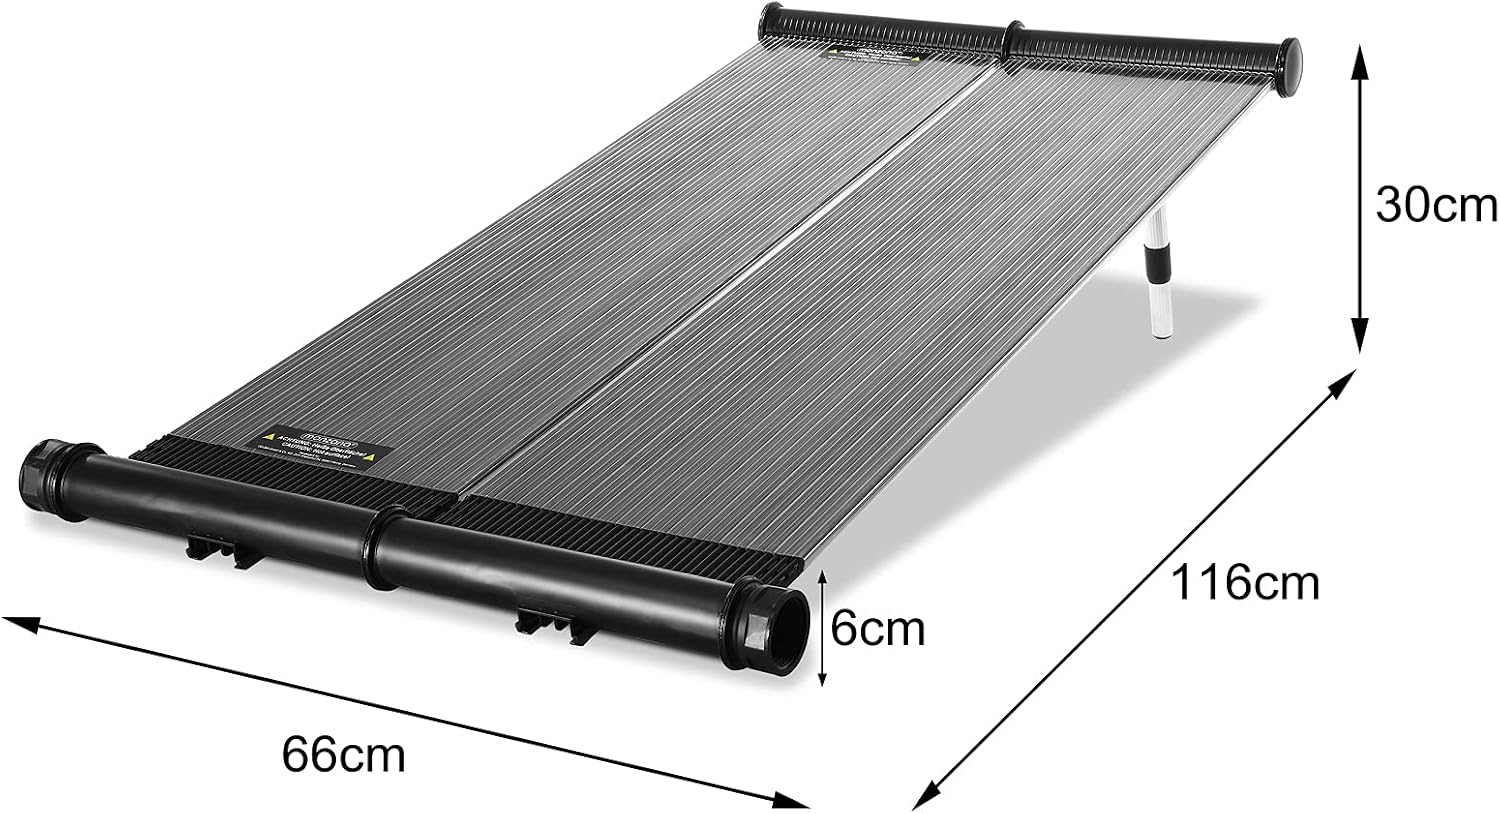
Image: Dimensional overview of the solar pool heater, indicating its length, width, panel height, and the adjustable height range.
| Model | MZSP116 |
| Dimensions (L x W x H) | 116 x 66 x 6 cm |
| Material | Polypropylene (Plastic) |
| Max. Working Pressure | 3 bar |
| Adjustable Angle Range | 15° - 22° |
| Connector Size | 38 mm |
| Recommended Flow Rate | Up to 6200 l/h (Note: Lower flow rate can increase heating efficiency) |
9. Customer Support and Warranty
For technical assistance, spare parts, or warranty inquiries, please contact your retailer or the manufacturer directly. Please have your model number (MZSP116) and purchase date available when contacting support.
Information regarding specific warranty terms and availability of spare parts is not provided in this manual. Please refer to your purchase documentation or contact the seller for details.