Introduction
Thank you for choosing the Raddy RD23 Portable DAB/FM Radio. This compact and versatile radio offers high-quality digital audio broadcasting (DAB/DAB+) and traditional FM radio reception, along with Bluetooth connectivity for streaming audio from your smart devices. Its lightweight design and rechargeable battery make it an ideal companion for both indoor and outdoor use. Please read this manual carefully to ensure proper operation and to fully utilize all features of your new radio.
Safety Information
- Do not expose the device to rain, moisture, or extreme temperatures.
- Avoid dropping or subjecting the device to strong impacts.
- Do not disassemble or attempt to repair the unit yourself. Refer all servicing to qualified personnel.
- Keep out of reach of children.
- Use only the specified charging cable and power source.
- Dispose of batteries and electronic components responsibly according to local regulations.
Package Contents
- Raddy RD23 Portable DAB/FM Radio
- USB Charging Cable
- User Manual
Product Overview

Figure 1: Front Panel Controls
This image displays the front of the Raddy RD23 radio, highlighting its digital display screen and the numeric keypad with navigation and function buttons. Key buttons include OK, Menu, Info, Mode, Scan, and a lock button.

Figure 2: Top Panel Ports
This image shows the top of the Raddy RD23 radio, detailing the antenna connection, headphone jack, ON/OFF switch, USB port, and TF card slot. These are the primary connection points for the device.
Controls and Functions:
- Display Screen: Shows station information, time, battery level, and menu options.
- Number Buttons (1-6): For direct station selection or menu navigation.
- OK Button: Confirms selections.
- Left/Right Arrows (< / >): Navigate through menus or adjust volume/frequency.
- P Button: Preset button for saving and recalling favorite stations.
- INFO Button: Displays additional information about the current broadcast.
- MENU Button: Accesses the main menu for settings.
- MODE Button: Switches between DAB, FM, and Bluetooth modes.
- SCAN Button: Initiates automatic station scanning.
- Lock Button: Locks/unlocks the keypad to prevent accidental presses.
- ON/OFF Switch: Powers the device on or off.
- Headphone Jack: For private listening with 3.5mm headphones.
- USB Port: For charging and potentially USB stick playback.
- TF Card Slot: For playing audio files from a TF (MicroSD) card.
- Antenna: Extendable telescopic antenna for improved radio reception.
Setup
1. Charging the Battery

Figure 3: Charging the RD23 Radio
The image shows the Raddy RD23 radio connected to a laptop via a USB cable, indicating the charging process. The radio features a built-in rechargeable battery.
The Raddy RD23 has a built-in 700mAh rechargeable battery. Before first use, fully charge the radio.
- Connect the supplied USB charging cable to the radio's USB port.
- Connect the other end of the USB cable to a USB power adapter (not included) or a computer's USB port.
- The charging indicator on the display will show the charging status. It will turn off or change color when fully charged.
2. Turning On/Off
Slide the ON/OFF switch located on the top of the radio to the "ON" position to power on the device. Slide it to the "OFF" position to power off.
3. Antenna Adjustment
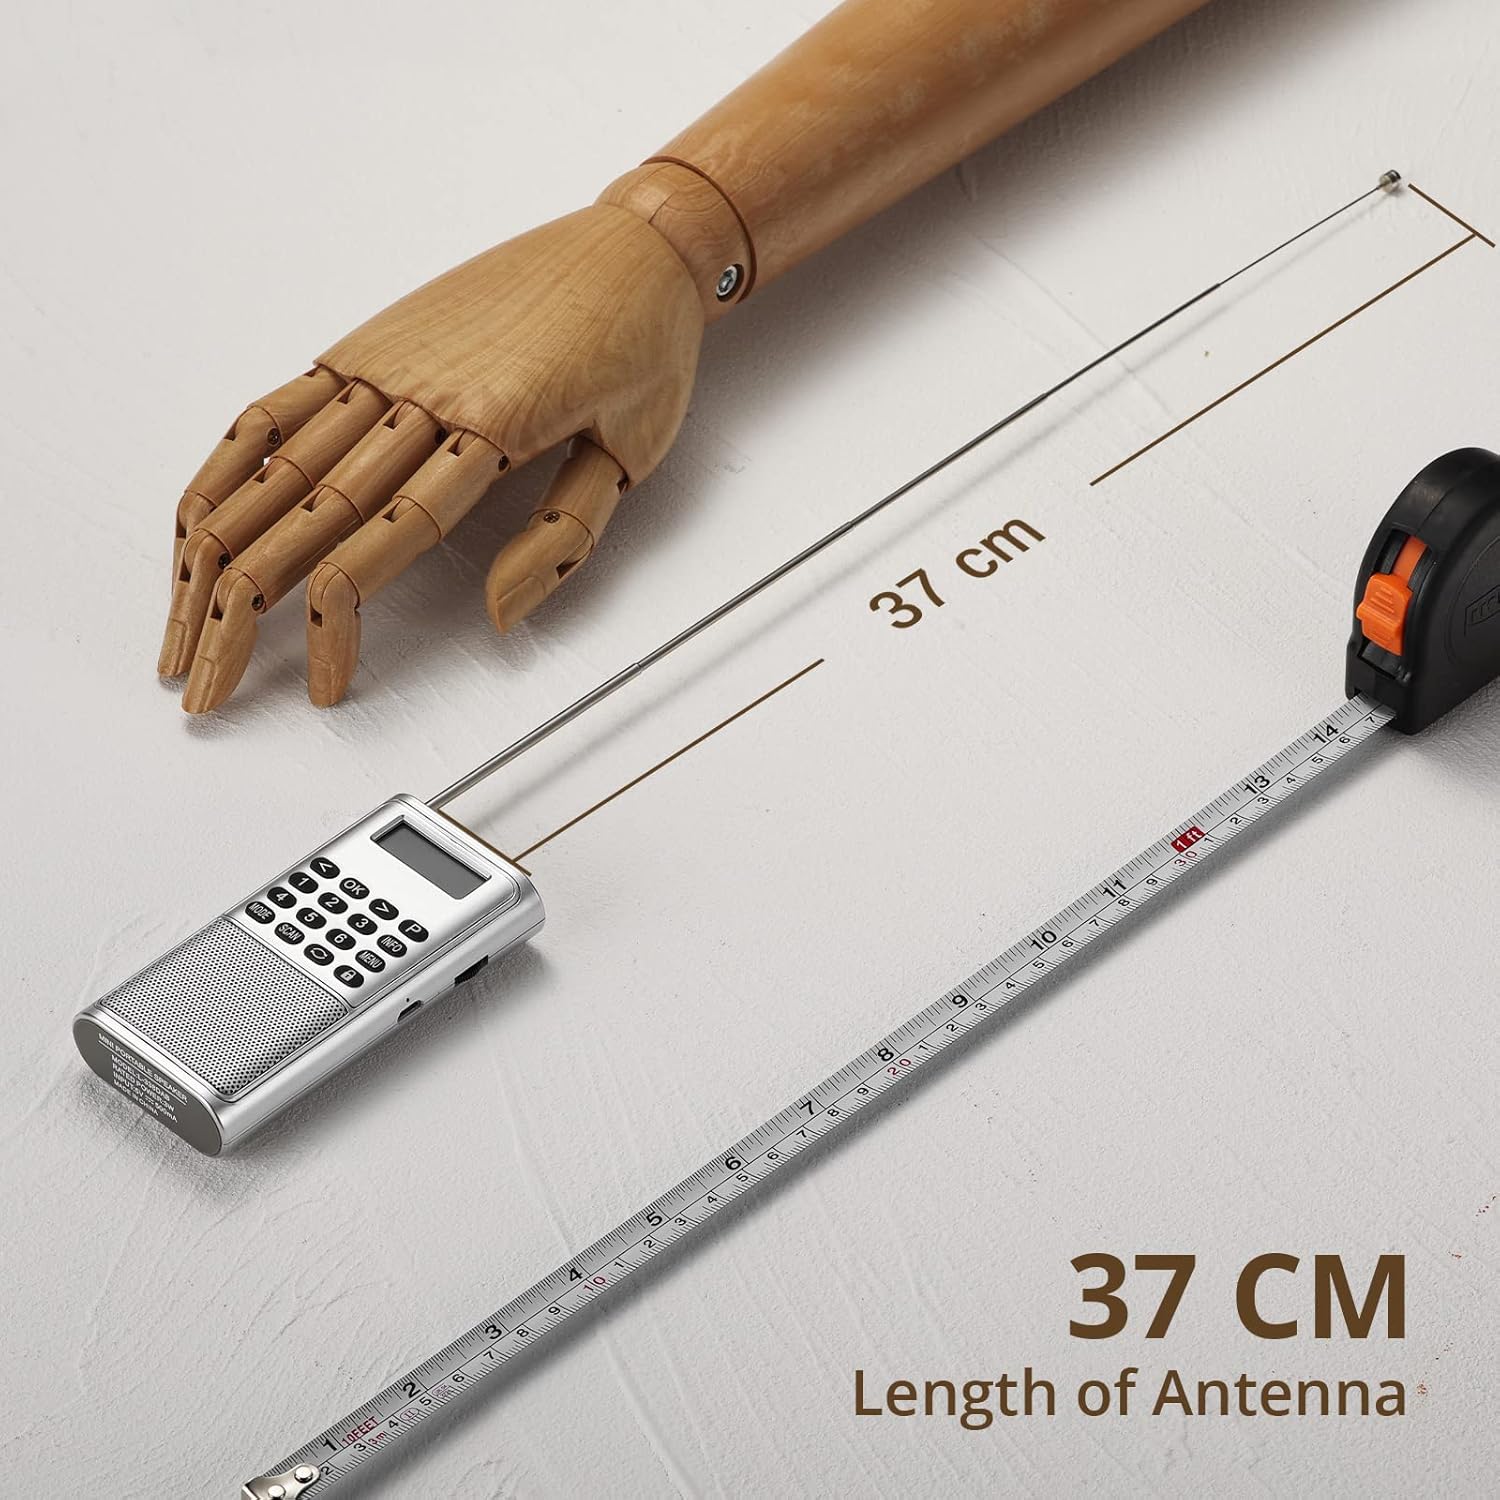
Figure 4: Extended Antenna
This image illustrates the Raddy RD23 radio with its telescopic antenna fully extended, demonstrating its length for optimal signal reception. The antenna extends to approximately 37 cm.
For optimal radio reception, fully extend the telescopic antenna. Adjust its position for the best signal quality.
Operating Instructions
1. DAB/DAB+ Radio Mode
- Turn on the radio. If it's not already in DAB mode, press the MODE button until "DAB" appears on the display.
- The radio will automatically scan for available DAB/DAB+ stations upon first use or if no stations are found. To manually scan, press the SCAN button.
- Once scanning is complete, use the Left/Right Arrow buttons to navigate through the list of available stations.
- Press the OK button to select a station.
- Press the INFO button to cycle through different information displays (e.g., program type, signal strength, time).
- To save a station as a preset, tune to the desired station, then press and hold the P button. Use the number buttons (1-6) to select a preset slot, then press OK to confirm. To recall a preset, press the P button, then the corresponding number button.
2. FM Radio Mode
- Press the MODE button until "FM" appears on the display.
- To auto-scan and save FM stations, press the SCAN button. The radio will scan and store all strong signals.
- To manually tune, use the Left/Right Arrow buttons to adjust the frequency step by step. Press and hold the Left/Right Arrow buttons for automatic seek to the next strong station.
- Saving and recalling FM presets works similarly to DAB mode using the P button and number buttons.
3. Bluetooth Mode

Figure 5: Bluetooth Connectivity
This image shows the Raddy RD23 radio wirelessly connected to a smartphone via Bluetooth, demonstrating its capability to stream audio from a mobile device. The phone's screen displays a music player interface.
The Raddy RD23 can connect to your smartphone or other Bluetooth-enabled devices to stream audio.
- Press the MODE button until "Bluetooth" or a Bluetooth icon appears on the display. The radio will enter pairing mode.
- On your smartphone or Bluetooth device, enable Bluetooth and search for available devices.
- Select "RD23" from the list of found devices.
- Once paired, you can play audio from your device through the radio's speaker.
- Note: The RD23 DAB radio cannot be connected to headphones via Bluetooth. It only functions as a Bluetooth receiver.
4. USB/TF Card Playback Mode
The radio supports playing audio files directly from a USB stick or TF (MicroSD) card.
- Insert a USB stick into the USB port or a TF card into the TF card slot.
- Press the MODE button until the display indicates USB or TF card playback.
- The radio will automatically start playing audio files. Use the navigation buttons to skip tracks or adjust volume.
5. Headphone Use
Plug any standard 3.5mm headphones into the headphone jack on the top of the radio for private listening. The internal speaker will automatically mute when headphones are connected.
Maintenance
- Cleaning: Wipe the radio with a soft, dry cloth. Do not use abrasive cleaners or solvents.
- Battery Care: To prolong battery life, avoid fully discharging the battery frequently. Charge the radio regularly, even if not in use, to maintain battery health.
- Storage: When storing for extended periods, ensure the radio is fully charged and store it in a cool, dry place.
Troubleshooting
| Problem | Possible Cause | Solution |
|---|---|---|
| No power/Radio won't turn on | Battery is depleted. | Charge the radio using the USB cable. |
| Poor radio reception (DAB/FM) | Antenna not extended or positioned correctly; weak signal area. | Fully extend and adjust the antenna. Try moving to a different location. Perform a new scan. |
| Bluetooth pairing failed | Radio not in pairing mode; device too far; Bluetooth disabled on source device. | Ensure radio is in Bluetooth mode. Keep devices within 10 meters. Enable Bluetooth on your source device and try pairing again. |
| No sound from speaker | Volume too low; headphones connected; mute activated. | Increase volume. Disconnect headphones. Check if mute is active. |
| USB/TF card not playing | Incorrect file format; card/USB not inserted correctly; corrupted files. | Ensure files are in a supported format (e.g., MP3). Reinsert the card/USB. Try a different card/USB. |
Specifications
| Feature | Detail |
|---|---|
| Model Number | RD23 |
| Brand | Radioddity |
| Radio Bands | DAB, DAB+, FM |
| Connectivity | Bluetooth, USB, TF Card, 3.5mm Headphone Jack |
| Battery | 700mAh Lithium-ion (Rechargeable) |
| Power Source | Battery Powered (USB Rechargeable) |
| Dimensions (L x W x H) | 11 x 3.2 x 7 cm (approx. 4.3 x 1.3 x 2.8 inches) |
| Special Features | Built-in Clock, Lightweight, Portable |
| Color | Silver |
Warranty and Support
For warranty information and technical support, please refer to the warranty card included with your product or visit the official Radioddity website. Keep your purchase receipt as proof of purchase for any warranty claims.


