1. Product Overview
The Makeid L1-A Label Maker is a portable and rechargeable wireless label printer designed for creating custom labels at home, school, or work. It connects wirelessly via Bluetooth to compatible Android and iOS devices, allowing users to design personalized labels using a dedicated mobile application. This device utilizes thermal printing technology to produce clear and lasting prints on waterproof, fade-resistant, and residue-free label tapes. It features a built-in cutter for easy label separation.
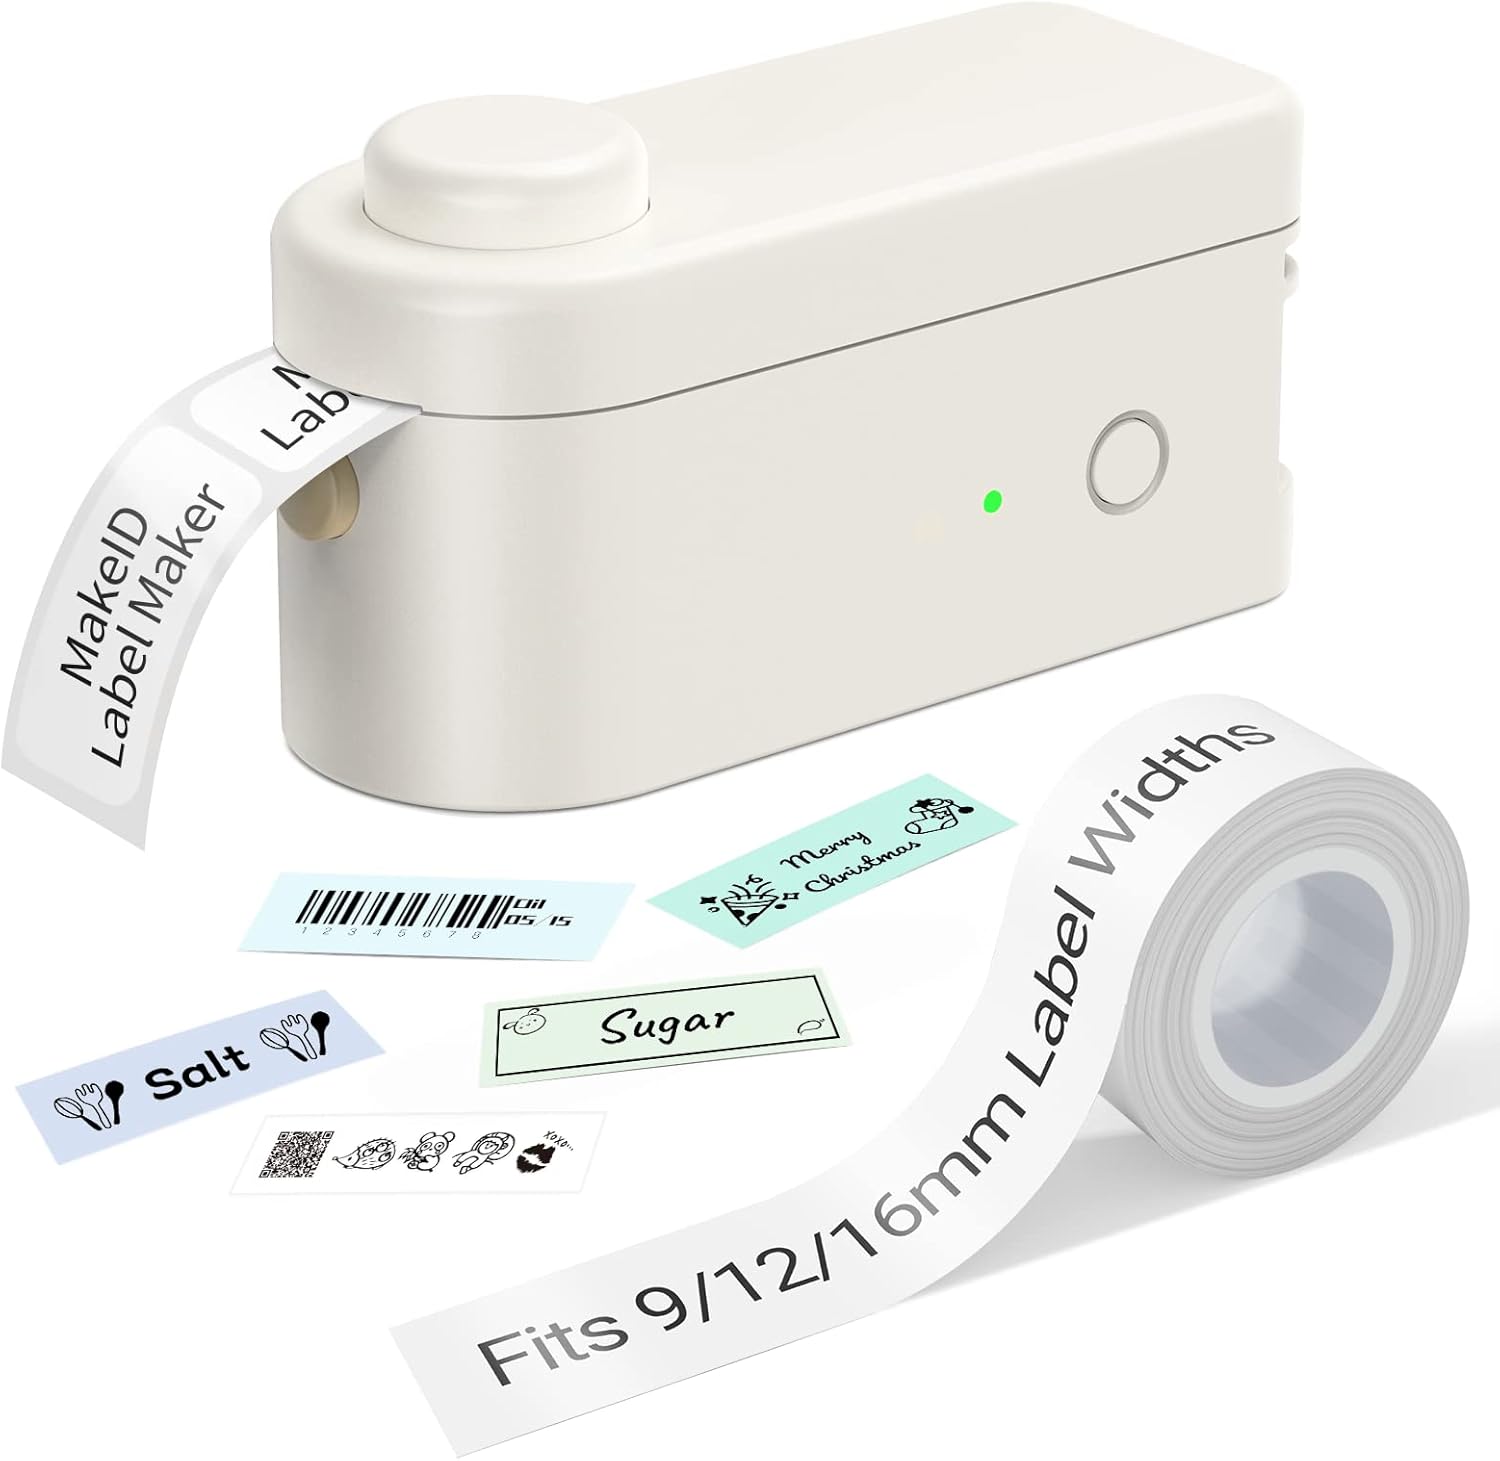
Figure 1: Makeid L1-A Label Maker with a roll of label tape and examples of printed labels, demonstrating its compact size and output capabilities.
2. Safety Information
- Do not expose the device to extreme temperatures, direct sunlight, or high humidity.
- Keep the device away from water and other liquids.
- Do not attempt to disassemble or repair the device yourself. Refer to qualified service personnel.
- Use only Makeid approved label tapes and accessories.
- Keep out of reach of children.
- Ensure proper ventilation during charging.
3. Setup Guide
3.1 Unboxing and Initial Charge
Carefully remove the label maker and any accessories from the packaging. Before first use, fully charge the device using the provided USB cable. The charging indicator light will typically change color or turn off when charging is complete.
3.2 Installing Label Tape
- Open the tape compartment cover on the label maker.
- Insert the label tape cartridge, ensuring it clicks into place securely.
- Gently pull a small length of tape out of the cartridge, extending it slightly past the cutter.
- Close the tape compartment cover.

Figure 2: The Makeid label maker with its tape compartment open, illustrating the process of inserting a label tape cartridge.
3.3 App Download and Bluetooth Connection
The Makeid label maker operates via a dedicated mobile application. Download the "MakeID-Life" app from your device's app store (Google Play for Android, App Store for iOS).

Figure 3: Step-by-step guide within the Makeid app demonstrating how to turn on Bluetooth, select the L1 model, and confirm the connection for printing.
- Ensure Bluetooth is enabled on your smartphone or tablet.
- Open the MakeID-Life app.
- Turn on the Makeid label maker by pressing the power button.
- Within the app, navigate to the device connection section (often indicated by a Bluetooth icon or "Connect Device").
- Select the "L1" model from the list of available devices.
- Confirm the connection. The app will indicate when the device is successfully paired.
4. Operating Instructions
4.1 Designing Labels
The MakeID-Life app provides a versatile interface for label design. You can:
- Enter text and choose from multiple font styles.
- Add numbers, symbols, emojis, and icons.
- Create continuous labels or die-cut labels (depending on tape type).
- Adjust label length and other parameters.

Figure 4: The Makeid-Life app displaying various font choices and customization features, including the ability to add images, QR codes, and barcodes to labels.
4.2 Printing Labels
Once your label design is complete in the app:
- Tap the "Print" button within the app.
- The label maker will begin printing the label.
- After printing, wait for the label to fully emerge from the printer.
- Press the built-in cutter button to cleanly cut the label.

Figure 5: Examples of labels created with the Makeid label maker, demonstrating its versatility for continuous labels (9mm, 12mm, 16mm widths) and die-cut labels, suitable for various classification needs.

Figure 6: Demonstrations of the Makeid label maker's practical applications, including personal item identification, business product labeling, kitchen organization, and cautionary reminders.
5. Maintenance
5.1 Cleaning the Print Head
To ensure optimal print quality, periodically clean the thermal print head. Use a soft, lint-free cloth lightly dampened with isopropyl alcohol. Gently wipe the print head surface. Ensure the device is turned off and unplugged before cleaning.
5.2 Storage
Store the label maker in a cool, dry place away from direct sunlight and extreme temperatures. Remove the label tape cartridge if the device will not be used for an extended period.
6. Troubleshooting
| Problem | Possible Cause | Solution |
|---|---|---|
| Device won't turn on | Low battery; Power button not pressed correctly | Charge the device; Press and hold the power button for a few seconds. |
| Cannot connect via Bluetooth | Bluetooth off on phone/tablet; Device not in pairing mode; App issue | Ensure Bluetooth is on; Restart the label maker; Restart the app; Forget device in phone's Bluetooth settings and re-pair. |
| Poor print quality / Faded print | Print head dirty; Incorrect tape installed; Low battery | Clean the print head; Ensure correct Makeid tape is used; Charge the device. |
| Tape jam / Label not feeding | Tape not installed correctly; Obstruction in tape path | Re-install tape cartridge; Check for any debris and carefully remove. |
7. Specifications
- Brand: Makeid
- Model Name: L1-A
- Connectivity Technology: Bluetooth
- Printing Technology: Thermal
- Special Features: Portable, Wireless, Built-in Cutter
- Compatible Tape Widths: 9mm, 12mm, 16mm
- Printer Output: Monochrome
- Max Print Speed: 25 ppm
- Item Weight: 0.28 Pounds (approx. 127g)
- DPI Resolutions: 203DPI, 300DPI (model dependent)
8. Warranty and Support
Specific warranty information is typically provided with your product packaging or on the manufacturer's official website. Please refer to these resources for details regarding warranty coverage and terms.
For technical support, troubleshooting assistance beyond this manual, or inquiries about replacement parts and accessories, please visit the official Makeid website or contact their customer service department. Contact information can usually be found on the product packaging or the Makeid brand store page.
Note: As per the provided product data, specific warranty duration or direct support contact details are not available in this document.


