
1. Introduction
The Lenco Xemio-560BU is a versatile MP3/MP4 player designed for portable entertainment. It features 8GB of internal storage, expandable up to 128GB via a microSD card slot, a 1.8-inch color TFT screen, and a built-in voice recorder. This manual provides essential information for setting up, operating, and maintaining your device, ensuring you get the most out of its features.
2. Safety Information
Please read and understand all safety instructions before using the device. Failure to follow these instructions may result in injury or damage to the device.
- Do not expose the device to water, moisture, or extreme temperatures.
- Avoid prolonged listening at high volume levels to prevent possible hearing damage.
- Use only the supplied USB cable and compatible power sources for charging.
- Do not attempt to disassemble, repair, or modify the device yourself. Refer all servicing to qualified personnel.
- Keep the device and accessories out of reach of small children.
3. Product Overview
3.1 Device Components

This image displays the front of the Lenco Xemio-560BU MP3/MP4 player. The device features a blue casing with yellow control buttons shaped like a paw print. The 1.8-inch color TFT screen is visible at the top, displaying icons for music, photos, videos, and settings. Below the screen are the 'M' (Menu), 'Return', 'Previous/Rewind', 'Next/Fast Forward', 'Play/Pause', 'Volume Up (+)', and 'Volume Down (-)' buttons.
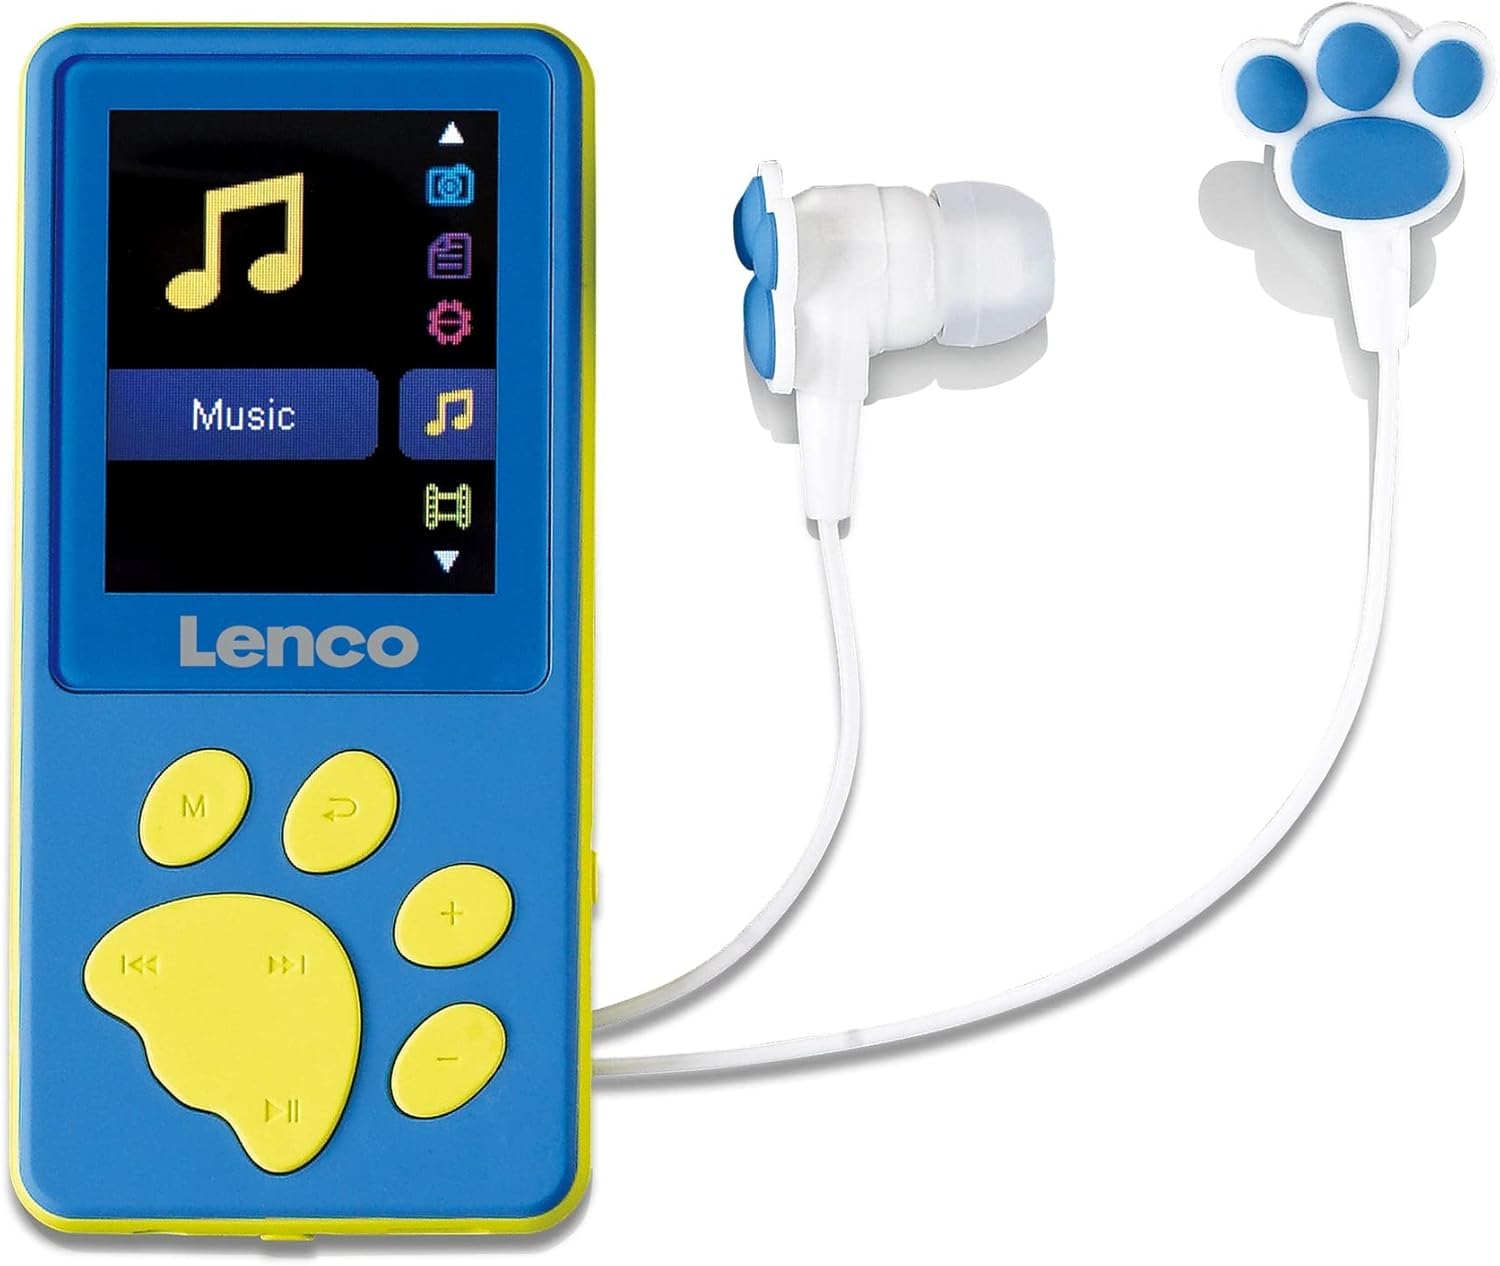
This image shows the Lenco Xemio-560BU MP3/MP4 player alongside its included earbuds. The player is blue with yellow paw-print shaped buttons. The earbuds are white with blue paw print accents on the earpieces, designed for comfortable listening.

This image presents the back of the Lenco Xemio-560BU MP3/MP4 player. The casing is solid blue, and visible markings include 'Made in PRC', 'CE', and 'FC' logos, indicating compliance with various standards.
3.2 Included Components
The following items are included with your Lenco Xemio-560BU MP3/MP4 Player:
- Lenco Xemio-560BU MP3/MP4 Player
- In-ear headphones (earbuds with paw print design)
- 3 pairs of ear tips (various sizes)
- USB cable
4. Setup
4.1 Charging the Device
Before first use, fully charge the player. Connect the supplied USB cable to the player's USB port and to a computer's USB port or a compatible USB power adapter (not included). The battery status indicator on the screen will show charging progress. A full charge typically takes a few hours.
4.2 Inserting a MicroSD Card
The Xemio-560BU has 8GB of internal memory, which can be expanded. Locate the microSD card slot on the side of the player. Insert a microSD card (up to 128GB, not included) into the slot until it clicks into place. Ensure the card is inserted with the correct orientation to avoid damage. To remove, gently push the card in until it springs out.
4.3 Powering On/Off
To turn the device on, press and hold the 'Play/Pause' button or the 'M' button for a few seconds until the screen lights up. To turn it off, press and hold the same button until the screen goes blank.
5. Operating Instructions
5.1 Basic Navigation
- M (Menu) Button: Press to access the main menu or return to the previous menu level.
- Previous/Rewind (⏪) and Next/Fast Forward (⏩) Buttons: Use to navigate through menu options, select tracks, or fast forward/rewind during playback.
- Play/Pause (⏸) Button: Press to select an option, start/pause playback, or confirm an action.
- Volume Up (+) and Volume Down (-) Buttons: Adjust the playback volume.
5.2 Music Playback
- From the main menu, select the 'Music' icon.
- Browse your audio files and folders using the navigation buttons.
- Press the 'Play/Pause' button to select a song and begin playback.
- Use the 'Previous/Rewind' and 'Next/Fast Forward' buttons to skip tracks. Hold them down to fast forward or rewind within a track.
- Adjust the volume using the '+' and '-' buttons. Note: The device may display a warning message when increasing volume to prevent hearing damage. Press the '+' button again to confirm and proceed with volume adjustment.
5.3 Video Playback
The player supports MP4 (XVID) video format.
- From the main menu, select the 'Video' icon.
- Navigate to your video files.
- Press the 'Play/Pause' button to start playback.
5.4 Image and E-book Viewing
The player supports BMP and JPEG image formats, and TXT e-book formats.
- Select the 'Photos' or 'E-books' icon from the main menu.
- Browse and select your desired file to view.
5.5 Voice Recording
The Xemio-560BU features an integrated microphone for voice recording.
- From the main menu, select the 'Voice Recorder' icon.
- Press the 'Play/Pause' button to start recording.
- Press the 'Play/Pause' button again to stop and save the recording.
5.6 File Transfer
To transfer files to or from your player:
- Connect the player to your computer using the supplied USB cable.
- The player will be recognized as a removable disk drive on your computer.
- Open the player's drive and drag and drop your desired audio, video, image, or text files into the appropriate folders (e.g., 'Music', 'Video', 'Photos').
- Safely eject the device from your computer before disconnecting the USB cable.
6. Maintenance
6.1 Cleaning
Wipe the device with a soft, dry, lint-free cloth. Do not use liquid cleaners, aerosols, or harsh chemicals, as these may damage the surface or internal components.
6.2 Battery Care
To prolong the life of the internal Lithium Polymer battery, avoid fully discharging it frequently. Charge the device regularly, even if not in constant use. Store the device with a partial charge if it will not be used for an extended period.
6.3 Storage
When not in use, store the Lenco Xemio-560BU in a cool, dry place, away from direct sunlight and extreme temperatures.
7. Troubleshooting
7.1 Device is Unresponsive or Frozen
If the device becomes unresponsive, especially after a volume warning message, it may be temporarily frozen. In such cases, allow the battery to fully discharge. Once discharged, recharge the device to reset it. If the issue persists, check the Lenco support website for potential firmware updates or further troubleshooting steps.
7.2 Cannot Transfer Files
- Ensure the USB cable is securely connected to both the player and the computer.
- Try connecting to a different USB port on your computer.
- Verify that the player is recognized as a removable disk drive in your computer's file explorer.
- Ensure the files you are trying to transfer are in a supported format (MP3, MP4 (XVID), BMP, JPEG, TXT).
7.3 No Sound from Headphones
- Check that the headphones are fully plugged into the 3.5mm headphone jack.
- Ensure the volume is not set to zero or muted. Increase the volume using the '+' button.
- Test with a different pair of headphones to rule out a faulty headphone issue.
- Ensure the audio file format is supported (MP3).
8. Specifications
| Feature | Specification |
|---|---|
| Model Number | Xemio-560BU |
| Internal Storage Capacity | 8GB |
| Maximum Expandable Storage | 128GB (Micro SD card) |
| Display Type | TFT LCD |
| Screen Size | 1.8 inches |
| Screen Resolution | 160x120 pixels |
| Supported Audio Formats | MP3 |
| Supported Image Formats | BMP, JPEG |
| Supported Video Formats | MP4 (XVID) |
| Supported Text Formats | TXT |
| Battery Type | 1 Lithium Polymer (included) |
| Product Dimensions (L x W x H) | 4.72 x 4.33 x 1.57 inches |
| Item Weight | 3.17 ounces |
| Headphone Impedance | 32.00 ohm |
| Special Features | Voice Recorder, Integrated Microphone |
9. Warranty and Support
9.1 Manufacturer's Warranty
The Lenco Xemio-560BU MP3/MP4 Player is covered by a 24-month manufacturer's warranty from the original date of purchase. This warranty covers defects in materials and workmanship under normal use. It does not cover damage caused by misuse, accidents, unauthorized modifications, or normal wear and tear.
9.2 Customer Support
For technical assistance, warranty claims, or further information regarding your Lenco Xemio-560BU, please visit the official Lenco website or contact their customer service department. You may also find additional resources, FAQs, and updated manuals available for download on the product support page.


