
Important Safety Instructions
Always read and understand all safety warnings, instructions, illustrations, and specifications provided with this power tool. Failure to follow all instructions listed below may result in electric shock, fire, and/or serious injury.
- Keep work area clean and well lit. Cluttered or dark areas invite accidents.
- Do not operate power tools in explosive atmospheres, such as in the presence of flammable liquids, gases, or dust. Power tools create sparks which may ignite the dust or fumes.
- Keep children and bystanders away while operating a power tool. Distractions can cause you to lose control.
- Use personal protective equipment. Always wear eye protection. Protective equipment such as dust mask, non-skid safety shoes, hard hat, or hearing protection used for appropriate conditions will reduce personal injuries.
- Prevent unintentional starting. Ensure the switch is in the off-position before connecting to battery pack, picking up or carrying the tool.
- Do not overreach. Keep proper footing and balance at all times. This enables better control of the power tool in unexpected situations.
- Dress properly. Do not wear loose clothing or jewelry. Keep your hair and clothing away from moving parts. Loose clothes, jewelry or long hair can be caught in moving parts.
- Maintain power tools and accessories. Check for misalignment or binding of moving parts, breakage of parts and any other condition that may affect the power tool’s operation. If damaged, have the power tool repaired before use.
- Use the power tool, accessories and tool bits etc. in accordance with these instructions, taking into account the working conditions and the work to be performed. Use of the power tool for operations different from those intended could result in a hazardous situation.
Product Overview
The Ryobi ONE+ R18DD4-215GJ is a versatile 18V cordless drill driver designed for various drilling and driving applications. It features a powerful motor, automatic spindle lock, and a keyless chuck for quick bit changes.

Figure 1: Ryobi ONE+ R18DD4-215GJ Cordless Drill Driver kit, showing the drill, two 1.8Ah Li-ion batteries, and the battery charger.
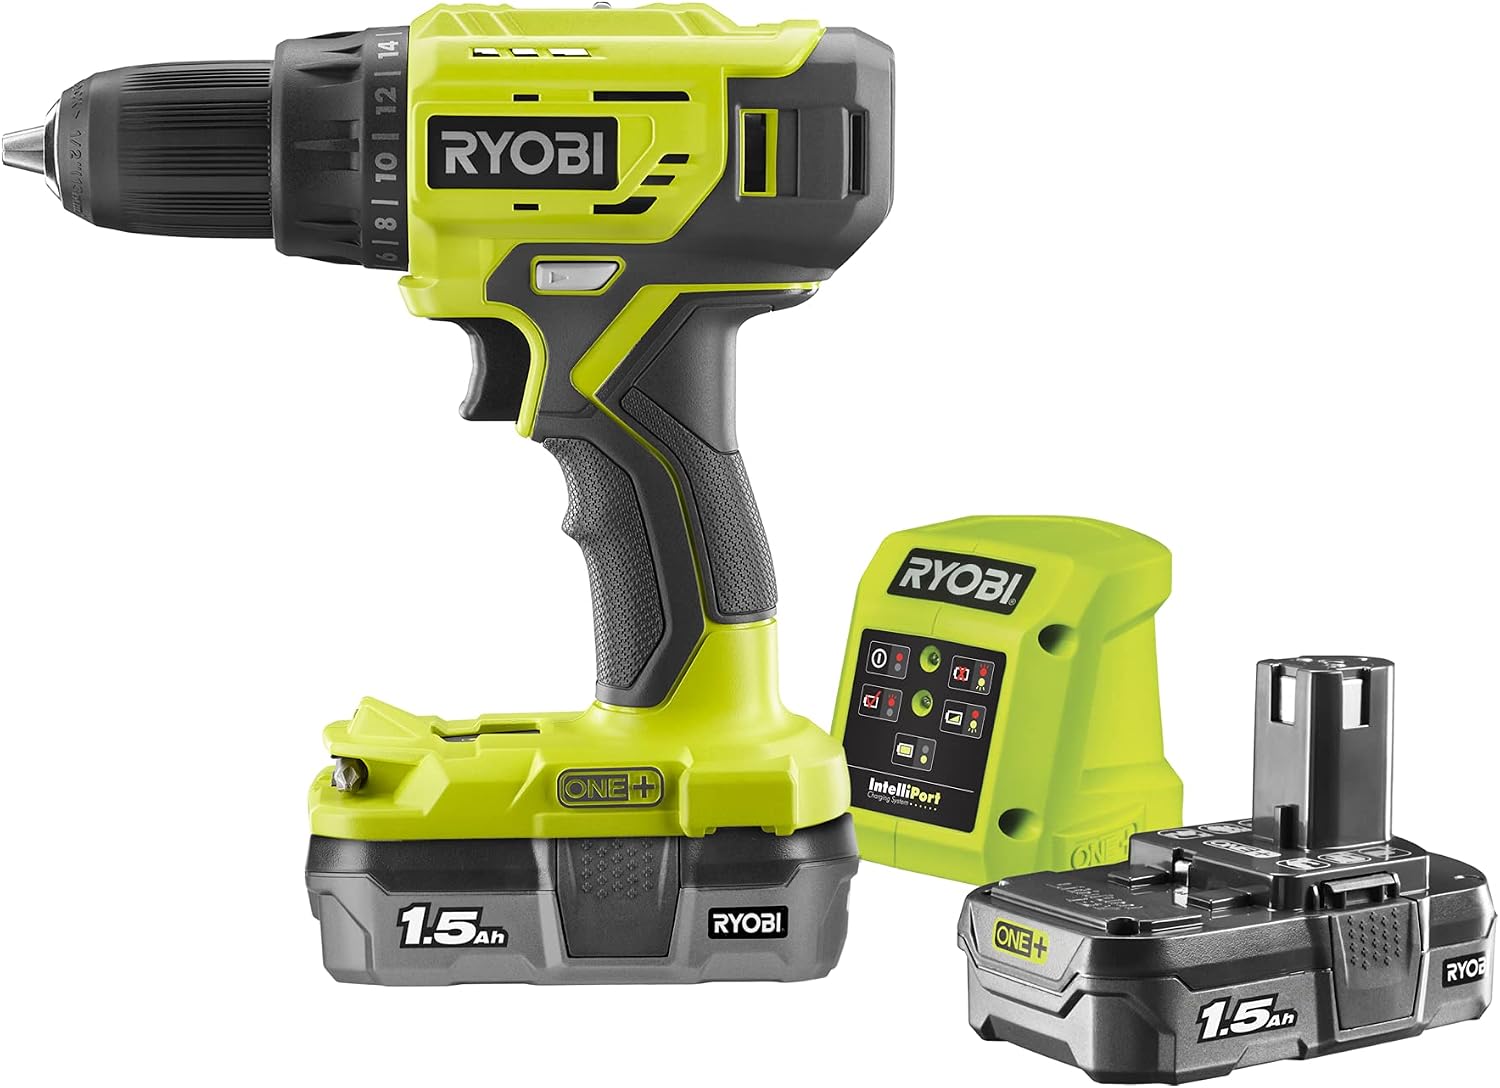
Figure 2: Side view of the Ryobi ONE+ R18DD4-215GJ drill driver, highlighting the ergonomic grip and the battery connection point, alongside the charger and a spare battery.
Key Components:
- Keyless Chuck: For quick and easy bit changes (1.5mm - 13mm capacity).
- Torque Collar: Adjusts the clutch setting for driving screws to prevent over-driving.
- Speed Selector: Switches between high and low-speed settings for different applications.
- Forward/Reverse Switch: Controls the direction of rotation.
- Trigger Switch: Activates the tool and controls speed.
- Battery Pack: 18V Li-ion battery (1.8Ah).
- Battery Charger: For recharging the battery packs.
- Bit Storage: Convenient storage for drill bits directly on the tool.
Setup and Assembly
1. Charging the Battery
Before first use, fully charge the battery pack. Ensure the charger is connected to a standard power outlet. Insert the battery pack into the charger until it clicks into place. The charger's indicator lights will show the charging status. A full charge typically takes approximately 60 minutes for a 1.8Ah battery.
2. Installing and Removing the Battery Pack
- To Install: Align the ribs on the battery pack with the grooves in the tool's battery port. Slide the battery pack into the tool until it latches securely.
- To Remove: Press the battery release latches (located on the sides of the battery pack) and slide the battery pack out of the tool.
3. Installing and Removing Drill Bits
- To Install: Rotate the chuck counter-clockwise to open the jaws. Insert the drill bit into the chuck as far as it will go. Rotate the chuck clockwise to tighten the jaws securely around the bit. The automatic spindle lock ensures easy one-hand tightening.
- To Remove: Rotate the chuck counter-clockwise to loosen the jaws and remove the bit.
Operating Instructions
1. Powering On/Off and Speed Control
The tool is activated by pressing the trigger switch. The speed of the drill is variable and controlled by the amount of pressure applied to the trigger. Releasing the trigger turns the tool off. The motor brake ensures quick stopping of the chuck.
2. Adjusting Speed and Torque
- Speed Selector: Use the switch on top of the drill to select between two speed ranges:
- Low Speed (1): For high torque applications like driving large screws or drilling large holes.
- High Speed (2): For faster drilling in softer materials or smaller holes.
- Torque Collar: Rotate the torque collar to select the desired clutch setting. Lower numbers are for driving small screws into soft materials, while higher numbers are for driving larger screws or drilling. The drill setting (drill icon) provides maximum torque for drilling applications.
3. Forward/Reverse Rotation
The forward/reverse switch, located above the trigger, controls the direction of rotation. Push it to the left for forward (clockwise) rotation and to the right for reverse (counter-clockwise) rotation. Position the switch in the center to lock the trigger and prevent accidental starting.
4. Drilling and Driving Applications

Figure 3: Using the drill driver to install a screw into a cabinet door, demonstrating its utility for driving applications.
- Drilling: Select the appropriate drill bit for the material. Use the drill setting on the torque collar for maximum power. Apply steady, even pressure.
- Driving Screws: Select a suitable screwdriver bit. Adjust the torque collar to a setting that prevents over-driving the screw but is sufficient to drive it fully. Start with a lower torque setting and increase if necessary.

Figure 4: Drilling a pilot hole in a wooden chair frame, illustrating the precision and control offered by the tool for drilling tasks.
Maintenance
Regular maintenance ensures the longevity and optimal performance of your drill driver.
- Cleaning: Keep the tool's ventilation openings clear and free of debris. Use a soft, damp cloth to clean the exterior. Do not use harsh chemicals or abrasive cleaners.
- Storage: Store the tool, batteries, and charger in a cool, dry place, away from direct sunlight and moisture. Ensure the battery is removed from the tool before storage.
- Battery Care: Do not store batteries in a discharged state. Recharge them periodically if not in use for extended periods. Avoid exposing batteries to extreme temperatures.
- Chuck Maintenance: Periodically clean the chuck jaws to ensure proper gripping of bits.
Troubleshooting
Refer to the table below for common issues and their potential solutions.
| Problem | Possible Cause | Solution |
|---|---|---|
| Tool does not start | Battery not charged or not properly installed. Trigger lock engaged. | Charge battery. Ensure battery is fully inserted. Disengage trigger lock (forward/reverse switch in center position). |
| Reduced power or speed | Battery low. Overload protection activated. | Recharge battery. Reduce pressure on the tool or use a lower speed setting. |
| Chuck not holding bit securely | Chuck jaws dirty or worn. Bit shank dirty. | Clean chuck jaws and bit shank. Ensure bit is inserted fully and chuck is tightened firmly. |
| Tool stops during operation | Overload protection. Battery overheated. | Reduce load. Allow battery to cool down before resuming use. |
Technical Specifications
| Specification | Value |
|---|---|
| Model Number | R18DD4-215GJ |
| Brand | RYOBI |
| Voltage | 18 Volts |
| Power Source | Battery (Li-ion) |
| Battery Capacity (Included) | 2 x 1.8 Ah |
| Max Torque | 50 Newton-meters |
| Max No-Load Speed | 1800 rpm |
| Chuck Type | Keyless Chuck with Automatic Spindle Lock |
| Chuck Capacity | 1.5 mm - 13 mm |
| Weight (Tool only) | Approximately 3.3 Kilograms (including battery, as per package weight) |
| Special Features | Reverse Rotation, Bit Storage |
Warranty Information
RYOBI products are manufactured to high quality standards and are rigorously tested. This product is covered by a manufacturer's warranty. Please refer to the warranty card included with your product or visit the official RYOBI website for detailed warranty terms and conditions specific to your region. Keep your proof of purchase for warranty claims.
Customer Support
For technical assistance, spare parts, or service, please contact RYOBI customer support. Contact information can typically be found on the RYOBI official website or in the documentation provided with your product. When contacting support, please have your model number (R18DD4-215GJ) and serial number (if applicable) ready.


