
1. Introduction
This manual provides essential information for the safe installation, operation, and maintenance of your Aigostar 30W LED Floodlight with Motion Sensor. Please read these instructions carefully before use and retain them for future reference.

Image 1: Aigostar 30W LED Floodlight with Motion Sensor. The image highlights the product's IP65 waterproof rating with simulated water droplets.
2. Safety Instructions
- Ensure the power supply is disconnected before installation or maintenance.
- Installation should be performed by a qualified electrician in accordance with local wiring regulations.
- Do not look directly into the LED light source when it is illuminated.
- This product is designed for outdoor use (IP65 rated) but should not be submerged in water.
- Do not modify the product or use it for purposes other than its intended use.
- Keep packaging materials away from children.
3. Product Overview
The Aigostar 30W LED Floodlight features a motion sensor, providing efficient and automated outdoor lighting. It is designed for durability and performance in various weather conditions.
Key Features:
- Power: 30W
- Luminous Flux: 2700 Lumens
- Color Temperature: 4000K Natural White
- Waterproof Rating: IP65
- Material: Die-cast Aluminum housing, Polycarbonate (PC) shade
- Sensor: Integrated motion sensor with adjustable settings
- Lifespan: Up to 30,000 hours
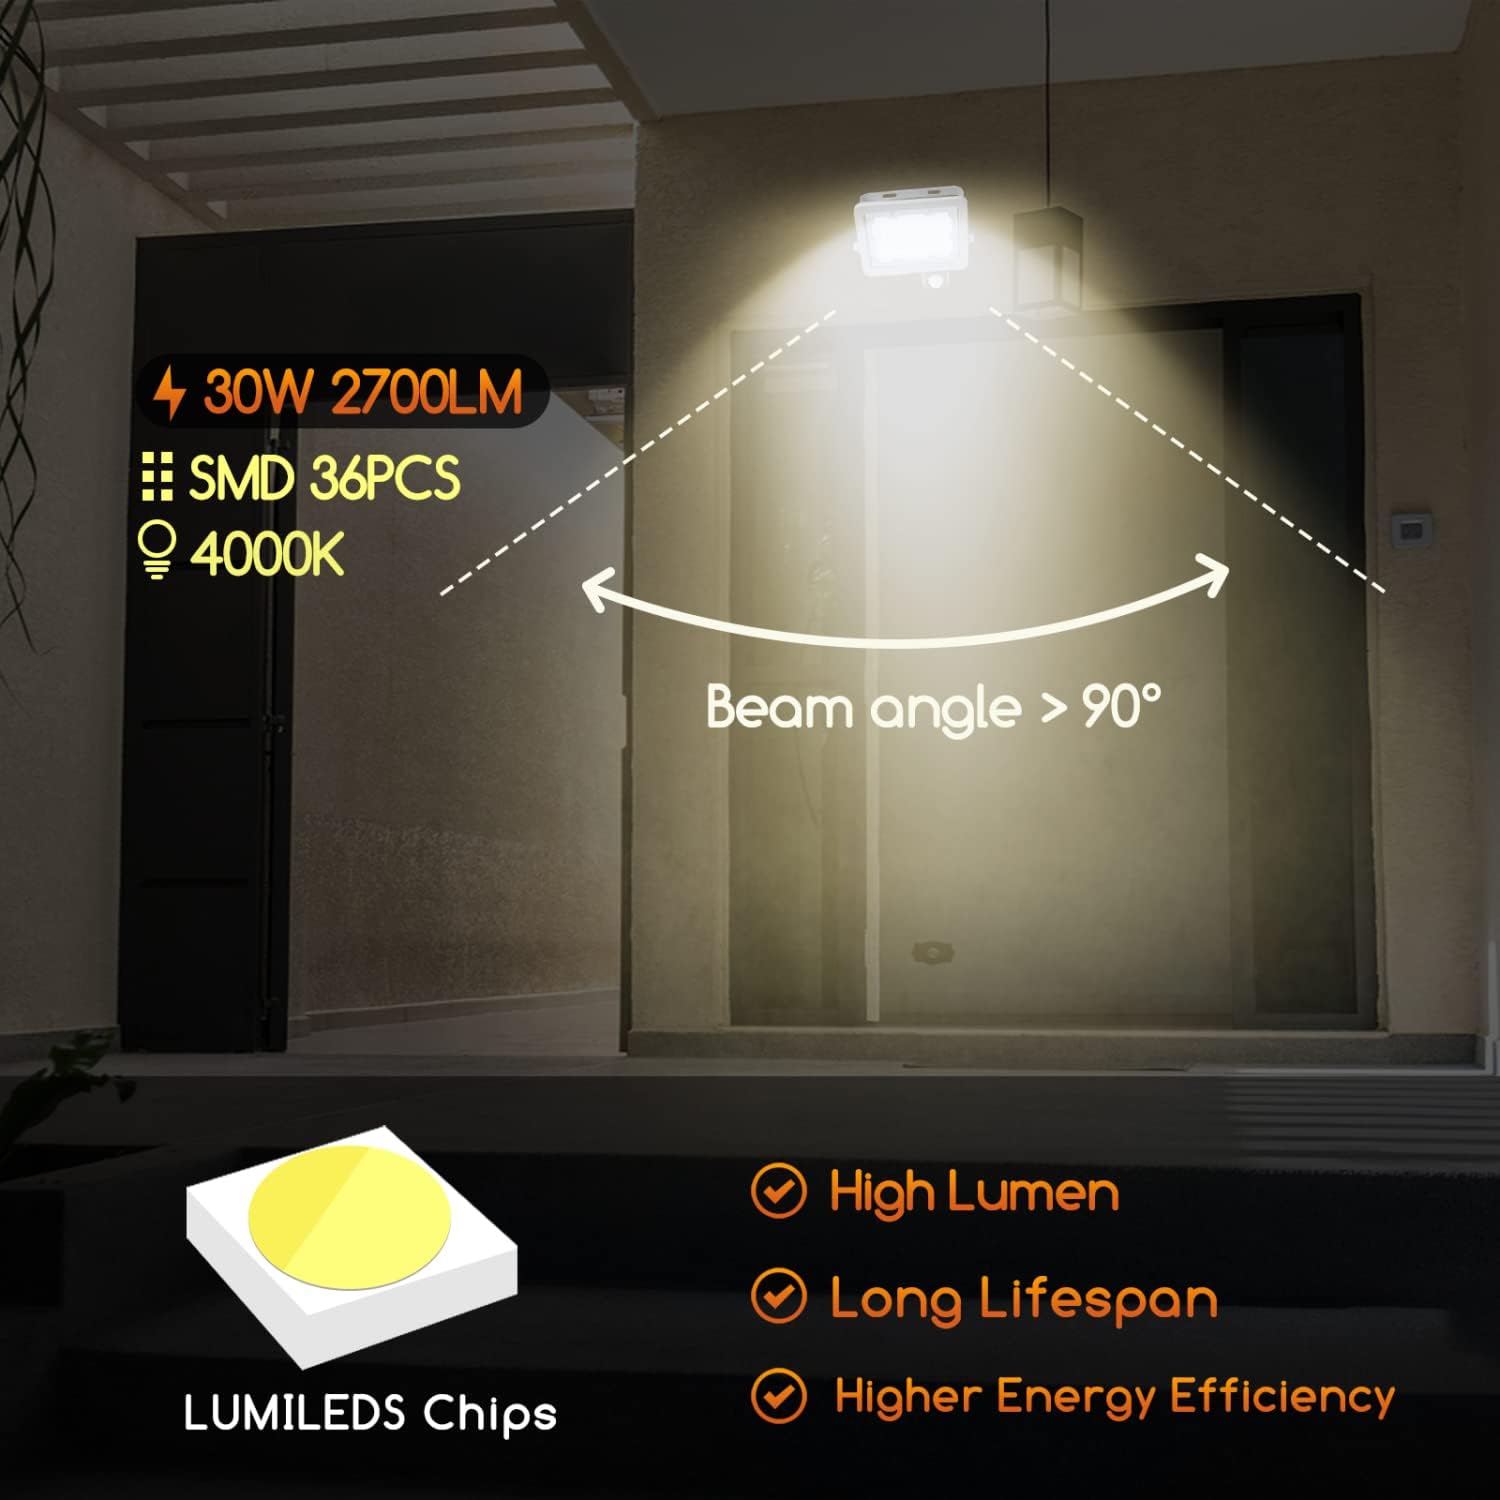
Image 2: Product specifications and features. This image illustrates the light's power, brightness, color temperature, LED chip type, and wide beam angle.

Image 3: Durability features. This image demonstrates the floodlight's resilience against rain, heat, and frost, confirming its IP65 rating and suitability for outdoor environments.

Image 4: Optical and thermal design. This image details the optical lens for enhanced light projection and the efficient heat dissipation system, which contributes to the product's long lifespan.
4. Installation
Follow these steps for proper installation of your floodlight:
- Choose a Location: Select a suitable outdoor location that provides the desired illumination coverage and allows the motion sensor to detect movement effectively. Consider the sensor's detection range (up to 8 meters).
- Mounting: Securely attach the floodlight's mounting bracket to a solid surface using appropriate screws and anchors (not included). The bracket allows for angle adjustment.
- Wiring: Connect the floodlight to your main power supply. Ensure the power is OFF at the circuit breaker before wiring. Refer to the wiring diagram below:
- Brown Wire: Live (L)
- Blue Wire: Neutral (N)
- Yellow & Green Wire: Earth (E)
Ensure all connections are secure and properly insulated, especially for outdoor use. The cable has a cross-sectional area of 3x1.0mm² and a length of 25cm ± 5cm.
- Adjust Angle: Once mounted and wired, adjust the floodlight and sensor to the desired angle. The sensor can rotate 350° horizontally and 180° vertically.

Image 5: Dimensions and wiring diagram. This image provides critical information for installation, including the physical size of the unit and the standard electrical wiring color codes.
5. Setup (Motion Sensor Adjustment)
The integrated motion sensor has three adjustable dials to customize its operation:

Image 6: Motion sensor adjustment dials. This image details how to configure the sensor's sensitivity, light duration, and ambient light threshold for activation.
- SENS (Sensitivity): Adjusts the detection range of the motion sensor. Turn the dial to set the sensitivity from 2 meters to a maximum of 8 meters.
- TIME (Light Duration): Controls how long the light stays on after motion is detected. Set the duration from 10 seconds to 540 seconds (9 minutes).
- LUX (Ambient Light Threshold): Determines the ambient light level at which the sensor will activate the floodlight.
- Turn towards the 'sun' symbol for the light to work during both day and night.
- Turn towards the 'moon' symbol for the light to work only at night or in low-light conditions.
6. Operation
Once installed and configured, the Aigostar LED Floodlight will operate automatically based on your motion sensor settings. When motion is detected within the set range and the ambient light conditions meet the LUX setting, the floodlight will illuminate for the specified TIME duration.

Image 7: Application scenarios. This image provides examples of where the floodlight can be effectively used, such as roofs, garages, yards, and passages.
7. Maintenance
- Cleaning: Periodically clean the floodlight and sensor lens with a soft, damp cloth to remove dust and debris. Do not use abrasive cleaners or solvents.
- Inspection: Regularly check the wiring and mounting for any signs of damage or loosening. Ensure the waterproof seals are intact.
- Power Off: Always disconnect power before performing any maintenance.
8. Troubleshooting
| Problem | Possible Cause | Solution |
|---|---|---|
| Light does not turn on. | No power supply. Incorrect LUX setting. Faulty wiring. | Check power connection and circuit breaker. Adjust LUX dial towards 'sun' symbol for testing. Verify wiring connections. |
| Light stays on continuously. | Continuous motion detected. TIME setting too long. LUX setting too high (always on). | Check for obstructions or constant movement in sensor range. Adjust TIME dial to a shorter duration. Adjust LUX dial towards 'moon' symbol. |
| Sensor does not detect motion. | SENS setting too low. Obstruction in sensor's field of view. Sensor angle incorrect. | Increase SENS setting. Clear any obstructions. Adjust sensor angle for optimal coverage. |
9. Specifications
- Model: BK02-30W-4000K
- Power: 30W
- Luminous Flux: 2700 lm
- Color Temperature: 4000K (Natural White)
- Waterproof Rating: IP65
- Material: Aluminum (housing), Polycarbonate (PC) (shade)
- Beam Angle: >90°
- Lifespan: Up to 30,000 hours
- Sensor Detection Range: Max 8 meters (adjustable 2-8m)
- Sensor Time Setting: 10s - 540s
- Dimensions: 176.8mm (L) x 179.6mm (W) x 54.1mm (H)
- Energy Efficiency Class: F (as per EU 2019/2015)
For detailed product information and energy label data, please refer to the EPREL database:
View EPREL Product Information
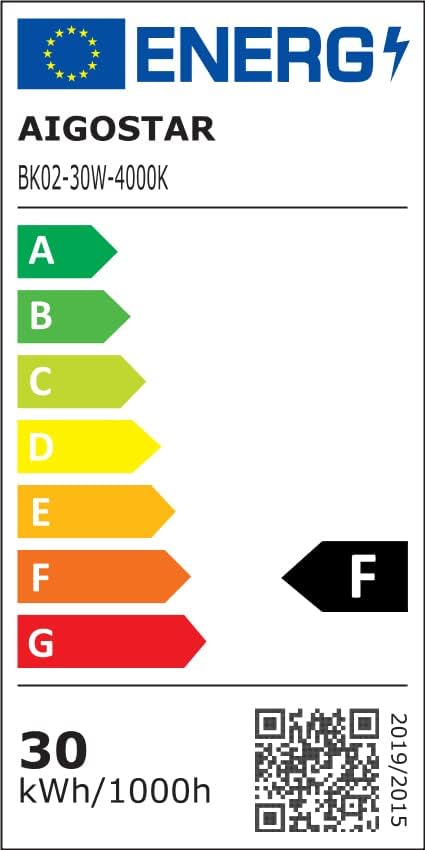
Image 8: EU Energy Label. This label provides information on the product's energy efficiency class and consumption, along with the model number.


