
1. Important Safety Information
Please read this manual carefully before operating the appliance and keep it for future reference. Failure to follow these instructions may result in electric shock, fire, or injury.
- Ensure the power supply matches the voltage specified on the rating label.
- Do not operate the unit with a damaged cord or plug.
- Keep the appliance away from heat sources and direct sunlight.
- Do not block air inlets or outlets.
- This appliance contains R290 refrigerant. Handle with care and ensure proper ventilation during installation and maintenance.
- Always unplug the unit before cleaning or servicing.
- Do not use chemical solvents for cleaning.
- This appliance is not intended for use by persons (including children) with reduced physical, sensory or mental capabilities, or lack of experience and knowledge, unless they have been given supervision or instruction concerning use of the appliance by a person responsible for their safety.
2. Package Contents
Verify that all items are present and undamaged upon unpacking.
- 1 x Klarstein Kraftwerk Smart Portable Air Conditioner
- 1 x Remote Control
- 1 x Window Sealing Kit (for tilt windows)
- 1 x Exhaust Hose with Connectors
- 1 x Water Drainage Hose
- 1 x User Manual (English)

Image: Contents of the delivery, including the air conditioner unit, remote control, window sealing kit, exhaust hose, and drainage hose.
3. Setup and Installation
3.1 Positioning the Unit
Place the air conditioner on a flat, stable surface. Ensure there is at least 30 cm (12 inches) of space around the unit for proper airflow. The integrated castors allow for easy movement between rooms.

Image: The portable air conditioner with integrated wheels for easy transport.
3.2 Exhaust Hose Installation
- Attach the exhaust hose to the air outlet on the back of the unit.
- Extend the hose to the nearest window or opening.
- Use the provided window sealing kit to secure the exhaust hose in the window opening, preventing hot air from re-entering the room.

Image: Quick installation with the window kit, showing the exhaust hose and window seal.
3.3 Drainage Hose (Dehumidifier Mode)
For continuous dehumidification, connect the drainage hose to the designated outlet and route it to a suitable drain or container. In cooling mode, water typically evaporates, but manual drainage may be required if the internal tank fills.
4. Operating Instructions
4.1 Control Panel and Remote Control
The unit can be controlled via the touch control panel on top of the unit or the included remote control. The remote control requires 2x AAA batteries (not included).
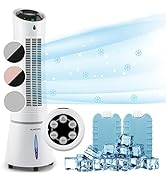
Image: Digital display and remote control for the air conditioner.
4.2 Operating Modes
- Cooling Mode: Reduces room temperature. Set desired temperature and fan speed.
- Dehumidifier Mode: Removes excess moisture from the air.
- Fan Mode: Circulates air without cooling. Select desired fan speed.
- Sleep Mode: Operates quietly with reduced fan speed and gradually increases temperature for comfortable sleep.
4.3 Smart Control (App & Alexa)
The Klarstein Kraftwerk Smart can be controlled via the Klarstein app on your smartphone and is compatible with Amazon Alexa and Google Home. Follow the app's instructions for pairing the device.

Image: Simple and practical use with the Klarstein app, compatible with Amazon Alexa and Google Home.
4.4 Timer Function
Use the timer function to set the unit to turn on or off automatically after a specified period.
5. Maintenance
Regular maintenance ensures optimal performance and extends the lifespan of your air conditioner. Always unplug the unit before performing any maintenance.
5.1 Cleaning the Air Filter
The air filter should be cleaned every two weeks or more frequently depending on usage. A dirty filter reduces efficiency.
- Turn off and unplug the unit.
- Locate and remove the air filter from the back or side of the unit.
- Clean the filter with a vacuum cleaner or wash it with warm water and mild detergent.
- Allow the filter to dry completely before reinserting it.
5.2 Cleaning the Unit Exterior
Wipe the exterior of the unit with a soft, damp cloth. Do not use harsh chemicals, abrasives, or solvents.
5.3 Seasonal Storage
If storing the unit for an extended period:
- Drain any accumulated water from the unit.
- Clean the air filter.
- Cover the unit to protect it from dust.
- Store in a dry, cool place.
6. Troubleshooting
Before contacting customer support, refer to the following table for common issues and solutions.
| Problem | Possible Cause | Solution |
|---|---|---|
| Unit does not turn on. | No power, power cord unplugged, fuse blown. | Check power connection, wall outlet, and circuit breaker. |
| Insufficient cooling. | Dirty air filter, blocked air intake/outlet, room too large, windows/doors open, exhaust hose not properly installed. | Clean filter, clear obstructions, ensure proper room size for unit capacity, close windows/doors, check exhaust hose installation. |
| Unit is noisy. | Unit not on a flat surface, internal components vibrating. | Ensure unit is on a level surface. Some operational noise is normal for portable AC units. |
| Water leakage. | Drainage plug not properly sealed, drainage hose blocked or improperly connected. | Check drainage plug and hose connections. Clear any blockages in the drainage hose. |
| Wi-Fi connection issues. | Incorrect Wi-Fi settings, 5GHz network used, temporary glitch. | Ensure you are connecting to a 2.4GHz Wi-Fi network. Try unplugging the unit for 10 seconds, then reconnecting. Refer to the app's pairing instructions. |
7. Specifications
| Feature | Detail |
|---|---|
| Brand | KLARSTEIN |
| Model Name | Kraftwerk Smart |
| Cooling Capacity | 10,000 BTU (2.9 kW) |
| Dehumidification Capacity | 23 Litres |
| Airflow Volume | 440 m³/h |
| Recommended Room Size | 29-49 m² |
| Noise Level | 50 dB (Min) / 65 dB (Max) |
| Energy Efficiency Class | A |
| Refrigerant | R-290 |
| Power Consumption | 1150 Watts |
| Voltage | 220 Volts |
| Dimensions (D x W x H) | 38P x 35.5l x 82.2H cm |
| Weight | 26 Kilograms |
| Control Method | Remote Control, App Control |
| Filter Type | Charcoal |

Image: Energy efficiency label for the product.
Image: Technical drawing with product dimensions.
8. Warranty and Customer Support
8.1 Warranty Information
This product comes with a limited warranty. Please refer to the warranty card included in your package or contact customer support for detailed terms and conditions. The warranty covers manufacturing defects under normal use.
8.2 Customer Support
For technical assistance, spare parts, or any questions regarding your Klarstein Kraftwerk Smart air conditioner, please contact Klarstein customer support. Contact details can typically be found on the official Klarstein website or in your purchase documentation.
Before contacting support, please have your model number (Kraftwerk Smart) and purchase date available.


