
1. Introduction
This manual provides detailed instructions for the installation and care of the SRJTEK 10.1 inch Touch Screen Digitizer Panel, compatible with DigiLand DL1023 and DL1016 tablet models. This product is designed to replace a broken or malfunctioning touch screen, restoring full functionality to your device. Adherence to these guidelines is crucial for proper setup, installation, and troubleshooting.
2. Package Contents
Verify that all items listed below are present in your package:
- 1 x Touch Screen Digitizer Panel (for DigiLand DL1023/DL1016)
- 1 x Repair Tool Kit
- 1 x Adhesive

Image: The SRJTEK 10.1 inch Touch Screen Digitizer Panel shown with the accompanying repair tools and adhesive strips.
3. Important Safety Information
- Professional Installation Recommended: Due to the delicate nature of electronic components and the precision required, professional installation is highly recommended. Damage incurred during self-installation may void the product warranty.
- Fragile Component: The digitizer panel is made of glass and is fragile. Handle with extreme care to prevent breakage.
- Disconnect Power: Always ensure the tablet is completely powered off and disconnected from any power source before beginning the installation process.
- Static Electricity: Take precautions against static electricity, which can damage electronic components. Consider using an anti-static wrist strap.
- Eye Protection: Wear appropriate eye protection to guard against small shards of glass if the original screen is already broken.
4. Setup and Preparation
- Power Off Tablet: Ensure your DigiLand DL1023 or DL1016 tablet is completely powered off.
- Gather Tools: Collect all necessary tools, including those provided in the repair kit (prying tools, screwdrivers) and any additional tools you may need (e.g., heat gun or hair dryer, suction cup).
- Prepare Workspace: Set up a clean, well-lit, and organized workspace to prevent loss of small parts and ensure a smooth installation process.
5. Installation Instructions
The following steps outline the process for replacing your tablet's touch screen digitizer. Exercise caution and patience throughout the procedure.
- Step 1: Remove the Old Screen
Carefully apply heat to the edges of the tablet's screen to soften the adhesive. Use a heat gun or hair dryer on a low setting, moving it constantly to avoid overheating any single area. Once the adhesive is softened, use the provided prying tools to gently separate the old digitizer from the tablet frame. Work slowly and methodically around all edges to avoid damaging the frame or internal components.
- Step 2: Disconnect Flex Cables
Once the old digitizer is sufficiently separated, carefully disconnect the flex cable(s) from the tablet's motherboard. These are typically secured by small latches or connectors that need to be gently flipped open or pulled. Avoid pulling directly on the cable itself.

Image: A close-up view of the digitizer's flex cable, which connects to the tablet's main board.
- Step 3: Clean the Frame
Thoroughly clean any remaining adhesive residue from the tablet's frame. A clean and smooth surface is crucial for proper adhesion of the new screen. Use an appropriate cleaning solution (e.g., isopropyl alcohol) and a lint-free cloth.
- Step 4: Connect and Test New Screen
Before fully adhering the new digitizer, carefully connect its flex cable(s) to the motherboard. Power on the tablet to test the touch functionality and display responsiveness. Ensure all areas of the screen respond correctly to touch input. If issues arise, power off and re-check the cable connections.
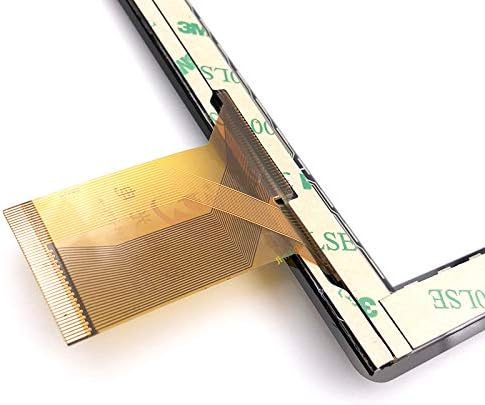
Image: The reverse side of the digitizer panel, highlighting the pre-applied adhesive strips for secure mounting.
- Step 5: Apply Adhesive and Secure New Screen
If the test is successful, power off the tablet. Remove the protective film from the adhesive strips on the new digitizer or apply the provided adhesive to the tablet frame, following the pattern of the original adhesive. Carefully align the new digitizer with the tablet frame and gently press it into place, ensuring even pressure across the entire surface. Avoid applying excessive force.
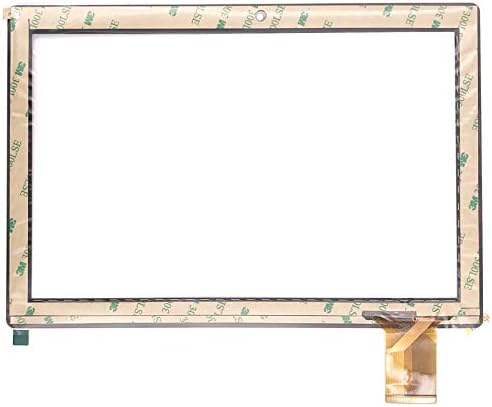
Image: A comprehensive view of the digitizer's back, showing the flex cable and the full layout of the adhesive for installation.
- Step 6: Final Reassembly
Reassemble any other components that were removed during the disassembly process. Allow the adhesive to cure for several hours (typically 2-4 hours, or refer to specific adhesive instructions if provided) before extensive use to ensure a strong bond.
6. Post-Installation Check
After completing the installation, perform the following checks:
- Power On: Turn on your tablet.
- Test Touch Response: Navigate through the tablet's interface, open apps, and type to ensure the touch screen responds accurately and consistently across the entire display.
- Check Display Quality: Verify that the display is clear, free of dead pixels, lines, or discoloration.
7. Maintenance
To ensure the longevity and optimal performance of your new touch screen digitizer:
- Cleaning: Clean the screen with a soft, lint-free microfiber cloth. For stubborn smudges, slightly dampen the cloth with water or a screen-specific cleaning solution. Avoid harsh chemicals or abrasive materials.
- Protection: Consider using a screen protector and a protective case to shield the screen from scratches and impacts.
- Avoid Pressure: Do not place heavy objects on the tablet or apply excessive pressure to the screen, as this can cause damage.
8. Troubleshooting
- Screen Not Responding to Touch
- Ensure the flex cables are securely and correctly connected to the tablet's motherboard. Power off the tablet, carefully re-open it, and re-seat the connections. Verify there is no debris obstructing the connectors.
- Display Issues (e.g., lines, no image, flickering)
- Check the flex cable connection for the display. Inspect the cable itself for any kinks, tears, or damage that might have occurred during installation. Ensure the connector on the motherboard is also undamaged.
- Screen Cracks Easily
- The digitizer is a glass component and is inherently fragile. It must be handled with extreme care during installation and subsequent use. Avoid dropping the tablet or applying excessive pressure to the screen. If the screen cracks after installation, it typically indicates physical impact or improper handling.
- Adhesive Not Holding
- Ensure the tablet frame was thoroughly cleaned of old adhesive residue and grease before applying the new adhesive. Allow sufficient curing time for the adhesive to bond properly.
If troubleshooting steps do not resolve the issue, it is recommended to seek professional repair services.
9. Product Specifications
- Screen Size: 10.1 inches
- Compatibility: DigiLand DL1023, DigiLand DL1016
- Item Weight: 9.1 ounces
- Package Dimensions: 10.91 x 8.54 x 1.26 inches
- Manufacturer: SRJTEK
10. Warranty and Support
SRJTEK provides a 6-month after-sale service for this product. If you encounter any problems with the item received, such as manufacturing defects or non-functionality upon arrival, please contact SRJTEK customer service for assistance. They are committed to providing a new replacement or a satisfactory solution.
Please note that parts damaged during installation due to improper handling, or damage resulting from user error, are not accepted for return or covered under the warranty. It is essential to follow the installation instructions carefully or seek professional assistance.