1. Introduction
The Satlink ST5150 is a versatile field meter designed for measuring DVB-S/S2, DVB-T/T2 (H.265), and DVB-C signals. This device provides numerical and graphical representations of signal strength and quality (MER), along with signal-to-noise ratio (C/N) and Bit Error Rate (BER). It features a high-resolution 4.3-inch TFT-LCD display for real-time image quality verification.
This manual provides essential instructions for the safe and efficient operation of your Satlink ST5150 device.
2. Safety Information
- Read all instructions carefully before using the device.
- Do not expose the device to rain or moisture.
- Use only the provided power adapter for charging.
- Avoid dropping or subjecting the device to strong impacts.
- Do not attempt to open or repair the device yourself. Refer all servicing to qualified personnel.
- Ensure proper ventilation during operation.
3. Package Contents
Verify that all items listed below are included in your package:
- Satlink ST5150 Field Meter
- Protective Rubber Cover
- Plug-in Power Adapter
- 12V Connection Cable
- AV Cable (3.5mm jack to 3 x RCA)
- 2 x F-Connectors (for RF/ANT measurement sockets)

Image 3.1: Satlink ST5150 device with its protective cover, power adapter, AV cable, and F-connectors.
4. Device Overview
Familiarize yourself with the main components of the Satlink ST5150.
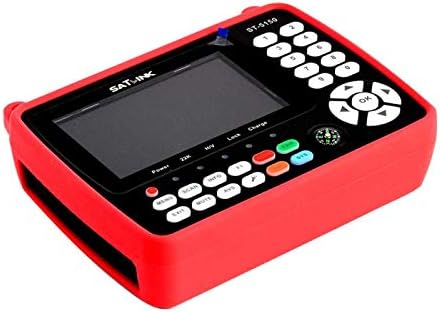
Image 4.1: Front view of the Satlink ST5150 device, showing the display, control buttons, and protective red rubber cover.

Image 4.2: Detailed view of the Satlink ST5150's control panel, including the 4.3-inch LCD screen, numeric keypad, navigation buttons, and function keys.
4.1. Front Panel
- LCD Display: 4.3-inch TFT-LCD screen for viewing menus, signal data, and video.
- Numeric Keypad (0-9): For entering values and channel numbers.
- Navigation Buttons (Up/Down/Left/Right/OK): For menu navigation and selection.
- MENU: Accesses the main menu.
- SCAN: Initiates channel scanning.
- INFO: Displays signal information.
- EXIT: Returns to the previous screen or exits a menu.
- MUTE: Mutes audio output.
- AVS: Switches to AV input mode.
- SAT/SYS: Toggles between satellite, terrestrial, and cable modes.
- Power Indicator: LED indicating power status.
- 22K Indicator: LED indicating 22KHz tone status.
- H/V Indicator: LED indicating horizontal/vertical polarization.
- Lock Indicator: LED indicating signal lock.
- Charge Indicator: LED indicating battery charging status.
4.2. Side/Rear Panels (General)
- RF/ANT Input: For connecting DVB-S/S2, DVB-T/T2, or DVB-C antenna/LNB.
- HDMI Output: Connects to an external monitor or TV.
- AV Input/Output: 3.5mm jack for AV cable connection.
- DC IN: Power input for charging the device.
- USB Port: For software updates or data transfer (if applicable).
5. Setup
5.1. Charging the Device
- Connect the provided plug-in power adapter to the DC IN port on the device.
- Plug the power adapter into a standard electrical outlet.
- The "Charge" indicator LED will illuminate during charging. The LED will change color or turn off when fully charged (refer to device for specific behavior).
- Allow sufficient time for a full charge before initial use.
5.2. Initial Power-On
- Press and hold the POWER button until the display turns on.
- The device will boot up and display the main menu or the last used measurement mode.
5.3. Connecting to an Antenna/LNB
- Ensure the device is powered off before making connections.
- For satellite (DVB-S/S2) measurements, connect the LNB cable from your satellite dish to the RF/ANT input using one of the supplied F-connectors.
- For terrestrial (DVB-T/T2) or cable (DVB-C) measurements, connect the antenna or cable signal to the RF/ANT input.
6. Operating Instructions
6.1. Selecting Measurement Mode
Press the SAT/SYS button to cycle through DVB-S/S2, DVB-T/T2, and DVB-C measurement modes.
6.2. Satellite (DVB-S/S2) Measurement
- Select DVB-S/S2 mode using the SAT/SYS button.
- Press MENU and navigate to "Satellite Setup" or similar.
- Select the desired satellite from the pre-programmed list (e.g., Astra 19.2E).
- Configure LNB settings (LNB type, LO frequency, 22KHz, DiSEqC, USALS, Unicable) as required for your setup. The device supports DiSEqC 1.0, 1.1, 1.2, USALS, Unicable 1.0 & 1.1, and LNB power (13/18V, 0/22kHz).
- Adjust the dish alignment while observing the signal strength and quality (MER, C/N, BER) on the display. An acoustic signal will assist in fine-tuning.
- Once a strong signal is achieved, press SCAN to search for channels.
6.3. Terrestrial (DVB-T/T2) and Cable (DVB-C) Measurement
- Select DVB-T/T2 or DVB-C mode using the SAT/SYS button.
- Press MENU and navigate to "Terrestrial Setup" or "Cable Setup".
- Enter the appropriate frequency, bandwidth, and modulation parameters for your region/provider.
- Adjust the antenna/cable connection while observing signal strength and quality.
- Press SCAN to search for channels.
6.4. Signal Information Display
Press the INFO button to view detailed signal parameters, including:
- Signal Level (dBµV, dBm, or dBmV)
- Carrier to Noise Ratio (C/N)
- Bit Error Rate (BER)
- Modulation Error Ratio (MER)
6.5. HDMI Output
Connect an HDMI cable from the device's HDMI 1.4 port to an external monitor or TV to view the device's OSD menu and video output on a larger screen.
6.6. AV Input/Output and CCTV Camera Test
The 3.5mm AV jack can be used for:
- AV Output: Connect the supplied AV cable to an external display for analog video and audio output.
- AV Input: Connect an analog video source (e.g., CCTV camera) to the AV input. Press AVS to switch to AV input mode.
- CCTV Camera Power Test: The device can provide 12V power to test CCTV cameras. Refer to the device's menu for activating this function.
7. Maintenance
- Cleaning: Use a soft, dry cloth to clean the device. Do not use liquid cleaners or solvents.
- Storage: Store the device in a cool, dry place away from direct sunlight and extreme temperatures.
- Battery Care: For prolonged storage, charge the battery periodically to maintain its health.
8. Troubleshooting
| Problem | Possible Cause | Solution |
|---|---|---|
| Device does not power on. | Low battery or power adapter issue. | Charge the device using the supplied power adapter. Ensure the adapter is properly connected and the outlet is functional. |
| No signal detected. | Incorrect antenna/LNB connection, wrong mode selected, or misaligned antenna. | Check all cable connections. Ensure the correct measurement mode (DVB-S/S2, DVB-T/T2, DVB-C) is selected. Verify antenna/dish alignment and LNB settings. |
| Poor signal quality. | Weak signal, interference, or incorrect LNB/antenna settings. | Fine-tune antenna/dish alignment. Check for obstructions. Verify LNB/antenna settings are correct for your system. |
| No video on external monitor via HDMI. | HDMI cable issue, incorrect input selected on monitor, or device not outputting. | Ensure HDMI cable is securely connected. Select the correct HDMI input on your monitor/TV. Check device settings for HDMI output. |
9. Specifications
- Model: ST5150
- Brand: Satlink
- Supported Standards: DVB-S/S2, DVB-T/T2 (H.265), DVB-C
- Display: 4.3-inch TFT-LCD
- Signal Measurement: Level (dBµV, dBm, dBmV), C/N, BER, MER
- LNB Power: 13V/18V, 0/22kHz
- DiSEqC Support: 1.0, 1.1, 1.2, USALS
- Unicable Support: 1.0 & 1.1
- Video Output: HDMI 1.4, AV (3.5mm jack)
- Video Input: Analog AV (3.5mm jack)
- CCTV Power Output: 12V
- Item Weight: 600 g
- ASIN: B08XVXKSTQ


