
Deerma DX118C
Deerma DX118C Mini Portable Vacuum Cleaner
User Instruction Manual
1. Introduction
Thank you for choosing the Deerma DX118C Mini Portable Vacuum Cleaner. This manual provides essential information for the safe and efficient use of your new appliance. Please read it thoroughly before operation and keep it for future reference.
The Deerma DX118C is a versatile cleaning tool designed for both vertical and handheld use, offering powerful suction for various surfaces including wood floors, tiles, and carpets. Its lightweight design and ergonomic handle ensure comfortable and effective cleaning.
2. Important Safety Instructions
When using electrical appliances, basic precautions should always be followed, including the following:
- Read all instructions before using this appliance.
- Do not leave the vacuum cleaner unattended when plugged in. Unplug from outlet when not in use and before servicing.
- To reduce the risk of electric shock, do not use outdoors or on wet surfaces.
- Do not allow to be used as a toy. Close attention is necessary when used by or near children.
- Use only as described in this manual. Use only manufacturer’s recommended attachments.
- Do not use with damaged cord or plug. If appliance is not working as it should, has been dropped, damaged, left outdoors, or dropped into water, return it to a service center.
- Do not pull or carry by cord, use cord as a handle, close a door on cord, or pull cord around sharp edges or corners. Do not run appliance over cord. Keep cord away from heated surfaces.
- Do not unplug by pulling on cord. To unplug, grasp the plug, not the cord.
- Do not handle plug or appliance with wet hands.
- Do not put any object into openings. Do not use with any opening blocked; keep free of dust, lint, hair, and anything that may reduce air flow.
- Keep hair, loose clothing, fingers, and all parts of body away from openings and moving parts.
- Do not pick up anything that is burning or smoking, such as cigarettes, matches, or hot ashes.
- Do not use to pick up flammable or combustible liquids, such as gasoline, or use in areas where they may be present.
- Do not use without dust cup and/or filters in place.
- Turn off all controls before unplugging.
- Use extra care when cleaning on stairs.
3. Product Overview and Components
Familiarize yourself with the parts of your Deerma DX118C vacuum cleaner.
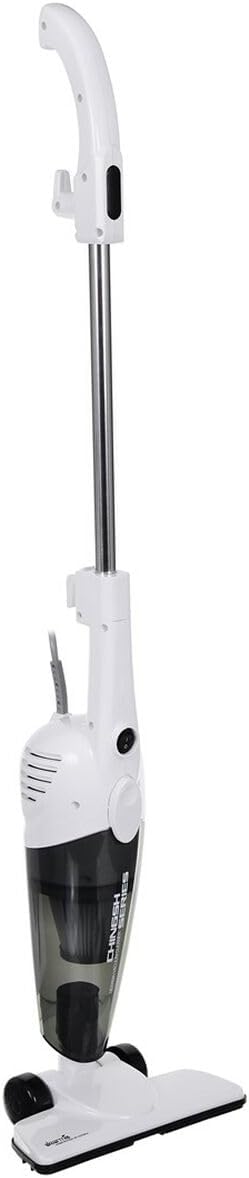
Figure 3.1: Fully assembled Deerma DX118C in stick vacuum configuration.

Figure 3.2: The main handheld vacuum unit, featuring the motor and dust cup.
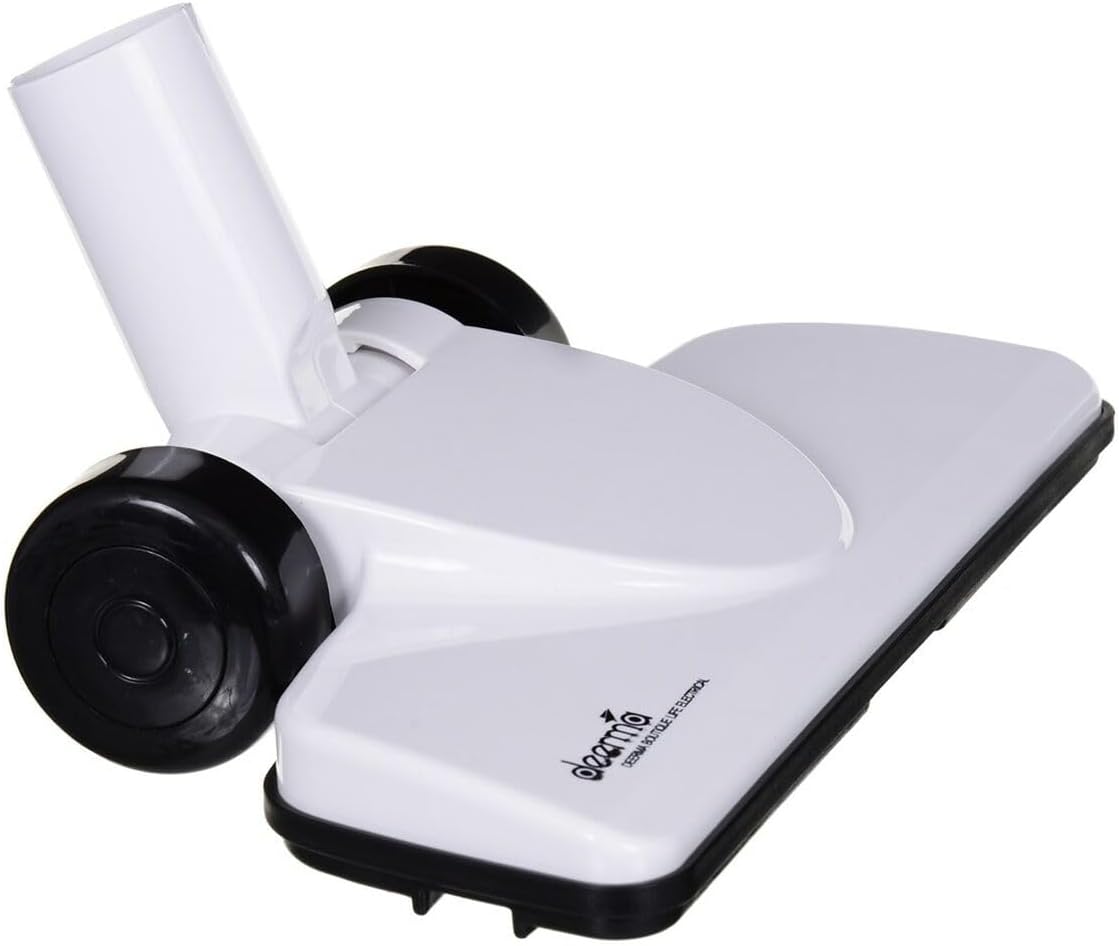
Figure 3.3: The slim floor brush attachment, designed for efficient cleaning on various floor types.

Figure 3.4: The 1.2L capacity dust cup, detachable for easy emptying and cleaning.

Figure 3.5: Included accessory kit: a crevice tool for narrow spaces and a brush nozzle for delicate surfaces.

Figure 3.6: The washable HEPA filter, essential for trapping fine dust particles.

Figure 3.7: The power switch located on the main unit for easy operation.
List of Components:
- Main Handheld Unit (Motor and Dust Cup)
- Extension Tube/Handle
- Floor Brush Attachment
- Crevice Tool
- Brush Nozzle
- HEPA Filter (inside dust cup)
- Power Cord
4. Setup and Assembly
The Deerma DX118C can be assembled in two configurations: stick vacuum or handheld vacuum.
4.1. Assembling as a Stick Vacuum:
- Insert the extension tube into the main handheld unit until it clicks securely into place.
- Attach the floor brush to the bottom end of the extension tube, ensuring it is firmly connected.
- Ensure the dust cup is properly installed on the main unit.
4.2. Assembling as a Handheld Vacuum:
- For handheld use, the extension tube is not required.
- Directly attach either the crevice tool or the brush nozzle to the suction opening of the main handheld unit.
- Ensure the dust cup is properly installed on the main unit.
5. Operating Instructions
5.1. Powering On/Off:
- Plug the power cord into a suitable electrical outlet (220V).
- Locate the power switch on the main handheld unit (refer to Figure 3.7).
- Press the switch to the 'ON' position to start the vacuum cleaner.
- To turn off, press the switch to the 'OFF' position.
- Always unplug the vacuum cleaner from the power outlet after use.
5.2. Using Attachments:
- Floor Brush: Ideal for cleaning large floor areas, including hard floors and carpets. The slim design and 90° rotatable head allow easy access under furniture and into corners.
- Crevice Tool: Use for cleaning narrow gaps, corners, and hard-to-reach areas like between sofa cushions or along baseboards.
- Brush Nozzle: Suitable for cleaning delicate surfaces, upholstery, curtains, and keyboards. The bristles help dislodge dust without scratching.
To switch between stick and handheld modes, simply detach or attach the extension tube and desired accessory as described in Section 4.
6. Maintenance
Regular maintenance ensures optimal performance and extends the lifespan of your vacuum cleaner.
6.1. Emptying the Dust Cup:
It is recommended to empty the 1.2L dust cup after each use to prevent secondary contamination and maintain suction power.
- Ensure the vacuum cleaner is turned off and unplugged.
- Press the release button to detach the dust cup from the main unit (refer to Figure 3.4).
- Hold the dust cup over a trash bin and open the bottom lid to empty the contents.
- Close the lid and reattach the dust cup to the main unit, ensuring it clicks securely into place.
6.2. Cleaning the Filter:
The HEPA filter should be cleaned regularly, especially if you notice a decrease in suction.
- Ensure the vacuum cleaner is turned off and unplugged.
- Remove the dust cup as described above.
- Carefully remove the HEPA filter from inside the dust cup (refer to Figure 3.6).
- Tap the filter gently over a trash bin to remove loose dust.
- If necessary, rinse the filter under running water. Ensure it is completely dry before reinserting it into the dust cup. Do not use a brush or abrasive materials to clean the filter.
- Once dry, place the filter back into the dust cup and reattach the dust cup to the main unit.
6.3. Cleaning the Exterior:
Wipe the exterior of the vacuum cleaner with a soft, damp cloth. Do not use harsh detergents or solvents.
7. Troubleshooting
If you encounter issues with your vacuum cleaner, refer to the table below for common problems and solutions.
| Problem | Possible Cause | Solution |
|---|---|---|
| Vacuum cleaner does not turn on. | Not plugged in; Power outlet not working; Power switch is off. | Ensure plug is firmly in outlet; Check outlet with another appliance; Turn power switch to 'ON'. |
| Low suction power. | Dust cup is full; Filter is clogged; Hose/attachments are blocked. | Empty dust cup; Clean or replace filter; Check and clear any blockages in the hose or attachments. |
| Unusual noise during operation. | Blockage in the brush or hose; Loose component. | Turn off and unplug. Check for and remove any blockages. Ensure all components are securely assembled. |
| Dust escaping from vacuum. | Dust cup not properly installed; Filter missing or damaged. | Ensure dust cup is securely attached; Check if filter is correctly installed and undamaged. |
8. Specifications
| Brand: | Deerma |
| Model Number: | DX118C |
| Dimensions (L x W x H): | 2.79 x 24.64 x 16.51 cm (Product) |
| Weight: | 1.4 Kilograms |
| Dust Cup Capacity: | 1.2 Liters |
| Power: | 600 Watts |
| Voltage: | 220 Volts |
| Noise Level: | 70 dB |
| Special Feature: | Portable |
| Filter Type: | Cyclone |
| Power Source: | Corded Electric |
| Cordless: | No |
9. Warranty and Support
For warranty information and customer support, please refer to the warranty card included with your purchase or contact the retailer where the product was purchased. Keep your proof of purchase for any warranty claims.
Related documentsDX118C


Ask a question about this manual
Ask about setup, troubleshooting, compatibility, parts, safety, or missing instructions. Manuals+ will review the question and use this page’s manual context to help answer it.