
1. Important Safety Information
Read and understand all safety precautions before operating the generator. Failure to follow these instructions may result in serious injury or death.
- Carbon Monoxide Hazard: Generators produce carbon monoxide, a colorless, odorless, poisonous gas. Operate the generator ONLY outdoors and far away from windows, doors, and vents. Never operate in an enclosed area.
- Fire Hazard: Gasoline is highly flammable. Refuel in a well-ventilated area with the engine off and cool. Do not smoke or allow open flames near the generator.
- Electrical Shock Hazard: Do not operate the generator in wet conditions. Ensure all electrical connections are secure and dry. Never touch electrical components with wet hands.
- Hot Surfaces: The generator's engine and muffler become very hot during operation and remain hot for a period after shutdown. Avoid touching hot surfaces to prevent burns.
- Children and Pets: Keep children and pets away from the generator at all times.
- Grounding: Always properly ground the generator before use to prevent electrical shock.
2. Package Contents
Verify that all items are present in the package:
- iPower SM4500i Inverter Generator
- Remote Control
- USB Port (integrated)
- DC Port (integrated)
- User Manual (this document)
- Oil Funnel (typically included)
- Spark Plug Wrench (typically included)
3. Product Overview
Familiarize yourself with the main components and controls of your iPower SM4500i inverter generator.

Figure 3.1: Front view of the iPower SM4500i Inverter Generator.

Figure 3.2: Detailed view of the control panel.
Control Panel Features:
- Main Switch: Controls fuel flow and ignition.
- Engine Start/Stop Button: For electric starting and stopping.
- DC 12V Outlet: For charging 12V batteries.
- Circuit Breaker: Protects the generator from overload.
- AC 230V Outlets: For connecting standard electrical appliances.
- USB Port (5V DC): For charging mobile devices.
- Data Center Display (V.H.T): Shows voltage, frequency, and running hours.
- Low Idle Mode Switch: Engages fuel-saving mode.
- Fuel Gauge: Indicates fuel level.
- Parallel Operation Outlets: For connecting two generators in parallel (requires parallel cables, sold separately).

Figure 3.3: Side view showing fuel cap and service panel.

Figure 3.4: Generator being transported using its handle and wheels.
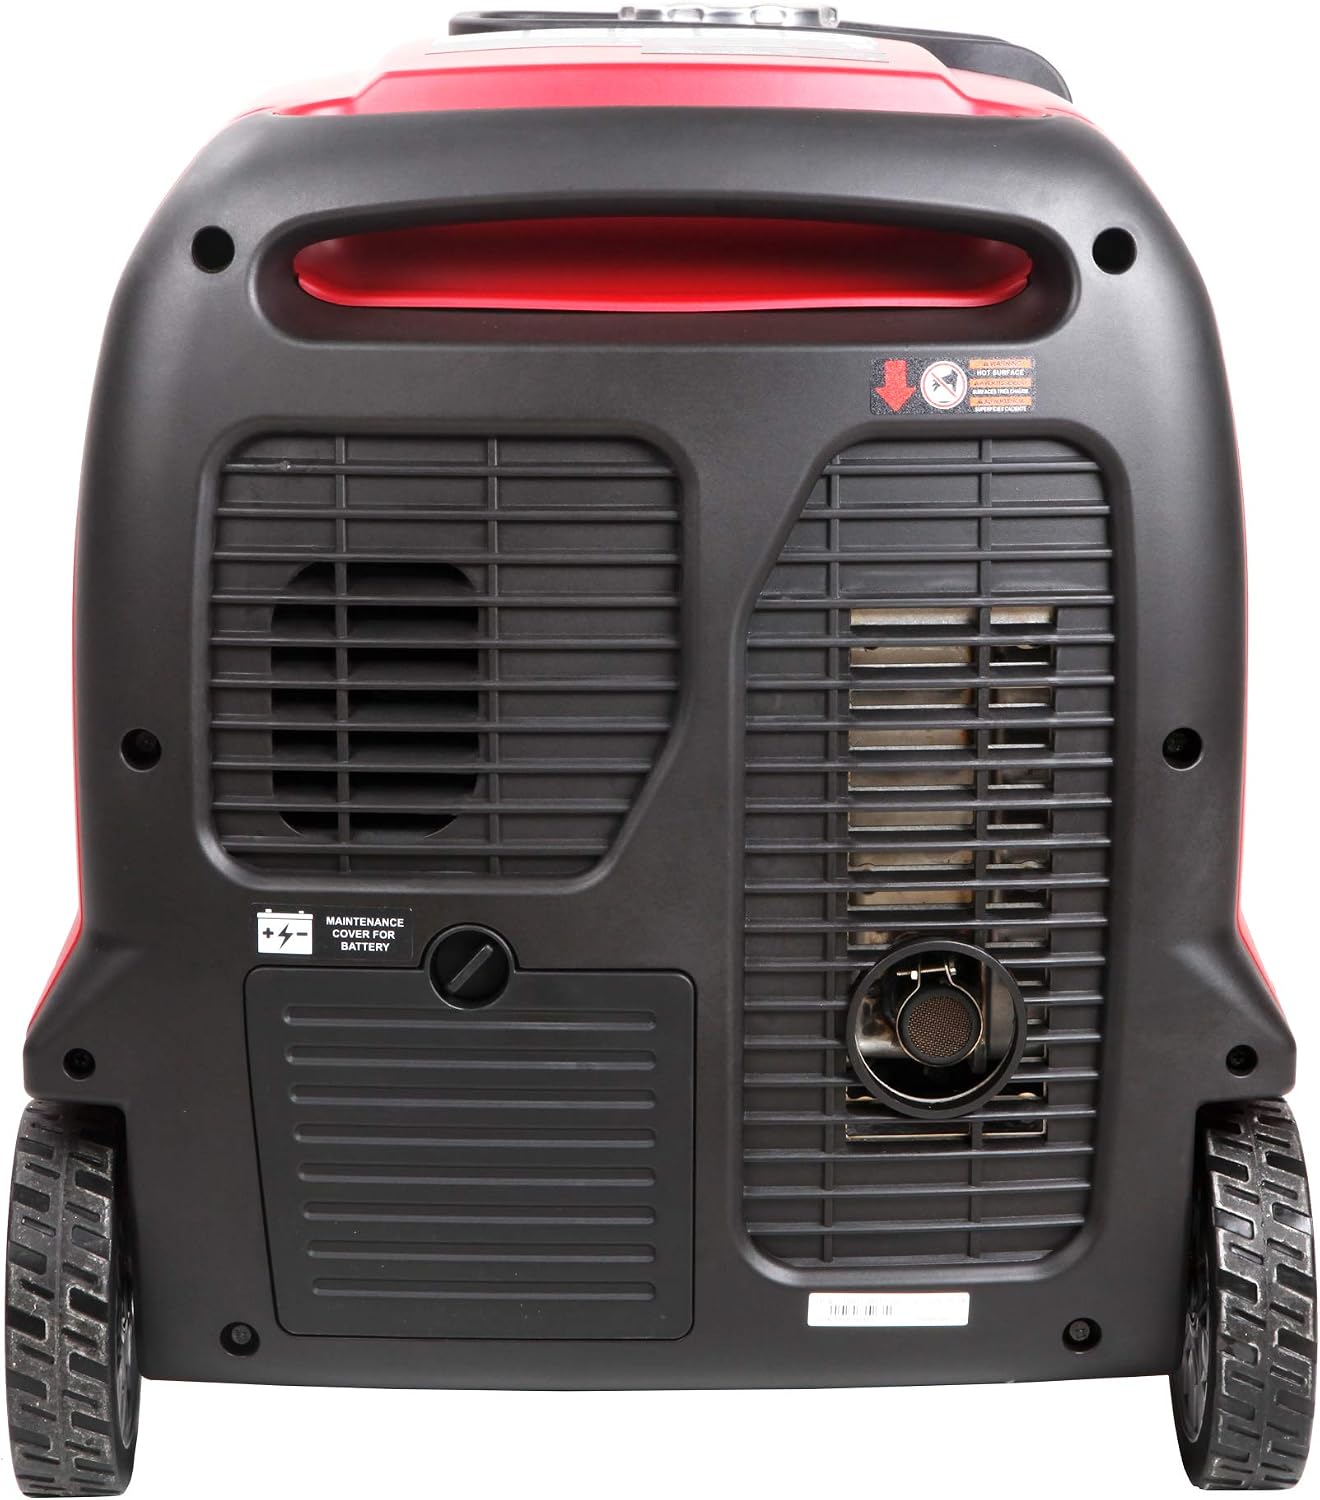
Figure 3.5: Rear view with battery access.
4. Setup
4.1 Unpacking and Inspection
- Carefully remove the generator from its packaging.
- Inspect for any shipping damage. Contact your dealer immediately if damage is found.
- Ensure all included accessories are present.
4.2 Adding Engine Oil
The generator is shipped without engine oil. You must add the correct amount and type of oil before first use.
- Place the generator on a level surface.
- Locate the oil fill cap/dipstick (refer to the manual diagram for exact location).
- Remove the oil fill cap/dipstick.
- Using the provided oil funnel, slowly add the recommended engine oil (e.g., SAE 10W-30) until it reaches the upper mark on the dipstick. Do not overfill.
- Securely replace the oil fill cap/dipstick.
4.3 Adding Fuel (Gasoline)
Use fresh, unleaded gasoline with an octane rating of 87 or higher.
- Ensure the generator is turned OFF and has cooled down.
- Move the generator to a well-ventilated outdoor area for refueling.
- Unscrew the fuel cap.
- Slowly add gasoline to the fuel tank, being careful not to overfill. Leave some space for fuel expansion. The tank capacity is 10 liters.
- Securely replace the fuel cap. Wipe up any spilled fuel immediately.
4.4 Grounding the Generator
Proper grounding is essential for safety.
- Connect a grounding wire (not included) from the generator's grounding terminal to a suitable ground source, such as a ground rod driven into the earth.
5. Operating Instructions
5.1 Pre-Start Checklist
- Generator is on a level, outdoor surface.
- Engine oil level is correct.
- Fuel tank is filled with fresh gasoline.
- All electrical loads are disconnected from the generator.
- Generator is properly grounded.
5.2 Starting the Generator
Your SM4500i generator offers multiple starting methods:
Manual Start:
- Turn the Main Switch to the 'ON' position.
- Pull the recoil starter handle firmly and smoothly until the engine starts.
Electric Start:
- Turn the Main Switch to the 'ON' position.
- Press and hold the Engine Start/Stop button until the engine starts. Release the button once the engine is running.
Remote Start:
- Ensure the generator's Main Switch is in the 'ON' position.
- Press the 'START' button on the remote control. The generator will attempt to start.
5.3 Connecting Appliances
- Once the generator is running, allow it to warm up for a few minutes.
- Plug in your appliances to the appropriate AC 230V, DC 12V, or USB outlets.
- Do not exceed the generator's running wattage (3500W) or starting wattage (4000W). Overloading will trip the circuit breaker.
5.4 Eco Mode Operation
The Eco Mode switch reduces engine speed when loads are low, improving fuel efficiency and reducing noise.
- To activate Eco Mode, flip the 'Low Idle Mode' switch to the 'ON' position.
- To deactivate, flip the switch to the 'OFF' position.
5.5 Parallel Operation
The SM4500i can be connected in parallel with another compatible iPower inverter generator to double the available power. This requires a parallel kit (sold separately).
- Ensure both generators are off and cool.
- Connect the parallel cables according to the parallel kit instructions.
- Start both generators.
- Connect your appliances to the outlets on the parallel kit.
5.6 Stopping the Generator
- Disconnect all electrical loads from the generator.
- Allow the generator to run for a few minutes without load to cool down.
- Turn the Main Switch to the 'OFF' position.
- Alternatively, press the 'STOP' button on the remote control.
6. Maintenance
Regular maintenance ensures optimal performance and extends the life of your generator.
6.1 Maintenance Schedule
| Item | Every 25 Hours / Monthly | Every 100 Hours / Annually |
|---|---|---|
| Check Engine Oil | ✓ | |
| Change Engine Oil | ✓ | |
| Clean Air Filter | ✓ | |
| Inspect Spark Plug | ✓ | |
| Replace Spark Plug | ✓ | |
| Inspect Fuel Filter | ✓ |
6.2 Storage
For long-term storage (more than 30 days):
- Drain the fuel tank and carburetor. Run the engine until it stops from lack of fuel.
- Change the engine oil.
- Remove the spark plug and add a small amount of engine oil into the cylinder. Pull the recoil starter a few times to distribute the oil, then reinstall the spark plug.
- Clean the exterior of the generator.
- Store in a clean, dry, well-ventilated area.
7. Troubleshooting
This section addresses common issues you might encounter.
| Problem | Possible Cause | Solution |
|---|---|---|
| Engine will not start | No fuel Low oil level Main switch OFF Spark plug issue | Add fresh gasoline Add engine oil to correct level Turn main switch to ON Inspect/clean/replace spark plug |
| No power output | Circuit breaker tripped Overload Faulty appliance | Reset circuit breaker Reduce connected load Test appliance on another power source |
| Engine runs rough | Stale fuel Dirty air filter Spark plug issue | Drain and refill with fresh fuel Clean/replace air filter Inspect/clean/replace spark plug |
If you cannot resolve the issue using this guide, please contact customer support.
8. Specifications
| Feature | Detail |
|---|---|
| Model | SM4500i |
| Starting Watts | 4000W |
| Running Watts | 3500W |
| Engine Type | Four-stroke |
| Engine Displacement | 439 cc |
| Fuel Type | Gasoline (Note: Product specification listed 'Natural Gas' which may be a translation discrepancy or indicate dual-fuel capability not fully detailed.) |
| Fuel Tank Capacity | 10 Liters |
| Ignition System | Electronic |
| Outlets | AC 230V, DC 12V, USB 5V |
| Special Features | Remote Control, Fuel Gauge, Parallel Capability, Eco Mode |
| Dimensions (L x W x H) | 60 x 60 x 60 cm |
| Weight | 58 kg |
| Recommended Uses | Camping, Outdoor Events, RVs |
9. Warranty and Support
For warranty information, please refer to the warranty card included with your product or visit the official iPower website. Keep your proof of purchase for warranty claims.
If you require technical assistance, replacement parts, or have questions not covered in this manual, please contact iPower customer support. Contact details can typically be found on the product packaging or the manufacturer's website.


