1. Introduction
This manual provides essential information for the safe and efficient operation of your Einhell Cordless Impact Drill TE-ID 18 Li Solo. This tool is a high-performance member of the Einhell Power X-Change family, designed for drilling and impact drilling tasks. Please read these instructions carefully before first use and keep them for future reference.

Figure 1: Einhell Cordless Impact Drill TE-ID 18 Li Solo. This image shows the main drill unit with an auxiliary handle and depth stop installed, ready for use. A battery is shown faded in the background, indicating it is not included.
2. General Safety Instructions
Always observe the following safety precautions when using power tools to reduce the risk of electric shock, fire, and serious injury.
- Work Area Safety: Keep your work area clean and well-lit. Cluttered or dark areas invite accidents. Do not operate power tools in explosive atmospheres, such as in the presence of flammable liquids, gases, or dust.
- Electrical Safety: Avoid body contact with earthed or grounded surfaces such as pipes, radiators, ranges, and refrigerators. There is an increased risk of electric shock if your body is earthed or grounded.
- Personal Safety: Always wear eye protection. Use hearing protection when operating impact drills. Wear a dust mask if drilling generates dust. Dress properly; avoid loose clothing or jewelry.
- Tool Use and Care: Do not force the power tool. Use the correct power tool for your application. Disconnect the battery pack from the power tool before making any adjustments, changing accessories, or storing power tools.
- Battery Tool Use and Care: Recharge only with the charger specified by the manufacturer. Use power tools only with specifically designated battery packs.
3. Product Components
Familiarize yourself with the various parts of your Einhell Cordless Impact Drill for proper and safe operation.
- Keyless Chuck: For quick and easy bit changes.
- Mode Selector Switch: To switch between drilling and impact drilling.
- Speed Control Trigger: For variable speed adjustment.
- Forward/Reverse Switch: To change rotation direction.
- Auxiliary Handle: Provides additional grip and control.
- Depth Stop: For precise drilling depth control.
- Battery Interface: For connecting Power X-Change batteries (sold separately).
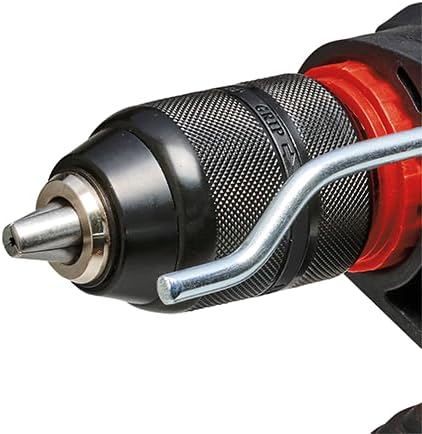
Figure 2: Close-up view of the 13 mm quick-change chuck. This component allows for tool-free bit changes.
4. Setup
4.1 Battery Installation (Battery and Charger Not Included)
The Einhell TE-ID 18 Li Solo is part of the Power X-Change family and requires an 18V Power X-Change battery and charger, which are sold separately. Ensure the battery is fully charged before use.
- Align the charged Power X-Change battery with the battery interface on the base of the drill.
- Slide the battery into place until it clicks securely.
- To remove, press the release button on the battery and slide it out.

Figure 3: Illustration indicating that the battery and charger are not included with the drill unit. These items must be purchased separately as part of the Einhell Power X-Change system.

Figure 4: Overview of the Einhell Power X-Change system, demonstrating the wide range of compatible tools that can use the same battery. This highlights the modularity of the system.
4.2 Auxiliary Handle and Depth Stop Installation
- Loosen the auxiliary handle by rotating it counter-clockwise.
- Slide the handle onto the front of the drill body.
- Insert the depth stop into the designated hole on the auxiliary handle.
- Adjust the auxiliary handle to a comfortable position and tighten it by rotating clockwise.
- Adjust the depth stop to the desired drilling depth by sliding it in or out.
4.3 Installing Drill Bits
- Ensure the drill is switched off and the battery is removed for safety.
- Rotate the chuck counter-clockwise to open the jaws.
- Insert the drill bit fully into the chuck.
- Rotate the chuck clockwise to securely tighten the jaws around the drill bit. Ensure the bit is centered and firmly gripped.
5. Operating Instructions
5.1 Powering On/Off and Speed Control
The drill is activated by pressing the speed control trigger. The speed is variable, increasing with greater pressure on the trigger. To turn off, release the trigger.

Figure 5: Close-up of the drill's trigger and forward/reverse switch. The trigger provides variable speed control, and the switch above it controls the direction of rotation.
5.2 Forward/Reverse Rotation
The forward/reverse switch, located above the trigger, controls the direction of rotation. Push it to the left for forward rotation (drilling) and to the right for reverse rotation (removing screws or jammed bits). Ensure the switch is in the central position to lock the trigger for safety when not in use.
5.3 Drilling and Impact Drilling Mode
The mode selector switch allows you to choose between standard drilling and impact drilling. For drilling into wood, metal, or plastic, select the drilling mode (drill bit symbol). For drilling into masonry or concrete, select the impact drilling mode (hammer symbol).

Figure 6: Close-up of the mode selector switch on the top of the drill. The left symbol indicates drilling mode, and the right symbol indicates impact drilling mode.
5.4 General Drilling Tips
- Always secure your workpiece.
- Start drilling at a low speed and gradually increase.
- Apply steady, even pressure. Do not force the drill.
- For deep holes, periodically withdraw the bit to clear debris.
- Use appropriate drill bits for the material.

Figure 7: A person demonstrating the use of the Einhell cordless impact drill for drilling into a wall. Proper grip and posture are shown, emphasizing safe operation.
6. Maintenance
Regular maintenance ensures the longevity and optimal performance of your drill.
- Cleaning: Keep the ventilation slots clean to prevent overheating. Use a soft brush or compressed air to remove dust and debris. Do not use water or chemical cleaners.
- Storage: Store the drill in a dry, secure place out of reach of children. Remove the battery pack before storage.
- Chuck Maintenance: Periodically clean the chuck jaws to ensure proper gripping of drill bits.
7. Troubleshooting
| Problem | Possible Cause | Solution |
|---|---|---|
| Drill does not start. | Battery not inserted correctly or discharged. | Ensure battery is fully inserted. Charge or replace battery. |
| Reduced power or speed. | Battery low or drill bit dull. | Charge battery. Replace or sharpen drill bit. |
| Drill bit jams. | Excessive pressure or incorrect bit for material. | Reduce pressure. Use appropriate bit. Use reverse rotation to free. |
| Overheating. | Blocked ventilation slots or continuous heavy use. | Clean ventilation slots. Allow drill to cool down. |
8. Technical Specifications
| Feature | Value |
|---|---|
| Model | TE-ID 18 Li Solo (Part No. 4513960) |
| Brand | Einhell |
| Power Source | Battery Powered (Power X-Change 18V Li-Ion) |
| Voltage | 18 Volts |
| Maximum Rotational Speed | 260 RPM |
| Maximum Chuck Size | 13 Millimeters |
| Drilling Capacity Wood | 25 Millimeters |
| Drilling Capacity Metal | 10 Millimeters |
| Item Weight | 1.65 Kilograms (3.63 pounds) |
| Product Dimensions (L x W x H) | 11.14" x 2.64" x 7.87" |
| Special Features | Adjustable, Wireless, Speed Electronics, Forward/Reverse Rotation |
9. Warranty and Support
For warranty information and customer support, please refer to the documentation included with your purchase or visit the official Einhell website. Keep your proof of purchase for any warranty claims.
Einhell Official Website: www.einhell.com


