
1. Introduction and Overview
The Bella Pro Series Espresso Machine is designed to provide a convenient and efficient way to prepare various coffee beverages, including espresso, cappuccino, and latte. This appliance features a 5-bar pressure system, an 8-ounce glass carafe capable of holding up to 4 demitasse cups, and an integrated milk frother. Its user-friendly design includes a one-touch button for simplified operation and a removable drip tray for easy maintenance.
Key Features:
- Brew up to 4 cups of your favorite beverage.
- Included glass carafe for easy serving.
- Removable drip tray for convenient cleaning.
- Integrated milk frother for heating and frothing milk.
- One-touch button for simplified operation.
2. Important Safety Instructions
When using electrical appliances, basic safety precautions should always be followed to reduce the risk of fire, electric shock, and/or injury to persons. Read all instructions carefully before using this appliance.
- Do not touch hot surfaces. Use handles or knobs.
- To protect against electrical shock, do not immerse cord, plugs, or appliance in water or other liquid.
- Close supervision is necessary when any appliance is used by or near children.
- Unplug from outlet when not in use and before cleaning. Allow to cool before putting on or taking off parts, and before cleaning the appliance.
- Do not operate any appliance with a damaged cord or plug, or after the appliance malfunctions or has been damaged in any manner.
- The use of accessory attachments not recommended by the appliance manufacturer may result in fire, electric shock, or injury to persons.
- Do not use outdoors.
- Do not let cord hang over edge of table or counter, or touch hot surfaces.
- Do not place on or near a hot gas or electric burner, or in a heated oven.
- To disconnect, turn any control to 'off', then remove plug from wall outlet.
- Do not use appliance for other than intended use.
3. Product Components
Familiarize yourself with the various parts of your Bella Pro Series Espresso Machine:
- Main Unit (housing the heating element and pump)
- Water Reservoir (internal)
- Filter Holder / Portafilter
- Filter Basket (for ground coffee)
- Glass Carafe (8 oz. capacity)
- Steam Wand / Milk Frother
- Drip Tray (removable)
- Control Knob / One-Touch Button
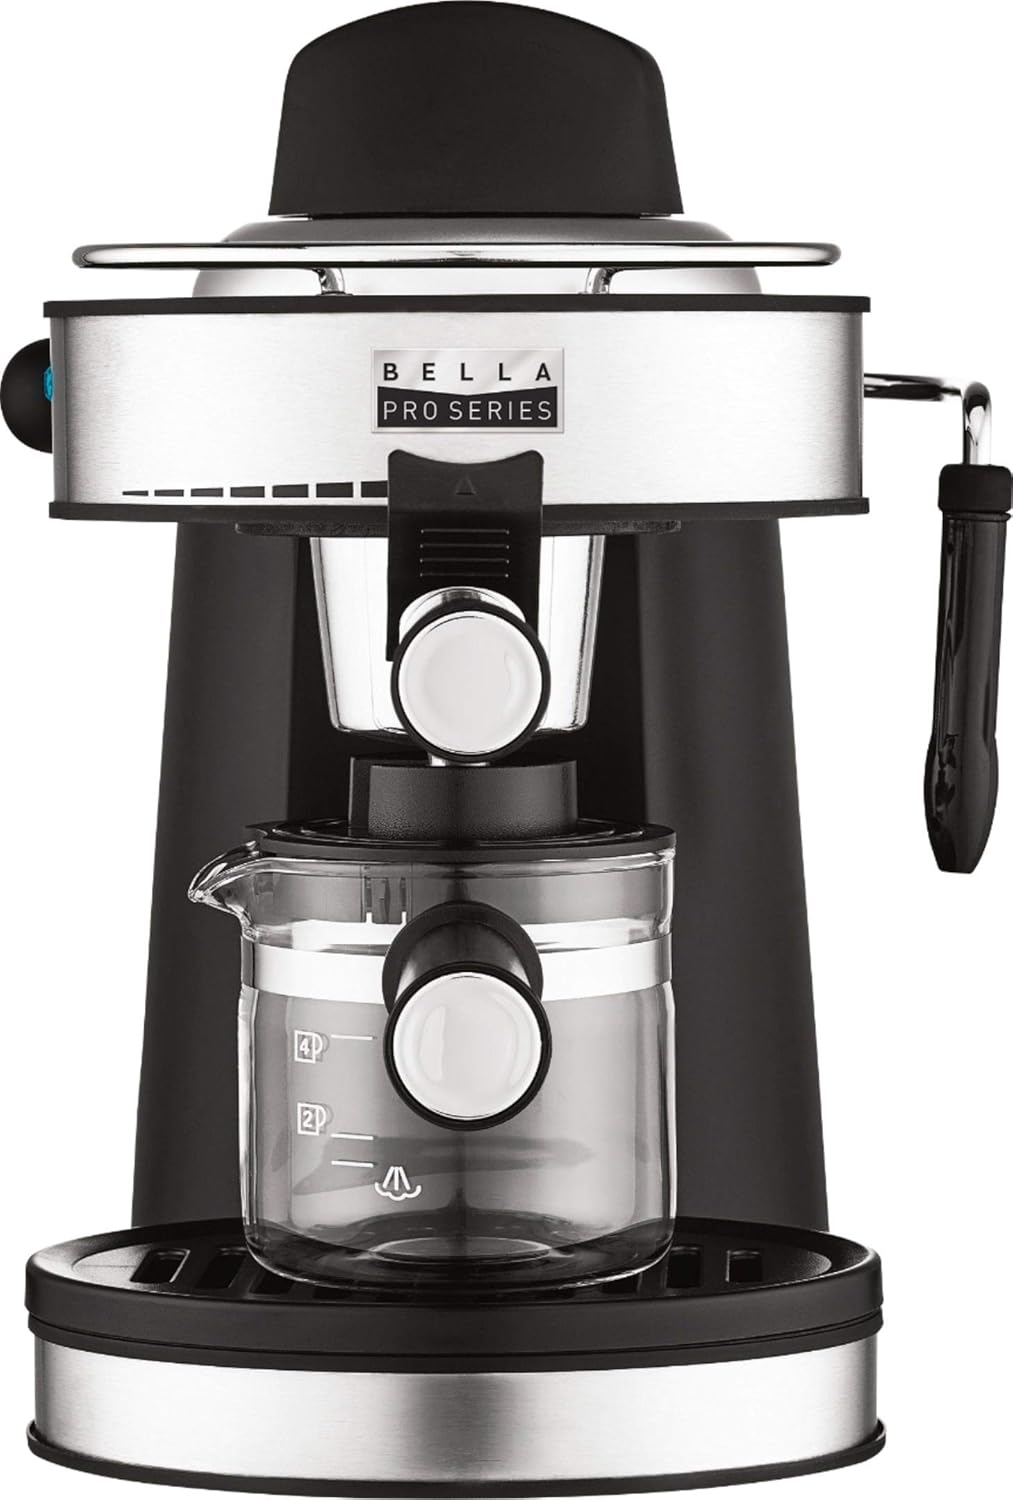
Figure 3.1: Front view of the Bella Pro Series Espresso Machine, showing the main unit, glass carafe, and portafilter handle.
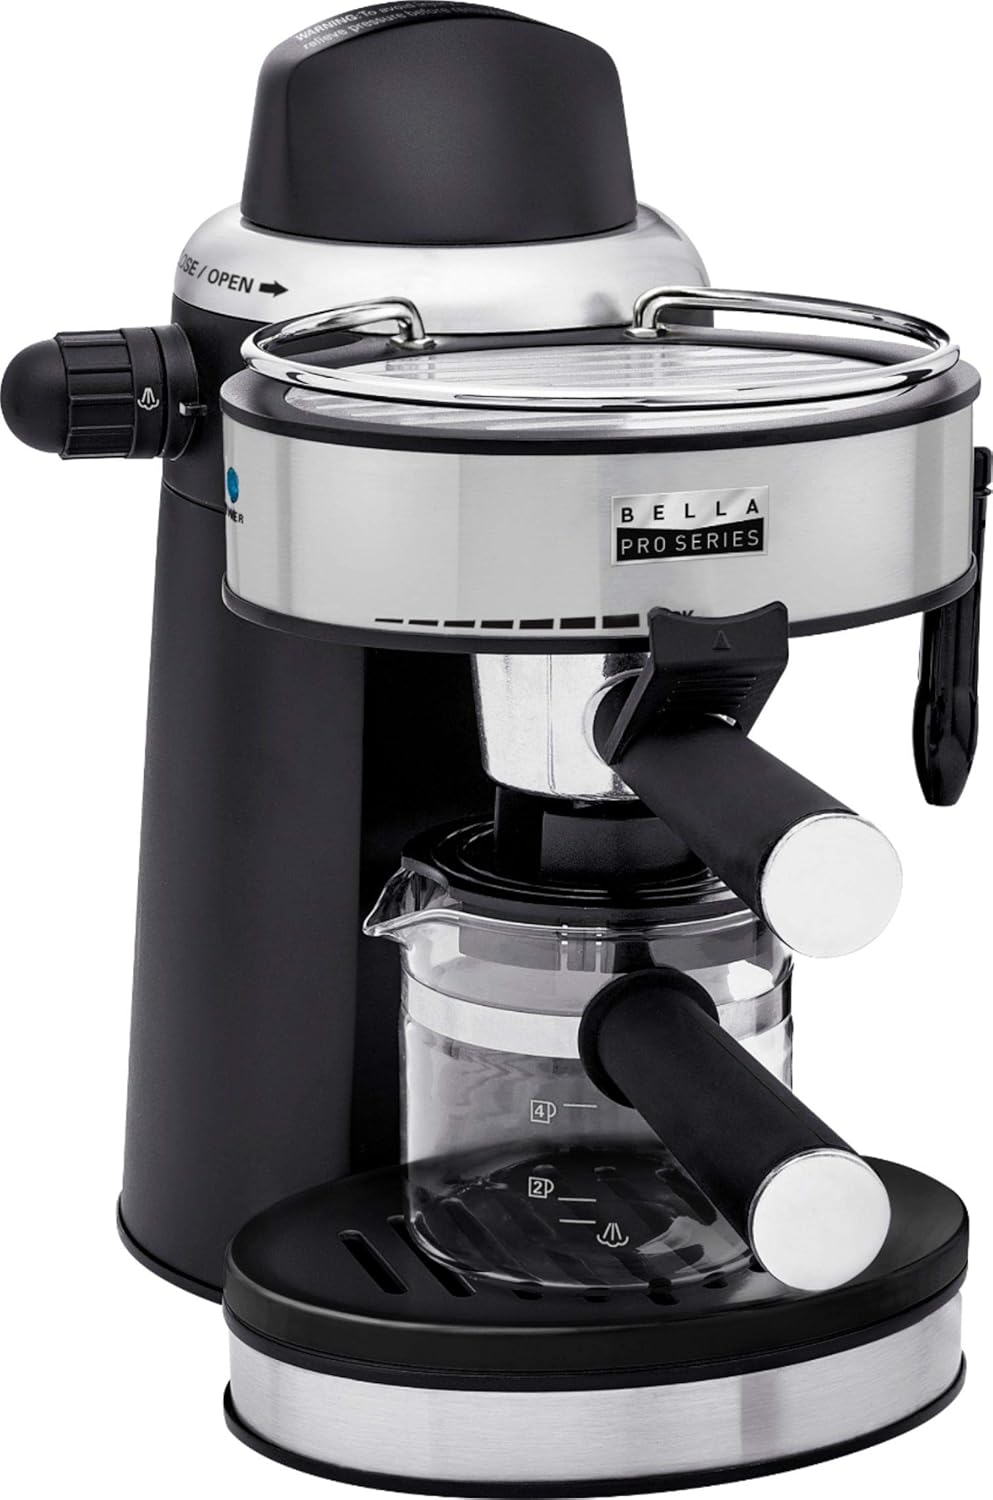
Figure 3.2: Angled view of the Bella Pro Series Espresso Machine, highlighting the overall design and component placement.
4. Initial Setup
Before first use, follow these steps to prepare your espresso machine:
- Unpacking: Carefully remove all packaging materials and inspect the machine for any damage. Keep packaging for future storage or transport.
- Cleaning: Wash the glass carafe, filter holder, and filter basket in warm, soapy water. Rinse thoroughly and dry. Wipe the exterior of the main unit with a damp cloth.
- First Use / Priming:
- Fill the water reservoir with fresh, cold water up to the MAX line.
- Place the empty glass carafe on the drip tray.
- Insert the filter holder (without coffee) into the machine and lock it into place.
- Plug the machine into a grounded electrical outlet.
- Turn the control knob to the 'Brew' position and allow water to flow through until the reservoir is empty. This primes the pump and cleans the internal system.
- Repeat this process 2-3 times to ensure thorough cleaning.
5. Operating Instructions
5.1. Making Espresso
- Ensure the water reservoir is filled with fresh, cold water.
- Add desired amount of finely ground espresso coffee to the filter basket. Do not overfill.
- Insert the filter basket into the filter holder, then attach the filter holder to the machine and twist firmly to lock it into position.
- Place the glass carafe on the drip tray, directly beneath the filter holder.
- Plug in the machine. Turn the control knob to the 'Brew' position. The machine will begin to brew espresso into the carafe.
- Once the desired amount of espresso is brewed (refer to carafe markings for 2 or 4 cups), turn the control knob to the 'Off' position.
- Carefully remove the carafe and serve.
5.2. Frothing Milk
The integrated steam wand allows you to heat and froth milk for cappuccinos and lattes.

Figure 5.1: Close-up view of the steam control knob, used to activate the milk frother.
- Fill a small pitcher with cold milk (dairy or non-dairy). Do not fill more than one-third full, as milk will expand.
- Ensure the machine is plugged in and has water in the reservoir.
- Position the steam wand just below the surface of the milk in the pitcher.
- Turn the control knob to the 'Steam' position. Steam will begin to release from the wand.
- Move the pitcher up and down slowly to incorporate air and create foam. Continue until desired temperature and froth consistency are achieved.
- Turn the control knob to the 'Off' position to stop steaming.
- Immediately wipe the steam wand with a damp cloth to prevent milk residue from drying.
6. Cleaning and Maintenance
Regular cleaning ensures optimal performance and extends the life of your espresso machine.
6.1. Daily Cleaning
- After Each Use: Turn off and unplug the machine. Allow it to cool.
- Filter Holder and Basket: Remove the filter holder, discard used coffee grounds, and rinse the filter holder and basket under running water.
- Glass Carafe: Wash the glass carafe with warm, soapy water.
- Drip Tray: Remove and empty the drip tray. Wash with warm, soapy water and rinse.
- Steam Wand: Immediately after frothing, wipe the steam wand with a damp cloth. Briefly turn on the steam function to clear any internal milk residue.
- Exterior: Wipe the exterior of the machine with a soft, damp cloth. Do not use abrasive cleaners or scourers.
6.2. Descaling
Mineral deposits from water can build up over time, affecting machine performance. Descale your machine every 2-3 months, or more frequently if you have hard water.
- Prepare a descaling solution according to the descaler manufacturer's instructions, or use a mixture of white vinegar and water (1:1 ratio).
- Fill the water reservoir with the descaling solution.
- Place the glass carafe on the drip tray.
- Turn the machine on and run half of the solution through the brew cycle (without coffee).
- Turn the machine off and let it sit for 15-20 minutes.
- Turn the machine on and run the remaining solution through the brew cycle.
- Empty the carafe and rinse it.
- Fill the reservoir with fresh, clean water and run 2-3 full cycles to rinse out any descaling solution residue.
7. Troubleshooting Guide
If you encounter issues with your espresso machine, refer to the following common problems and solutions:
| Problem | Possible Cause | Solution |
|---|---|---|
| No coffee brews | No water in reservoir; Machine not primed; Clogged filter. | Fill reservoir; Prime the machine; Clean filter basket. |
| Weak coffee | Insufficient coffee grounds; Coarse grind; Machine needs descaling. | Add more coffee; Use finer grind; Descale the machine. |
| No steam from wand | Steam wand clogged; Not enough water; Machine not heated. | Clean steam wand; Fill reservoir; Allow machine to heat up. |
| Leaking from filter holder | Filter holder not properly locked; Gasket worn. | Ensure filter holder is firmly locked; Contact customer support for gasket replacement. |
8. Technical Specifications
| Specification | Detail |
|---|---|
| Brand | BELLA |
| Model Number | 90070 |
| Color | Stainless Steel |
| Coffee Maker Type | Espresso Machine |
| Special Feature | Milk Frother |
| Pressure | 5 bars |
| Carafe Capacity | 8 ounces (approx. 4 demitasse cups) |
| Power | 750W |
| Filter Type | Reusable |
| Product Dimensions | 6.6 x 10 x 11.3 inches |
| Item Weight | 6.11 pounds |
| UPC | 829486900709 |
9. Warranty and Customer Support
This Bella Pro Series Espresso Machine is covered by a limited manufacturer's warranty. Please refer to the warranty card included with your product for specific terms and conditions, including coverage duration and limitations.
For technical assistance, troubleshooting beyond this guide, or to inquire about warranty service, please contact Bella customer support. Contact information can typically be found on the product packaging or on the official Bella website.
Online Support: Visit the official BELLA website for FAQs, product registration, and additional support resources. Visit the BELLA Store on Amazon


