1. Introduction
This manual provides comprehensive instructions for the setup, operation, maintenance, and troubleshooting of your REOLINK RLC-1224A 12MP PoE IP Dome Security Camera. This camera is designed for outdoor surveillance, offering 12MP resolution, smart human/vehicle/pet detection, full-color night vision, and two-way audio communication.
2. Setup
2.1. What's in the Box
- RLC-1224A Camera x1
- Waterproof Lid x1
- 1m Network Cable x1
- Quick Start Guide x1
- Surveillance Sticker x1
2.2. Preparation
Before you begin, ensure you have the following items:
- Router with available LAN port
- PoE Switch or PoE NVR (not included)
- Ethernet cable (1m cable included, longer may be needed)
- Smartphone with the latest Reolink App installed (available on App Store and Google Play)
- Drill, hammer, screwdriver, and mounting template (for installation)
2.3. Powering On and Initial Configuration
- Connect the Camera: Connect your RLC-1224A camera to a PoE switch using an Ethernet cable. Then, connect the PoE switch to your router's LAN port with another Ethernet cable. This provides both power and data transmission.
- Download/Update Reolink App: Ensure your Reolink App is updated to the latest version.
- Add Camera to App:
- Automatic Detection: Ensure your phone is connected to the same network as the camera. In the Reolink App settings, enable 'Add Devices Automatically'. The camera should appear in the device list. Tap it to enter the initialization page.
- Manual Addition: Tap the '+' button in the app, then scan the QR code located on the camera. Alternatively, tap 'Input UID/IP' to manually enter the UID number or IP address, or tap 'LAN' to scan for devices within your local network.
- Initialize Camera: Follow the on-screen prompts to create a device password and name your camera.
Video: How to set up and install the Reolink RLC-1224A camera, covering initial power-on and app configuration.
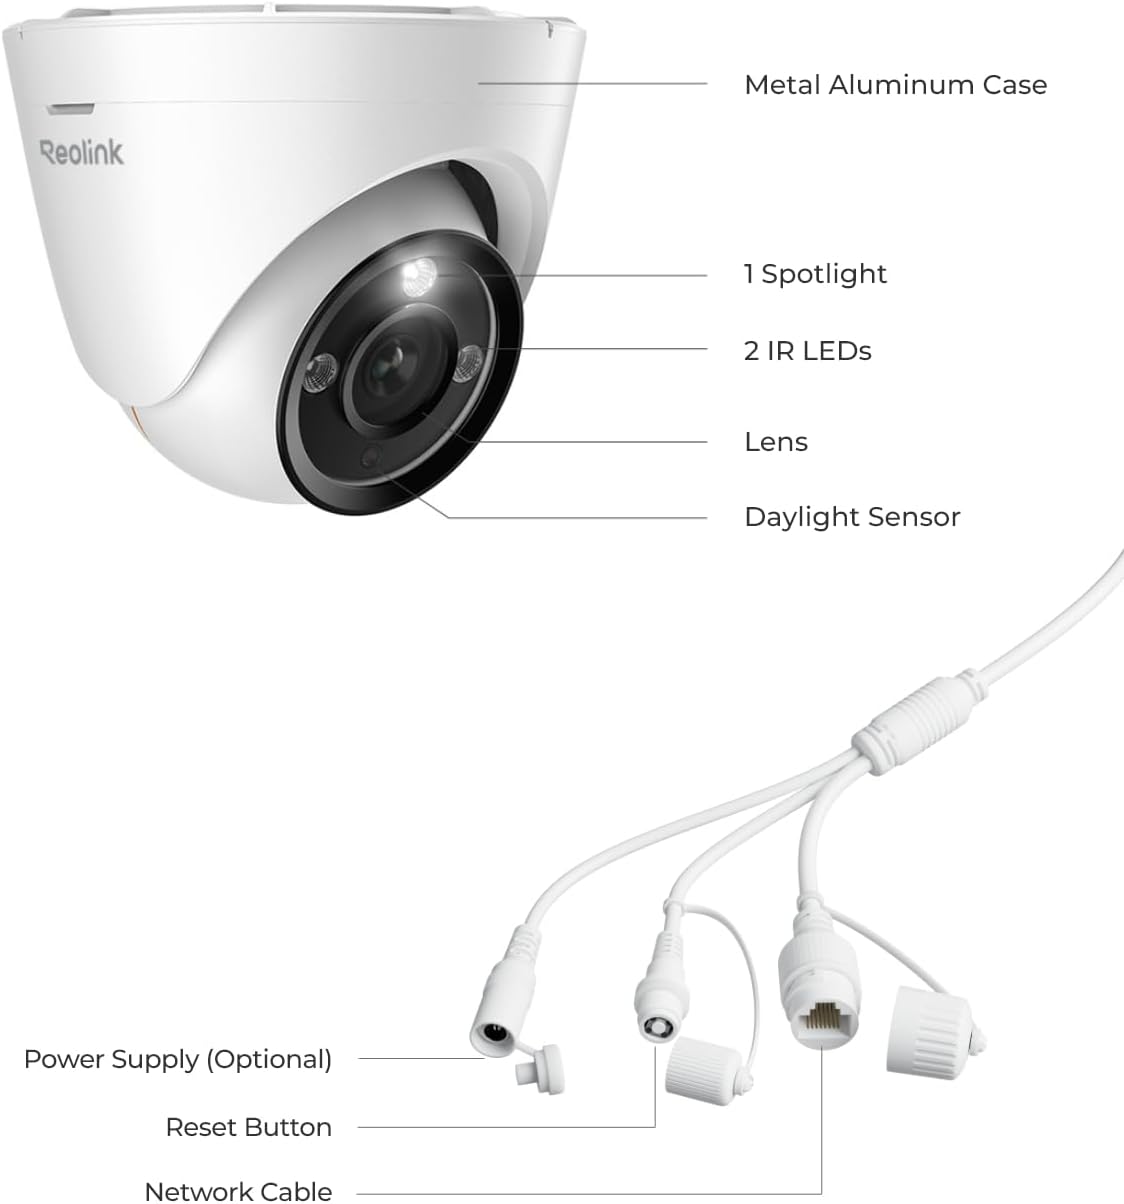
Image: Detailed view of the RLC-1224A camera's cable connections, including the Ethernet port, optional power input, and reset button.

Image: Connection diagram illustrating how to connect the RLC-1224A camera to a PoE switch and a router for a stable wired PoE connection.
3. Installation
3.1. Mounting Considerations
For optimal image quality and performance, avoid pointing the camera directly at sunlight, mirrors, or glass windows, as this can cause glare or reflections.
3.2. Mounting the Camera
- Positioning: Choose a suitable location for installation, such as a ceiling or wall, ensuring a clear field of view.
- Drill Holes: Use the provided mounting template to mark and drill holes on the chosen surface.
- Secure Base Plate: Screw the camera's base plate firmly to the surface.
- Attach Camera: Attach the camera body to the base plate. Turn the camera clockwise to lock it firmly, ensuring the two small notches are aligned.
- Adjust Angle: Rotate the camera body clockwise or counter-clockwise to adjust its viewing angle as needed.
- Waterproof Lid: Install the provided waterproof lid over the Ethernet cable connector to prevent water intrusion and ensure long-lasting performance.
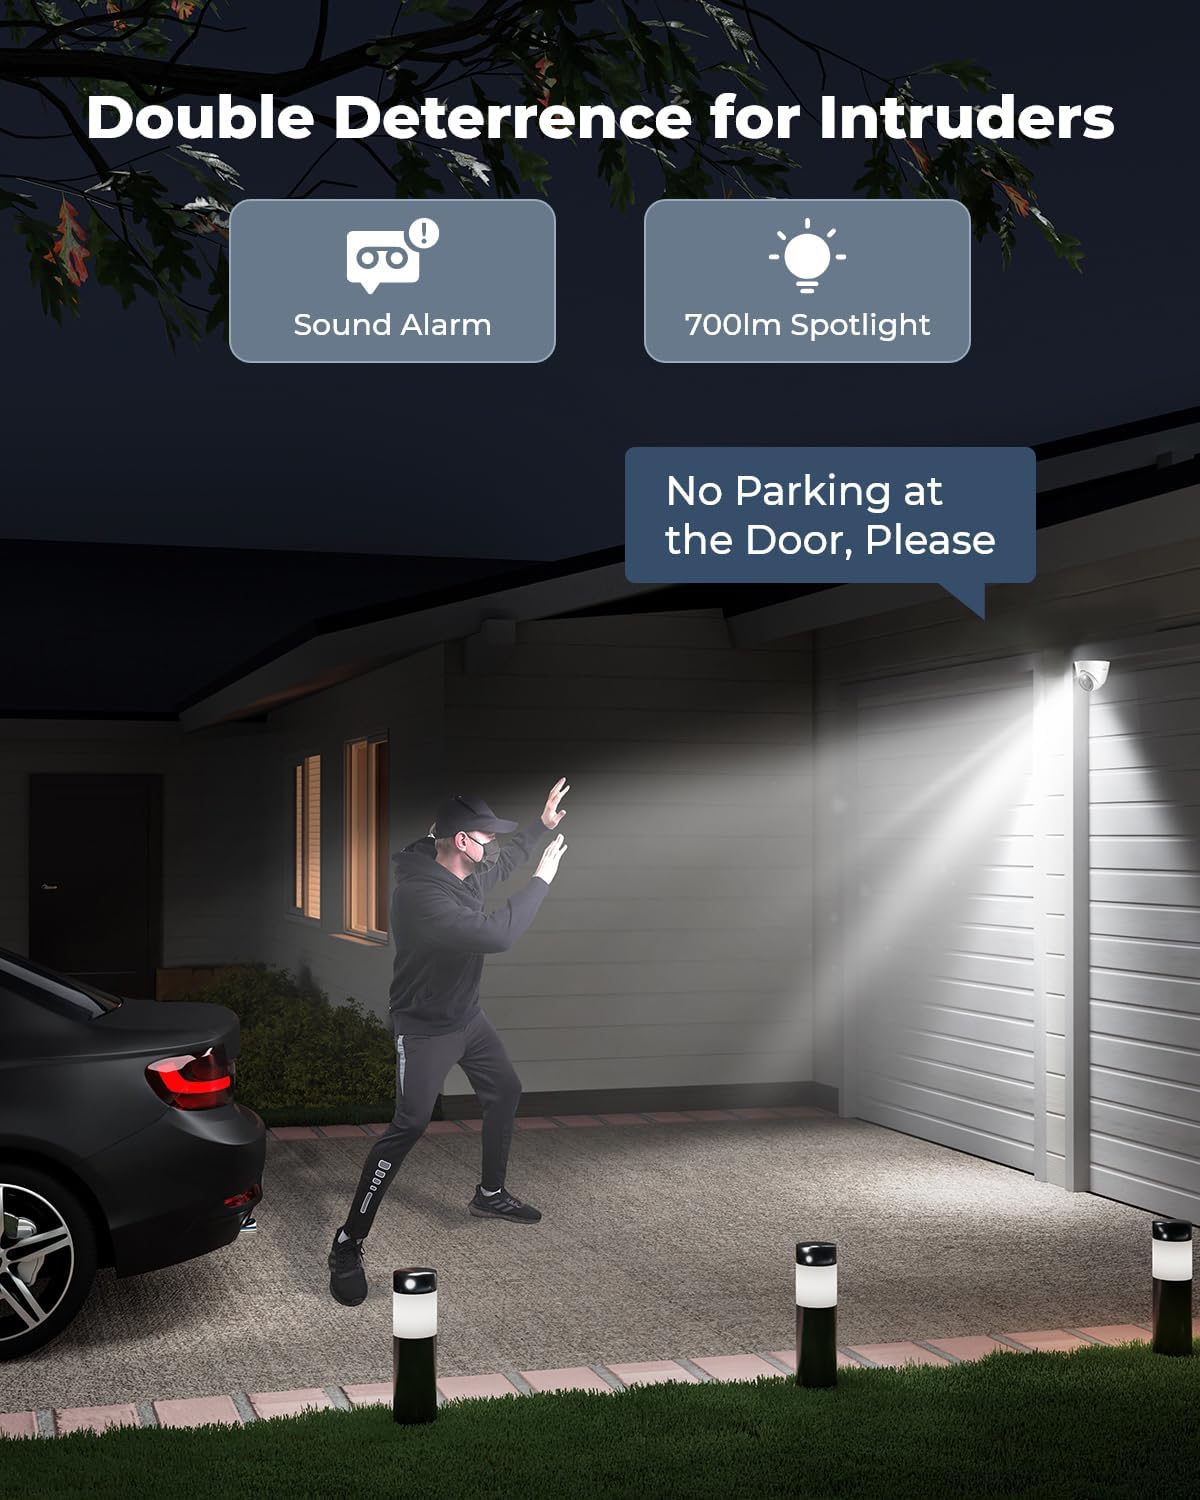
Image: The RLC-1224A dome camera securely mounted on a ceiling, providing a wide-angle view.

Image: The RLC-1224A dome camera mounted on a wall, showcasing its flexibility for various installation scenarios.
4. Operating
4.1. Live View and Recording
Access the live feed and recorded footage through the Reolink App on your smartphone or the Reolink Client software on your computer (Windows/Mac). You can also view the live feed via web browsers using the camera's IP address.
4.2. 12MP Ultra HD Visuals
The RLC-1224A captures video at an industry-leading 12MP (4512x2512) resolution, providing exceptionally clear and detailed images for wider coverage and enhanced surveillance.
Video: An overview of REOLINK's ultra-high-resolution security cameras, highlighting the clarity and detail of 12MP video.
4.3. Full-Color Night Vision with Spotlight
Equipped with a 700-lumen spotlight, the camera provides full-color night vision, allowing you to see vivid details even in low-light conditions. The spotlight can also act as a deterrent to potential intruders.
4.4. Smart Person/Vehicle/Pet Detection
The camera features advanced detection capabilities that distinguish between people, vehicles, and pets. This reduces false alarms and ensures you receive relevant alerts. You can customize motion detection zones and alarm delays for each detection type.
Video: Demonstration of the RLC-1224A's 12MP resolution and smart human/vehicle detection capabilities.
4.5. Two-Way Talk
Utilize the built-in microphone and speaker to communicate with visitors or deter unwanted guests directly through the Reolink App.

Image: The Reolink App on a smartphone displaying a live camera feed and the two-way talk function.
4.6. Flexible Recording Options
The camera supports various recording methods:
- MicroSD Card: Insert a microSD card (up to 512GB, not included) for local storage of recordings.
- Reolink NVR: Connect to a Reolink NVR for 24/7 continuous recording and massive storage.
- FTP/NAS: Configure the camera to upload recordings to an FTP server or Network Attached Storage (NAS).

Image: The RLC-1224A camera with its microSD card slot, highlighting local storage capability up to 512GB.
5. Maintenance
5.1. Cleaning the Camera
Periodically clean the camera lens to ensure clear image quality. Use a soft, damp cloth to gently wipe away dust or debris. Avoid abrasive cleaners that could scratch the lens.
5.2. Firmware Updates
Regularly check for and install firmware updates for your camera via the Reolink App or Client. Updates often include performance improvements, new features, and security enhancements.
5.3. Waterproof Lid
Ensure the waterproof lid covering the Ethernet cable connector remains securely installed to protect against moisture and environmental elements, especially in outdoor settings.
6. Troubleshooting
6.1. Camera Not Powering On
Verify that the Ethernet cable is securely connected to both the camera and the PoE switch/NVR. Ensure the PoE switch/NVR is powered on and functioning correctly.
6.2. Cannot Add Camera to App
- Ensure your smartphone and the camera are connected to the same local network during the initial setup.
- Check if the 'Add Devices Automatically' option is enabled in the Reolink App settings.
- If adding manually, double-check the UID or IP address for accuracy.
6.3. Black Screen or Video Loss on NVR Monitor
If using a Reolink NVR, ensure its firmware is updated to the latest version. After updating, the camera should preview in 8MP resolution on the NVR monitor (still 12MP in Reolink App/Client). Third-party NVRs are not officially supported.
6.4. Image Quality Issues
If the image appears washed out or has glare, check if the camera is pointed directly at strong light sources, mirrors, or reflective glass surfaces. Adjust the camera's position to avoid these conditions.
For further assistance, please refer to the official Reolink support resources.
7. Specifications
| Feature | Specification |
|---|---|
| Model Name | RLC-1224A |
| Video Capture Resolution | 12MP (4512x2512) |
| Effective Still Resolution | 12 MP |
| Viewing Angle | 97 Degrees |
| Night Vision Range | 100 Feet (with 700lm spotlight) |
| Low Light Technology | Night Color |
| Detection Type | Smart Person/Vehicle/Pet Detection |
| Connectivity Technology | Ethernet (PoE) |
| Power Source | Power over Ethernet (PoE) or 12V DC |
| Wattage | 6 watts |
| Storage Options | Up to 512GB microSD Card, Reolink NVR, FTP/NAS |
| Controller Type | Reolink APP |
| Indoor/Outdoor Usage | Outdoor |
| International Protection Rating | IP67 (Waterproof) |
| Material | Aluminum |
| Product Dimensions | 4.62 x 4.62 x 4.08 inches |
| Item Weight | 1.12 pounds |
8. Warranty and Support
REOLINK products typically come with a limited warranty. Please refer to the official REOLINK website or your purchase documentation for specific warranty terms and conditions.
For technical support, FAQs, and additional resources, visit the REOLINK Support Center or contact REOLINK customer service directly. The Reolink App and Client also provide access to support features and community forums.


