
Telwin 816145
Telwin INFINITY PLASMA 40 Plasma Cutting System User Manual
Model: 816145
1. Introduction
This user manual provides essential information for the safe and efficient operation, setup, maintenance, and troubleshooting of your Telwin INFINITY PLASMA 40 plasma cutting system. Please read this manual thoroughly before using the equipment to ensure proper handling and to prevent injury or damage.
The Telwin INFINITY PLASMA 40 is a compressed air plasma cutting inverter system designed for precise and deformation-free cutting of various conductive materials.
2. Safety Instructions
WARNING: Plasma cutting equipment can be dangerous if not used correctly. Always follow safety precautions to prevent electric shock, burns, fire, and other serious injuries.
- Personal Protective Equipment (PPE): Always wear appropriate PPE, including welding helmet with proper shade, flame-resistant clothing, heavy-duty gloves, and safety shoes.
- Ventilation: Ensure adequate ventilation to remove fumes and gases produced during cutting. Work in a well-ventilated area or use local exhaust ventilation.
- Electrical Safety: Connect the machine to a properly grounded power supply. Do not operate in wet conditions. Inspect cables and connections for damage before each use.
- Fire Prevention: Keep flammable materials away from the cutting area. Have a fire extinguisher readily available.
- Compressed Air: Ensure the air compressor is properly maintained and provides clean, dry air at the recommended pressure.
- Maintenance: Disconnect the power supply before performing any maintenance or changing consumables.
3. Product Overview
The Telwin INFINITY PLASMA 40 is a compact and powerful inverter plasma cutting system designed for a wide range of cutting applications.
Key Features:
- Compressed air plasma cutting inverter system with pilot arc striking.
- Suitable for cutting all conductive materials including steel, stainless steel, galvanized steel, aluminum, copper, and brass.
- Capable of cutting thicknesses up to 15 mm with high precision.
- Compact and lightweight design (approximately 6.48 kg) for easy transport.
- Features consumable change signaling for optimal cutting performance.
- Equipped with automatic torch cooling to enhance productivity.
- Includes air pressure display.
- Integrated thermostatic, overvoltage, undervoltage, and overcurrent protections.
Components Included:
- Plasma cutting unit
- Plasma torch
- Ground clamp
Product Views:

Figure 3.1: Front view of the Telwin INFINITY PLASMA 40 plasma cutting system, showing the main unit, plasma torch, and ground clamp. The control panel with the current adjustment knob is visible on the right side of the unit.
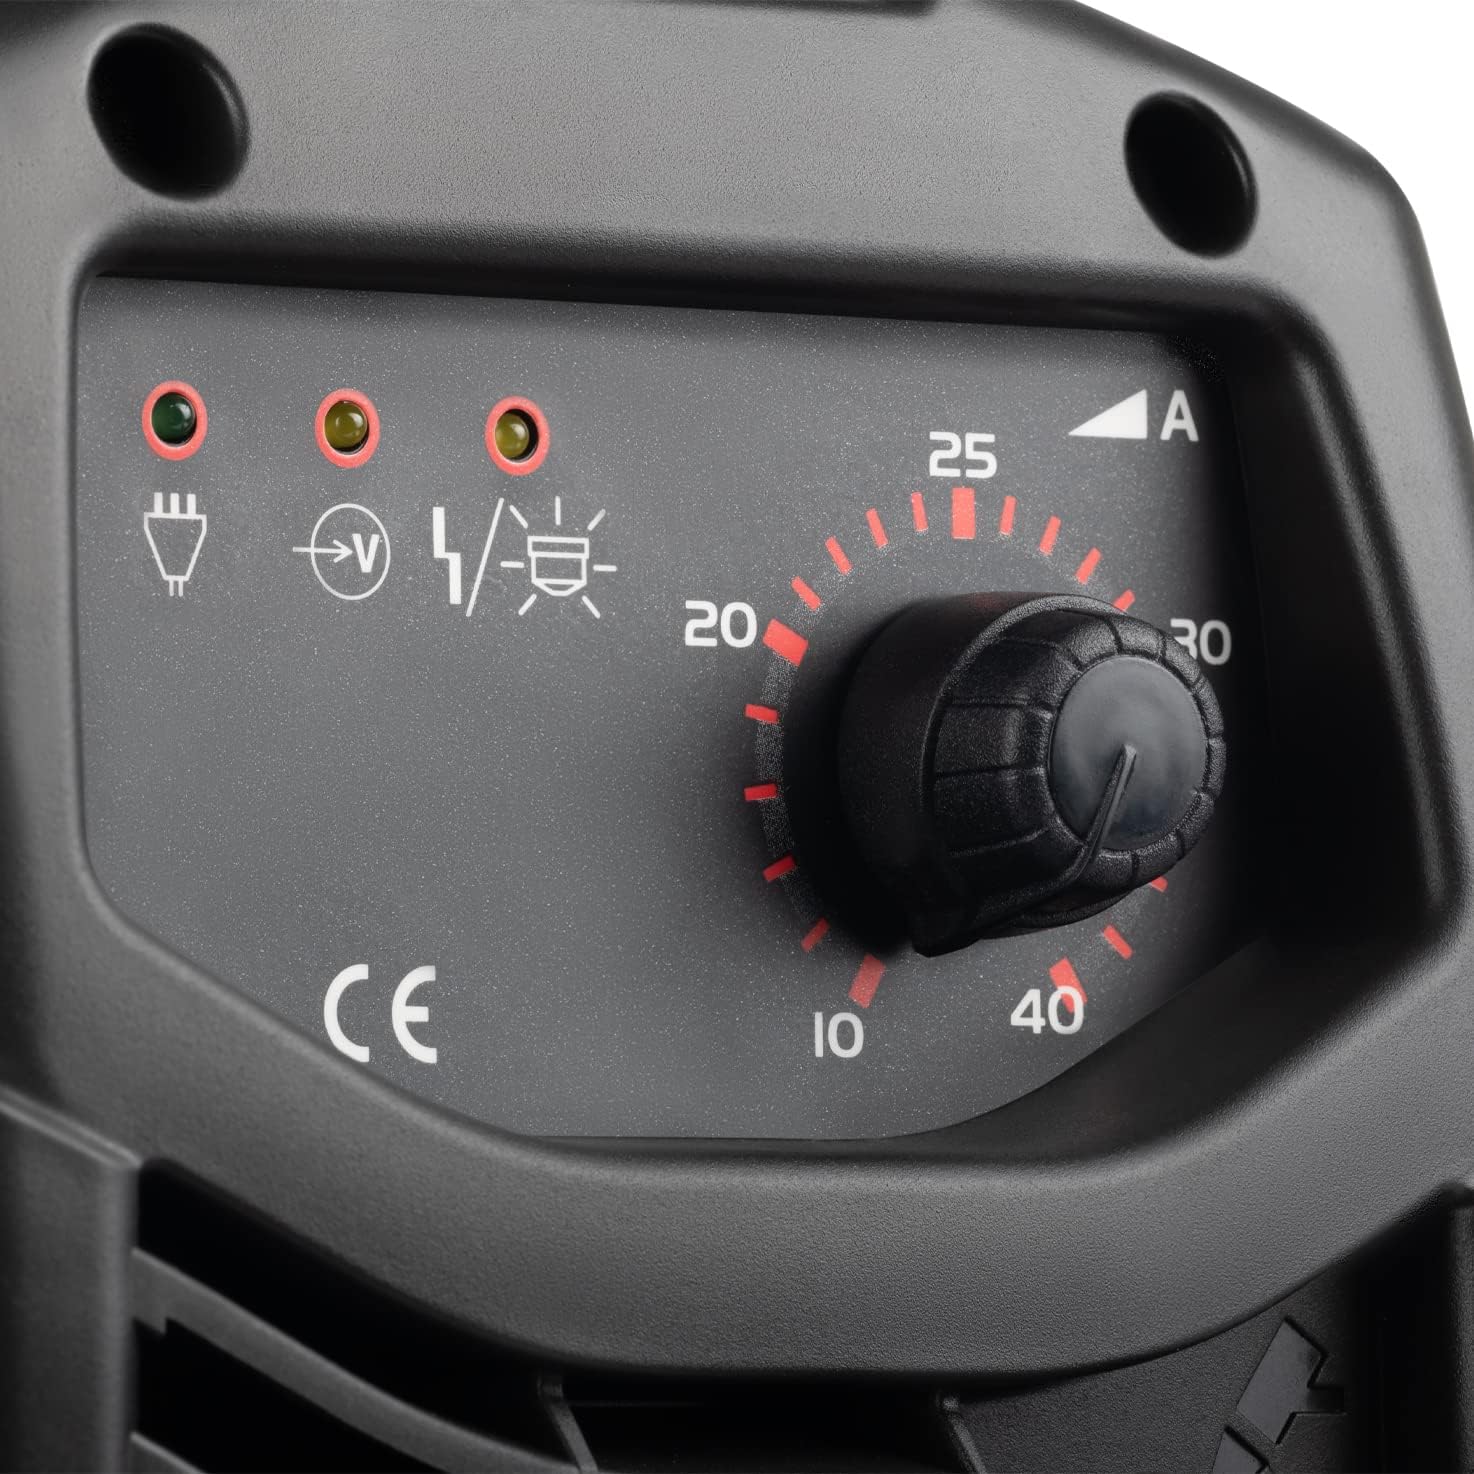
Figure 3.2: Detailed view of the control panel, featuring the current adjustment knob (10-40A), indicator lights for power, voltage presence, and protection status, and the CE marking.

Figure 3.3: Rear view of the unit, displaying the main power switch, the compressed air input connection with integrated air filter/regulator, and cooling vents.
4. Setup
4.1 Unpacking
- Carefully remove the plasma cutter and all accessories from the packaging.
- Inspect the unit for any signs of damage during transit. If damage is found, do not operate the machine and contact your supplier.
- Retain the packaging for future storage or transport.
4.2 Power Connection
- Ensure the main power switch on the rear of the unit is in the OFF position.
- Connect the power cable to a suitable 230V AC, 50/60Hz grounded power outlet. The unit requires a power supply capable of delivering 4 KW.
- Verify that the power outlet is protected by an appropriate circuit breaker.
4.3 Air Compressor Connection
- Connect a clean, dry compressed air supply to the air inlet fitting located on the rear of the unit (refer to Figure 3.3).
- The unit has an integrated air filter/regulator. Ensure the air pressure is set according to the material thickness and cutting requirements. The air pressure display on the unit will assist in setting the correct pressure.
- Use an air hose with appropriate fittings to ensure a secure, leak-free connection.
4.4 Torch and Ground Clamp Connection
- Connect the plasma torch cable to the designated connector on the front panel of the unit. Ensure it is securely fastened.
- Connect the ground clamp cable to the ground terminal on the front panel.
- Attach the ground clamp firmly to the workpiece or the cutting table, ensuring good electrical contact. The ground connection must be as close as possible to the cutting area.
5. Operating Instructions
5.1 Before Operation
- Ensure all safety instructions (Section 2) have been read and understood.
- Wear all necessary Personal Protective Equipment (PPE).
- Verify that the workpiece is clean and free of rust, paint, or other contaminants that could affect cutting quality.
- Confirm that the air pressure is correctly set for the material thickness.
5.2 Cutting Process
- Turn on the main power switch on the rear of the unit. The power indicator light on the front panel should illuminate.
- Adjust the cutting current using the knob on the front panel (refer to Figure 3.2). The appropriate current setting depends on the material type and thickness.
- Position the torch nozzle directly on the edge of the workpiece or at the starting point for piercing.
- Press the torch trigger. The pilot arc will strike.
- Once the pilot arc is established and penetrates the material, begin moving the torch steadily along the desired cut line. Maintain a consistent speed to achieve a clean cut.
- For piercing, hold the torch perpendicular to the material, press the trigger, and allow the arc to penetrate before moving.
- Release the torch trigger to stop cutting.
5.3 Adjusting Settings
- Cutting Current: The current knob allows adjustment from 10A to 40A. Higher current is generally required for thicker materials or faster cutting speeds.
- Air Pressure: The optimal air pressure is crucial for cut quality and consumable life. Refer to the air pressure display and adjust the regulator on the rear of the unit as needed.
6. Maintenance
Regular maintenance ensures the longevity and optimal performance of your Telwin INFINITY PLASMA 40.
6.1 Consumable Replacement
The plasma torch uses consumables (electrode, nozzle, swirl ring, shield cap) that wear out over time. The unit features a consumable change signaling system to indicate when replacement is needed. Always replace worn consumables promptly to maintain cut quality and prevent damage to the torch.
- Ensure the machine is turned off and disconnected from the power supply before changing consumables.
- Follow the specific instructions provided with your torch for proper disassembly and reassembly of consumables.
6.2 Cleaning
- Keep the unit clean and free of dust and debris. Use a dry, soft cloth for cleaning the exterior.
- Periodically clean the cooling vents to ensure proper airflow and prevent overheating.
6.3 Air Filter Maintenance
The integrated air filter/regulator (Figure 3.3) collects moisture and particles from the compressed air. Regularly check the filter bowl and drain any accumulated water. Clean or replace the filter element as necessary to ensure a supply of clean, dry air to the plasma torch.
7. Troubleshooting
This section provides solutions to common issues you might encounter. For problems not listed here, contact Telwin customer support.
| Problem | Possible Cause | Solution |
|---|---|---|
| Unit does not power on | No power supply; Main switch off; Faulty power cable/outlet | Check power connection; Turn on main switch; Test power outlet; Inspect cable for damage |
| No arc / Arc not stable | Poor ground connection; Worn consumables; Incorrect air pressure; Torch not connected properly | Ensure good ground contact; Replace consumables; Adjust air pressure; Check torch connection |
| Poor cut quality / Excessive dross | Incorrect cutting speed; Worn consumables; Incorrect air pressure; Material too thick for current setting | Adjust cutting speed; Replace consumables; Adjust air pressure; Increase current or reduce thickness |
| Overheating / Protection light on | Exceeded duty cycle; Blocked cooling vents; High ambient temperature | Allow unit to cool down; Clear cooling vents; Ensure adequate ventilation |
| Air pressure display incorrect | Faulty air regulator; Air leak in system | Check air regulator; Inspect air lines for leaks |
8. Specifications
| Specification | Value |
|---|---|
| Manufacturer | Telwin |
| Model Number | 816145 |
| Product Dimensions (L x W x H) | 14.5 x 55 x 24 cm |
| Weight | 6.48 kg |
| Power Input | 230V AC (derived from product title) |
| Power | 4 KW |
| Cutting Thickness (Max) | 15 mm |
| Special Features | Lightweight, Portable |
| Handle Material | Plastic |
| Country of Origin | Italy |
9. Warranty and Support
Telwin products are manufactured to high-quality standards. For information regarding warranty coverage, terms, and conditions, please refer to the warranty card included with your product or visit the official Telwin website.
For technical assistance, spare parts, or service, please contact your authorized Telwin dealer or Telwin customer support directly. When contacting support, please have your product model number (816145) and serial number ready.
You can find contact information on the Telwin official website or through your point of purchase.
Related documents816145


Ask a question about this manual
Ask about setup, troubleshooting, compatibility, parts, safety, or missing instructions. Manuals+ will review the question and use this page’s manual context to help answer it.