
DRONEEYE 4DF6
DRONEEYE 4DF6 Drone User Manual
Model: 4DF6
1. Introduction
Thank you for choosing the DRONEEYE 4DF6 Drone. This user manual provides essential information for the safe operation, setup, and maintenance of your new drone. Please read this manual thoroughly before operating the drone to ensure proper use and to maximize your flying experience.

Figure 1.1: DRONEEYE 4DF6 Drone with remote controller, two batteries, and carrying case.
2. Safety Guidelines
Operating a drone requires responsibility. Adhere to the following safety guidelines to prevent injury or damage:
- Read the Manual: Always read the entire manual before first flight.
- Age Requirement: This product is not suitable for children under 14 years old. Adult supervision is recommended for younger users.
- Flight Environment: Fly in open, clear areas away from people, animals, buildings, and obstacles. Avoid flying near airports or restricted airspace.
- Weather Conditions: Do not fly in strong winds, rain, snow, or fog.
- Battery Safety: Use only original batteries and chargers. Do not overcharge or short-circuit batteries. Discontinue use if batteries are damaged or swollen.
- Propeller Safety: Keep hands, face, and loose clothing away from rotating propellers.
- Visual Line of Sight: Always maintain visual line of sight with the drone during flight.
- Emergency Stop: Familiarize yourself with the emergency stop function.
3. Package Contents
Verify that all items are present in your package:
- DRONEEYE 4DF6 Drone
- Remote Controller
- Rechargeable Drone Batteries (x2)
- USB Charging Cable
- Spare Propellers (x4)
- Propeller Guards (x4)
- Screwdriver
- User Manual
- Carrying Case
4. Components Overview
4.1 Drone Components
The DRONEEYE 4DF6 drone features foldable arms for portability. Key components include:
- Camera: 1080P HD FPV camera for photo and video capture.
- Propellers: Four main propellers for lift and thrust.
- Motors: Brushless motors for stable flight.
- Battery Compartment: Located at the rear of the drone.
- LED Indicators: Provide status information during flight.

Figure 4.1: Overview of the 4D-F6 FPV Drone and its remote controller.
4.2 Remote Controller Components
The remote controller provides intuitive control over the drone:
- Left Joystick: Controls throttle (up/down) and yaw (rotate left/right).
- Right Joystick: Controls pitch (forward/backward) and roll (left/right).
- One Key Takeoff/Landing Button: Initiates automatic takeoff or landing.
- Headless Mode Button: Activates headless flight mode.
- Speed Switch Button: Toggles between different speed modes.
- Phone Holder: Securely holds your smartphone for FPV viewing.
5. Setup
5.1 Charging Batteries
Before first use, fully charge both the drone batteries and the remote controller battery.
- Connect the USB charging cable to the drone battery.
- Plug the USB end into a 5V/2A USB adapter (not included).
- Charging time is approximately 90-120 minutes per drone battery. The indicator light will change when fully charged.
- For the remote controller, insert 3 x AAA batteries (not included) into the battery compartment.
5.2 Installing Drone Battery
- Ensure the drone is powered off.
- Locate the battery compartment at the rear of the drone.
- Insert the fully charged drone battery into the compartment until it clicks into place.
5.3 Propeller Installation
If propellers are not pre-installed or need replacement:
- Identify propellers A and B. Each motor arm is marked with A or B.
- Attach propeller A to motor A, and propeller B to motor B. Ensure correct orientation.
- Secure each propeller with the provided screws using the screwdriver.
- Attach propeller guards by snapping them onto the drone's arms.
5.4 App Installation and Connection
For FPV and advanced features, download the dedicated DRONEEYE app.
- Scan the QR code in the quick start guide or search for 'DRONEEYE FPV' in your device's app store.
- Install the app on your smartphone.
- Power on the drone.
- Go to your phone's Wi-Fi settings and connect to the drone's Wi-Fi network (e.g., 'DRONEEYE-XXXXXX').
- Open the DRONEEYE app. The live video feed should appear, indicating a successful connection.
6. Operating Instructions
6.1 Pre-Flight Checklist
- Ensure drone and remote batteries are fully charged.
- Check that propellers are securely attached and undamaged.
- Confirm you are in a safe, open flying area.
- Connect your smartphone to the drone's Wi-Fi (if using FPV).
6.2 Pairing and Calibration
- Place the drone on a flat, level surface.
- Power on the drone, then power on the remote controller.
- Push the left joystick (throttle) all the way up, then all the way down. The drone's lights will stop flashing, indicating successful pairing.
- To calibrate the gyroscope, push both joysticks down and to the right simultaneously. The drone's lights will flash rapidly and then become solid, indicating successful calibration.
6.3 Take-off and Landing
- Manual Take-off: Push both joysticks down and outwards to start the propellers. Slowly push the left joystick up to ascend.
- One Key Take-off: Press the One Key Takeoff/Landing button on the remote. The drone will automatically ascend to a stable hovering height.
- Manual Landing: Slowly pull the left joystick down until the drone lands. Release the joystick once landed.
- One Key Landing: Press the One Key Takeoff/Landing button. The drone will automatically descend and land.

Figure 6.1: Simplified operations including One Key Takeoff/Landing, 3D Flips, and Headless Mode.
6.4 Basic Flight Controls
- Altitude Hold: The drone maintains a stable altitude automatically, allowing easier control of horizontal movement.
- Headless Mode: In headless mode, the drone's orientation is relative to the pilot, regardless of the drone's front direction. Activate by pressing the Headless Mode button.

Figure 6.2: Visual representation of Intelligent Flight features including One Key Start/Land, Headless Mode, and Orbit Flight.
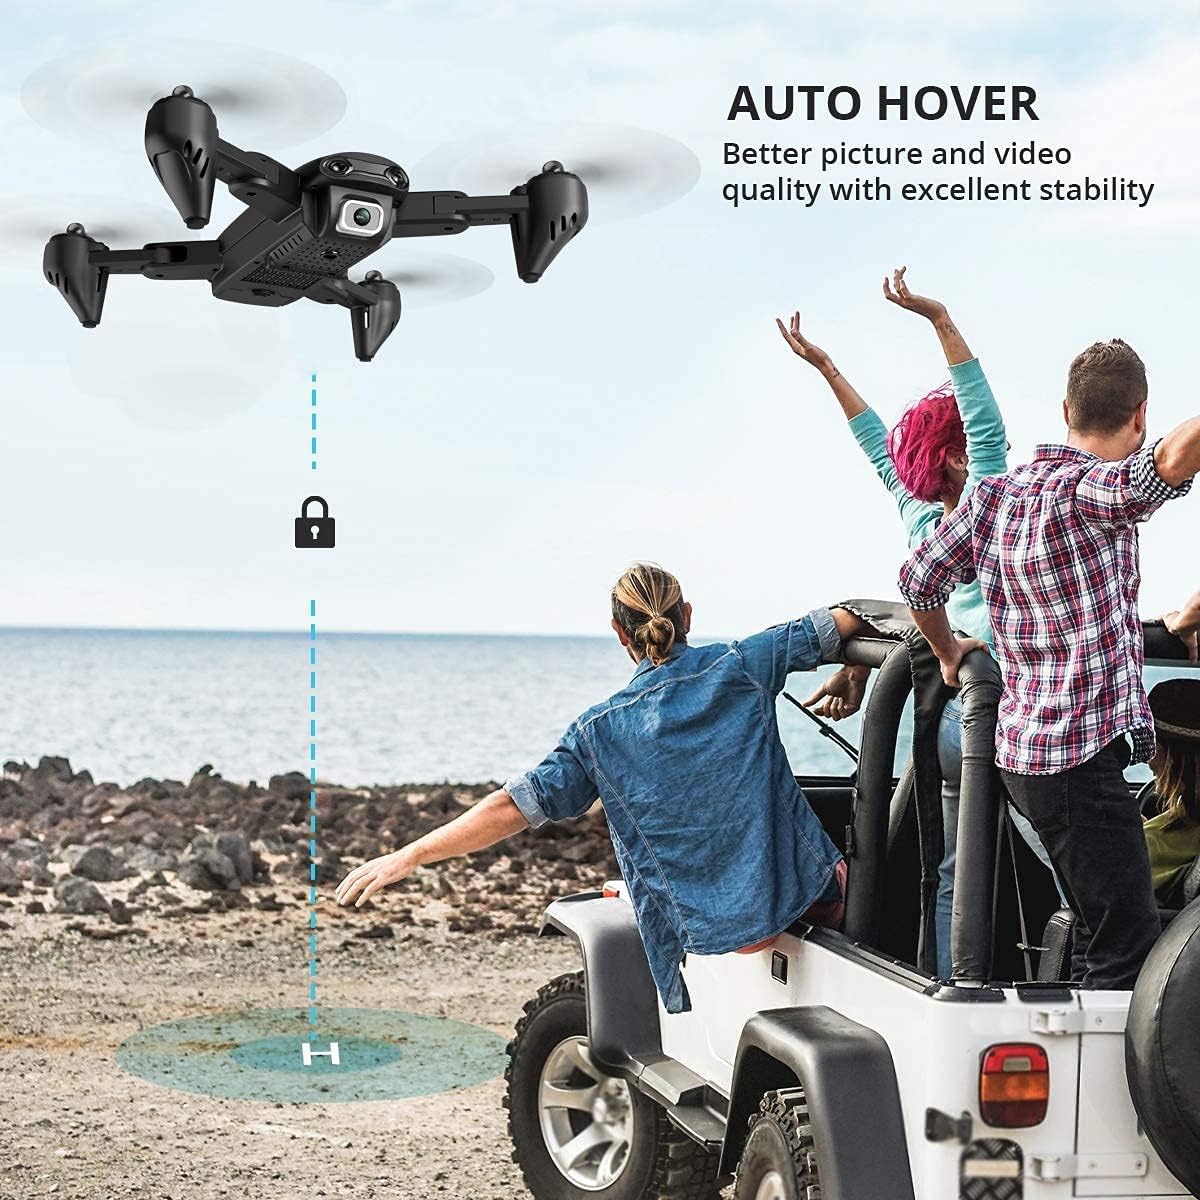
Figure 6.3: The Auto Hover feature ensures stable picture and video quality by maintaining a fixed position.
6.5 Advanced Flight Modes
- Waypoint Fly (Trajectory Flight): Draw a path on the app screen, and the drone will automatically follow it.
- 3D Flips: Press the 3D Flip button and move the right joystick in any direction to perform a 360-degree flip. Ensure sufficient altitude.
- Gravity Control: Control the drone's direction by tilting your smartphone (requires app connection).

Figure 6.4: The Waypoint Fly feature allows the drone to follow a pre-defined path.

Figure 6.5: The drone offers fun features like 3D Flips, Gravity Control, and 360-degree Rolling.

Figure 6.6: Gravity Control allows you to direct the drone by adjusting your smartphone's position.
6.6 Camera Operation and FPV
- The 1080P HD camera captures high-quality photos and videos.
- FPV Real-time Transmission: Once connected to the app, you can view the drone's camera feed live on your smartphone screen.
- Photos and videos are saved directly to your smartphone's gallery.

Figure 6.7: The 1080P FPV HD Camera records high-quality videos and images.

Figure 6.8: FPV Real-time Transmission allows you to share incredible views instantly.
7. Maintenance
- Cleaning: Use a soft, dry cloth to clean the drone and remote controller. Do not use harsh chemicals or solvents.
- Propellers: Regularly inspect propellers for cracks or damage. Replace damaged propellers immediately.
- Storage: Store the drone and accessories in the provided carrying case in a cool, dry place away from direct sunlight.
- Batteries: For long-term storage, charge batteries to approximately 50% capacity. Remove batteries from the drone and remote if not used for extended periods.
8. Troubleshooting
| Problem | Possible Cause | Solution |
|---|---|---|
| Drone does not respond to remote. | Not paired; low battery; interference. | Re-pair drone and remote; charge batteries; move to an area with less interference. |
| Drone drifts during flight. | Not calibrated; uneven surface during startup; wind. | Recalibrate gyroscope on a flat surface; fly in calm conditions. |
| Propellers do not spin. | Battery not connected; propellers jammed; motor issue. | Ensure battery is fully inserted; check for obstructions; contact support if motor is faulty. |
| FPV image is blurry or disconnected. | Weak Wi-Fi signal; app not connected. | Ensure strong Wi-Fi connection; restart app and drone; fly closer to the drone. |
| Drone does not lift off. | Low battery; propellers installed incorrectly. | Charge battery; verify correct propeller (A/B) installation. |
9. Specifications
| Feature | Detail |
|---|---|
| Brand | DRONEEYE |
| Model | 4DF6 |
| Camera | 1080P HD FPV |
| Flight Time | Up to 15 minutes per battery (approx. 30 min with 2 batteries) |
| Control Distance | Varies based on environment and signal strength |
| Battery Type (Drone) | Lithium Ion |
| Battery Type (Remote) | AAA (not included) |
| Special Features | FPV, First Person View, Foldable, Altitude Hold, Headless Mode, One Key Start/Landing, Waypoint Fly, 3D Flips, Gravity Control |
| Item Weight | 740 g |
10. Warranty and Support
DRONEEYE products are manufactured to high quality standards. For warranty information, technical support, or service inquiries, please refer to the contact information provided on the product packaging or the official DRONEEYE website. Please retain your proof of purchase for warranty claims.
Ask a question about this manual
Ask about setup, troubleshooting, compatibility, parts, safety, or missing instructions. Manuals+ will review the question and use this page’s manual context to help answer it.