
1. Introduction
This manual provides essential information for the safe and efficient operation of your new Hisense WD3S9043BW7 Washer Dryer. Please read these instructions carefully before installation and use, and keep them for future reference. This appliance combines washing and drying functions, offering convenience and space-saving benefits.

Figure 1: Hisense WD3S9043BW7 Washer Dryer
2. Important Safety Information
To reduce the risk of fire, electric shock, or injury when using your appliance, follow these basic precautions:
- Read all instructions before using the appliance.
- Do not wash or dry articles that have been previously cleaned in, washed in, soaked in, or spotted with gasoline, dry-cleaning solvents, or other flammable or explosive substances, as they emit vapors that could ignite or explode.
- Do not allow children to play on or in the appliance. Close supervision of children is necessary when the appliance is used near children.
- Before the appliance is removed from service or discarded, remove the door to the washing/drying compartment.
- Do not reach into the appliance if the tub or drum is moving.
- Do not install or store this appliance where it will be exposed to the weather.
- Do not tamper with controls.
- Do not repair or replace any part of the appliance or attempt any servicing unless specifically recommended in the user-maintenance instructions or in published user-repair instructions that you understand and have the skills to carry out.
- Always disconnect the appliance from the power supply before cleaning, servicing, or removing any parts.
- Ensure the appliance is properly grounded.
3. Product Overview
3.1 Components
The Hisense WD3S9043BW7 Washer Dryer features a robust design with a front-loading drum made of stainless steel. Key components include the control panel, detergent dispenser drawer, and the main door.

Figure 2: Washer Dryer with open door showing the drum
3.2 Key Features
This appliance is equipped with advanced features for optimal laundry care:
- Washer and Dryer in One: Combines washing (9 kg capacity) and drying (6 kg capacity) functions in a single unit.
- Jet Wash: A powerful top-mounted jet system that enhances washing performance, aids in stain removal, and ensures even detergent distribution.
- Steam Programs: Utilizes steam for hygienic cleaning and softening of garments.
- Wash & Dry 60': A quick program designed to wash and dry small loads (up to 1 kg) in just 60 minutes.
- AutoWash: Automatically detects laundry load and adjusts water and detergent quantities for a customized and efficient wash.
- ConnectLife: Smart connectivity feature for remote control and energy monitoring via a mobile app.
- Hygiene Guard: Features an antibacterial gasket for enhanced hygiene.
- Inverter Motor: Provides quiet, efficient, and durable operation.
- Large LED Display: Offers clear and intuitive control for program selection and monitoring.

Figure 3: Overview of key features
4. Setup and Installation
4.1 Unpacking
- Remove all packaging materials, including the polystyrene base and any protective films.
- Locate and remove the transport bolts from the rear of the appliance. These bolts secure the drum during transit and must be removed before operation to prevent damage. Refer to the diagram for bolt locations.
- Keep the transport bolts for future transport of the appliance.
4.2 Positioning
- Place the washer dryer on a firm, level floor.
- Adjust the leveling feet to ensure the appliance is stable and perfectly level. An unbalanced machine can cause excessive vibration and noise.
- Ensure adequate ventilation around the appliance, especially if it is installed in a confined space. Do not block ventilation openings.
4.3 Water and Electrical Connections
- Connect the water inlet hose to a cold water tap with a 3/4-inch thread. Ensure connections are tight to prevent leaks.
- Position the drain hose into a standpipe or over the edge of a sink, ensuring it is securely fixed to prevent displacement during operation.
- Plug the power cord into a grounded 220 Volt electrical outlet. Do not use extension cords or adapters.

Figure 4: Washer Dryer installed in a laundry setting
5. Operating Instructions
5.1 Control Panel Overview
The control panel features a central program dial, a large LED display, and touch-sensitive buttons for various functions and settings.

Figure 5: Control Panel Detail

Figure 6: Large LED Display for simplified programming
5.2 Loading Laundry
- Open the appliance door and load laundry into the drum. Do not overload the machine; ensure there is enough space for clothes to tumble freely.
- Sort laundry by fabric type, color, and degree of soiling.
- For washing, the maximum capacity is 9 kg. For drying, the maximum capacity is 6 kg.
5.3 Adding Detergent and Additives
- Pull out the detergent dispenser drawer.
- Add appropriate amounts of detergent to the main wash compartment and fabric softener to the softener compartment.
- For liquid detergents, use the provided dispenser cup if available.
- Close the detergent drawer gently.
5.4 Selecting a Program
Turn the program dial to select one of the 15 available automatic programs. The LED display will show the default settings for the selected program.

Figure 7: Auto Wash program selection
Common programs include:
- Eco 40-60: Energy-efficient program for cottons and mixed fabrics.
- Cotton: For cotton items.
- Synthetics: For synthetic or mixed fabrics.
- Wool: Gentle wash for woolens.
- Quick Wash: Fast wash cycles for lightly soiled items.
- Wash & Dry 60': For small loads requiring quick wash and dry.
- Refresh: For refreshing clothes with steam.
- Allergy Care: For items requiring thorough rinsing to remove allergens.
- Baby Care: Gentle wash for baby clothes.
- Drum Clean: For cleaning the appliance drum.
5.5 Special Functions
After selecting a program, you can customize it using the special function buttons:
- Steam: Adds a steam phase to the wash cycle for enhanced hygiene and wrinkle reduction.
- AutoWash: The appliance automatically detects the load weight and adjusts water and detergent for optimal results.
- Delayed End: Set a specific time for the cycle to finish.
- Pause & Add: Allows you to pause the cycle and add forgotten items (if water level and temperature permit).
- Quick Wash+: Offers various quick wash durations (e.g., 15, 30, 49 minutes) for smaller loads.

Figure 8: Quick Wash+ options for small loads
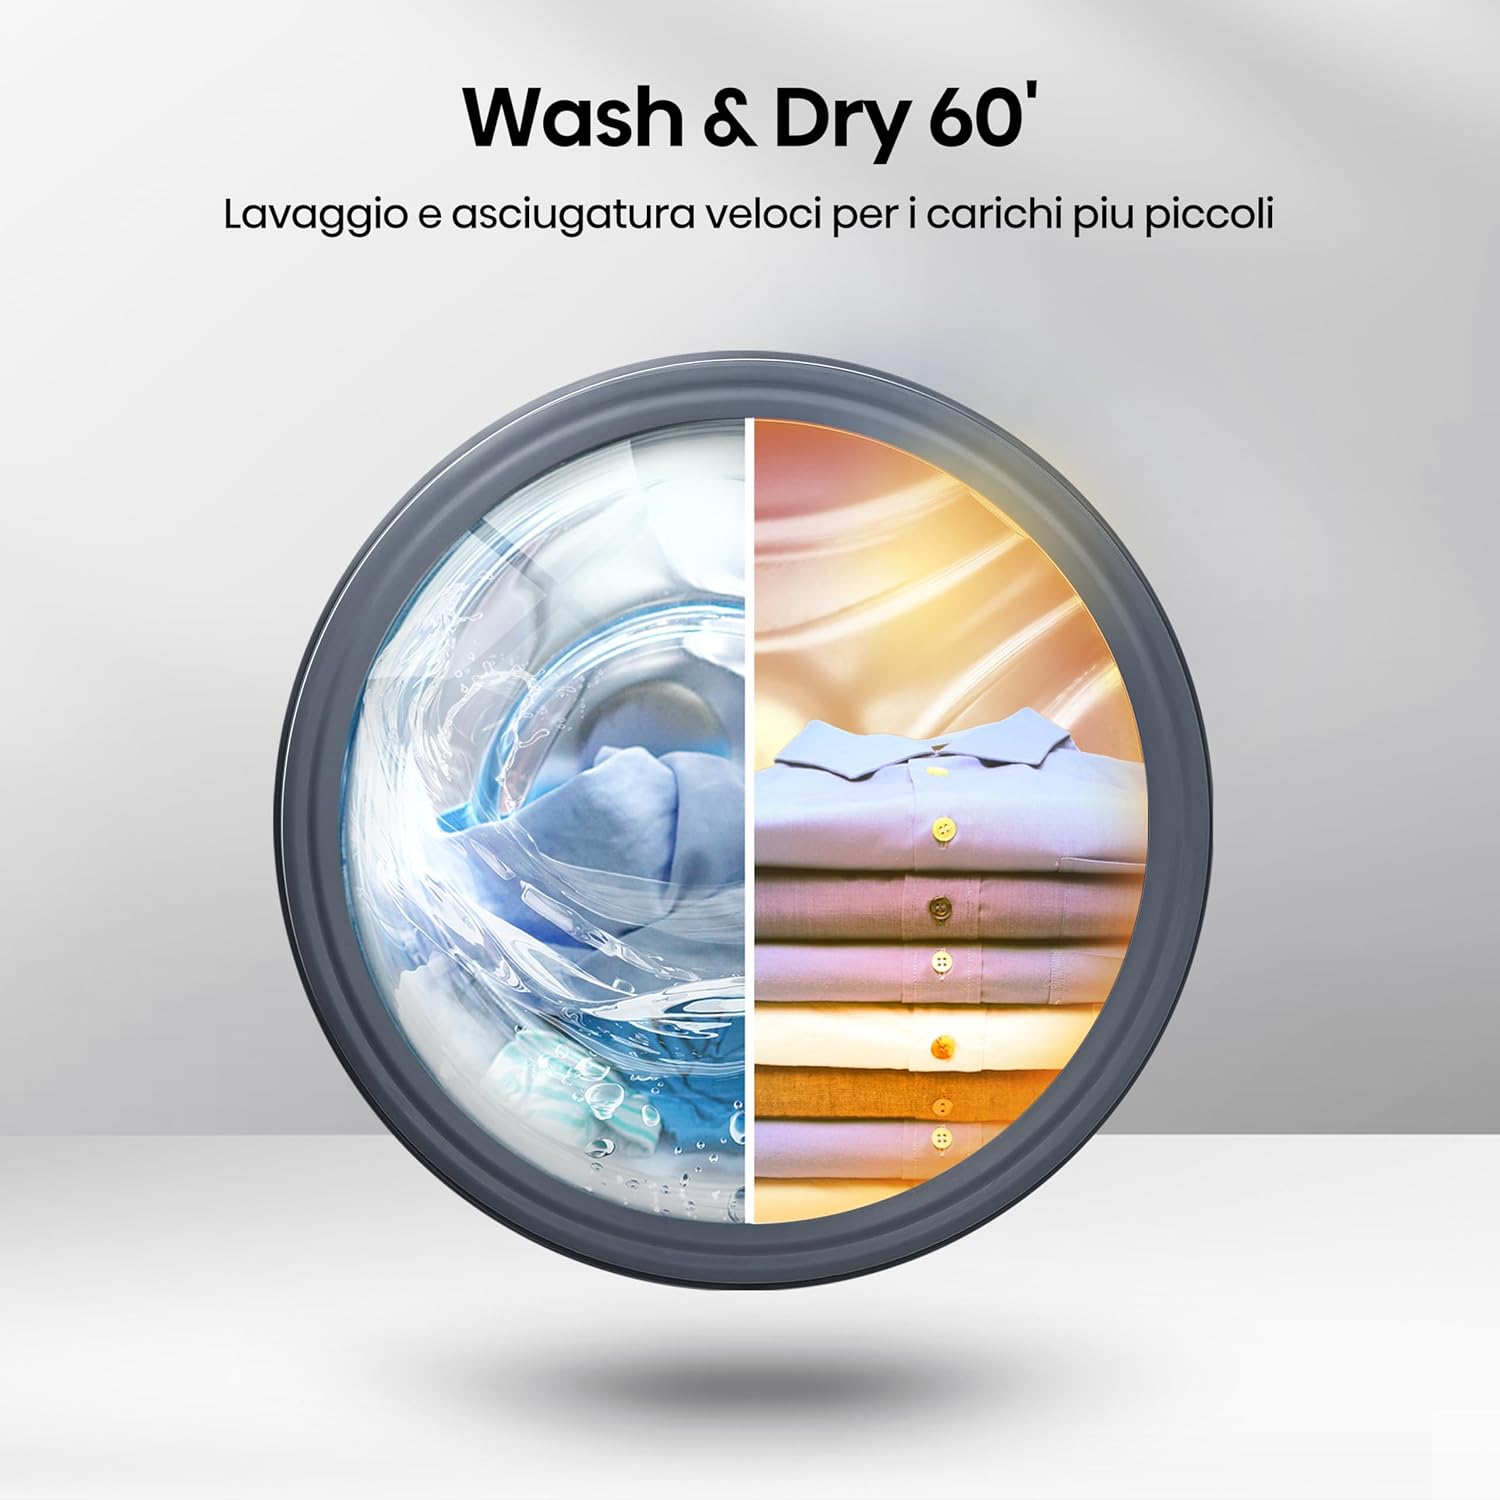
Figure 9: Wash & Dry 60' for quick cycles

Figure 10: Steam Wash for hygienic cleaning
5.6 Starting and Ending a Cycle
- Press the Start/Pause button to begin the selected program.
- The LED display will show the remaining time.
- At the end of the cycle, an audible signal may sound, and the display will indicate "End".
- Open the door and remove your laundry.
5.7 ConnectLife App (Smart Assist & Energy Monitoring)
The ConnectLife app allows you to control your washer dryer remotely and monitor its performance.
- Smart Assist: Helps you choose the perfect wash settings based on fabric type, color, and soil level.
- Energy Monitoring: Track your water and electricity consumption to manage costs and environmental impact.
- Download the ConnectLife app from your smartphone's app store and follow the in-app instructions to connect your appliance via Wi-Fi.

Figure 11: Smart Assist via ConnectLife App
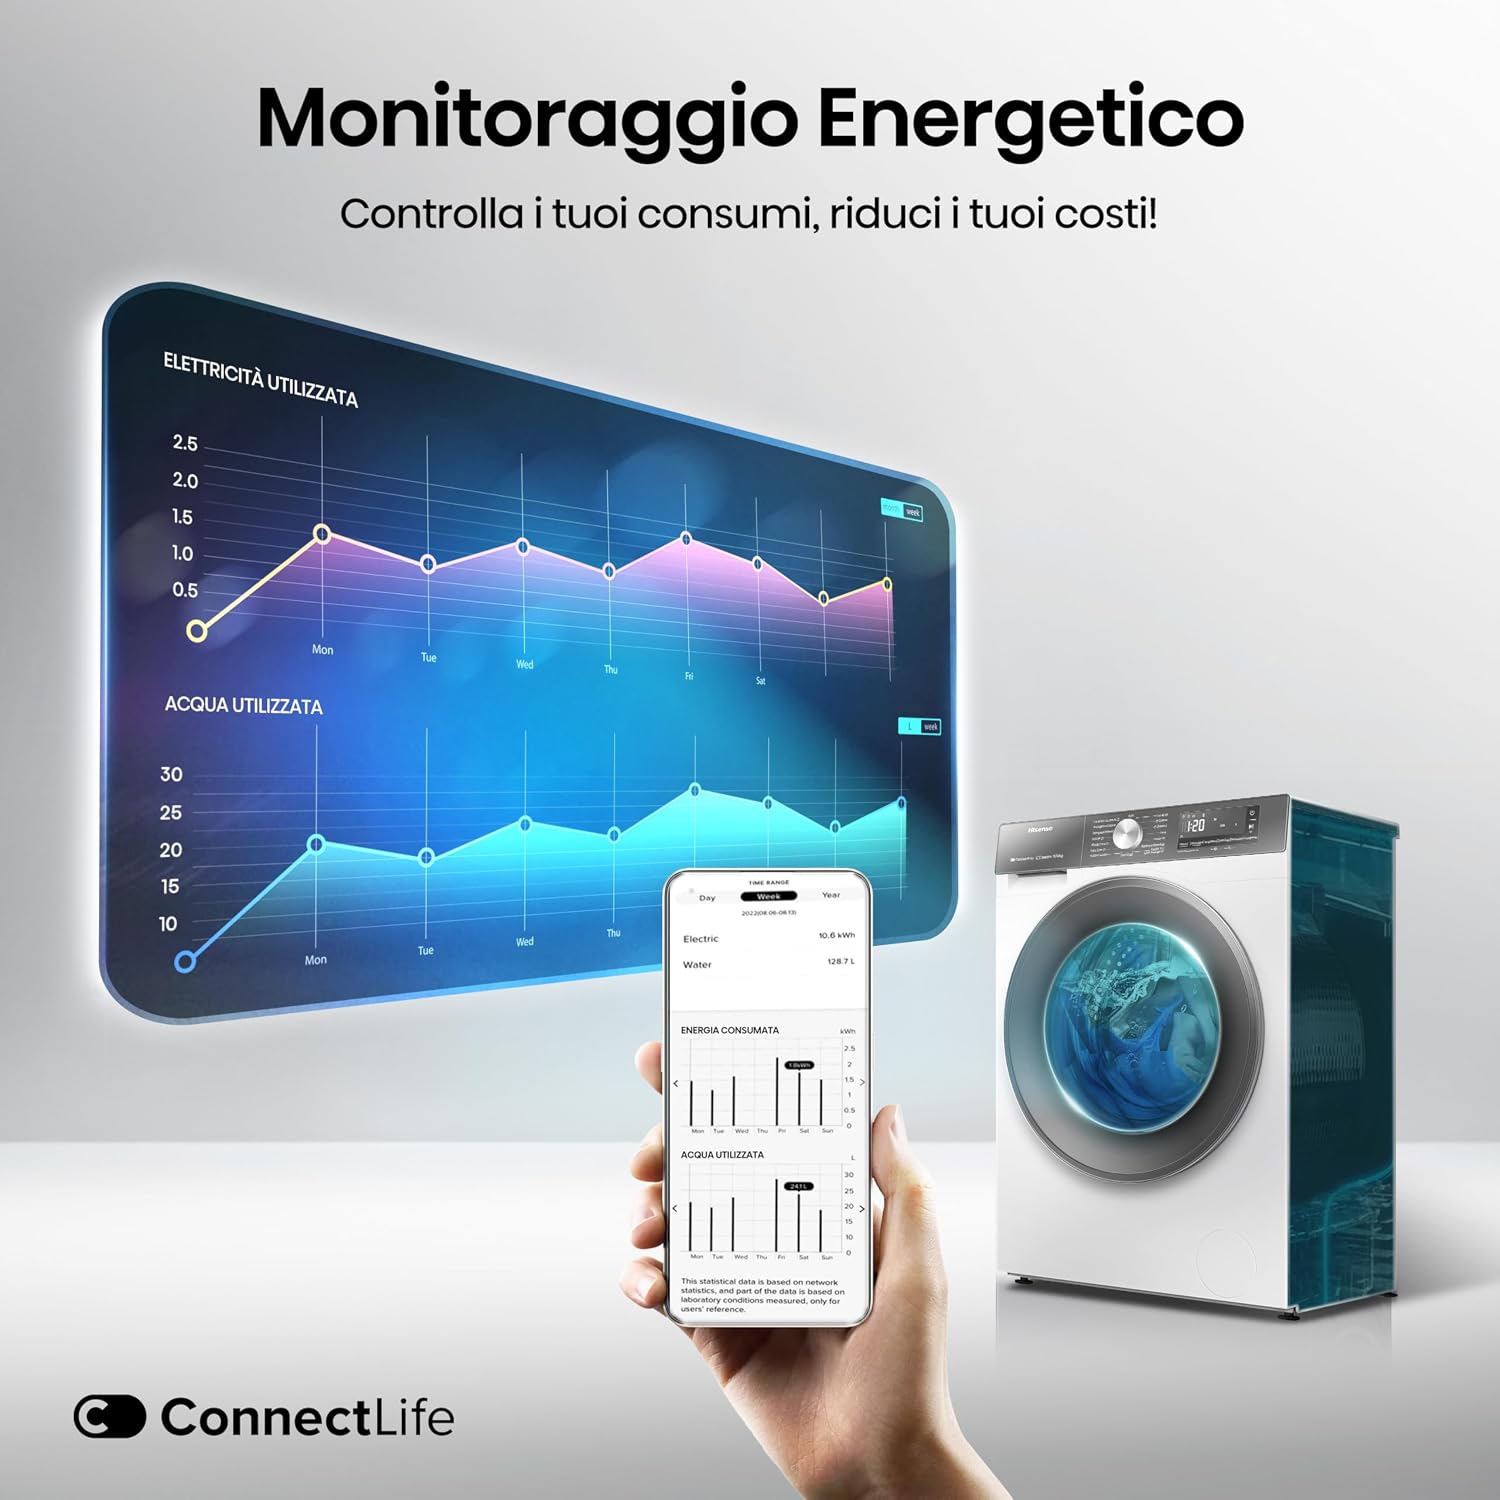
Figure 12: Energy Monitoring via ConnectLife App
6. Maintenance and Care
Regular maintenance ensures the longevity and optimal performance of your appliance.
6.1 Cleaning the Detergent Drawer
- Pull out the detergent drawer completely.
- Remove any removable parts and rinse them under running water to remove detergent residue.
- Clean the drawer housing with a brush.
- Reassemble and reinsert the drawer.
6.2 Cleaning the Drum
- Use the dedicated "Drum Clean" program regularly to prevent odor and residue buildup.
- Wipe the drum interior and the door gasket with a damp cloth after each use to remove moisture and lint.

Figure 13: Hygiene Guard feature for a cleaner drum
6.3 Cleaning the Filter
- Regularly clean the drain pump filter to prevent blockages and ensure proper drainage. Refer to the appliance diagram for filter location.
- Place a shallow container under the filter cap to catch any residual water.
- Unscrew the filter cap, remove any lint or foreign objects, and clean the filter under running water.
- Securely replace the filter cap.
6.4 Cleaning the Exterior
- Wipe the exterior surfaces with a soft, damp cloth.
- Do not use abrasive cleaners, solvents, or harsh chemicals.
7. Troubleshooting
Before contacting customer service, refer to the following table for common issues and their solutions.
| Problem | Possible Cause | Solution |
|---|---|---|
| Appliance does not start | Power cord not plugged in; door not closed properly; program not selected; Start/Pause button not pressed. | Check power connection; ensure door is latched; select a program; press Start/Pause. |
| No water intake | Water tap closed; water inlet hose kinked; water filter blocked. | Open water tap; straighten hose; clean water inlet filter. |
| Water not draining | Drain hose kinked or blocked; drain pump filter blocked. | Straighten or clear drain hose; clean drain pump filter. |
| Excessive vibration/noise | Appliance not level; transport bolts not removed; uneven load. | Adjust leveling feet; remove transport bolts; redistribute laundry in the drum. |
| Poor washing results | Incorrect detergent dosage; overloaded machine; wrong program selected. | Adjust detergent; reduce load size; select appropriate program. |
| Poor drying results | Overloaded machine; incorrect drying program; lint filter blocked. | Reduce load size; select appropriate drying program; clean lint filter. |
8. Technical Specifications
Detailed specifications for the Hisense WD3S9043BW7 Washer Dryer:

Figure 14: Product Dimensions
| Specification | Value |
|---|---|
| Brand | Hisense |
| Model Number | WD3S9043BW7 |
| Washing Capacity | 9 kg |
| Drying Capacity | 6 kg |
| Maximum Spin Speed | 1400 RPM |
| Energy Class (Wash) | A-30% |
| Energy Class (Wash & Dry) | D |
| Product Dimensions (D x W x H) | 55D x 59.5W x 84.5H cm |
| Item Weight | 65 Kilograms |
| Color | White / Silver |
| Drum Material | Stainless Steel |
| Voltage | 220 Volt |
| Control Type | App, Knob, Touch |
| Special Features | ConnectLife, Hygiene Guard, JetWash, AutoWash Program, Hygienic Steam |
| Included Components | Washer Dryer |
9. Warranty and Customer Support
Your Hisense WD3S9043BW7 Washer Dryer comes with a manufacturer's warranty.
- Warranty Period: This product is covered by a 2-year manufacturer's warranty. Please retain your proof of purchase for warranty claims.
- Warranty Coverage: The warranty covers defects in materials and workmanship under normal use. It does not cover damage caused by misuse, accident, unauthorized modification, or improper installation.
- Customer Support: For technical assistance, troubleshooting beyond this manual, or warranty claims, please contact Hisense customer service. Contact details can typically be found on the Hisense official website or in the documentation provided with your appliance.


