1. Product Overview
The SCOSCHE GMT0312DDCS is a premium installation solution designed to facilitate the integration of an aftermarket double DIN car stereo into select 1994-2012 General Motors vehicles. This kit ensures a seamless fit and maintains essential vehicle features, providing a factory-installed appearance for your new audio system. It includes a dash kit, radio replacement interface with steering wheel control (SWC) harness, and an antenna adapter.
2. Safety Information
- Always disconnect the negative battery terminal before beginning any electrical installation to prevent short circuits and electrical hazards.
- Wear appropriate personal protective equipment, such as safety glasses, during installation.
- Ensure all connections are secure and properly insulated to prevent electrical shorts or malfunctions.
- Refer to your vehicle's service manual for specific instructions on removing factory components.
- If you are unsure about any part of the installation process, consult a qualified professional.
3. Package Contents
Verify that all components are present before beginning installation:
- Radio Bezel and Mounting Brackets
- Single DIN Pocket
- Radio Replacement Interface with SWC Harness
- Antenna Adapter
- Instruction Manual
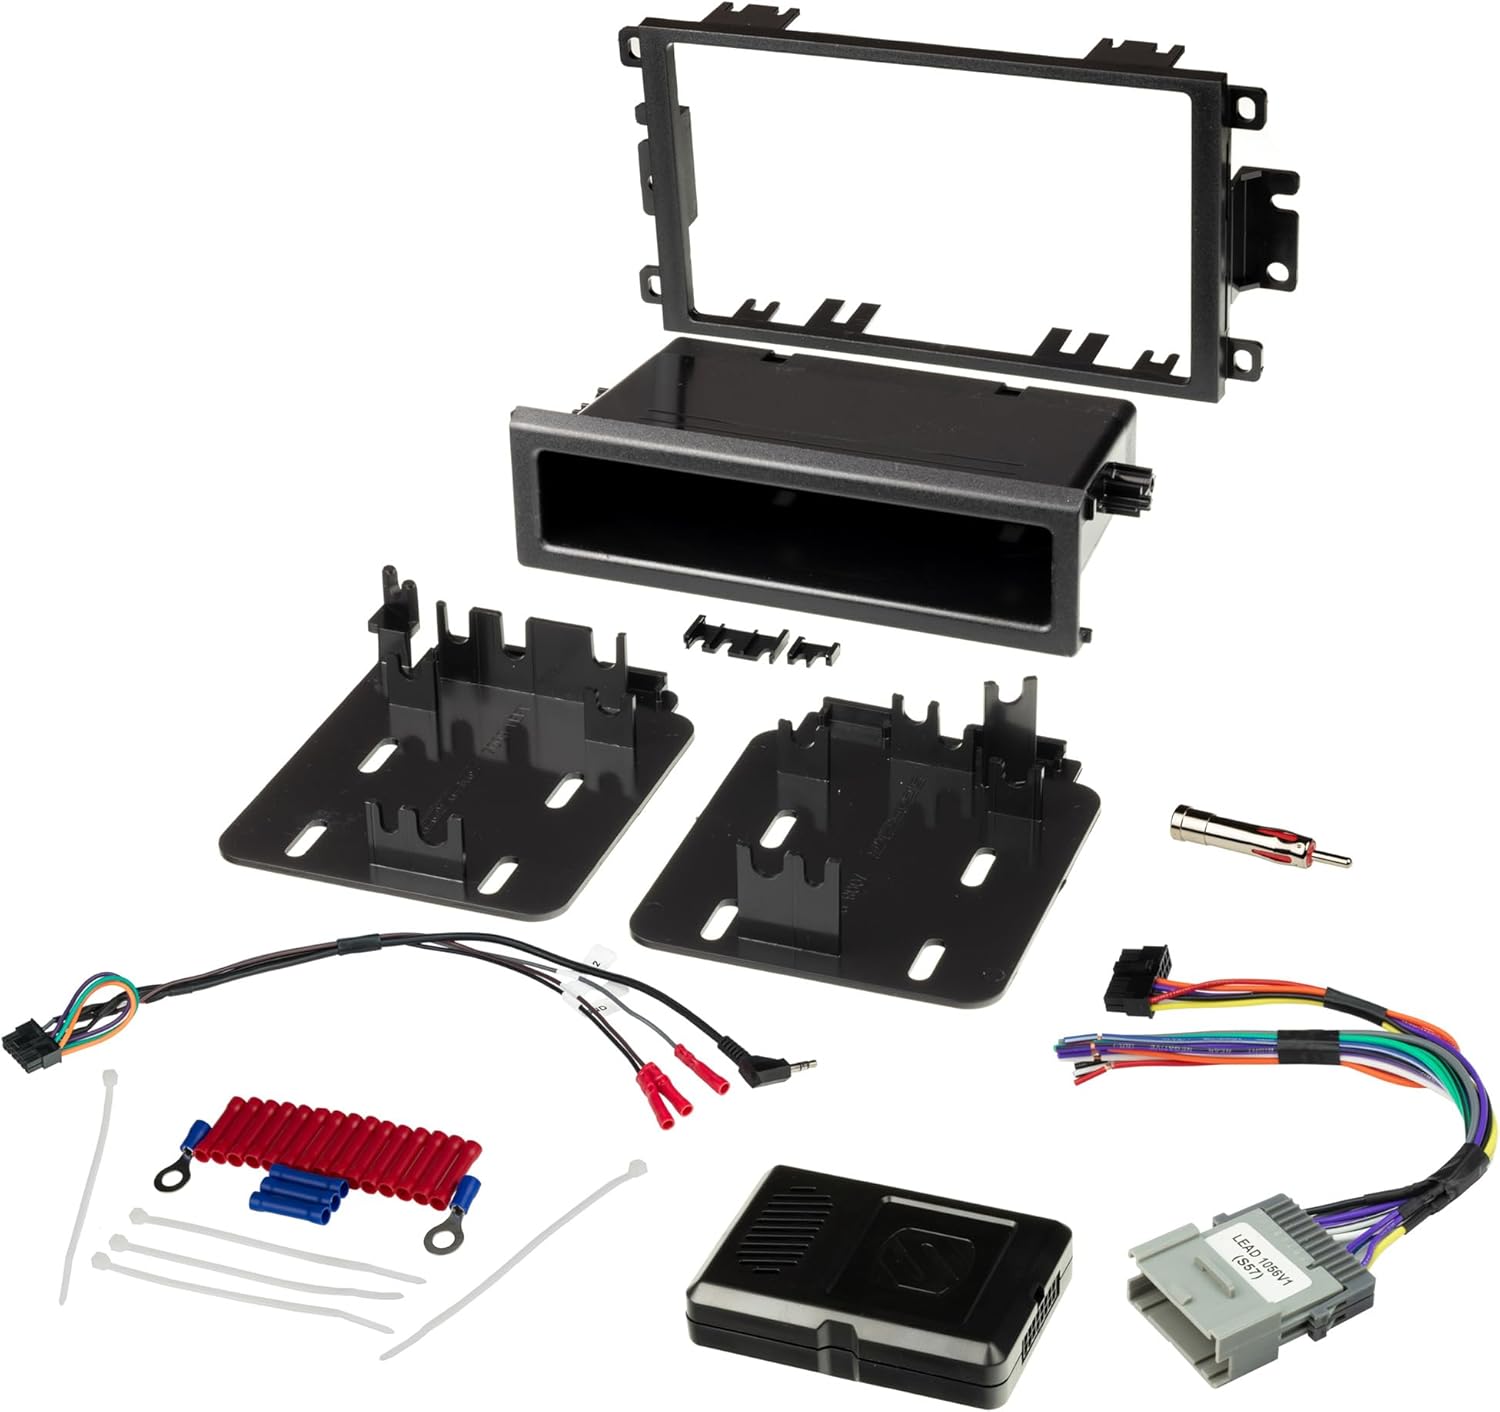
This image displays the complete set of components for the Scosche GMT0312DDCS installation kit. It includes the main dash bezel, mounting brackets, a single DIN storage pocket, the wiring harness with the interface module, an antenna adapter, and various small hardware pieces like screws and wire connectors.
4. Vehicle Compatibility and Sizing
This kit is designed for specific General Motors vehicles from 1994-2012. Please refer to the detailed fit guide provided in the images to confirm your vehicle's make, model, and year are supported. Ensure your aftermarket stereo fits within the specified dimensions.

This image illustrates the standard dimensions for Double DIN stereos, showing a maximum faceplate opening of 96.8mm x 173mm (approximately 3-13/16 inches x 6-13/16 inches). Some radios labeled as Double DIN may be oversized and require minor trimming of the kit for proper fitment.

This image displays the first page of the fit guide, listing compatible Buick, Cadillac, Chevrolet, and GEO models and their respective years. It also notes incompatibility with Digital "Premium Bose" Systems (RPO codes: Y91/Y92/Z75) and that OnStar features are not retained.

This image presents the second page of the fit guide, detailing compatible GMC, Honda, Hummer, Isuzu, Oldsmobile, Pontiac, Suzuki, and Toyota models and their years. It reiterates the incompatibility with Digital "Premium Bose" Systems and the non-retention of OnStar features.
5. Installation Guide
Follow these steps for proper installation of your SCOSCHE GMT0312DDCS kit and aftermarket stereo.
5.1. Preparation
- Disconnect Battery: Disconnect the negative battery terminal to prevent electrical shorts during installation.
- Review Instructions: Carefully read the instructions provided with the kit and your new stereo.
5.2. Dash Disassembly
- Remove Trim Panels: Using a panel removal tool, carefully pry off any trim panels surrounding the factory radio.
- Unscrew Factory Radio: Locate and remove the screws securing the factory radio.
- Unplug Harnesses: Gently pull out the factory radio and unplug all electrical harnesses and the antenna cable from the back. Remove the factory radio.
5.3. Kit Assembly
- Prepare Dash Kit: Based on the instructions for your specific vehicle and stereo, break off or remove any tabs from the mounting brackets that are not required for your application.
- Install New Stereo: Secure your new aftermarket stereo into the SCOSCHE dash kit mounting brackets using the screws provided with your new stereo.

This image demonstrates the versatility of the dash kit, showing how it can accommodate various types of aftermarket radios, including Double DIN, Single DIN (with the included storage pocket), and Floating Screen Radios that utilize a Single DIN mounting frame.

This image highlights the construction and features of the dash kit, noting it is made from automotive-grade ABS plastic with a factory-matched texture. It also points out the convenient storage pocket for Single DIN installations.

This image shows the main dash kit bezel and the separate single DIN pocket, which can be used when installing a single DIN stereo to fill the remaining space in the double DIN opening.
5.4. Wiring Connections
- Connect Harnesses: Using splice connectors (or soldering), connect the wires from your new stereo's harness to the SCOSCHE radio replacement interface harness, matching colors as indicated in the wiring diagram (see Section 6).
- Interface Connections: Plug the vehicle harness into the SCOSCHE interface, and the SCOSCHE interface harness into your new radio. Connect the antenna adapter.

This image displays the radio replacement interface module and its associated wiring harness. The wires are color-coded and labeled for easy connection, and the harness quickly connects to the factory wiring while retaining steering wheel controls.
5.5. Reassembly and Testing
- Install Stereo: Carefully slide the assembled stereo and dash kit into the dashboard opening. Secure it with screws.
- Reconnect Battery: Reconnect the negative battery terminal.
- Test Functions: Turn on the radio and test all functions, including audio, balance, fade, and steering wheel controls.
- Reinstall Trim: Reinstall any removed trim panels.
5.6. Installation Video Guide
For a visual walkthrough of the installation process, please refer to the video below. This video demonstrates the general steps for installing an aftermarket car stereo using a Scosche kit, including dash disassembly, wiring, and reassembly.
6. EIA Wire Color Code Chart
The color codes used on this car stereo connector harness conform to the E.I.A. (Electronics Industry Association) standard. These colors may differ from the wiring codes found on your stereo. Always refer to your stereo owner's manual for specific wiring details before making any connections.

| Color | Function |
|---|---|
| Yellow | 12V Battery : Constant (+) |
| Red | 12V Battery : Switched (+) |
| Black | Chassis Ground (-) |
| Black/White | Factory Amplifier Ground |
| Blue | Antenna Power (When Tuner is ON) |
| Blue/White | Amplifier Turn On |
| Orange | Dash Illumination 12V |
| Orange/White | Dash Light Dimmer 1V-12V |
| Orange/Black | Dimmer Ground (Negative Trigger Circuit) |
| Brown | Phone Mute |
| White | Left Front Speaker (+) |
| White/Black | Left Front Speaker (-) |
| Gray | Right Front Speaker (+) |
| Gray/Black | Right Front Speaker (-) |
| Green | Left Rear Speaker (+) |
| Green/Black | Left Rear Speaker (-) |
| Purple | Right Rear Speaker (+) |
| Purple/Black | Right Rear Speaker (-) |
7. Product Specifications
- Product Dimensions: 2.75 x 8.5 x 16.25 inches
- Item Weight: 15.2 ounces
- Model Number: GMT0312DDCS
- Material: Automotive-grade ABS Plastic
- Compatibility: Select 1994-2012 Buick, Cadillac, Chevrolet, GMC, GEO, Hummer, Isuzu, Oldsmobile, Pontiac, Suzuki, and Toyota vehicles. (Refer to fit guide for details)
- Radio Type Support: Double DIN, Single DIN (with included pocket), Floating Screen Radios with Single DIN mounting frame.
- Features: Retains steering wheel controls, factory-matched texture.
8. Warranty and Support
The SCOSCHE GMT0312DDCS is backed by Scosche's Limited Lifetime Warranty. For technical assistance or warranty claims, please contact Scosche customer support. Detailed contact information can be found on the official Scosche website.


