
GLOBO B089WH1X7N
Globo Ceiling Fan Remote Control User Manual
Model: B089WH1X7N
1. Introduction
This manual provides instructions for the installation, operation, and maintenance of your Globo Infrared Remote Control for Ceiling Fans. This remote control system is designed to enhance the convenience of operating your Globo ceiling fan, allowing for easy adjustment of fan speeds and light settings, including dimming functionality.
Please read this manual thoroughly before installation and operation to ensure proper use and to prevent damage.
2. Safety Information
- Always disconnect power to the ceiling fan at the circuit breaker before installing or servicing the remote control system.
- Installation should be performed by a qualified electrician or a person with adequate electrical knowledge.
- Ensure all wiring connections are secure and comply with local electrical codes.
- Do not expose the remote control or receiver to water or excessive humidity.
- Use only the specified battery type (2x AA batteries) for the remote control.
- This remote control system is designed for Globo ceiling fans, with the exception of the Hagger Venti model. Compatibility with other brands is not guaranteed.
3. Package Contents
Verify that all items listed below are included in your package:
- Infrared Remote Control Unit
- Infrared Receiver Unit
- Wall Mount Holder for Remote Control
- 2x AA Batteries
4. Setup and Installation
The installation of the receiver unit requires access to the wiring compartment of your ceiling fan. Ensure power is OFF before proceeding.
4.1 Receiver Installation
- Disconnect Power: Turn off the power to the ceiling fan at the main circuit breaker. Verify power is off using a voltage tester.
- Access Fan Wiring: Carefully lower the canopy of your ceiling fan to expose the wiring connections.
- Connect Receiver:
Connect the receiver unit's wires to the corresponding wires of the ceiling fan and the household electrical supply. Typically, this involves:
- Black wire from receiver to Black (Live) wire from household supply.
- White wire from receiver to White (Neutral) wire from household supply.
- Blue wire from receiver to Blue (Light) wire from fan.
- Brown wire from receiver to Brown (Fan Motor) wire from fan.
- Green/Yellow wire (Ground) to Ground wire.
Ensure all connections are secure with wire nuts.
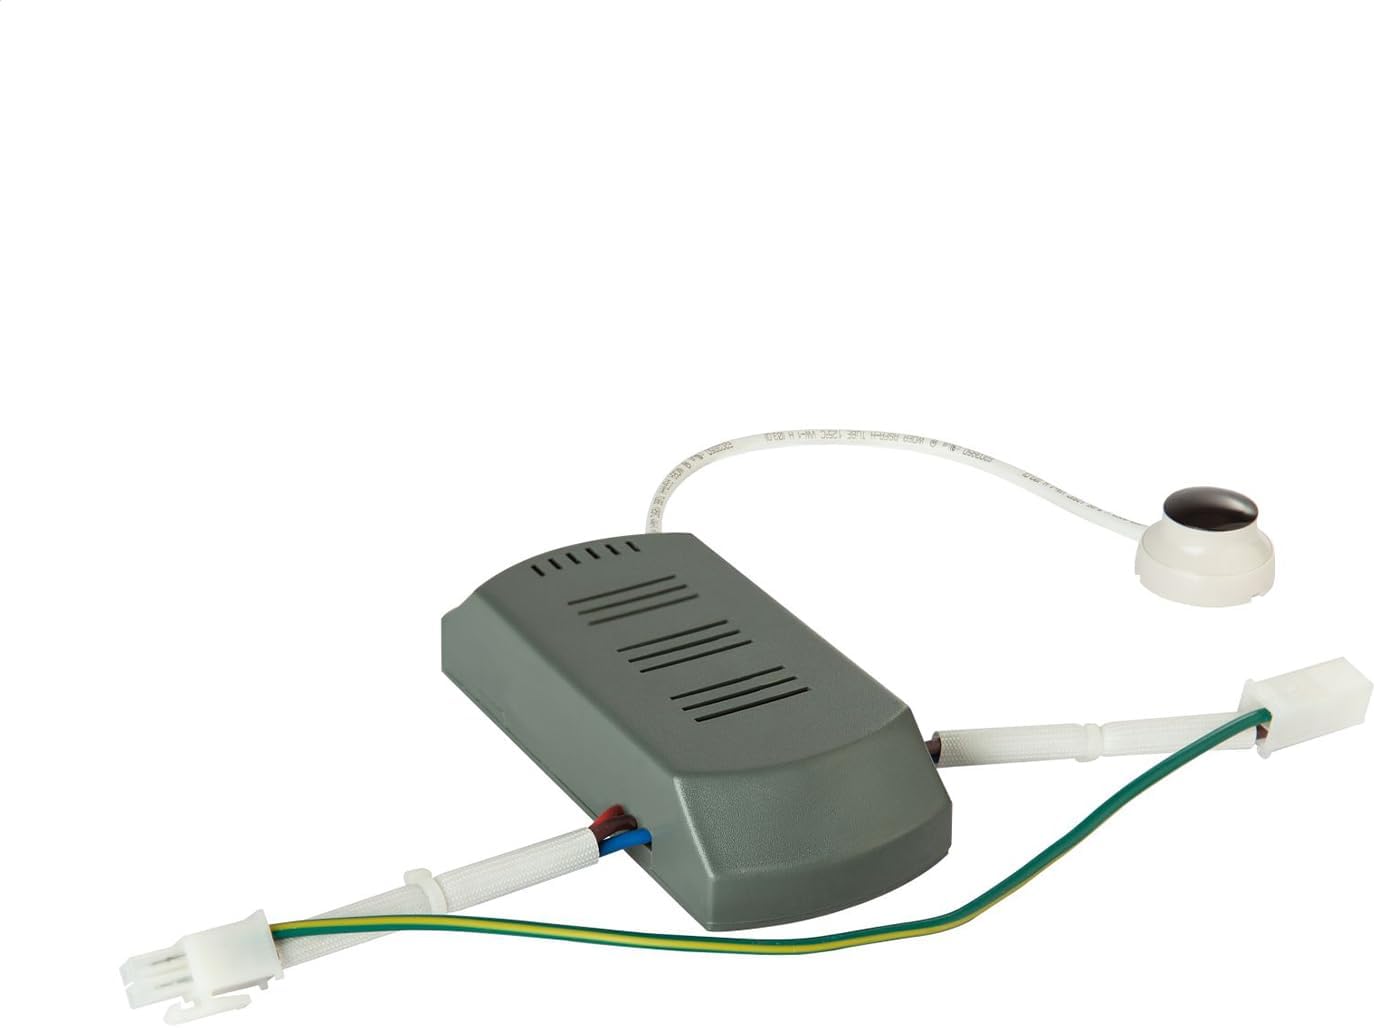
Image: The infrared receiver unit with its various colored wires for connection to the ceiling fan and power supply.

Image: Another view of the infrared receiver unit, showing the wire connections and the compact design.

Image: A close-up of the infrared sensor component of the receiver, which receives signals from the remote control.
- Position Receiver: Carefully tuck the receiver unit into the fan's canopy, ensuring it does not interfere with the fan's operation or wiring. The receiver's dimensions are approximately 14.9 cm (L) x 5.1 cm (W) x 2.2 cm (H).
- Reattach Canopy: Securely reattach the fan canopy.
- Restore Power: Turn the power back on at the circuit breaker.
4.2 Remote Control Setup
- Insert Batteries: Open the battery compartment on the back of the remote control and insert 2x AA batteries, observing the correct polarity (+/-).
- Test Functionality: Point the remote control towards the ceiling fan and test the fan and light functions to ensure proper operation.
4.3 Wall Mount Installation (Optional)
The remote control comes with a wall mount holder for convenient storage.
- Choose Location: Select a convenient location on a wall, away from direct sunlight or heat sources.
- Mount Holder: Use appropriate screws (not included) to secure the wall mount holder to the wall.
- Place Remote: Slide the remote control into the holder.

Image: The remote control unit securely placed in its white wall-mounted holder, ready for use.
5. Operating Instructions
The remote control allows for easy operation of your ceiling fan's various functions.

Image: The white remote control unit, showing the layout of its buttons for fan and light control.

Image: A closer view of the remote control, highlighting the button labels and design.
- LIGHT ON/OFF Button: Press this button to turn the ceiling fan light ON or OFF.
- DIMMER Button: When the light is ON, press and hold this button to adjust the brightness level. Release when the desired brightness is reached.
- FAN OFF Button: Press this button to turn the ceiling fan OFF.
- FAN SPEED Buttons (HI, MED, LOW):
- Press HI for high fan speed.
- Press MED for medium fan speed.
- Press LOW for low fan speed.
6. Maintenance
- Cleaning: Wipe the remote control and receiver with a soft, dry cloth. Do not use abrasive cleaners or solvents.
- Battery Replacement: Replace batteries when the remote control's range decreases or it stops responding. Always replace both batteries at the same time with new AA batteries.
- Storage: If storing the remote control for an extended period, remove the batteries to prevent leakage.
7. Troubleshooting
| Problem | Possible Cause | Solution |
|---|---|---|
| Fan/Light does not respond to remote. |
|
|
| Light does not dim. |
|
|
| Fan operates at only one speed. |
|
|
8. Specifications
| Feature | Detail |
|---|---|
| Brand | GLOBO |
| Model Number | B089WH1X7N |
| Material | Plastic |
| Dimensions (Remote) | Approx. 14.9 cm (L) x 5.1 cm (W) x 2.2 cm (H) |
| Number of Fan Speeds | 3 |
| Light Control | ON/OFF, Dimmer Function |
| Power Source (Remote) | 2x AA Batteries (Included) |
| Control Type | Infrared Remote Control |
| Compatibility | All Globo ceiling fans except Hagger Venti |
| Item Weight | 380 g |
9. Warranty and Support
For warranty information or technical support, please contact your retailer or the manufacturer, Globo, directly. Please have your product model number (B089WH1X7N) and purchase date available when contacting support.
For further assistance, you may refer to the official Globo website or contact their customer service department.
Related documentsB089WH1X7N


Ask a question about this manual
Ask about setup, troubleshooting, compatibility, parts, safety, or missing instructions. Manuals+ will review the question and use this page’s manual context to help answer it.