
1. Introduction
Thank you for choosing the RYOBI RY36C60A 36V 6A Battery Charger. This manual provides essential information for the safe and efficient operation, setup, and maintenance of your charger. Please read these instructions carefully before use and retain them for future reference.

Image 1: The RYOBI RY36C60A 36V 6A Battery Charger, shown from an angled top-front view, highlighting its compact design and LED indicator panel.
2. Safety Information
Always observe basic safety precautions when using electrical appliances to reduce the risk of fire, electric shock, and personal injury.
- Read all instructions: Familiarize yourself with the charger's operation and limitations.
- Indoor use only: Do not expose the charger to rain or wet conditions.
- Proper ventilation: Ensure the charger is placed in a well-ventilated area during use. Do not cover the charger's ventilation slots.
- Use only with specified batteries: This charger is designed for RYOBI 36V Lithium+ batteries. Do not attempt to charge other battery types.
- Inspect charger and battery: Before each use, check for any damage to the charger, cord, plug, or battery. Do not use if damaged.
- Avoid short circuits: Do not allow conductive materials to contact the charging terminals.
- Unplug when not in use: Disconnect the charger from the power supply when not in use or before cleaning.
- Keep away from children: Store the charger and batteries out of reach of children.
3. Package Contents
- RYOBI RY36C60A 36V 6A Battery Charger
- Instruction Manual
4. Setup
Follow these steps to set up your RYOBI battery charger:
- Unpack the charger: Carefully remove the charger from its packaging. Inspect for any shipping damage.
- Choose a suitable location: Place the charger on a stable, flat surface in a dry, well-ventilated area. Ensure there is sufficient space around the charger for air circulation.
- Connect to power: Plug the charger's power cord into a standard household electrical outlet. The charger's LED indicator may briefly illuminate.

Image 2: The RYOBI 36V 6A Battery Charger positioned on a wooden workbench, ready for use. This illustrates a typical setup environment.
5. Operating Instructions
Charging a RYOBI 36V Lithium+ battery:
- Insert the battery: Align the battery with the charger's port and slide it firmly into place until it clicks. Ensure a secure connection.
- Monitor charging: The charger's LED indicator will show the charging status. Refer to the 'LED Indicators' section for details. The 6A charge current provides ultra-fast charging.
- Remove the battery: Once the battery is fully charged (indicated by the LED), press the battery release latch and slide the battery out of the charger.
- Unplug the charger: Disconnect the charger from the power outlet when charging is complete and the charger is not in use.

Image 3: A RYOBI 36V battery being carefully aligned and inserted into the RY36C60A charger, demonstrating the initial step of the charging process.
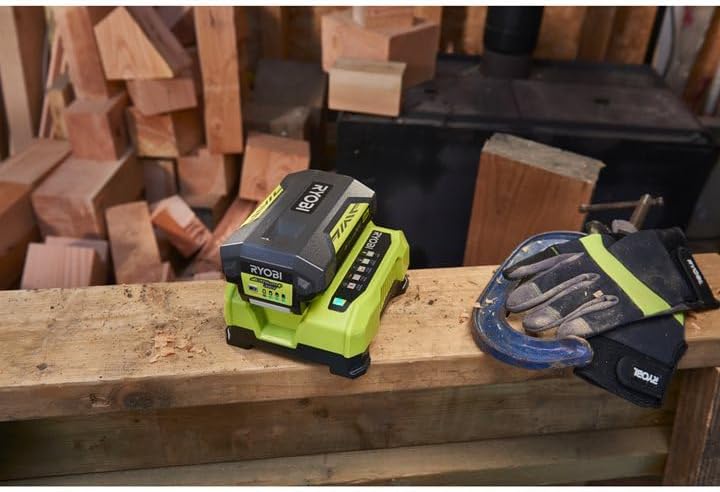
Image 4: A RYOBI 36V battery fully seated in the RY36C60A charger, with the charger's LED indicator illuminated, signifying active charging.
6. LED Indicators
The RY36C60A charger features an LED status indicator to communicate the battery's charging status:
| LED Status | Meaning |
|---|---|
| Solid Green | Battery fully charged. |
| Flashing Green | Battery is charging. |
| Solid Red | Battery or charger error. (e.g., battery too hot/cold, faulty battery) |
| Flashing Red | Battery is defective. |

Image 5: A close-up view of the RYOBI RY36C60A charger's LED indicator panel, showing the various lights that communicate charging status and potential errors.
7. Maintenance
Regular maintenance ensures optimal performance and longevity of your charger:
- Cleaning: Disconnect the charger from the power supply before cleaning. Use a soft, dry cloth to wipe the exterior. Do not use water or harsh chemicals.
- Ventilation: Keep the ventilation openings clear of dust and debris to prevent overheating.
- Storage: Store the charger in a cool, dry place, away from direct sunlight and moisture, when not in use.
8. Troubleshooting
If you encounter issues with your RYOBI RY36C60A charger, refer to the following table:
| Problem | Possible Cause | Solution |
|---|---|---|
| Charger not working / No LED indication | No power to the charger. | Check if the charger is properly plugged into a live outlet. Test the outlet with another device. |
| Battery not charging (Solid Red LED) | Battery too hot or too cold. | Allow the battery to reach room temperature (10°C - 40°C / 50°F - 104°F) before charging. |
| Battery not charging (Solid Red LED) | Faulty battery. | Try charging a different, known-good battery. If the issue persists with multiple batteries, the charger may be faulty. |
| Battery not charging (Flashing Red LED) | Defective battery. | The battery may be beyond repair. Replace the battery. |
If the problem persists after attempting these solutions, contact RYOBI customer support.
9. Specifications
| Feature | Specification |
|---|---|
| Brand | RYOBI |
| Model Number | RY36C60A |
| Input Voltage | 36 Volts |
| Output Voltage | 36 Volts |
| Charge Current | 6 Amperes |
| Item Weight | 1.02 Kilograms |
| Color | Green |
10. Warranty and Support
For warranty information, product registration, or technical support, please refer to the official RYOBI website or contact RYOBI customer service directly. Keep your purchase receipt as proof of purchase for warranty claims.


