1. Introduction
This manual provides essential instructions for the safe and efficient operation, maintenance, and troubleshooting of your Krups Excellence KM480D10 Programmable Coffee Maker. Please read this manual thoroughly before first use and keep it for future reference.
The Krups Excellence KM480D10 is an electric coffee maker featuring a black and stainless steel design with a large digital display for easy function selection and 24-hour programming. It includes a wide shower head for optimized coffee saturation, an infusion strength selector for a more aromatic beverage, and a 1-4 cup function specifically designed for preparing smaller quantities of coffee.
2. Important Safety Instructions
WARNING: Failure to follow these safety instructions may result in fire, electric shock, or personal injury.
- Read all instructions before using the appliance.
- Do not touch hot surfaces. Use handles or knobs.
- To protect against fire, electric shock, and injury to persons, do not immerse cord, plugs, or appliance in water or other liquid.
- Close supervision is necessary when any appliance is used by or near children.
- Unplug from outlet when not in use and before cleaning. Allow to cool before putting on or taking off parts, and before cleaning the appliance.
- Do not operate any appliance with a damaged cord or plug or after the appliance malfunctions, or has been damaged in any manner. Return appliance to the nearest authorized service facility for examination, repair, or adjustment.
- The use of accessory attachments not recommended by the appliance manufacturer may result in fire, electric shock, or injury to persons.
- Do not use outdoors.
- Do not let cord hang over edge of table or counter, or touch hot surfaces.
- Do not place on or near a hot gas or electric burner, or in a heated oven.
- Always attach plug to appliance first, then plug cord into the wall outlet. To disconnect, turn any control to "off", then remove plug from wall outlet.
- Do not use appliance for other than intended use.
- The carafe is designed for use with this appliance only. It must never be used on a range top.
- Do not place a hot carafe on a wet or cold surface.
- Do not use a cracked carafe or a carafe having a loose or weakened handle.
- Do not clean carafe with cleansers, steel wool pads, or other abrasive materials.
3. Product Overview
Familiarize yourself with the components and key features of your Krups Excellence KM480D10 coffee maker.

Figure 1: Front-side view of the Krups Excellence KM480D10 coffee maker, showing the digital display, control buttons, and glass carafe.
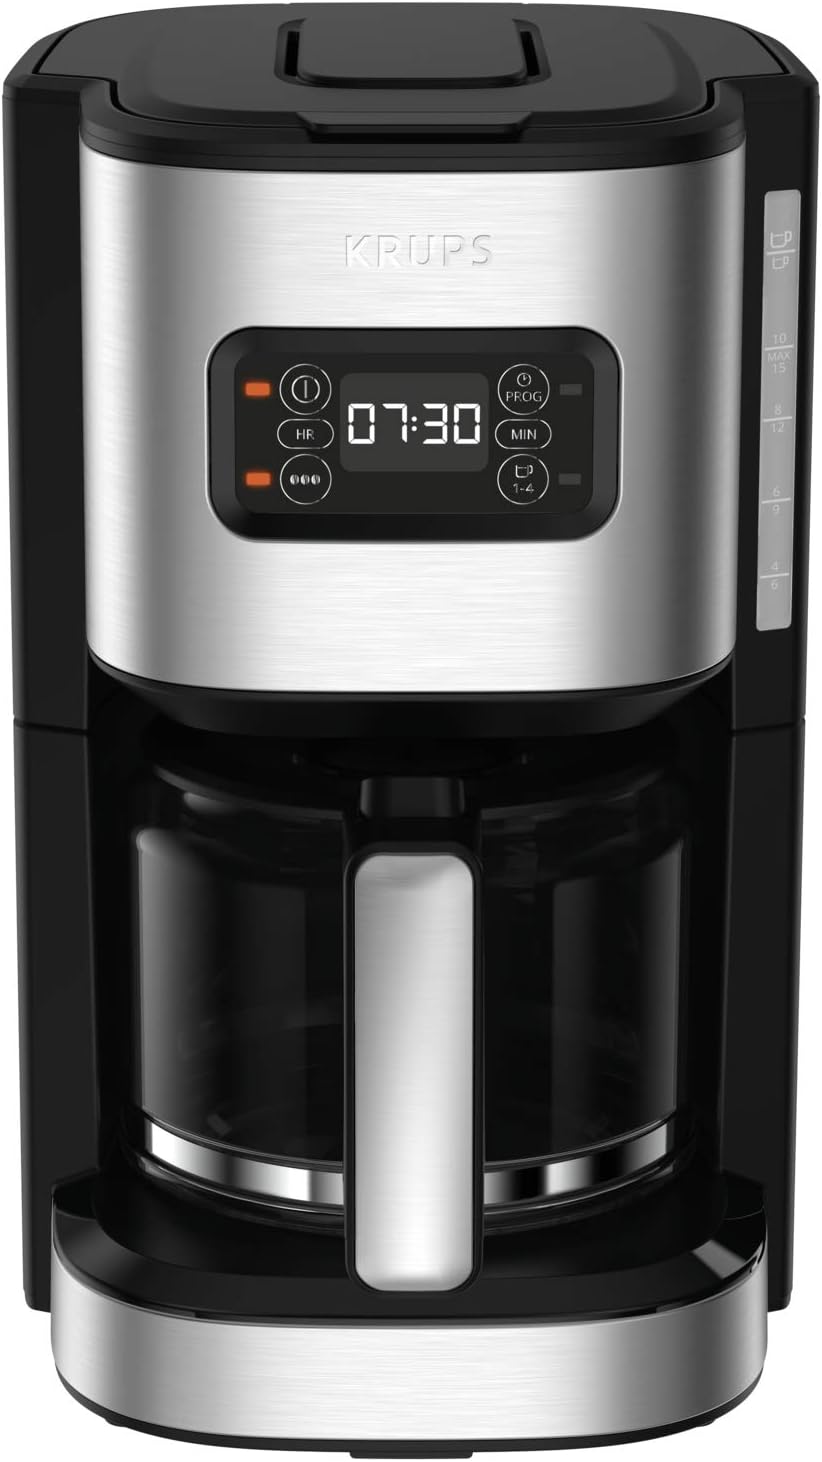
Figure 2: Front view of the coffee maker, highlighting the water level indicator on the side and the digital display.
Key Features:
- 24-Hour Programmable Coffee Maker: Set the brewing time up to 24 hours in advance.
- Modern Digital Display: Easy-to-read screen for time, programming, and functions.
- Large Water Diffusion Head: Ensures uniform saturation of coffee grounds for optimal aroma extraction.
- Coffee Strength Selector: Adjust coffee intensity with a pre-infusion function for a more aromatic brew.
- 1-4 Cup Mode: Specifically designed for brewing smaller quantities of aromatic coffee.
- Anti-Drip System: Allows for clean serving without drips, even before the brewing cycle is complete.
- Automatic Shut-Off: The coffee maker turns off automatically after 30 minutes of keeping coffee warm.
- 1.25 L Capacity: Large capacity, brewing up to 15 cups of coffee.
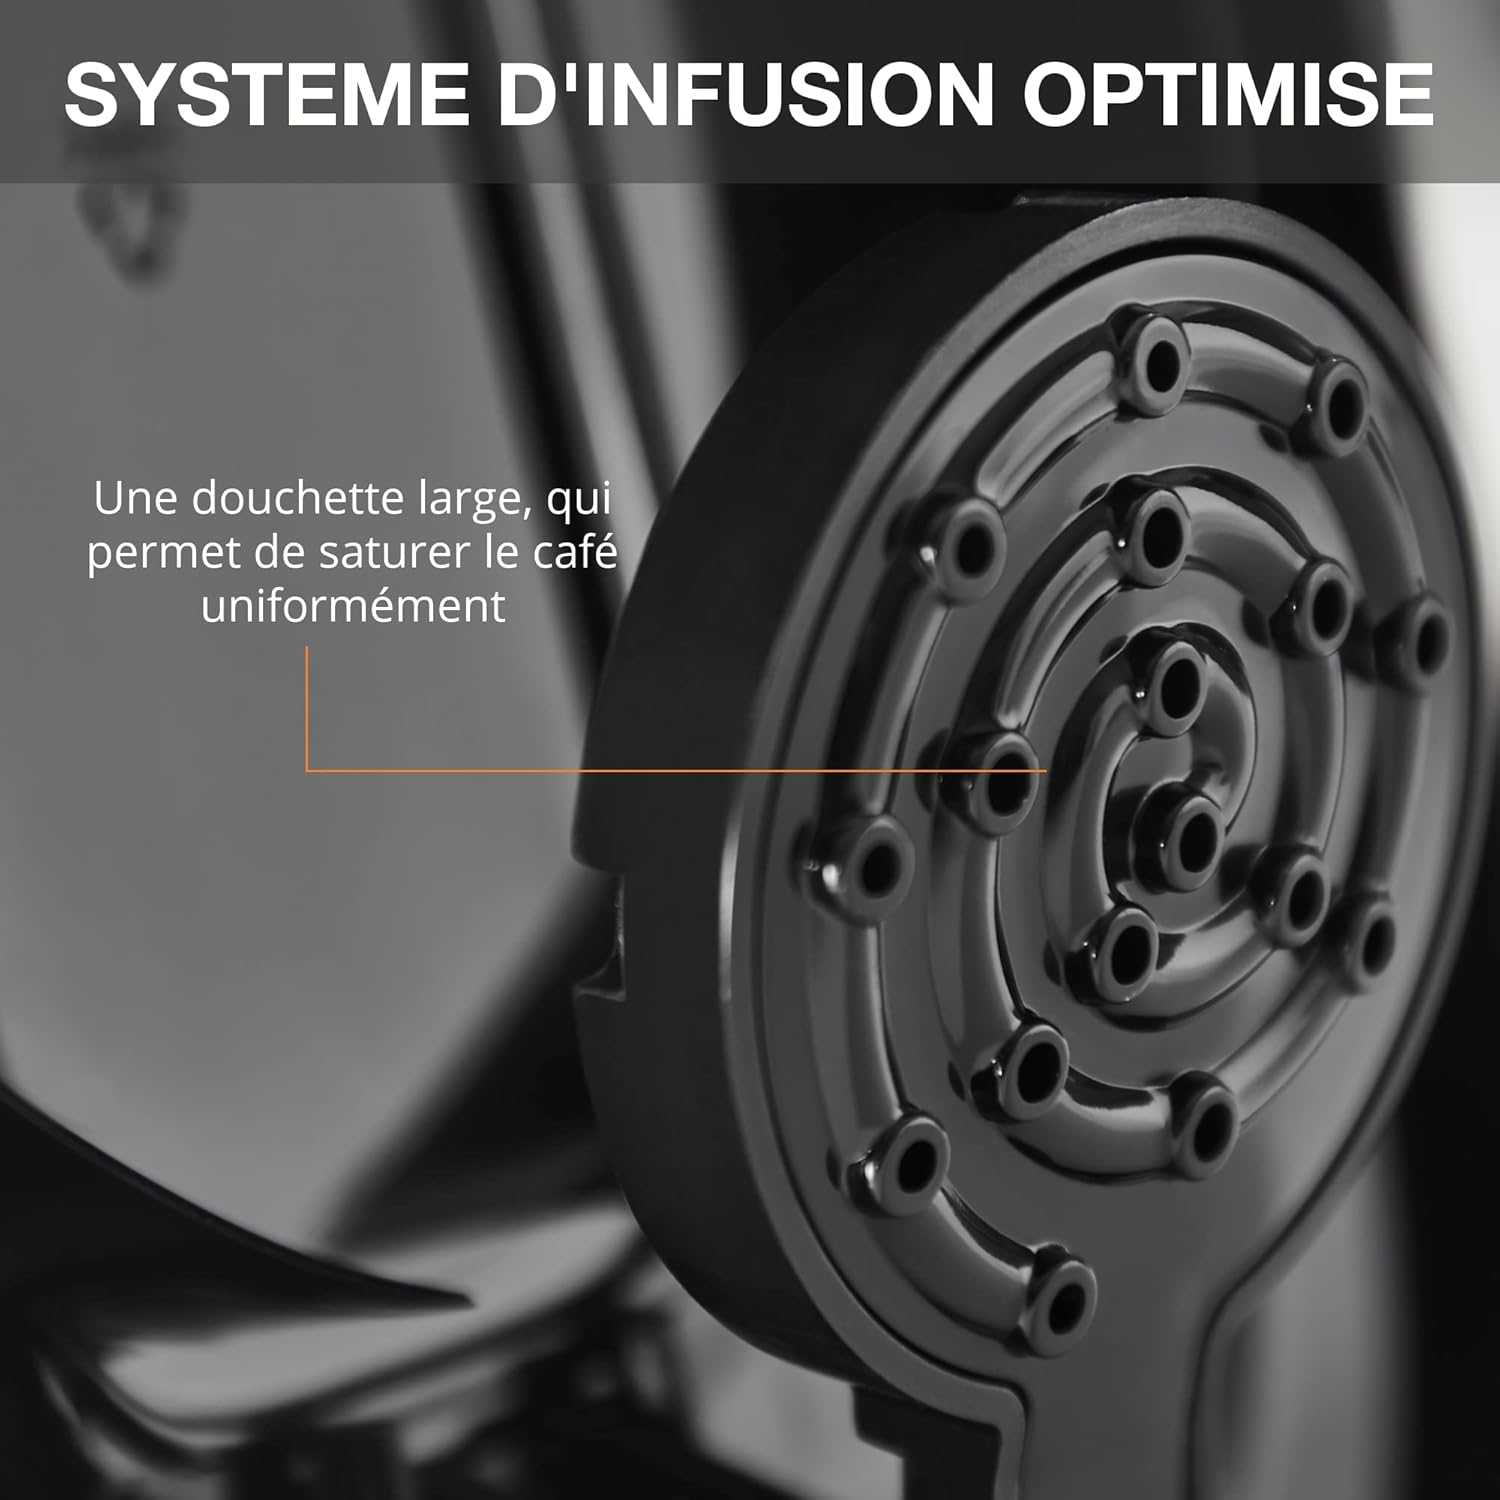
Figure 3: Close-up of the optimized infusion system with a large shower head for uniform coffee saturation.
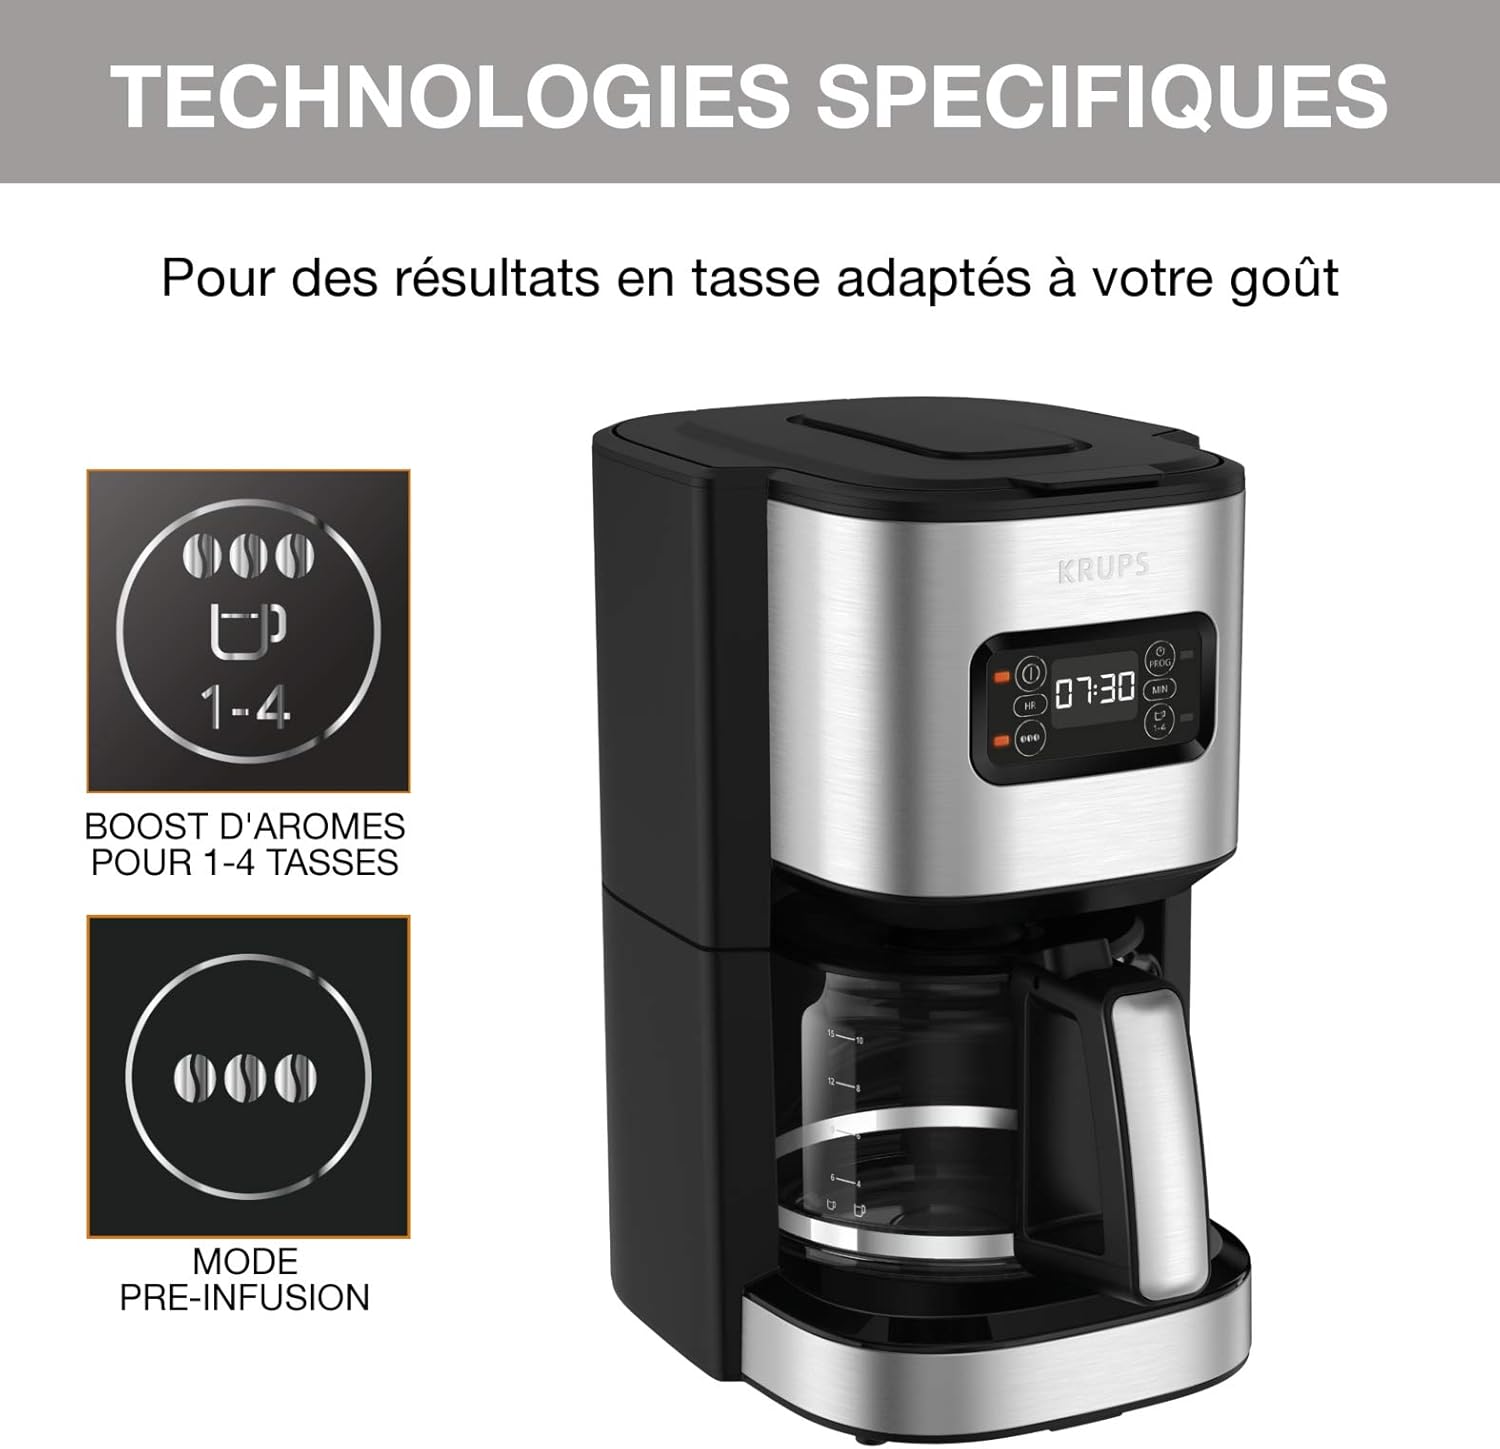
Figure 4: Illustration of specific technologies, including the 1-4 cup boost for aroma and the pre-infusion mode.
4. Setup and First Use
4.1 Unpacking
- Carefully remove all packaging materials from the coffee maker.
- Check that all parts are present and undamaged: coffee maker unit, glass carafe, filter basket, and measuring spoon.
- Retain packaging for future transport or disposal.
4.2 Initial Cleaning
Before first use, it is recommended to clean the coffee maker to remove any manufacturing residues.
- Wash the glass carafe, lid, and filter basket in warm, soapy water. Rinse thoroughly and dry.
- Wipe the exterior of the coffee maker with a damp cloth.
- Run two full cycles with cold water only (without coffee grounds) to flush the internal components.
4.3 Positioning the Appliance
- Place the coffee maker on a flat, stable, heat-resistant surface.
- Ensure adequate ventilation around the appliance.
- Keep the appliance away from heat sources and water.
- Plug the power cord into a suitable electrical outlet.
5. Operating Instructions
5.1 Brewing Coffee
- Fill Water Reservoir: Open the lid and fill the water reservoir with fresh, cold water up to the desired level indicated on the side of the coffee maker. Do not exceed the "MAX" line (1.25 L / 15 cups).
- Insert Filter: Place a paper filter (size 1x4 or similar) into the filter basket.
- Add Coffee Grounds: Add the desired amount of ground coffee into the filter. A general guideline is one level tablespoon of coffee per cup (150ml). Adjust to personal preference.
- Place Carafe: Ensure the glass carafe with its lid is correctly placed on the warming plate.
- Select Strength (Optional): Use the coffee strength selector to choose between regular or a more intense brew. The pre-infusion function enhances aroma.
- Select 1-4 Cup Function (Optional): If brewing a small quantity (1-4 cups), activate this function for optimized brewing.
- Start Brewing: Press the "On/Off" button to start the brewing cycle. The indicator light will illuminate.
- Anti-Drip System: The anti-drip system allows you to temporarily remove the carafe during brewing to pour a cup without drips. Return the carafe within 20 seconds to prevent overflow.
- Keep Warm: After brewing, the coffee maker will automatically switch to a keep-warm function for 30 minutes, then shut off.
5.2 Programming the Brewing Time (24-Hour Timer)
The digital display allows you to program the coffee maker to start brewing at a specific time within a 24-hour period.

Figure 5: Image showing a hand setting the programmable timer on the coffee maker's digital display.
- Prepare the coffee maker as described in "5.1 Brewing Coffee" (water, filter, coffee grounds, carafe in place).
- Press the "PROG" button. The display will show "PROG" and the time will flash.
- Use the "HR" (Hour) and "MIN" (Minute) buttons to set the desired start time.
- Press the "PROG" button again to confirm the programmed time. The "PROG" indicator will remain lit.
- The coffee maker will automatically start brewing at the set time.
- To cancel the program, press the "PROG" button until the indicator light turns off.
6. Cleaning and Maintenance
Regular cleaning ensures optimal performance and extends the lifespan of your coffee maker.
6.1 Daily Cleaning
- Always unplug the coffee maker and allow it to cool completely before cleaning.
- Discard used coffee grounds and paper filter.
- Wash the glass carafe, lid, and filter basket in warm, soapy water. These parts are generally dishwasher-safe (top rack only), but hand washing is recommended for longevity.
- Wipe the exterior of the coffee maker, warming plate, and control panel with a soft, damp cloth. Do not use abrasive cleaners or scouring pads.
- Do not immerse the main unit, power cord, or plug in water or any other liquid.

Figure 6: The anti-drip system in action, showing a clean counter even when the carafe is temporarily removed.
6.2 Descaling
Mineral deposits (limescale) can build up in your coffee maker over time, affecting performance and coffee taste. Descale regularly, depending on water hardness and frequency of use (e.g., every 1-3 months).
- Prepare a descaling solution: Mix white vinegar and water in equal parts, or use a commercial descaling agent designed for coffee makers, following the product instructions.
- Fill the water reservoir with the descaling solution up to the "MAX" line.
- Place an empty paper filter in the filter basket and the empty carafe on the warming plate.
- Start a brewing cycle. Allow half of the solution to brew through, then turn off the coffee maker and let it sit for 15-20 minutes to allow the solution to work.
- Turn the coffee maker back on to complete the brewing cycle with the remaining solution.
- After the cycle is complete, discard the solution and rinse the carafe and filter basket.
- Run at least two full cycles with fresh, cold water only to thoroughly rinse the coffee maker and remove any residual descaling solution taste.
7. Troubleshooting
Before contacting customer service, please refer to the following table for common issues and their solutions.
| Problem | Possible Cause | Solution |
|---|---|---|
| Coffee does not brew. |
|
|
| Coffee tastes weak or too strong. |
|
|
| Water overflows from the filter basket. |
|
|
| Coffee is not hot enough. |
|
|
8. Specifications
| Feature | Detail |
|---|---|
| Brand | KRUPS |
| Model Number | KM480D10 |
| Color | Brushed Stainless Steel |
| Dimensions (L x W x H) | 28.9 x 20 x 33.2 cm (11.4 x 7.9 x 13.1 inches) |
| Capacity | 1.25 Liters (up to 15 cups) |
| Power | 1000 Watts |
| Voltage | 220 Volts |
| Material | Metal |
| Automatic Shut-off | Yes (after 30 minutes of keep-warm) |
| Special Features | Digital Display, 1-4 Cup Function, Large Diffusion Head, Keep Warm, Visible Water Level, Programmable, Infusion Strength Selector, Anti-Drip System |
| Item Weight | 2.07 Kilograms (4.56 lbs) |
| Country of Origin | China |

Figure 7: Dimensions of the Krups Excellence KM480D10 coffee maker: 33.2 cm height, 28.9 cm depth, 20 cm width.
9. Warranty and Support
KRUPS is committed to providing high-quality products and support.
9.1 Repairability
This appliance is designed for repairability for 15 years at a fair price. This commitment is supported by a network of 6200 authorized repair centers worldwide, contributing to environmental protection and waste reduction.

Figure 8: Logo indicating 15 years of repairability.
9.2 Customer Support
For any questions, issues, or to locate an authorized service center, please visit the official KRUPS website or contact their customer service department. Contact information can typically be found on the KRUPS website or in the product packaging.
You can also visit the KRUPS Brand Store on Amazon for more product information and support resources.


