
Pymeter 10A 1200W
Pymeter Digital Temperature Controller User Manual
Model: 10A 1200W
Introduction
This user manual provides detailed instructions for the operation, setup, and maintenance of your Pymeter Digital Temperature Controller. Designed for precise temperature management, this dual-probe thermostat is ideal for various applications including terrariums, heat mats, heating pads, cooling fans, freezers, and refrigerators. Please read this manual thoroughly before use to ensure safe and optimal performance.
Safety Precautions
- Always ensure the device is properly grounded.
- Do not immerse the main unit in water or expose it to excessive moisture. The probes are waterproof, but the main unit is not.
- Ensure the total wattage of connected devices does not exceed 1200W (10A).
- Keep out of reach of children and pets.
- Disconnect power before cleaning or performing any maintenance.
- Do not attempt to disassemble or repair the unit yourself. Contact qualified personnel for service.
- Different measurement methods and contact status can lead to varied results. Do not compare with common inaccurate thermometers. Calibrate with an ice-water mixture (0℃/32℉) if necessary for verification.
Package Contents
Verify that all items are present in your package:
- 1 x Pymeter Digital Temperature Controller (10A 1200W)
- 2 x Waterproof Temperature Probes
- 1 x User Manual (this document)

Image: Contents of the Pymeter Digital Temperature Controller package, showing the main unit, two temperature probes, and the instruction manual.
Product Features & Components
The Pymeter Digital Temperature Controller is designed for versatile temperature management with its dual-zone control capabilities.
- Dual Zones Control: Two independent outlets, each capable of controlling heating or cooling devices.
- Dual Waterproof Sensors: Allows for monitoring and control of two separate areas simultaneously.
- Safety Features: High and low temperature alarms, and temperature difference alarm for enhanced security.
- Compressor Protection: Features a Power-On delay to protect compressors from frequent on/off cycles, suitable for converting freezers to refrigerators.
- Wide Application: Suitable for reptile terrariums, heat mats, aquariums, greenhouses, grow tents, and more.

Image: The Pymeter Digital Temperature Controller, displaying its digital screen, control buttons (SET, SAV, Up, Down), and two distinct power outlets labeled OUT 1 and OUT 2.
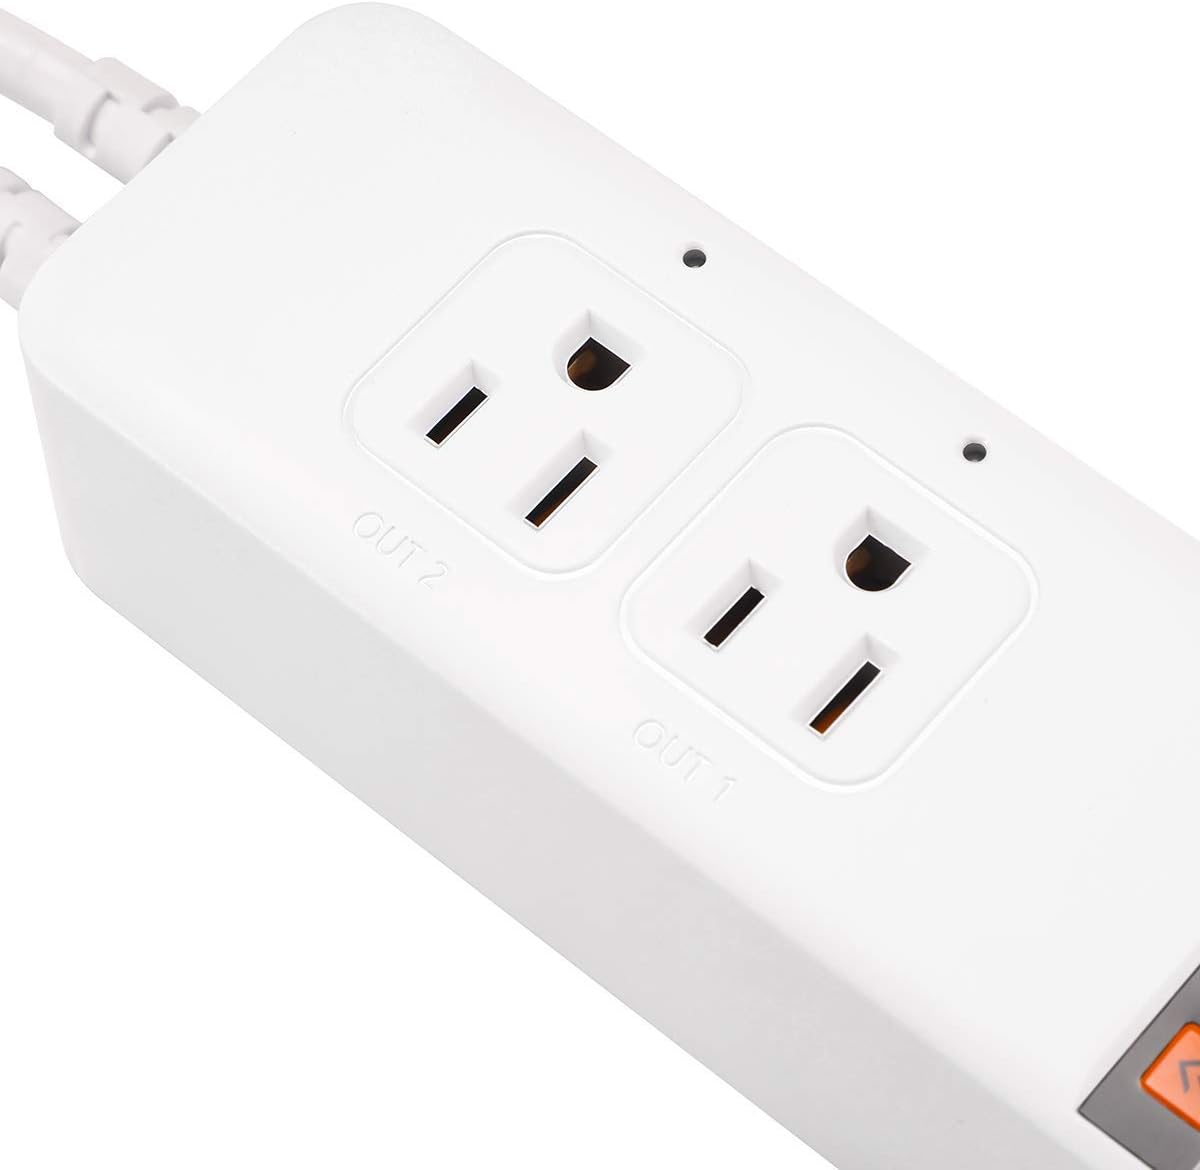
Image: A detailed view of the two controlled outlets on the Pymeter thermostat, showing their individual indicator lights and labels.

Image: An illustration demonstrating the Pymeter controller's use with a terrarium, showing how it can manage both a heat lamp and a heat mat for optimal heating.
Installation & Setup
- Mounting: The unit can be wall-mounted or placed on a flat surface. Ensure it is in a location with good ventilation and away from direct heat or moisture.
- Connect Probes: Insert the two waterproof temperature probes into the designated ports at the bottom of the unit. Place the probe tips in the areas where temperature monitoring and control are required.
- Connect Devices: Plug your heating or cooling devices (e.g., heat mat, fan, lamp) into the "OUT 1" and "OUT 2" controlled outlets.
- Power On: Plug the Pymeter controller into a standard 120V AC power outlet. The display will light up, showing the current temperature readings.

Image: The Pymeter controller installed on a wall, illustrating its compact design and how it can be integrated into a setup.
Operating Instructions
Understanding the Display
The display shows two main temperature values:
- PV (Process Value): The current temperature measured by the probe.
- SV (Set Value): The target temperature or setting value.
Basic Navigation and Settings
- Press the SET button to cycle through the settings for each outlet (1oN, 1oF, 2oN, 2oF, AL, AH, d7, P0-P8).
- Use the Up and Down arrows to adjust values.
- Press SAV to save your changes and exit the setting mode. If no button is pressed for a few seconds, the unit will automatically save and exit.
Temperature Control Logic
The Pymeter controller operates by setting ON-Temp and OFF-Temp for each outlet.
Heating Mode (1oN & 1oF for Outlet 1, 2oN & 2oF for Outlet 2)
- Heating starts when the temperature drops to the ON-Temp (1oN/2oN).
- Heating stops when the temperature rises to the OFF-Temp (1oF/2oF).
- For heating, you MUST SET ON-Temp LESS than OFF-Temp.
- In heating mode, ON-Temp is the minimum temperature you allow, and OFF-Temp is the maximum temperature you allow.
Cooling Mode (1oN & 1oF for Outlet 1, 2oN & 2oF for Outlet 2)
- Cooling starts when the temperature rises to the ON-Temp (1oN/2oN).
- Cooling stops when the temperature drops to the OFF-Temp (1oF/2oF).
- For cooling, you MUST SET ON-Temp GREATER than OFF-Temp.
- In cooling mode, ON-Temp is the maximum temperature you allow, and OFF-Temp is the minimum temperature you allow.
Advanced Settings (P0-P8)
Press and hold the SET button for 3 seconds to enter the advanced settings menu (P0-P8).
| Parameter | Description | Default Value |
|---|---|---|
| P0 | Temperature Unit (℃/℉) | ℉ |
| P1 | Power-On Delay (0-10 minutes) | 0 |
| P2 | Temperature Calibration (Sensor 1) | 0.0 |
| P3 | Temperature Calibration (Sensor 2) | 0.0 |
| AL | Low Temperature Alarm | Default (usually very low) |
| AH | High Temperature Alarm | Default (usually very high) |
| d7 | Temperature Difference Alarm (between Sensor 1 and Sensor 2) | Default (usually high) |
Note: To factory reset settings, change the temperature unit (P0) from Fahrenheit to Celsius or vice versa. This will revert all alarm settings (AL, AH, d7) to their default values.
Maintenance
- Cleaning: Wipe the unit with a soft, dry cloth. Do not use abrasive cleaners or immerse in water.
- Probe Care: Ensure probes are clean and free of debris for accurate readings. Avoid bending or damaging the probe cables.
- Storage: When not in use, store the controller in a cool, dry place away from direct sunlight.
Troubleshooting
Issue: Reading temperature is inaccurate.
Solution: Every Pymeter controller is calibrated at the factory. Do not compare its readings to common inaccurate thermostats or temperature guns. If you suspect inaccuracy, calibrate the device using an ice-water mixture (which is 32℉ / 0℃ when ice is melting). You can also use the P2 and P3 parameters in the advanced settings to fine-tune the calibration if needed, comparing it to a known accurate thermometer.
Issue: Beeper keeps sounding.
Solution: This is likely due to the alarm settings (AL, AH, d7) being triggered.
- AL (Low Temperature Alarm): Sounds when the current temperature is at or below the AL setting.
- AH (High Temperature Alarm): Sounds when the current temperature is at or above the AH setting.
- d7 (Temperature Difference Alarm): Sounds when the temperature deviation between Sensor 1 and Sensor 2 exceeds the d7 setting.
Technical Specifications
| Specification | Value |
|---|---|
| Brand | Pymeter |
| Model Number | 10A 1200W |
| Product Dimensions | 8.26"D x 2.16"W x 1.57"H |
| Controller Type | Push Button |
| Special Feature | Dual Zones Control, Each outlet works for Heating or Cooling |
| Color | White |
| Specific Uses For Product | Heat Pump, Refrigerator |
| Temperature Control Type | Heating, Cooling |
| Included Components | Dual Sensors |
| Power Source | AC |
| Item Weight | 1.04 Pounds |
| Voltage | 120 Volts |
| Material | Polycarbonate (PC) |
| Shape | Rectangular |
| Display Type | LED |
| Control Type | Button Control |
| Control Method | Remote |
| Mounting Type | Wall Mount |
| Style | Modern |
| Backlight | Yes |
| Wattage | 1200 watts |
| UPC | 791386439637 |
| Manufacturer | Pymeter |
| Batteries required | No |

Image: Dimensional drawing of the Pymeter controller, indicating its length, width, and height.

Image: The back of the Pymeter controller, displaying its electrical specifications and regulatory compliance markings.
Warranty & Support
For warranty information and technical support, please refer to the contact details provided on the product packaging or visit the official Pymeter website. Keep your purchase receipt for warranty claims.
Related documents10A 1200W


Ask a question about this manual
Ask about setup, troubleshooting, compatibility, parts, safety, or missing instructions. Manuals+ will review the question and use this page’s manual context to help answer it.