1. Introduction
This manual provides instructions for the safe and effective use of your Vanguard VEO3GO265HAB Compact Aluminum Travel Tripod. Please read this manual thoroughly before operating the product and retain it for future reference. The VEO3GO265HAB is a versatile travel tripod designed for photographers requiring a compact, lightweight, and stable support solution for various shooting scenarios, including still photography and videography with cameras and smartphones.
2. Package Contents
Verify that all items are present in the package:
- Vanguard VEO3GO265HAB Tripod with Ball Head
- Smartphone Holder
- Bluetooth Remote
- Spiked Feet (set)
- Tripod Bag
3. Setup
3.1 Unfolding the Tripod
- Release the leg locks and extend the tripod legs.
- Adjust the leg angles by pressing the angle adjustment tabs located at the top of each leg. There are three available angles: 21°, 50°, and 80°.
- Extend the center column to the desired height by rotating the center column lock counter-clockwise, pulling the column up, and then rotating clockwise to secure.

Image: The Vanguard VEO3GO265HAB tripod fully assembled and extended, showcasing its compact design and ball head.
3.2 Attaching a Camera or Device
- Ensure the quick release plate is securely attached to your camera or device.
- Open the quick release clamp on the BH-102 ball head.
- Slide the quick release plate with your device into the clamp and tighten the locking knob until secure.
3.3 Swapping Feet (Rubber/Spiked)
The tripod comes with pre-installed rubber feet suitable for most surfaces. For enhanced grip on soft ground, ice, or uneven terrain, you can replace them with the included spiked feet.
- Unscrew the rubber feet from the bottom of the tripod legs.
- Screw the spiked feet into place until they are firmly attached.
3.4 Smartphone Holder Installation
To use a smartphone with the tripod:
- Attach the smartphone holder to the quick release plate, or directly to the ball head if preferred.
- Securely place your smartphone into the holder. The holder accommodates smartphones up to 3.4 inches wide.
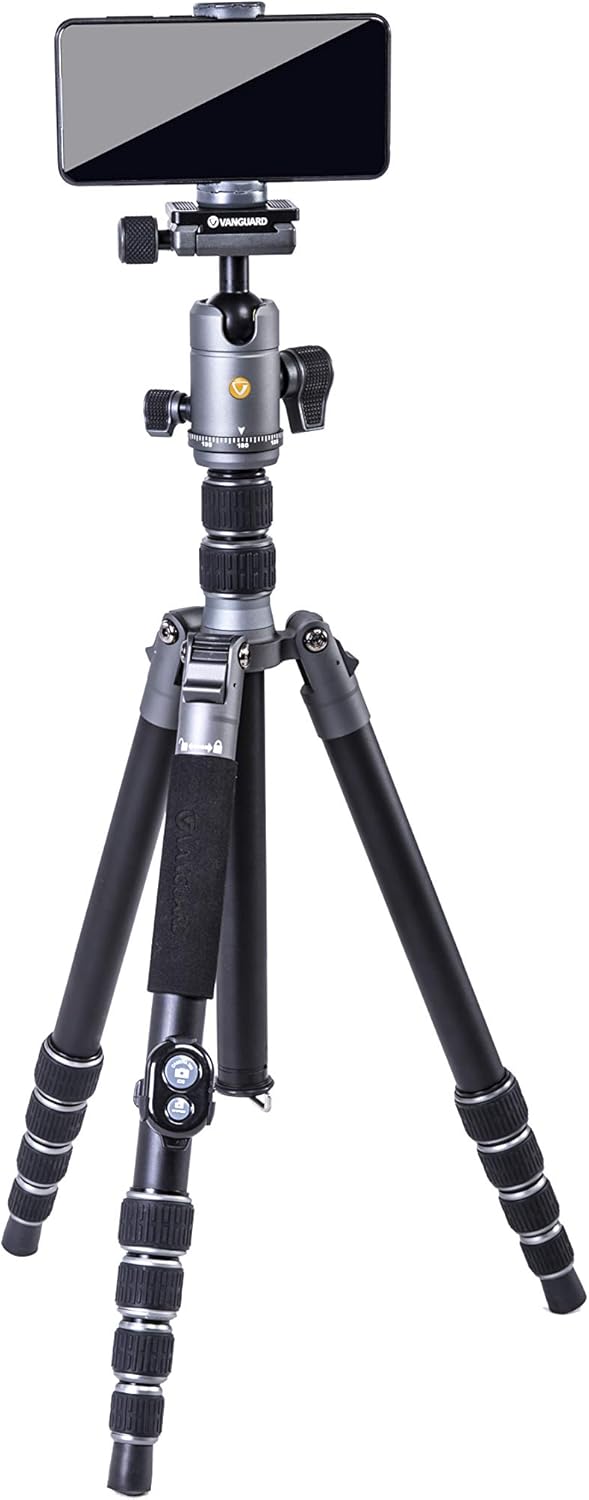
Image: The tripod shown with a smartphone securely mounted in the included holder, ready for use.
3.5 Bluetooth Remote Pairing
The Bluetooth remote allows for remote shutter activation, useful for selfies or to minimize camera shake.
- Ensure the remote has power (check battery if not responding).
- Turn on the remote.
- On your smartphone, navigate to Bluetooth settings and search for new devices.
- Select the remote (usually named 'AB Shutter3' or similar) to pair.
- Once paired, open your camera app and press the appropriate button on the remote (iOS or Android) to trigger the shutter.

Image: The Bluetooth remote control and the smartphone holder, essential accessories for mobile photography.
4. Operation
4.1 Extending and Retracting Legs
The tripod features rapid-set twist leg locks. To extend a leg section, twist the lock counter-clockwise to loosen, pull the leg section out to the desired length, and then twist clockwise to secure it firmly.
4.2 Monopod Conversion
One of the tripod legs can be detached and combined with the center column to form a monopod.
- Unscrew the leg with the foam grip from the tripod chassis.
- Unscrew the center column from the tripod chassis.
- Screw the detached leg onto the bottom of the center column.
- Attach the ball head to the top of the newly formed monopod.

Image: The tripod leg detached and assembled with the center column to form a monopod, offering flexible shooting options.

Image: The monopod configuration being used as a selfie stick with a smartphone attached, demonstrating its versatility.
4.3 Low Angle and Macro Photography
For low-angle shots or macro photography, the center column can be reversed or removed and replaced with the included Low Angle Adapter.
- Reversing the Center Column: Unscrew the center column lock, remove the center column, flip it upside down, and reinsert it into the tripod chassis. Secure the lock.
- Using the Low Angle Adapter: Remove the center column entirely. Attach the ball head directly to the Low Angle Adapter, then attach the adapter to the tripod chassis.
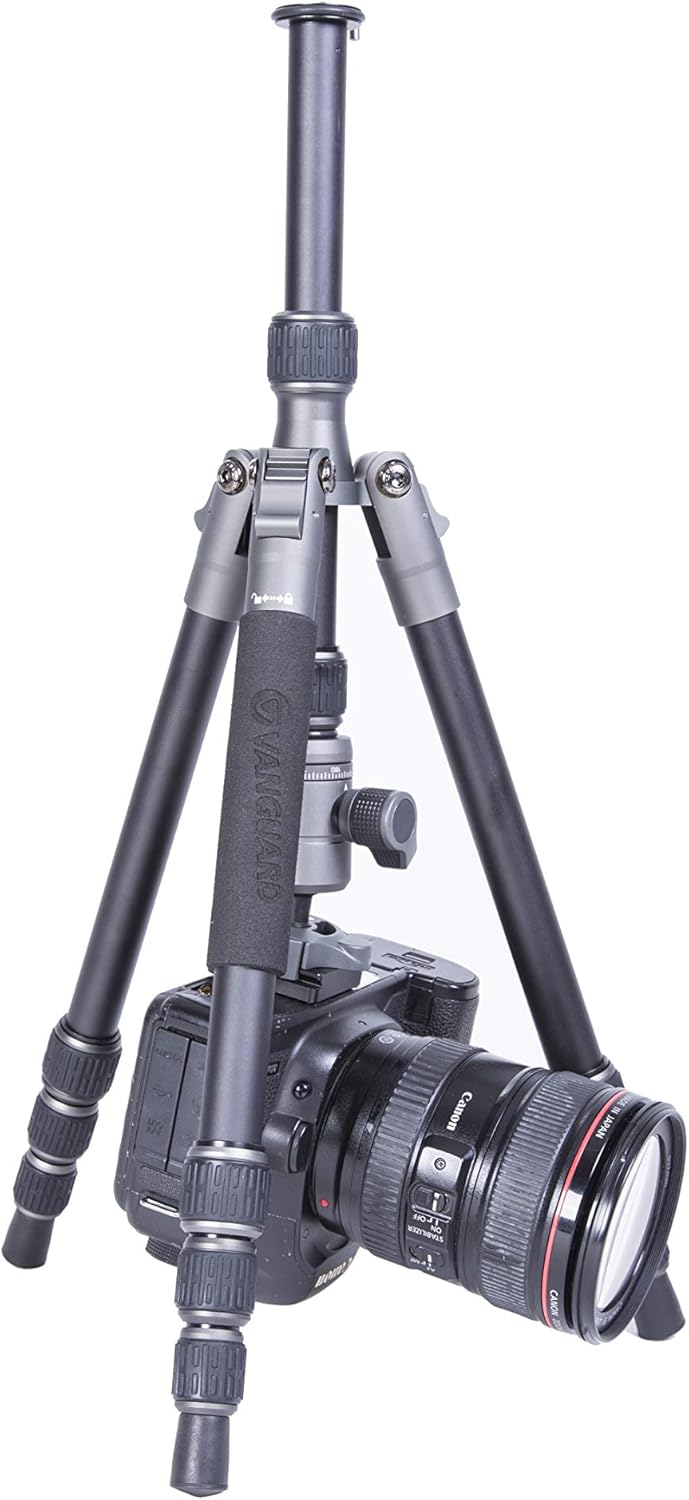
Image: The tripod configured for low-angle photography, with a camera mounted, illustrating its capability for ground-level shots.
4.4 Ball Head Adjustments
The BH-102 ball head features an ergonomic locking knob for securing the ball and an independent pan-lock for 360° panoramic movements.
- Ball Lock: Rotate the main locking knob to loosen or tighten the ball, allowing for precise positioning of your camera.
- Pan Lock: Use the smaller knob to lock or unlock the panning base, enabling smooth horizontal rotation without affecting the camera's tilt.
4.5 Enhancing Stability
For additional stability, especially in windy conditions or with heavier equipment, utilize the retractable hook located at the base of the center column. Hang a camera bag or other weight from this hook to lower the tripod's center of gravity.
5. Maintenance
5.1 Cleaning Leg Locks
The twist leg locks are designed for easy disassembly, cleaning, and reassembly. Periodically clean them to prevent dirt and debris from affecting their smooth operation.
- Carefully unscrew and remove the twist locks from each leg section.
- Clean any accumulated dirt, sand, or dust from the internal mechanisms and leg sections using a soft cloth and mild detergent if necessary.
- Ensure all parts are completely dry before reassembling the leg locks.
5.2 General Care
- Wipe down the tripod with a clean, dry cloth after each use, especially if exposed to moisture, dust, or sand.
- Avoid exposing the tripod to extreme temperatures or harsh chemicals.
- Store the tripod in its protective bag when not in use to prevent scratches and damage.
6. Troubleshooting
6.1 Stability Issues
If the tripod feels unstable:
- Ensure all leg sections and the center column are fully extended and securely locked.
- Verify that the leg angle adjustment tabs are fully engaged in their chosen positions.
- For windy conditions or heavy loads, utilize the retractable hook to hang additional weight (e.g., a camera bag) from the center column.
- Ensure the correct feet (rubber or spiked) are used for the terrain.
6.2 Monopod Play
If the monopod exhibits slight wobble at the connection point:
- Ensure both the detached leg and the center column are tightly screwed together.
- Verify that the ball head is securely attached to the top of the monopod.
6.3 Leg Lock Operation
If leg locks are stiff or not holding securely:
- Disassemble and clean the twist locks as described in the Maintenance section to remove any debris.
- Ensure the locks are fully tightened when securing leg sections.
6.4 Bluetooth Remote Connection
If the Bluetooth remote is not connecting or functioning:
- Check the remote's battery and replace if necessary.
- Ensure Bluetooth is enabled on your smartphone.
- Unpair and re-pair the remote in your smartphone's Bluetooth settings.
- Ensure you are pressing the correct button (iOS or Android) for your device.
7. Specifications
| Feature | Detail |
|---|---|
| Model Name | VEO3GO265HAB |
| Material | Aluminum |
| Maximum Height | 65.5 Inches |
| Folded Length | 16.1 Inches |
| Item Weight | 3.7 Pounds |
| Weight Limit | 22 Pounds |
| Tripod Head Type | Ball Head (BH-102) |
| Leg Sections | 5 |
| Leg Angles | 21°, 50°, 80° |
| Compatible Devices | Camera, Smartphone, Spotting Scope |
8. Warranty and Support
For warranty information, technical support, or service inquiries regarding your Vanguard VEO3GO265HAB tripod, please refer to the official Vanguard website or contact Vanguard customer service directly. Keep your purchase receipt as proof of purchase for warranty claims.
Official Vanguard Website: www.vanguardworld.com


